Casio 2307 Configuration guide

2307/2335-1
Module No. 2307/2335
GENERAL GUIDE
•Press Cto change from mode to mode.
•Holding down Cin any mode for about one second returns to the normal
timekeeping screen.
•Pressing Cafter performing some operation in the Recall Mode, Alarm
Mode, or Countdown Alarm Mode returns to the normal timekeeping
screen.
▼
0
1
08
D
AB
C
630
630
Timekeeping Mode
•Pressing Bin any mode besides the Countdown Alarm Mode or
Stopwatch Mode illuminates the display for about 1.5 second. The backlight
is disabled while a setting screen is on the display.
•The backlight of Module 2307 illuminates both the digital display and analog
face. The backlight of Module 2335 illuminates the digital display only.
•If you do not perform any operation for a few minutes while a setting screen
(with flashing digits) is on the display, the watch automatically exits the
setting screen.
•If you do not perform any operation for about 10 hours in the Barometer
Mode, Altimeter Mode, or Thermometer Mode, the watch automatically
reverts to the Timekeeping Mode screen.
A
L
7OO
▼
Press D.
▼
Press D.
▼
A
8
A0
0
1
13
Barometer Mode
▼
▼
L
A
2
1
50
Altimeter Mode
ENP
8
1
5
Thermometer Mode
▼
▼
▼
S
0
0
OO
Stopwatch Mode
▼
▼
▼
A
0
0
OO
Countdown Alarm Mode
Press
C.
Press C.
Press C.
Press C.
Press
C.
Press C.
Press C.
Press C.
Press D.
▼
▼
▼
▼
E
A
C
2
1
50
Recall Mode
▼
▼
Alarm Mode
TIMEKEEPING MODE
•Pressing Dchanges the display in the sequence shown below.
•The display type you select is used until you change it.
To set the time and date
1. While in the Timekeeping Mode, hold down Auntil the seconds digits
flash on the display.
2. Press Cto move the selection (flashing) in the following sequence.
Seconds Hour Minutes
12/24
YearMonthDay
3. While the seconds setting is selected (flashing), press Dto reset it to 00.
If you press Dwhile the seconds setting is in the range of 30 to 59, the
seconds are reset to 00 and 1 is added to the minutes. If the seconds
setting is in the range of 00 to 29, the minutes count is unchanged.
•While the 12/24-hour format setting is selected, press Dto toggle it
between 12 and 24.
Day of week
Month – Day
•When the 12-hour format is selected, the indicator Pappears on the diaplay
to indicate “p.m.” times. There is no indicator for “a.m.” times. Selecting the
24-hour format causes the 24 to appear on the display.
•While any other setting is selected (flashing), press Dto increase the
number or Bto decrease it.
•Holding down either button changes the setting at high speed.
4. After you set the time and date, press Ato change to the contrast setting
screen.
•The indicator CNT appears on the left of the screen, and the value
indicating the current contrast setting flashes on the right.
•You can set the contrast to one of 11 levels in the range of –5 to +5.
5. Press Dto make the display darker, or Bto make it lighter.
6. After the contrast is the setting you want, press Ato return to the normal
timekeeping screen.
•The day of the week is automatically set in accordance with the date.
•The date can be set within the range of January 1, 1995 to December 31,
2039.
•The watch’s built-in full automatic calendar automatically makes allowances
for different month lengths and leap years. Once you set the date, there
should be no reason to change it except after the replacement of the
watch’s battery.
To set the analog time
1. Pull the crown out to stop the second hand.
•If you plan to restart analog timekeeping on some time signal (from the
radio or television), pull the crown out when the second hand is at the 12
o’clock position.
2. Set the hands by turning the crown.
3. Push the crown back in to restart timekeeping.
•Analog time is kept by a mechanical timepiece. Because of this, the second
hand may not start to move exactly when you push the crown back in.
Press D.
Press D.
▼
▼
Crown
▼
Press D.
0
1
08
D
AB
C
630
630
Seconds
Hour : Minutes
PM indicator
Barometric pressure graph
*See “BAROMETER MODE”.
Month – Day

2307/2335-2
Parallel to
ground
More than
40°
ABOUT THE BACKLIGHT
This watch features an electroluminescent (EL) backlight that helps you easily
read the face, even in total darkness. Its Auto Backlight function automatically
lights the watch face whenever you turn your wrist towards your face.
•The backlight of Module 2307 illuminates
both the digital display and analog face. The
backlight of Module 2335 illuminates the
digital display only.
Note
•The backlight of the watch employs an electroluminescent (EL) light, which
loses illuminating power after very long use.
•Frequent use of the backlight shortens the battery life.
•The illumination provided by the backlight may be hard to see when viewed
under direct sunlight.
•The watch will emit an audible sound whenever the display is illuminated. It
does not indicate malfunction of the watch.
•The backlight automatically turns off whenever an alarm sounds.
To manually turn on the backlight
•Pressing Bin any mode besides the Countdown Alarm Mode or
Stopwatch Mode illuminates the display for about 1.5 second. The backlight
is disabled while a setting screen is on the display.
To switch the auto backlight function on and off
While in the Timekeeping Mode, hold down Dfor one second to turn the Auto
Backlight function on and off.
Hold down D.
0
1
08
D
AB
C
Auto backlight
indicator
▼
▼
ON OFF
8
8
88
D
0
1
08
8
8
88
D
0
1
08
•The auto backlight indicator is shown on the display in all modes while the
auto backlight function is on.
•In order to protect against running down the battery, the auto backlight
function is automatically turned off approximately six hours after you turn it
on. Repeat the above procedure to turn the auto backlight function back on
if you want.
•Pressing Bin any mode besides the Countdown Alarm Mode or
Stopwatch Mode illuminates the display for about 1.5 second, regardless of
the auto backlight function on/off setting.
About the Auto Backlight function
While the Auto Backlight function is turned on, the backlight automatically
lights for about 1.5 second in any mode whenever you position your wrist as
described below.
Important!
Avoid wearing the watch on the inside of your wrist. Doing so causes the Auto
Backlight to operate when it is not needed, which shortens battery life.
Moving the watch to a position that is parallel to the ground and then tilting
it towards you more than 40 degrees causes the backlight to illuminate.
•The backlight may not illuminate if the face of the watch is more than 15
degrees off parallel as shown below. Make sure that the back of your hand
is parallel to the ground.
More than 15 degrees
too low
Parallel to ground More than 15 degrees
too high
•Static electricity or magnetic force can interfere with proper operation of the
auto backlight function. If the auto backlight does not illuminate, try moving
the watch back to the starting position (parallel with the ground) and then tilt
it back towards you again. If this does not work, drop your arm all the way
down so it hangs at your side, and then bring it back up again.
•Under certain conditions the backlight may not light until about one second
or less after turn the face of the watch towards you. This does not
necessarily indicate malfunction of the backlight.
Warning!
•Never try to read your watch when mountain climbing or hiking in
areas that are dark or in areas with poor footing. Doing so is
dangerous and can result in serious personal injury.
•Never try to read your watch when running where there is the danger
of accidents, especially in locations where there might be vehicular or
pedestrian traffic. Doing so is dangerous and can result in serious
personal injury.
•Never try to read your watch when riding on a bicycle or when
operating a motorcycle or any other motor vehicle. Doing so is
dangerous and can result in a traffic accident and serious personal
injury.
•When you are wearing the watch, make sure that its auto backlight
function is turned off before riding on a bicycle or operating a
motorcycle or any other motor vehicle. Sudden and unintended
operation of the auto backlight can create a distraction, which can
result in a traffic accident and serious personal injury.
BAROMETER MODE
This watch uses a pressure sensor to measure barometric pressure. It can be
adjusted to correct for measurement error.
Important !
The barometer that is built into this watch measures changes in barometric
pressure, which you can then apply to your own weather predictions. It is not
intended for use as a precision instrument in official weather prediction or
reporting applications.
Example barometer applications
•Before going mountain climbing, you can take readings to predict upcoming
weather.
•You can predict the weather for golf or other outdoor activities.
About barometric pressure measurements
The watch takes barometric pressure measurements every five seconds for
the first two minutes after you enter the Barometer Mode. The Barometer
Mode indicator 1 flashes on the display during these two minutes.
After the first two minutes, the Barometer Mode indicator 1 stops flashing, and
the watch automatically takes measurements every two hours (starting from
midnight).
The watch continues to take barometric pressure readings every two hours,
even if you change to another mode. Measurement data can be viewed on the
Timekeeping Mode screen on the barometric pressure graph.
*1 The barometric pressure graph shows the barometric pressure readings
for the past 18 hours. The flashing point on the right of the display is the
point of the last measurement.
*2 The displays show “– –––hPa”(or inHg) if a measured value falls outside
the range of 460 hPa/mb to 1100 hPa/mb (13.55 inHg to 32.45 inHg). The
normal display will return as soon as the pressure returns with the
allowable range.
A
8
A0
D
AB
C
0
1
13
0
1
13
Barometer Mode indicator 2
Remaining memory
Barometric pressure graph
*1
Press A.
Unit of measurement
Last measurement
*2
(updated every two hours)
▼
▼
5 seconds
later
▼
Barometer Mode
indicator 1

2307/2335-3
Using the barometric pressure graph
Barometric pressure is affected by changes in weather and temperature. The
following shows how to interpret the data that appears on the barometric
pressure graph.
A rising graph generally means better weather.
A falling graph generally means deteriorating
weather.
Note that if there are sudden changes in weather or
temperature, the graph line of past measurements
may run off the top or bottom of the display. The
entire graph will become visible once barometric
pressure conditions stabilize.
The following conditions cause the barometric pressure measurement to be
skipped, with the corresponding point on the barometric pressure graph being
left blank.
•Barometric reading that is out of range (460 hPa/mb to 1100 hPa/mb/13.55
inHg to 32.45 inHg).
•Sensor malfunction.
•Dead battery.
Selecting the unit of measurement
1. Use Cto enter the Barometer Mode.
2. Hold down Auntil “OFF”or the current barometric pressure value flashes
on the display.
3. Press Cto change to the measurement unit selection screen.
4. Each press of Dor Bcycles the barometric pressure measurement unit
as shown below.
hPa mb inHg
5. After you select the measurement unit you want, press Ato return to the
Barometer Mode screen.
•Note that all measurement data currently in memory is also deleted
whenever you change the barometric pressure, altitude, or temperature unit
of measurement.
Calibrating the barometric pressure measurement
The sensor of this watch is calibrated at the factory before shipment, and
further adjustment is normally not required. If noticeable error is found in the
barometric pressure readings produced by the watch, you can adjust it to
correct the error.
Important!
Incorrectly calibrating the barometric pressure measurement of this watch can
result in incorrect readings. Compare the readings produced by the watch with
those of another reliable, accurate barometer.
Calibrating the barometric pressure
1. Use Cto enter the Barometer Mode.
2. Hold down Auntil “OFF”or the current barometric pressure calibration
value flashes on the display.
•“OFF”appears when the factory setting is currently set as the current
barometric pressure calibration value.
3. Each press of Dincreases the displayed barometric pressure by 1 hPa/mb,
while pressing Bdecreases it. Holding down either button changes the
value at high speed.
•If inHg is currently selected as the unit of measurement, the above
operations change the reading by 0.05 inHg.
•Pressing Band Dat the same time returns to the “OFF”setting.
4. After calibrating the barometric pressure, press Ato return to the
Barometer Mode screen.
L
A
D
AB
C
2
1
50
2
1
50
Altimeter Mode indicator 2
Remaining memory
Altitude graph
Press A.
Unit of measurement
Current altitude
5 seconds
later
▼
▼
▼
400
Altimeter Mode
indicator 1
ALTIMETER MODE
A built-in altimeter uses a pressure sensor to detect the current barometric
pressure, which is then used to estimate the current altitude in accordance
with ISA (International Standard Atmosphere) values for altitude and
barometric pressure. If you preset a reference altitude, the watch will also
calculate the current relative altitude based on your preset value.
Important !
•This watch estimates altitude based on barometric pressure. This means
that altitude readings for the same location may vary if barometric pressure
changes.
•Sudden changes in the weather make it impossible to produce accurate
altitude readings.
•This watch employs a semiconductor pressure sensor, which is affected by
temperature changes. When taking altitude measurements, be sure to do
so while ensuring that the watch is not exposed to temperature changes.
•Do not use this watch while participating in sports where there are sudden
altitude changes. Also, do not use this watch for applications that demand
professional or industrial level precision. This watch should not be used
while engaging in the following activities: skydiving, hang gliding,
paragliding, gyrocopter riding, glider riding, etc.
Applications
When no reference altitude is preset:
•The watch produces approximate altitude readings.
When a reference altitude is preset:
•Before beginning the climb, set the reference altitude to 0 meter at the foot
of the mountain. This makes it possible to determine the difference in
altitude between the reference point and your destination.
•To determine the height of a tall building, set the reference altitude to 0
meter on the ground floor. Note that you
may not be able to get a good reading if
the building is pressurized or air-
conditioned.
•To determine the difference in altitude
between your house and another location, set the reference altitude to 0
meter at your house, and then check the reading when you arrive at the
other location.
•When mountain climbing, you can input
the altitude from a marker as your
reference altitude, which will then let you
know your altitude as your climb
proceeds. The following conditions will
prevent you from obtaining accurate
readings:
When barometric pressure changes because of changes in the weather
Extreme temperature changes
When the watch itself is subjected to strong impact
About altitude measurements
The watch measures altitude every five seconds for the first two minutes after
you enter the Altimeter Mode. The Altimeter Mode indicator 1 flashes on the
display during these two minutes.
After the first two minutes, the Altimeter Mode indicator 1 stops flashing, and
the watch automatically takes measurements every two minutes (on even
numbered minutes).
The display unit for Altimeter Mode measurements is 5 meters (20 feet), and
the display range is 0 to 6,000 meters (0 to 19,680 feet).
•The measured altitude may be a negative value in cases where there is a
reference altitude value set or because of certain barometric pressure
conditions.

2307/2335-4
Selecting the measurement unit
1. Use Cto enter the Altimeter Mode.
2. Hold down Auntil “OFF”or the current reference altitude value flashes on
the display.
3. Press Cto change to the measurement unit selection screen.
4. Each press of Dor Btoggles the altitude measurement unit as shown
below.
mFT
5. After you select the measurement unit you want, press Ato return to the
Altimeter Mode screen.
•Note that all measurement data currently in memory is also deleted
whenever you change the barometric pressure, altitude, or temperature unit
of measurement
Setting a reference altitude
After you set a reference altitude, the watch automatically calculates the
difference between the current altitude and your preset value. The altitude
measurements produced by this watch are subject to error caused by changes
in barometric pressure. Because of this, we recommend that you set the
reference altitude during your climb whenever one is available.
1. Use Cto enter the Altimeter Mode.
2. Hold down Auntil “OFF”or the current reference altitude value flashes on
the display.
•“OFF”appears when the factory setting is currently set as the reference
altitude value.
3. Each press of Dincreases the displayed altitude by 5 m, while pressing
Bdecreases it. Holding down either button changes the value at high
speed.
•If you have selected feet as your unit of measurement, the above
operations change the reading by 20 feet.
•You can set the reference altitude within the range of –6,000 meters to
6,000 meters (–19,680 feet to 19,680 feet).
•Pressing Band Dat the same time returns to the “OFF”setting.
4. After setting the reference altitude you want, press Ato return to the
Altimeter Mode screen.
THERMOMETER MODE
A built-in temperature sensor measures temperature and shows the measured
value on the display. The thermometer can be calibrated to correct for errors.
Important!
Temperature measurements are affected by your body temperature (while you
are wearing the watch), direct sunlight, and moisture. To achieve a more
accurate temperature measurement, remove the watch from your wrist, place
it in a well-ventilated location out of direct sunlight, and wipe off all moisture
from the case. It takes approximately 20 to 30 minutes for the case of the
watch to reach the temperature of the surrounding air.
About temperature measurements
The watch takes temperature measurements every five seconds for the first
two minutes after you enter the Thermometer Mode. The Thermometer Mode
indicator 1 flashes on the display during these two minutes.
After the first two minutes, the Thermometer Mode indicator 1 stops flashing,
and the watch automatically takes measurements every five minutes.
Understanding the temperature display
The display shows “– –. –°C”(or °F) if a measured value falls outside the
range of –10.0°C to 60.0°C (14.0°F to 140.0°F). The normal display will return
as soon as the temperature returns within the allowable range.
ENP
D
AB
C
8
1
5
8
1
5
Thermometer Mode indicator 2
Remaining memory
Temperature graph
Press A.
Unit of measurement
Temperature
2 seconds
later
▼
▼
▼
Thermometer Mode
indicator 1
Selecting the measurement unit
1. Use Cto enter the Thermometer Mode.
2. Hold down Auntil “OFF”or the current temperature calibration value
flashes on the display.
3. Press Cto change to the measurement unit selection screen.
4. Each press of Dor Btoggles the temperature measurement unit as
shown below.
°C°F
5. After you select the measurement unit you want, press Ato return to the
Thermometer Mode screen.
•Note that all measurement data currently in memory is also deleted
whenever you change the barometric pressure, altitude, or temperature unit
of measurement.
Calibrating the temperature measurement
The temperature sensor of this watch is calibrated at the factory before
shipment, and further adjustment is normally not required. If noticeable error is
found in the temperature readings produced by the watch, you can adjust it to
correct the error.
Important!
Incorrectly calibrating the temperature measurement of this watch can result
in incorrect readings. Carefully read the following before doing anything.
•Compare the readings produced by the watch with those of another
reliable, accurate thermometer.
•If adjustment is required, remove the watch from your wrist and wait for 20
or 30 minutes to give the temperature of the watch time to stabilize.
Calibrating the temperature
1. Use Cto enter the Thermometer Mode.
2. Hold down Auntil “OFF”or the current temperature calibration value
flashes on the display.
•“OFF”appears when the factory setting is currently set as the current
temperature calibration value.
3. Each press of Dincreases the displayed temperature by 0.1°C, while
pressing Bdecreases it. Holding down either button changes the value at
high speed.
•If Fahrenheit is currently selected as the unit of measurement, the above
operations change the reading by 0.2°F.
•Pressing Band Dat the same time returns to the “OFF”setting.
4. After calibrating the temperature, press Ato return to the Thermometer
Mode screen.
MEMORY
The watch is equipped with memory that you can use to store up to 10
barometric pressure, altitude, and temperature readings. Note that the date
and time of the measurement is not included with the data. The number of
available blank records that can be used to store data is shown on the right
side of the Barometer, Altimeter, and Thermometer Mode screens.
Storing a Measurement
While in the Barometer, Altimeter, or Thermometer Mode, hold down Dfor
about one second until the watch beeps, indicating that the latest
measurement is stored in memory.
•The message “FULL”appears on the display for about one second when
you hold down Dwhile memory is full. No more data can be stored while
memory is full.
•If you want to store more data after memory becomes full, use the
procedure under “Recall Mode”below to delete the current data to make
room for new data.

2307/2335-5
A
D
AB
C
0
0
OO
0
1
OO 0
1
OO
A
L
D
AB
C
7OO
RECALL MODE
Recalling data
1. Use Cto enter the Recall Mode.
2. Each press of Dcycles through the barometric pressure, altitude, and
temperature data in memory. Mode indicators appear to tell you what type
of data is currently displayed.
•Note that measurement units are not indicated on the Recall Mode screens.
•The display shows “- - - - ––” if there is no data.
Deleting Data
While in the Recall Mode, hold down A. The
watch beeps, and the message CLR flashes
on the display to indicate data is about to be
deleted. Keep Adepressed for about two
seconds to delete all the measurement data
currently in memory.
•Note that this procedure deletes all
measurement data in memory. You cannot
delete individual records.
E
A
C
D
AB
C
2
1
50
Memory number
1 second
later
▼
Altitude
Recall Mode indicator
L
C
A
ALARM MODE
When the Daily Alarm is turned on, the alarm sounds for 20 seconds at the
preset time each day. Press any button to stop the alarm after it starts to
sound.
When the Hourly Time Signal is turned on, the watch beeps every hour on the
hour.
To set the alarm time
1. Hold down Auntil the hour digits start to flash on the display. The hour
digits flash because they are
selected
. At this time the alarm is
automatically turned on.
2. Press Cto change the selection in the sequence shown below.
Minutes
Hour
3. Press Dto increase the number or Bto decrease it.
•Holding down either button changes the setting at high speed.
4. After you set the alarm time, press Ato return to the Alarm Mode screen.
•The format (12-hour and 24-hour) of the alarm time matches the format you
select for normal timekeeping.
•When setting the alarm time using the 12-hour format, take care to set the
time correctly as morning or afternoon.
To stop the alarm
•Press any button to stop the alarm after it starts to sound.
Hourly time signal on
indicator
1 second
later
▼
Alarm on indicator
Alarm Mode indicator
Alarm time
To turn the Daily Alarm and Hourly Time Signal on
and off
Press Dwhile in the Alarm Mode to change the status of the Daily Alarm and
Hourly Time Signal in the sequence shown below.
•The alarm and hourly time signal indicator is displayed in all modes.
To test the alarm
Hold down Dwhile in the Alarm Mode to sound the alarm.
Both ON Both OFF Hourly Time
Signal only
Daily Alarm only
COUNTDOWN ALARM MODE
The countdown alarm can be set within a range of 10 seconds to 60 minutes.
When the countdown reaches zero, an alarm sounds for 10 seconds or until
you press any button.
To set the countdown start time and auto repeat
function on and off
1. Hold down Awhile in the Countdown Alarm Mode. The minutes setting
flashes on the display because it is
selected
.
2. Press Cto change the selection in the sequence shown below.
Minutes Seconds Auto repeat ON/OFF
3. Press Dto increase the selected setting or Bto decrease it. Holding
down either button changes the setting at high speed.
•The seconds can be set in units of 10 seconds.
•Set 0 minutes, 0 seconds to specify a start time of 60 minutes.
•While the AUTO ON/OFF setting is selected (flashing), press Dor Bto
toggle auto repeat on and off.
4. After you set the countdown start time and auto repeat ON/OFF setting,
press Ato return to the Countdown Alarm Mode screen.
To use the countdown alarm
1. Press Dwhile in the Countdown Alarm Mode to start the countdown
alarm operation.
2. Press Dagain to stop the countdown alarm operation.
•You can resume a paused countdown alarm operation by pressing D.
3. Stop the countdown alarm and then press Bto reset the countdown time
to its starting value.
•When the end of the countdown is reached and auto repeat is off, the alarm
sounds for 10 seconds or until you stop the alarm by pressing any button.
Countdown timing stops and the countdown time is automatically reset to its
starting value after the alarm stops.
•When the end of the countdown is reached while auto repeat is on, the
alarm sounds, but the countdown restarts from the beginning without
stopping. You can stop the countdown by pressing Dand manually reset
to the start time by pressing B.
•When the start time is less than one minute and auto repeat is turned on,
the countdown alarm tone sounds for only one second instead of the
normal 10 seconds.
1/10 second
1 second
later
▼
Minutes
Countdown Alarm Mode indicator
Seconds
Auto repeat ON Auto repeat OFF
Auto repeat ON indicator
STOPWATCH MODE
The Stopwatch Mode lets you record elapsed time, split times, and two
finishes. The range of the stopwatch is 59 minutes, 59.99 seconds.
Stopwatch functions are available in the Stopwatch Mode, which you can
enter using C.
S
D
AB
C
0
0
OO
1 second
later
▼
Stopwatch Mode indicator
1/100 second
Minutes
Seconds
▼
▼
DDB
Stop ClearStart
(a) Elapsed time measurement
(b) Split time measurement
(c) Split time and 1st-2nd place times
▼
▼
DDB
Start Stop Clear
▼
▼
DBB
Start Split release Clear
Record time of
second runner.
▼
D
▼
B
▼
D
▼
D
Stop
▼
B
Split
▼
B
Split
First runner
finishes.
Re-start
Split release
Stop
Second runner finishes.
Record time of first runner.

2307/2335-6
BATTERY REPLACEMENT
ALWAYS LEAVE BATTERY REPLACEMENT UP TO THE DEALER
WHERE YOU BOUGHT THE WATCH OR TO AN AUTHORIZED CASIO
DISTRIBUTOR. BE SURE TO SHOW THE FOLLOWING INFORMATION
TO THE PERSON REPLACING THE BATTERY.
Attention dealer or CASIO distributor
Be sure to use the following procedure when replacing the battery.
1. Remove the back cover screws, and then remove the back cover.
2. Pull up the battery holder.
3. Remove the old battery and load a new one.
4. Close the battery holder.
5. Touch the AC contact and the battery (+) side with metallic tweezers.
6. Replace the back cover and secure it with the screws.
7. Check the display of the watch. If the message “OPEn”is on the display, it
means the back cover is not closed correctly. Remove the back cover and
carefully replace it again.
* Absence of the “OPEn”message does not necessarily indicate an air-tight
seal.
Other tests are required to check for air tightness.
WARNING INDICATORS
This watch displays warning indicators to let you know when the sensor is
malfunctioning and when battery power is low.
Err Display – Sensor Malfunction Warning
This message indicates malfunction of the watch’s pressure sensor circuitry.
When sensor malfunction initially occurs, the watch stops taking
measurements, the “Err”message appears, and a buzzer sounds for about
three seconds.
•If the sensor is malfunctioning when it comes time for a barometric pressure
measurement to be taken, the barometric pressure value and altitude value
appears as “– –––” on the display and the corresponding point on the
barometric pressure graph is left blank.
•Whenever there is a sensor malfunction, be sure to take the watch to an
authorized CASIO distributor or Service Center as soon as possible.
Alteration of and Graph – Temporary Low Power
Warning
Temporary low power is indicated on the display when the battery level
temporarily drops below a certain level.
•Sensors are disabled while the temporary low power warning is being
indicated, but the light and tones are operational.
•Very low temperature can cause the low power warning to appear even
though battery power is not low. The low power warning should disappear
when the watch is restored to normal temperature.
•If the low power warning appears under normal temperature, replace the
battery as soon as possible.
Alteration of and – Battery Usage Warning
The watch automatically monitors your use of certain high battery drain
functions. The battery usage warning display appears whenever the watch
determines that your use of these functions is putting a heavy load on the
battery.
•Sensors, the light, and tones are disabled while the battery usage warning
is on the display.
•The following are the trigger values for the functions that are monitored for
battery usage.
Light: 100 Sensor Operations: 1,000
Alarm: 100 Mode Change: 1,000
•The battery usage warning appears whenever any single function is
performed the number of times noted above, or for any proportional number
of operations of multiple functions (such as 50 light operations and 50 alarm
operations, 50 light operations and 500 mode change operations, etc.).
•The monitor counter continues to be incremented as long as the duration
between two high power drain operations is less than 15 minutes. The
counter is reset to 0 whenever 15 minutes pass between operations.
Display – Low Power Warning
The low power warning appears to let you know that battery power is low.
•Sensors, the light, and tones are disabled while the low power warning is on
the display.
•The low power warning may appear under very low temperatures, although
battery power is not low. Correct operation should resume when the watch
returns to normal temperature.
•If the low power warning appears under normal temperatures, have the
watch’s battery replaced as soon as possible.
•Be sure to read “Battery Replacement”before trying to replace the battery.
ABOUT ALTITUDE AND BAROMETRIC
PRESSURE MEASUREMENTS
Altimeter
Generally, barometric pressure and temperature decrease as altitude
increases. This watch bases its altitude measurements on International
Standard Atmosphere (ISA) values stipulated by the International Civil
Aviation Organization (ICAO), which define relationships between altitude,
barometric pressure, and temperature.
0 ft 2000 ft
4000 ft
6000 ft
8000 ft
10000 ft
12000 ft
14000 ft
16000 ft
18000 ft
20000 ft
25.84 inHg
22.23 inHg
19.03 inHg
16.22 inHg
13.76 inHg
44.7°F
30.5°F
16.2°F
2.0°F
–12.2°F
59.0°F29.92 inHg
About 3.6°F
per 1000 ft
About 0.119 inHg per 200 ft
About 0.1315 inHg per 200 ft
About 0.15 inHg per 200 ft
About 0.17 inHg per 200 ft
About 0.192 inHg per 200 ft
About 0.21 inHg per 200 ft
ALTITUDE TEMPERATURE
Source: International Civil Aviation Organization
BAROMETRIC PRESSURE
540 hPa/mb
616 hPa/mb
701 hPa/mb
795 hPa/mb
899 hPa/mb
1013 hPa/mb
472 hPa/mb
0 m 500 m
1000 m
1500 m
2000 m
2500 m
3000 m
3500 m
4000 m
4500 m
5000 m
5500 m
6000 m
8.5°C
2°C
–4.5°C
–11°C
–17.5°C
–24°C
15°C
About 6.5°C
per 1000 m
About 6.7 hPa/mb per 100 m
About 7 hPa/mb per 100 m
About 8 hPa/mb per 100 m
About 9 hPa/mb per 100 m
About 10 hPa/mb per 100 m
About 11 hPa/mb per 100 m
About 12 hPa/mb per 100 m
ALTITUDE BAROMETRIC PRESSURE TEMPERATURE
Source: International Civil Aviation Organization
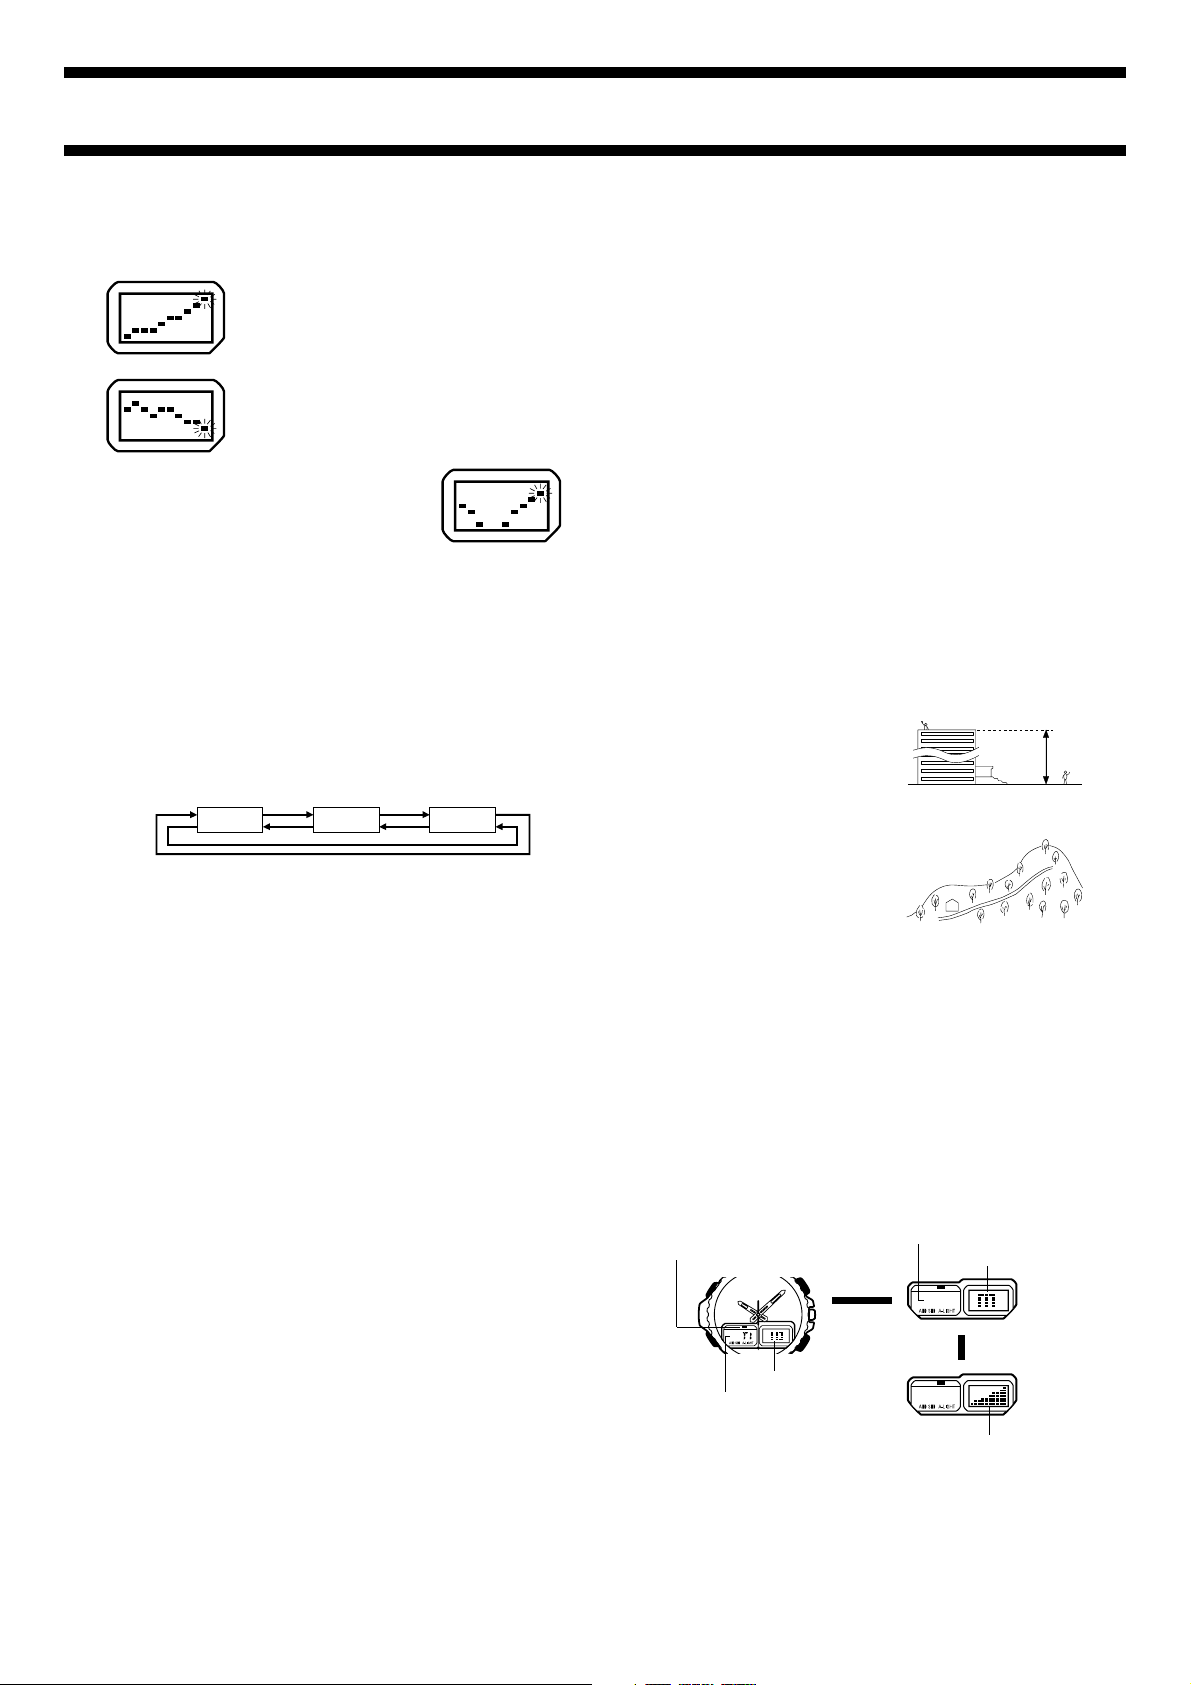
There are two standard methods of expressing altitude: Absolute altitude and
relative altitude. Absolute altitude expresses an absolute height above sea
level. Relative altitude expresses the difference between the height of two
different places.
Barometer
Barometric pressure indicates changes in the atmosphere, and by monitoring
these changes you can predict the weather with reasonable accuracy. Rising
barometric pressure indicates good weather, while falling pressure indicates
deteriorating weather conditions.
The barometric pressures that you see in the newspaper and on the TV
weather report are measurements corrected to values measured at 0 m sea
level.
Height of building 130 m
(Relative altitude)
Rooftop at an altitude of
230 m above sea level
(Altitude above sea level)
Sea
This manual suits for next models
4
Table of contents
Other Casio Watch manuals

Casio
Casio BGC-110B Troubleshooting guide

Casio
Casio 2952 User manual

Casio
Casio HS-80TW User manual

Casio
Casio Edifice EQW-T630YD-1A User manual

Casio
Casio GW-610DA-1V User manual

Casio
Casio QW-944 Configuration guide

Casio
Casio 3353 User manual

Casio
Casio QW-1848 Configuration guide

Casio
Casio 1570 User manual

Casio
Casio 2329 User manual

Casio
Casio 3259 User manual

Casio
Casio 2737 User manual

Casio
Casio AMW-703D-1AV User manual

Casio
Casio STANDARD W219 - 50-Meter WR Watch Manual User manual

Casio
Casio 5246 User manual

Casio
Casio 5086 User manual

Casio
Casio 5083 User manual

Casio
Casio QW-642 User manual

Casio
Casio QW-1628 User manual

Casio
Casio G-Shock G-5600-9 User manual