Operation Guide 4329
3
Calibration Signal
•The Japanese calibration signal (Call Sign: JJY) is maintained by
the National Institute of Information and Communications
Technology (NICT). It is transmitted 24 hours a day from the Mt.
Otakadoya transmitter (40 kHz) located in Tamura-gun,
Fukushima Prefecture, and from the Mt. Hagane transmitter (60
kHz) located on the border between Saga Prefecture and
Fukuoka Prefecture.
•The U.S. calibration signal (Call Sign: WWVB) is transmitted by
the National Institute of Standards and technology from Fort
Collins, Colorado.
The time data of the Japanese calibration signal (Call Sign:
JJY) is maintained by the Japan Standard Time Group of the
National Institute of Information and Communications
Technology (NICT). Note that transmission of the standard
wave may be interrupted occasionally due to maintenance,
lightning, etc.
For more information, visit the website of the Japan Standard
Time Group of the National Institute of Information and
Communications Technology (NICT) at the following URL.
http://jjy.nict.go.jp
•Note that the above URL is subject to change.
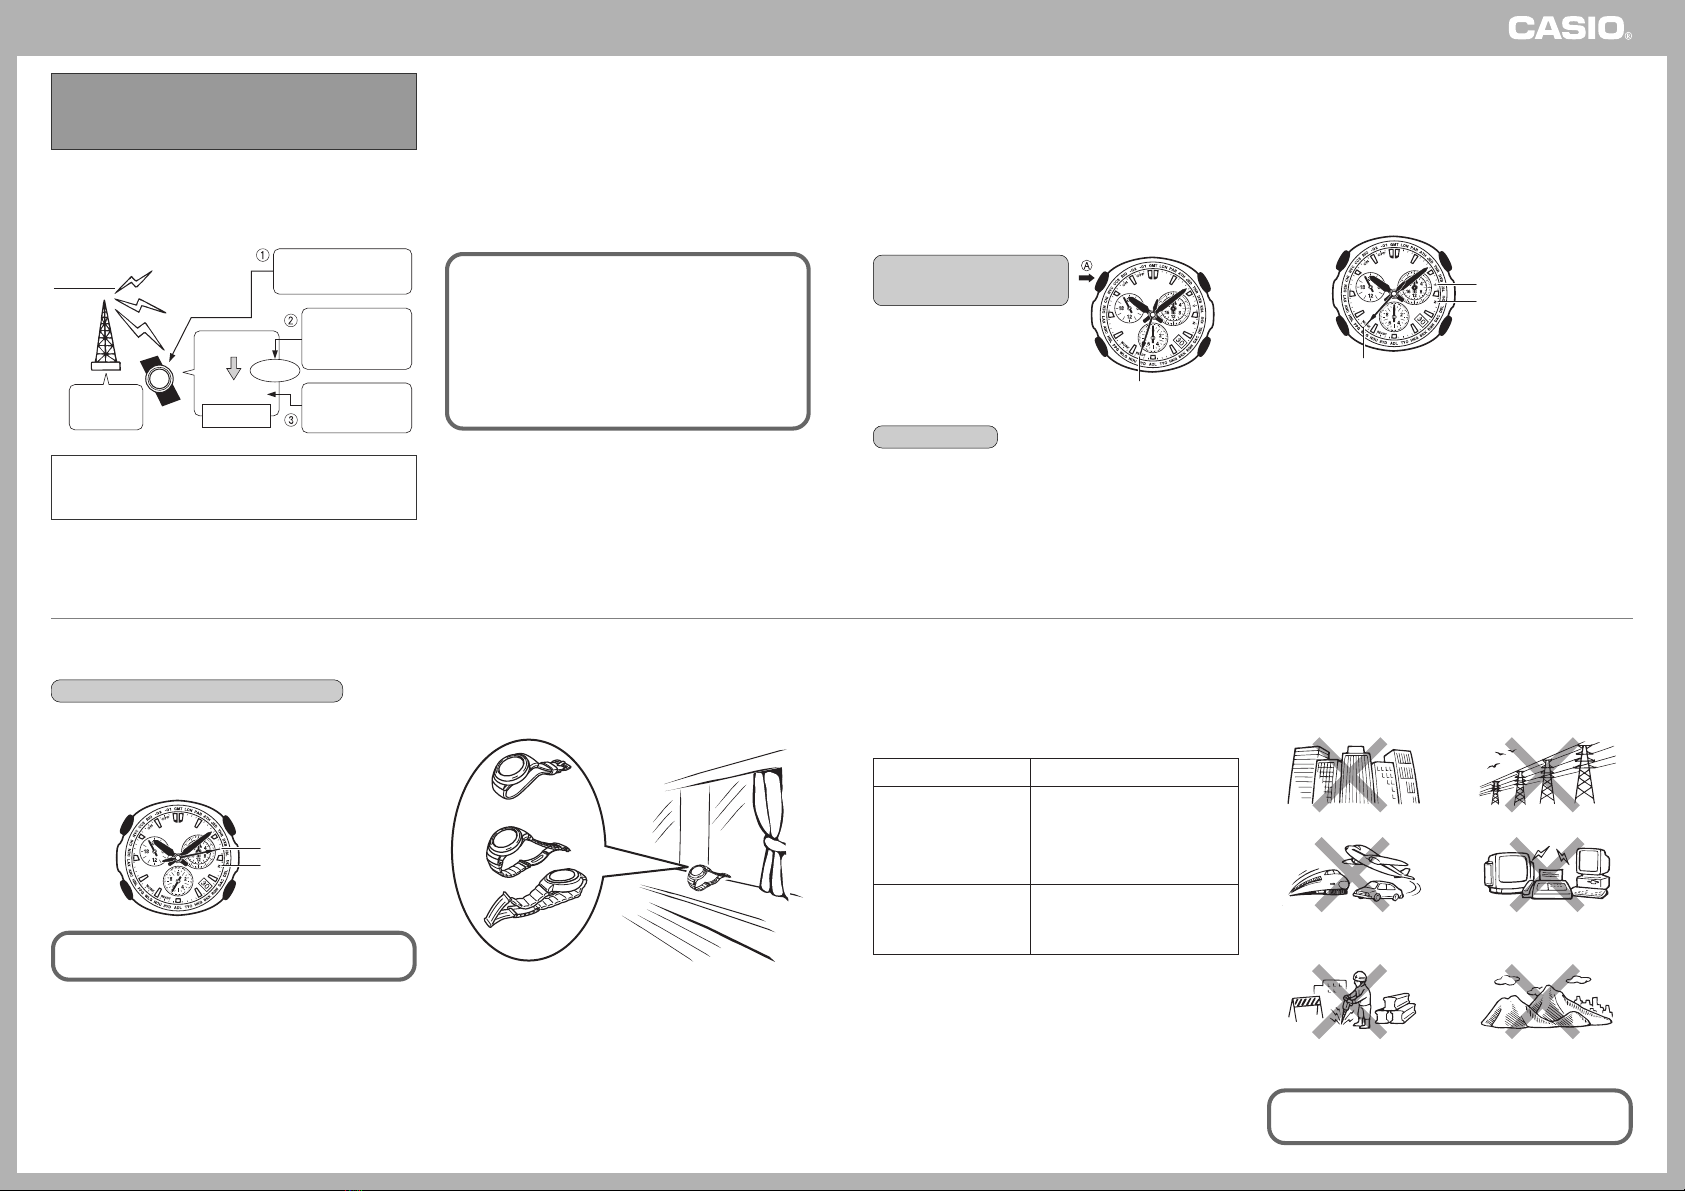
What is a radio-controlled watch?
Your radio-controlled watch is designed to receive a time
calibration signal that contains standard time data, and adjust its
current time setting accordingly.
Signal is received by
built-in antenna.
Watch decodes
received data and
converts it to time
data.
Time is adjusted
according to time
data.
Signal data
Cesium
atomic clock
Transmitter Long-wave time
calibration signal
Internally
Decode
Watch
Time data
After the watch receives the Standard Time signal, it performs
internal calculations to determine the current time. Because of
this, there may be an error of up to one second in the
displayed time.
How a Radio-controlled
Watch Works
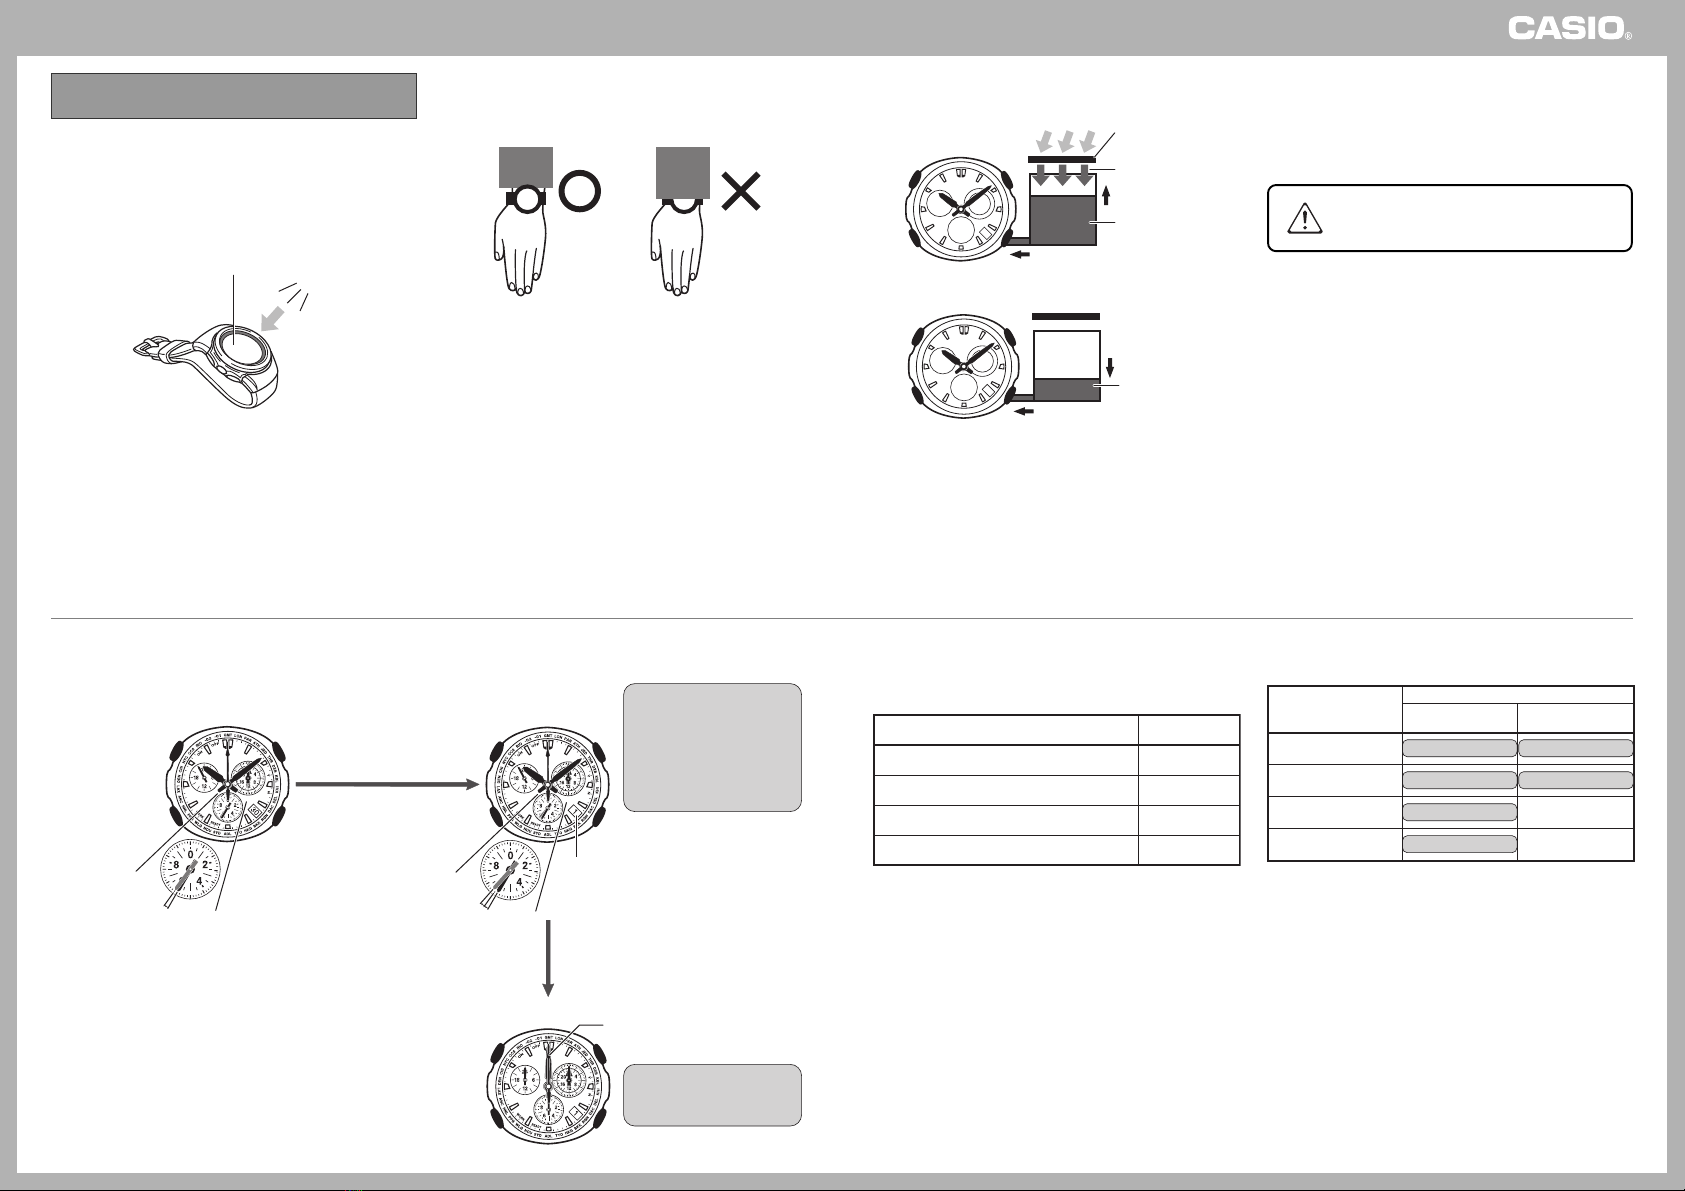
At the start of the receive operation
•The indicator hand will move to “READY”.
•The hour and minute hands will remain at their normal positions.
•The second hand will stop at “0”.
While reception is in progress
•The indicator hand will move to “WORK”.
•The hour and minute hands will remain at their normal positions.
•Do not move the watch while signal reception is in progress.
WORK
Y: Successful
N: Unsuccessful
When reception is complete
(Signaled when the watch beeps.)
•When signal reception is successful, the indicator hand will move
to “Y”. After about one or two minutes, the indicator hand will start
keeping track of the newly calibrated current time seconds.
•When signal reception is unsuccessful, the indicator hand will
move to “N”. After about one or two minutes, the indicator hand
will start keeping track of the previous (uncalibrated) current time
seconds.
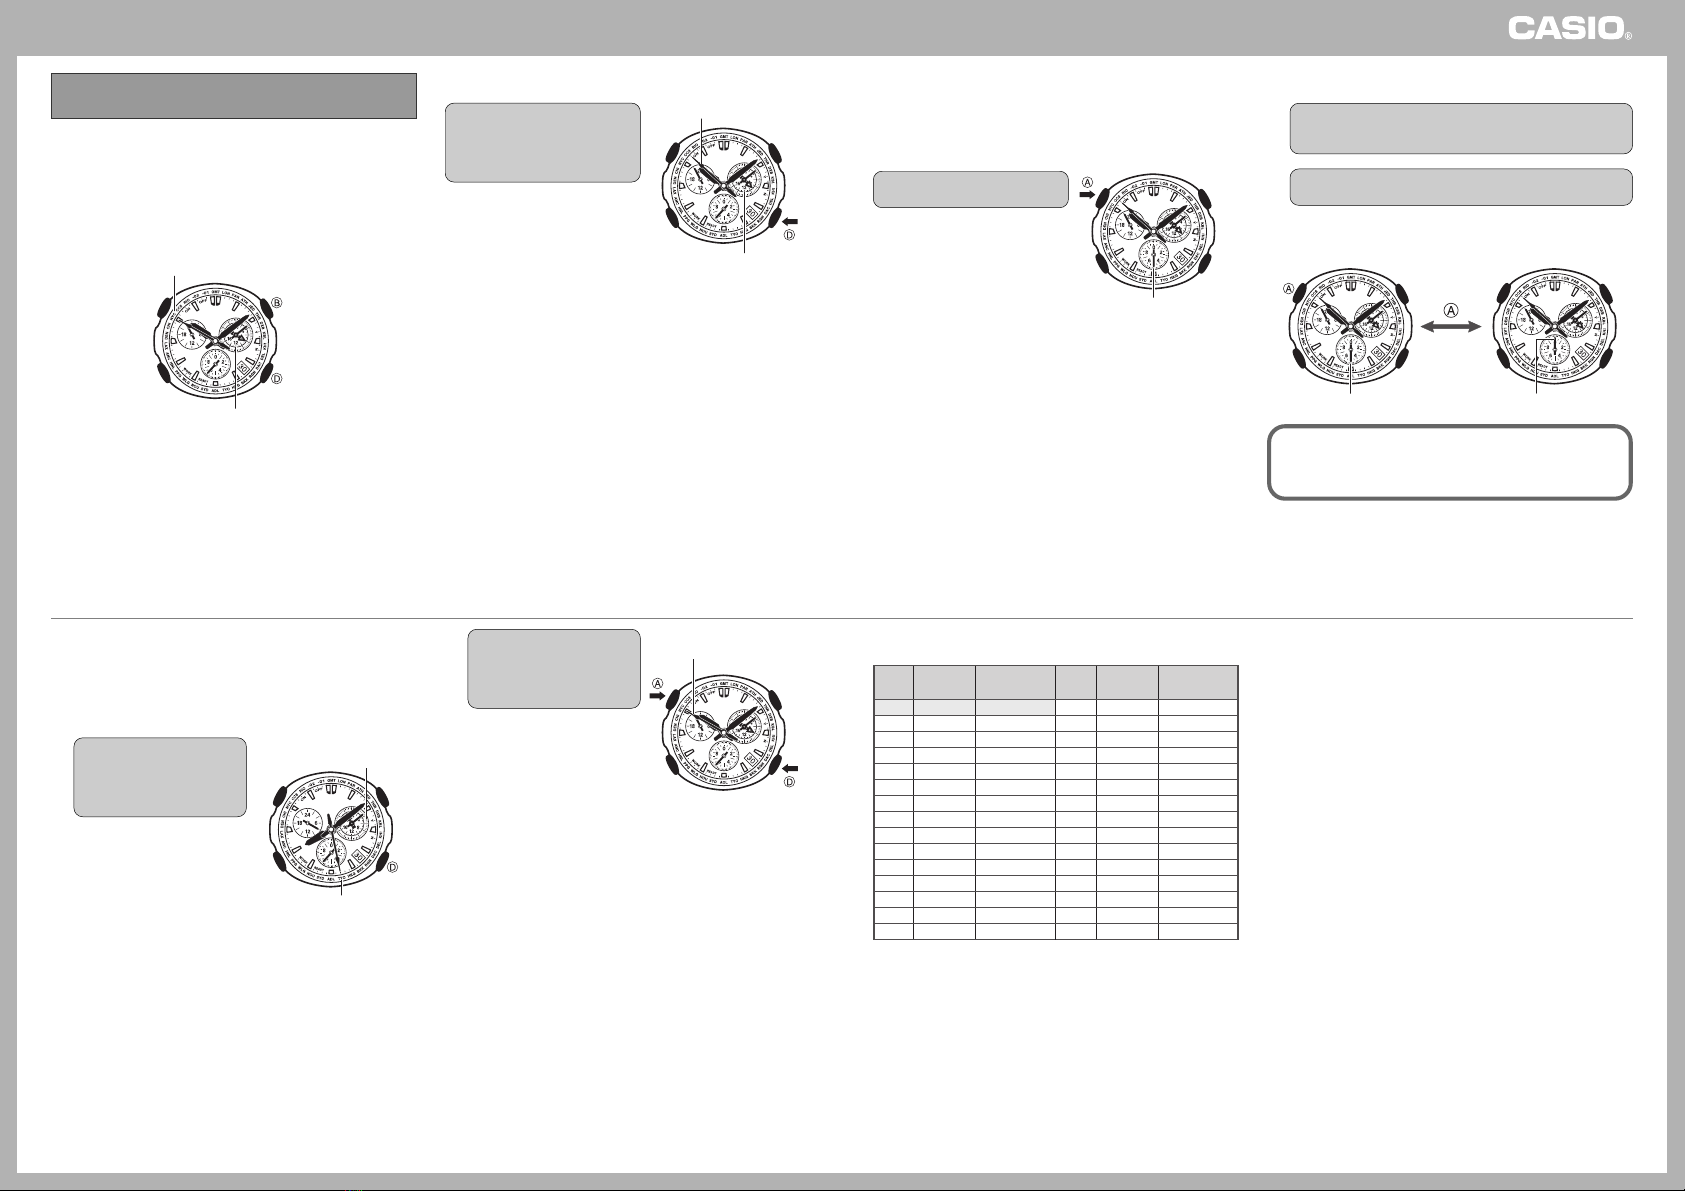
Receiving the Calibration Signal
There are two methods you can use in order to receive the time
calibration signal.
•Auto Receive
Up to six times per day
(Midnight, 1:00, 2:00, 3:00, 4:00, and 5:00 a.m.)
•As soon as one auto receive is complete, all subsequent auto
receives for that day are cancelled.
•To perform signal reception manually
You initiate signal reception by
pressing a button.
In the Timekeeping Mode,
hold down the AA
AA
Abutton for
about two seconds.
•The indicator hand will indicate
the result of the reception, the
watch will beep, and the
indicator hand will move to
“READY”.
■To interrupt reception
Press any button.
READY
■To position the watch for optimum
reception
Remove the watch from your wrist and place it somewhere so its
top (12 o’clock, where the antenna is located) is facing
approximately in the direction of the signal transmitter. Keep it
away from metal objects.
Resin Band
Metal Band
•Orienting the watch so it is sideways to the transmitter makes it
more difficult to receive the signal.
•Do not move the watch while it is receiving the calibration signal.
Time Required for Reception
Signal reception normally takes anywhere from about two to seven
minutes. Under certain signal conditions however, the receive
operation can take as long at 14 minutes.
■To check the result of the last receive
operation
In the Timekeeping Mode, press the AA
AA
Abutton.
•The indicator hand will move to “Y”(if the last reception was
successful) or “N”(if the last reception was unsuccessful).
•Press the Abutton to return to the Timekeeping Mode.
•The watch will also return to the Timekeeping Mode automatically
if you do not perform any operation for about five seconds.
Y: Successful
N: Unsuccessful
The last receive status changes each time a new time
calibration signal reception operation is performed.
Location
Reception is difficult and may even be impossible in the locations
described below. Avoid such locations when performing signal
reception.
•You should think of your watch operating like a radio or TV when it
is receiving the calibration signal.
If you are experiencing problems with reception, move away
from the types of locations described above to a location with
better reception, and try again.
Near high-voltage lines
Inside a vehicle
(automobile, train, plane, etc.)
Next to a household appliance or
office equipment (TV, speaker, fax,
PC, mobile phone, etc.)
In a location where there is
radio interference
(construction site, airport, etc.)
Near mountains
Among or near buildings
Reception Ranges
This watch is designed to receive the standard time calibration
signal of Japan (JJY) or of the United States (WWVB). The signal
that is received depends on the current Home City setting.
•For information about selecting a Home City, see “Selecting
Your Home City”. See “World Time City Code List”for details
on city codes.
Home City Transmitter
Either the Mt. Otakadoya signal
(40 kHz) or the Mt. Hagane signal
(60 kHz)
•Use one of these settings for
reception of the Japanese signal in
Japan or Taiwan.
Fort Collins, Colorado signal
• Use one of these settings for
reception of the U.S. signal in
North America.
TYO, HKG
LAX, DEN, CHI, NYC
•CASIO does not guarantee that the watch will be able to receive a
calibration signal correctly each day.
•Geographic contours, nearby buildings, the season, the time of
day, can even make reception impossible.
•Best reception is possible late at night.