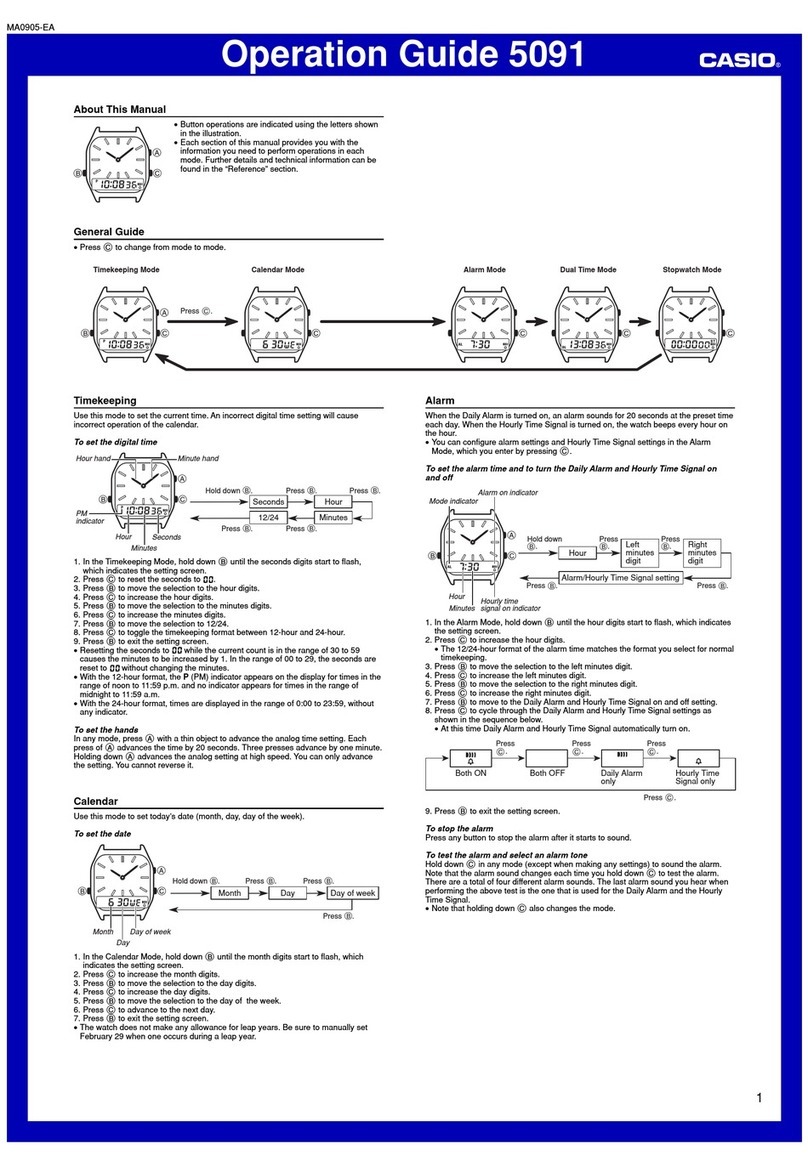
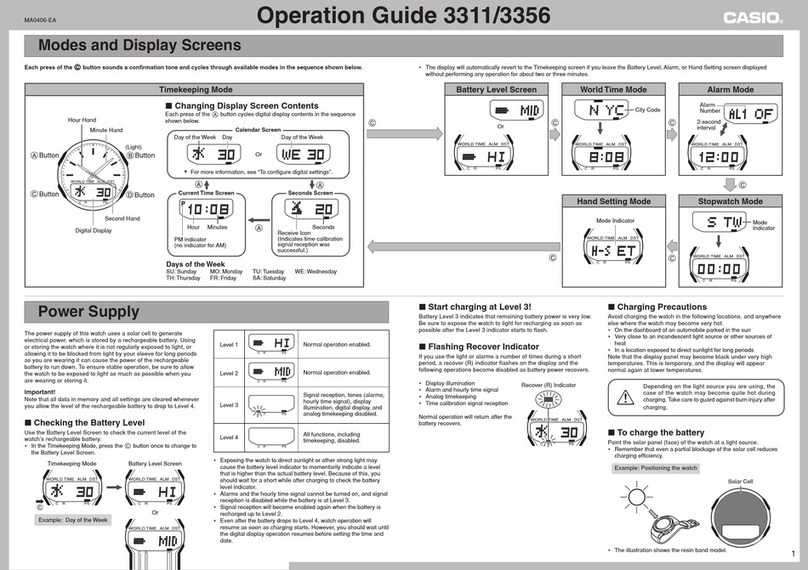
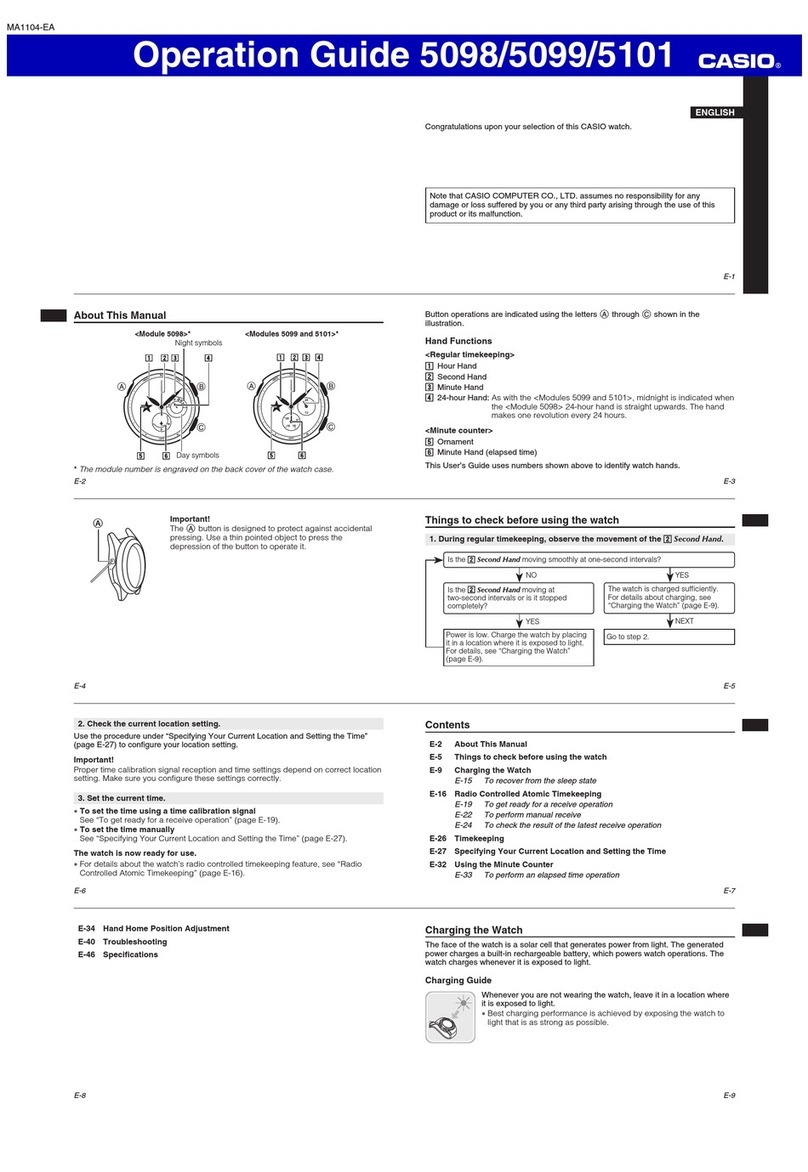
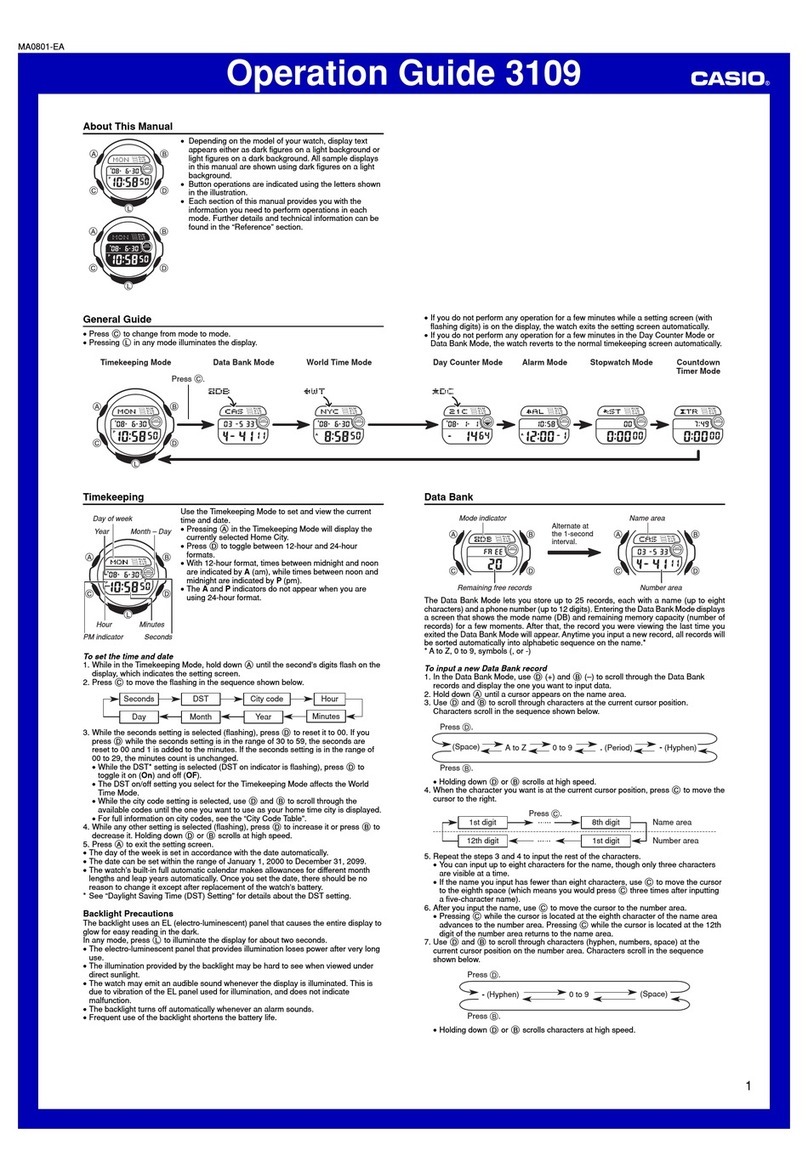
manuals.online logo
Brands
  1. Home
  2. •
  3. Brands
  4. •
  5. Casio
  6. •
  7. Watch
  8. •
  9. Casio DQ-950S User manual

Casio DQ-950S User manual

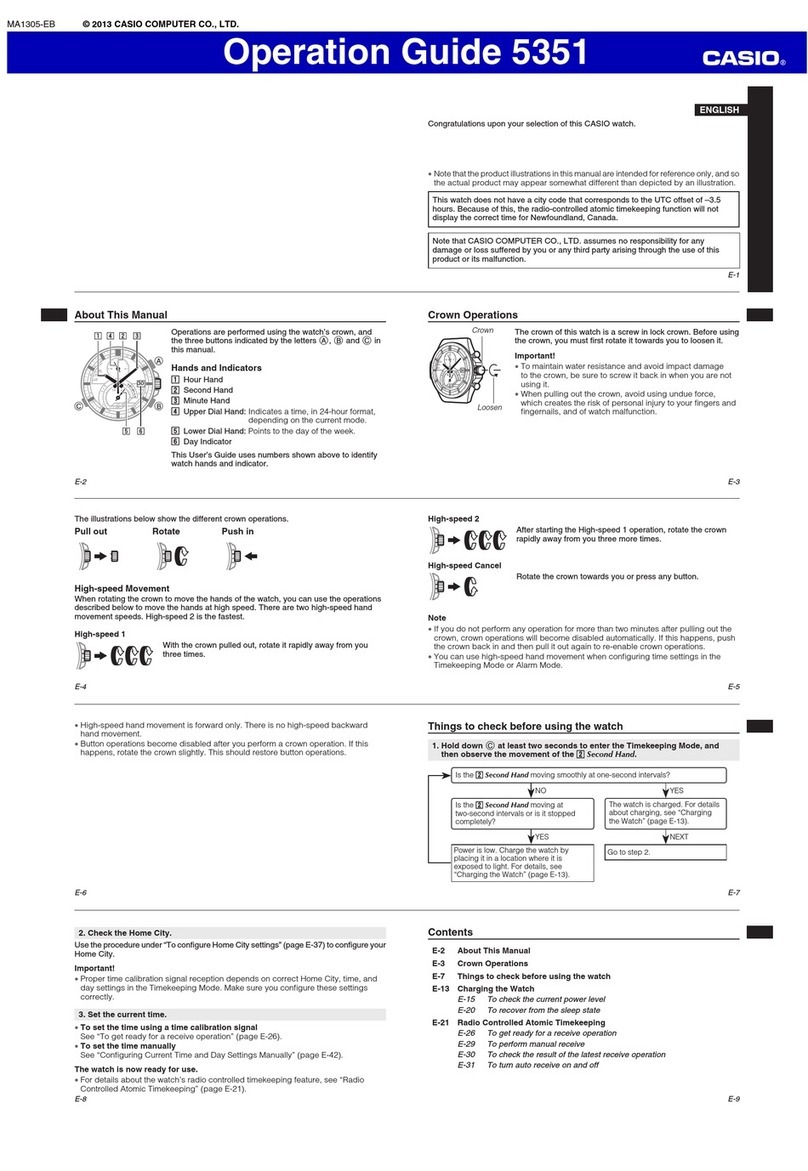
Operation Guide DQ-950S
1
MA1205-EA
ILLUSTRATION
©
2012 CASIO COMPUTER CO., LTD.
SNOOZE/LIGHT
ALARM
SET DEMO
RESET
SNOOZE
ON
OFF
3
4
2
ALARM
SNOOZE
ON
OFF
8
SET DEMO
5 6 7
1
MAX/MIN
MAX/MIN
RESET
SNOOZE/LIGHT
RESET
•A sticker is affixed to the glass of the clock when you purchase it. Be sure to remove the sticker before using the
clock.
•Depending on the clock model, the configuration of your clock may differ somewhat from that shown in the
illustration.
Current time
(Hour, minutes,
seconds)
Day of the week
Current HumidityCurrent Temperature
DATE
(month - date)
PM
indicator
Alarm time
Snooze on
indicator
Alarm on
indicator
Alarm Off Snooze Alarm On
Operation Guide DQ-950S
2
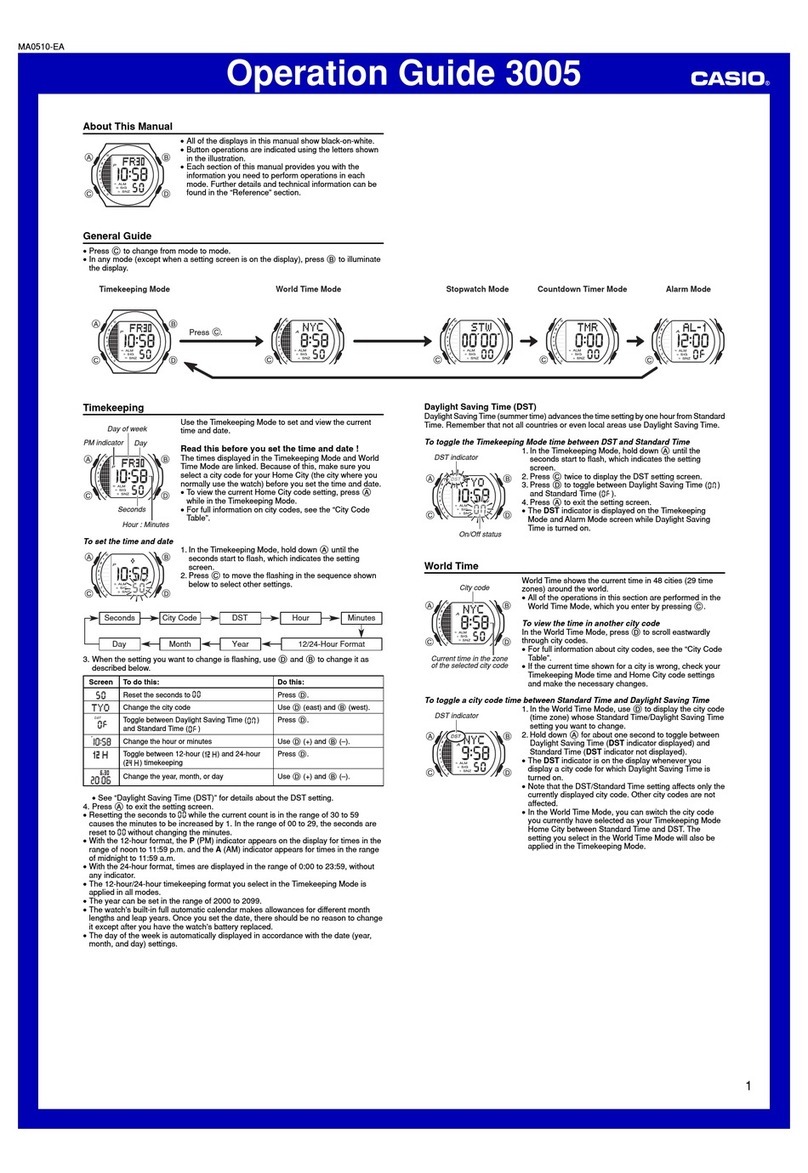
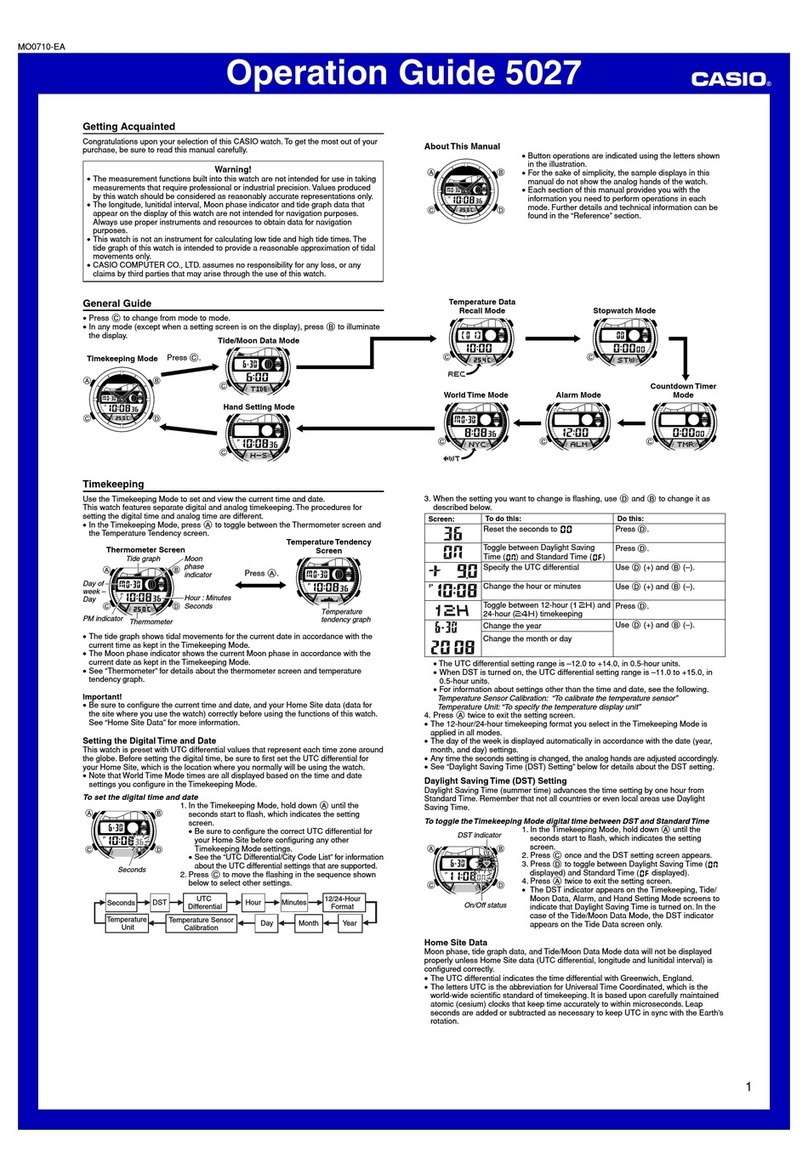
GENERAL GUIDE
11
11
1SNOOZE/LIGHT button
•Press this button to illuminate the display for about five seconds.
•The SNOOZE/LIGHT button is the area at the top of the clock panel marked “SNOOZE/LIGHT”.
•Pressing this button while the alarm is sounding stops the alarm.
22
22
2MAX/MIN button
Press this button to display the high and low temperature and humidity values.
33
33
3°C/°F button
Press this button to toggle the temperature units between Celsius and Fahrenheit.
44
44
4+(UP) / – (DOWN) buttons
Use these buttons to change the alarm time or the setting that is flashing on the display.
55
55
5SET button
Use this button when setting the current time.
66
66
6DEMO button
Press this button to test the alarm sound.
77
77
7RESET button
Press this button to reset the clock after replacing its batteries.
88
88
8Alarm Mode selector
SNOOZE: Snooze alarm on
ON: Alarm on
OFF: Alarm off
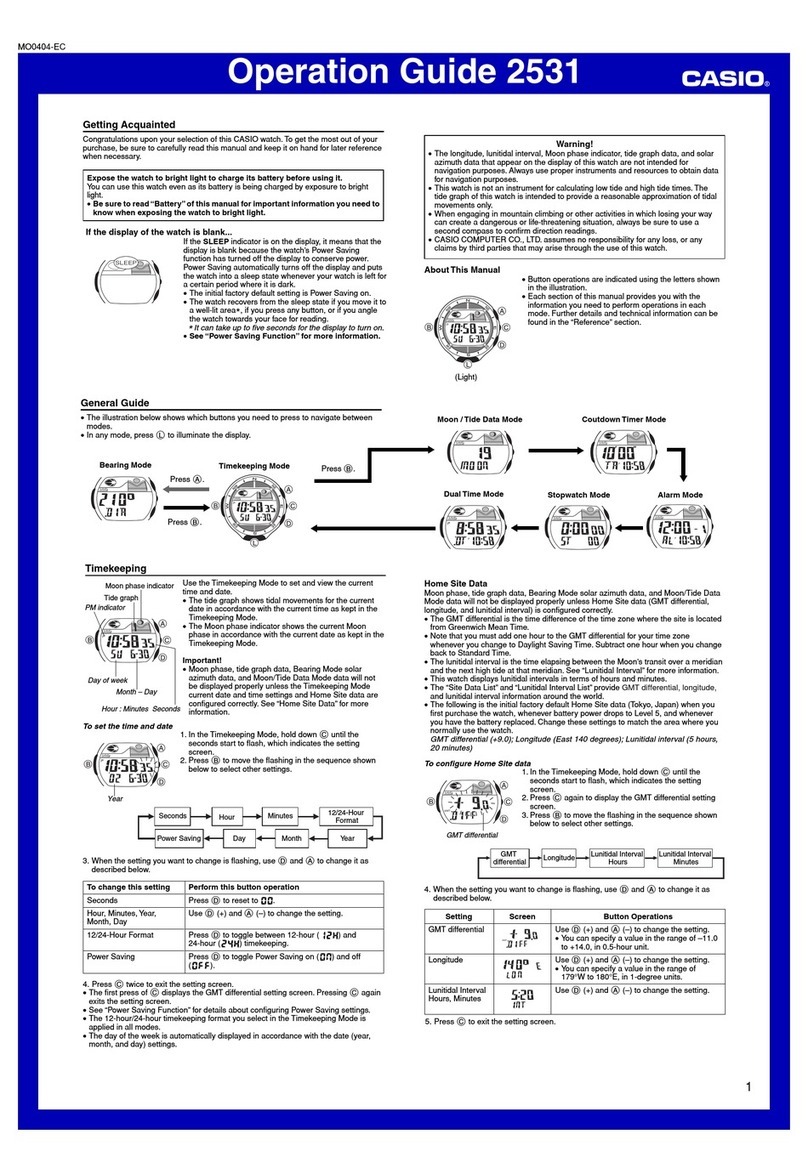
USING THE CLOCK
1. Press the SET button (5) to cycle through the setting screens as shown below.
12-hour/24-hour
Setting Screen
Time Setting ScreenMonth and Day Setting Screen
Year Setting Screen
Normal Timekeeping Screen Contrast Setting Screen
2. While the screen you want is displayed, use the – (DOWN) and +(UP) buttons (4) to change the flashing digits.
MAX/MIN
Press –(DOWN
)
to decrease
the flashing digits.
Press +(UP) to increase
the flashing digits.
•Holding down +(UP) or – (DOWN) changes the flashing digits at high speed.
•You can set the year in the range of 2000 to 2099. The day of the week is set automatically in accordance with
the date setting.
•Pressing +(UP) or – (DOWN) while the Time Setting Screen is on the display causes the seconds count to be
reset to 00.
•Each press of +(UP) or – (DOWN) while the 12-hour/24-hour Setting Screen is on the display toggles
between 12-hour and 24-hour timekeeping.
•You can set the contrast level in the range of 1 to 10.
3. After making the settings you want, use the SET button (5) to display the Normal Timekeeping Screen.
•The clock automatically returns to the Normal Timekeeping Screen if you leave a setting screen on the display
for about three minutes without performing any operation.
Operation Guide DQ-950S
3
USING THE ALARM
The alarm sounds when the alarm time you set is reached. You can also use the Alarm Mode selector (8) to
select the snooze alarm feature.
Setting the Alarm Time
Use the – (DOWN) and +(UP) buttons (4) to set the alarm time.
Pressing the – (DOWN) and +(UP) buttons (4) causes the alarm time to appear in place of the date on the
display.
MAX/MIN
Press to change the alarm
time setting (+).
Press to change the alarm
time setting (
—
).
•Holding down +(UP) or – (DOWN) changes the digits at high speed.
Turning the Alarm On and Off
Use the Alarm Mode selector (8) on the side of the clock to turn the alarm on and off, and to select the snooze
feature.
•The alarm time appears in place of the date on the display whenever the Alarm Mode selector (8) is set to ON
or SNOOZE.
•The volume of the alarm sound cycles through five levels as it sounds.
Stopping the Alarm
•When alarm is sounding, press the SNOOZE/LIGHT button (1) to stop it. When the snooze feature is turned on,
the alarm will sound again in about five minutes.
•To turn off the snooze feature, slide the Alarm Mode selector (8) to OFF.
USING THE LIGHT
Pressing the SNOOZE/LIGHT button (1) turns on the light and illuminates the display for easy reading in the dark.
Important!
•Overuse of the light can shorten battery life.
THERMOMETER AND HYGROMETER FUNCTIONS
A built-in sensor measures temperature and humidity, and shows the measured value on the display.
The readout from the temperature sensor can also be switched between Celsius (°C) and Fahrenheit (°F).
Temperature Measurements
•The temperature display shows “LO” for temperatures below –19.9°C (–3.8°F) and “HI” for temperatures above
49.9°C (121.8°F).
•Though temperature readings are displayed up to 0°C (32°F) and greater than 41°C (105°F), note that such
readings are actually outside the guaranteed temperature range of this clock.
Switching between Celsius and Fahrenheit
•Push the °C/°Fbutton (3) to select either Celsius (°C) or Fahrenheit (°F).
•Switching between Celsius and Fahrenheit causes current high temperature/humidity and low temperature/
humidity memory contents to be cleared.
°C/°F button (3)
°C°F
Celsius (°C) Fahrenheit (°F)
Humidity Measurements
•The humidity display shows “LO” for humidity below 10% and “HI” for humidity above 90%.
•Whenever the current temperature is outside the range of 0°C to 49.9°C, the humidity display will show “– –”.
Daily High Temperature/Humidity, Low Temperature/Humidity Memory
•The clock remembers the highest and lowest temperature and humidity readings for the current 24-hour day.
Each press of the MAX/MIN button (2) cycles between screens as illustrated below.
•Daily high and low temperature/humidity memory contents are cleared each day at midnight.
Changing the Temperature/Humidity Display Screen
•Press of the MAX/MIN button (2). Each press cycles between screens as shown below.
MAX/MIN button (2)
MAX/MIN button (2)
MAX/MIN button (2)
Current temperature and humidity
High temperature and humidity Low temperature and humidity
Turning On Temperature/Humidity Screen Auto Cycling
•Hold down the MAX/MIN button (2) for about one second. This will turn on temperature/humidity screen auto
cycling, which causes the screen contents to cycle from one screen to the next at regular intervals.
Current temperature and humidity
High temperature and humidity Low temperature and humidity
•To turn off temperature/humidity screen auto cycling, press the MAX/MIN button (2).
Alarm Mode selector
SNOOZE
ON
OFF
Description
The alarm sounds at the preset time for one minute, and seven more times every five
minutes thereafter. Even if you stop the alarm by pressing the SNOOZE/LIGHT
button (1), the alarm sounds again about five minutes later.
•The indicator flashes on the display to indicate that the snooze feature is
activated.
The alarm sounds at the preset time for one minute.
The alarm does not sound.
Operation Guide DQ-950S
4
BATTERY REPLACEMENT
Replace batteries whenever the display of the clock becomes dim and difficult to read.
1. Open the battery compartment cover as shown in the illustration.
2. Remove all of the old batteries.
3. Load a full set of new batteries. Make sure that their positive (+) and negative (–) ends face in the correct
directions. If you load batteries incorrectly, they can burst and damage the clock.
4. Press the RESET button (7). Be sure to press the RESET button (7) after replacing batteries.
5. Replace the battery compartment cover.
Battery precautions
•Keep batteries out of the reach of small children. If a battery is accidentally swallowed, contact your physician
immediately.
•Be sure to load the batteries with their positive (+) and negative (–) ends facing correctly.
•Never mix old and new batteries, or batteries of different brands.
•Never charge the batteries that come with the clock.
•Should batteries ever leak while in the clock, wipe out the fluid with a cloth, taking care not to let any get onto your
skin.
•Replace the batteries at least once a year, even if the current batteries are working properly.
•The batteries that come with the clock lose some of their power during transport and storage.
SPECIFICATIONS
Accuracy at Normal Temperature: ±60 seconds a month
Calendar System: Auto-calendar pre-programmed from the year 2000 to 2099
Alarm: Daily Alarm, Snooze Alarm (7 repeats)
Thermometer Functions: Measuring range: –19.9°C to 49.9°C (–3.8°F to 121.8°F)
Though temperature readings are displayed up to 0°C (32°F) and greater than 41°C (105°F), note that such
readings are actually outside the guaranteed temperature range of this clock.
High/Low Temperature Memory, Celsius (°C)/Fahrenheit (°F) switching
Temperature Sensor Precision: ±2°C (±4°F) in range of 0°C to 40°C (32°F to 104°F)
Hygrometer Function: Measuring range: 10% to 90%, when temperature is 0°C to 40°C (32°F to 104°F)
High/Low Humidity Memory
Humidity Sensor Precision: ±10%, when temperature is 5°C to 40°C (41°F to 104°F)
Other: LED light; 12/24-hour timekeeping
Battery: Two AAA size batteries (Type: R03)
Battery Life: Approximately 1 year
•1 minute alarm operation per day
•5 seconds light operation per day
Operating Temperature: 0°C to 40°C (32°F to 104°F)

Other Casio Watch manuals

Casio 2407 User manual

Casio

Casio 2407 User manual

Casio GX56-1ACR User manual

Casio

Casio GX56-1ACR User manual

Casio 5393 OC User manual

Casio

Casio 5393 OC User manual

Casio 5713 User manual

Casio

Casio 5713 User manual

Casio 3242 User manual

Casio

Casio 3242 User manual

Casio AQF100W-7BV User manual

Casio

Casio AQF100W-7BV User manual

Casio 1565 User manual

Casio

Casio 1565 User manual

Casio 3249 User manual

Casio

Casio 3249 User manual

Casio 5132 User manual

Casio

Casio 5132 User manual

Casio 5110 User manual

Casio

Casio 5110 User manual

Casio 5690 User manual

Casio

Casio 5690 User manual

Casio HS-3(V) User manual

Casio

Casio HS-3(V) User manual

Casio QW-760 Configuration guide

Casio

Casio QW-760 Configuration guide

Casio 5372 User manual

Casio

Casio 5372 User manual

Casio GW-002J Troubleshooting guide

Casio

Casio GW-002J Troubleshooting guide

Casio G-Shock BG2101-7 User manual

Casio

Casio G-Shock BG2101-7 User manual

Casio 3231 User manual

Casio

Casio 3231 User manual

Casio 5565 User manual

Casio

Casio 5565 User manual

Casio 5073 User manual

Casio

Casio 5073 User manual

Casio QW-950 Configuration guide

Casio

Casio QW-950 Configuration guide

Casio 5413 Service manual

Casio

Casio 5413 Service manual

Casio 5554 User manual

Casio

Casio 5554 User manual

Casio 5299 User manual

Casio

Casio 5299 User manual

Casio 2981 User manual

Casio

Casio 2981 User manual

Popular Watch manuals by other brands

foxbox QUARK Proton Series manual

foxbox

foxbox QUARK Proton Series manual

Seiko 4F series BATTERY REPLACEMENT MANUAL

Seiko

Seiko 4F series BATTERY REPLACEMENT MANUAL

Garett FIT 14 user manual

Garett

Garett FIT 14 user manual

Wolki WW1.57 user manual

Wolki

Wolki WW1.57 user manual

Wesseldon 46911 instruction manual

Wesseldon

Wesseldon 46911 instruction manual

Bombfrog DW-15 V2 user manual

Bombfrog

Bombfrog DW-15 V2 user manual

iwc portuguese chronograph classic reference... operating instructions

iwc

iwc portuguese chronograph classic reference... operating instructions

Asus ZenWatch quick start guide

Asus

Asus ZenWatch quick start guide

PORODO PD-KDSWT quick start guide

PORODO

PORODO PD-KDSWT quick start guide

SPINNAKER TRANSAT SP-5036 quick start guide

SPINNAKER

SPINNAKER TRANSAT SP-5036 quick start guide

Citizen C500 Setting instructions

Citizen

Citizen C500 Setting instructions

CP 27545 instruction manual

CP

CP 27545 instruction manual

Micgo G08 user guide

Micgo

Micgo G08 user guide

Sony SmartBand SWR10 Troubleshooting

Sony

Sony SmartBand SWR10 Troubleshooting

QUO SPORT user manual

QUO

QUO SPORT user manual

Timex i-Control M805 Instruction guide

Timex

Timex i-Control M805 Instruction guide

Marathon SSNAV-D manual

Marathon

Marathon SSNAV-D manual

Timex 941 manual

Timex

Timex 941 manual

manuals.online logo
manuals.online logoBrands
  • About & Mission
  • Contact us
  • Privacy Policy
  • Terms and Conditions

Copyright 2025 Manuals.Online. All Rights Reserved.