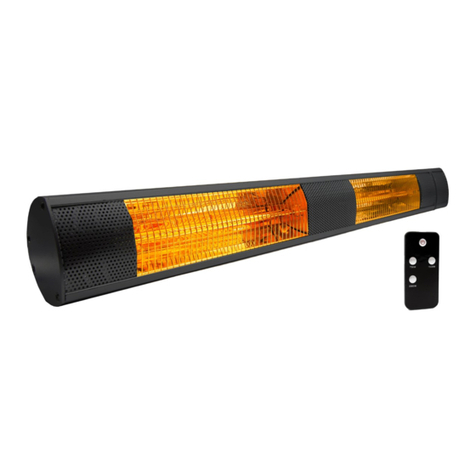
CASTLE NP10 User manual

NP10 / NP15 / NP20
WIFI HEATER
InstructionsManual
Read instructions manual before use!
Equipmart Ltd
Kiam House
Birchill Road
Knowsley Ind. Park North
Merseyside
L33 7TD
0151 548 5500
www.castleheaters.co.uk

Please read and follow the instructions in this user manual even if you feel you are familiar with
the product and find a place to keep it handy for future reference.
NOTE: The rating of this product (as marked on the product identification plate) is based on specific
loading tests. Normal use or the use of other recommended attachments may draw significantly less
power.
IMPORTANT SAFEGUARDS
WARNING: To reduce the risk of fire, electrical shock or injury to persons or property please read
all instructions carefully before using this product
WARNING: In order to avoid overheating, do not cover the heater, or operate in close proximity to
curtains, etc. Check air inlets and outlets from time to time for accumulated dust. Do not use
the heater near curtains and flammable materials.
When using any electrically powered product, basic safety precautions should always be followed,
including the following:
•Carefully read all instructions before operating your new product for the first time and save for future
reference.
•Remove and safely discard any packaging material and promotional labels before using the
appliance for the first time.
•To eliminate a choking hazard for young children, remove and safely discard the protective cover
fitted to the plug of this appliance.
•Always operate the product from a power source of the same voltage, frequency and rating as
indicated on the product identification plate.
•This appliance is not intended for use by persons (including children) with reduced physical, sensory
or mental capabilities, or lack of experience and knowledge, unless they have been given
supervision or instruction concerning use of the appliance by a person responsible for their safety.
•Keep the product away from fire or water at least 1.5m distance in the use of the product or storage.
•Keep out of reach of children and do not allow them to operate this appliance.
•Close supervision is necessary when the product is used near children or invalids. Children should
be supervised to ensure that they do not play with the appliance.
•This product must not be located immediately below a socket outlet and should not be used in the
immediate vicinity of water, such as bathtubs, washbowls, swimming pools etc. where the likelihood
of immersion or splashing could occur.
•Do not switch the appliance on until it is properly installed as described in this manual.
•Do not leave the heater running unattended.
•Do not use the appliance outdoors.
•Do not use if you have wet or damp hands.
•Never use the appliance on or near hot surfaces.
•Do not operate the product if it is dropped, damaged or showing signs of product malfunction.

•Do not operate the product with a damaged plug or cord. Return the complete product to the place of
purchase for inspection, refund or replacement.
•If the supply cord is damaged, the cord must be replaced by the manufacturer, its service agent or
similarly qualified persons in order to avoid hazard.
•Do not immerse or expose the product or flexible cord to rain, moisture or any other liquid.
•Switch off and unplug from outlet when the product is not in use and before cleaning the unit.
•To avoid personal injuries or property damage, do not insert any body parts (e.g. finger) or objects
through the air inlet or outlet openings when the heater is operating.
•This product is intended for normal domestic/household use only and should not be used for
industrial purposes.
•From time to time, please check the cord for damage. Never use the appliance if the cord or any part
of the appliance shows signs of damage.
•Repairs to electrical appliances should only be performed by a qualified electrician. Improper repairs
may place the user at serious risk.
•Do not run the main cable under carpets, rugs, etc.
•Do not allow the mains cable to hang over sharp edges or come into contact with hot surfaces.
•Never immerse the product in water or any other liquids.
•Before cleaning the appliance, ensure it is unplugged from the power and that it is completely
cooled.
•Do not clean the appliance with abrasive chemicals.
•Always disconnect the heater when moving it from one location to another.
•The use of attachments or accessories not recommended or sold by the product distributor may
cause personal or property hazards or injuries.
•Do not use the heater in reach of a shower, bath or a swimming pool.
•Heater is not located immediately below a socket-outlet.
•The surfaces of the heater are very hot during operation.Avoid contact with the wind outlet. Use
handles and knobs if necessary.
•Do not twist or wrap the power cord around the appliance as this may cause the insulation to weaken
and split, particularly where it enters the unit. Fully unwind the cord before use as a coiled cord may
overheat.
•Use of an extension cord is not recommended. However, if it is absolutely necessary ensure the cord
is short as possible (long cords coiled up can overheat and cause tripping accidents).
•Do not use the appliance on the same socket or electric circuit with other electrical appliances so as
to prevent the circuit from being overloaded, which will cause fire. Please do not prolong the power
cords by yourself or use movable socket.
•Ensure the cord is fully extended before use and accommodate it so that it is not in touch with any
part of the heater.
•Keep combustible materials such as furniture, pillows, bedding, clothes and curtains at least 1m
away from the appliance.
•Avoid touching the heater body whilst the heater is on. Do not move the appliance while it is
functioning in order to avoid overheating with the additional risk of fire.
•Switch off and unplug from outlet when not in use, before assembling or disassembling parts and
before cleaning. Remove by grasping the plug - do not pull on the cord.

•Do not use the appliance for other than its intended use.
•Do not leave the appliance unattended when switched on.
•Always use the heater on a leveled surface.
•Do not use the heater to dry your laundry. Never obstruct the intake and outlet grilles (danger of
overheating).
•Children shall not play with the appliance. Cleaning and user maintenance shall not be made by
children.
•Always use a fireguard when children and infirm persons can come into contact with the heater.
•Never sit or stand on the heater.
•When the heater is not in use, store in a cool dry location.
•Do not store until the heater cools down (allow the unit to cool down for at least 15-30 minutes).
•Do not use this heater in the immediate below or in front of a power outlet.
•In order to avoid overheating, do not cover the heater.
CAUTION: Some parts of this product can become very hot and cause burns. Particular
attention has to be given where children and vulnerable people are present.
CAUTION: This heater is to be operated in an upright position only. The heater incorporates a
tilt switch inbuilt in the heater body. If the heater is tilted or knocked over, the power will cut off
automatically. Put the heater back to an upright position and the heater will start working.
BEFORE FIRST USE
•Remove all packaging and check the appliance for any damages during transportation. If the unit
appears to have any damages, please contact the seller.
•Ensure a power socket is available to power the heater and that the heater is not directly located
under the power socket.
•Ensure the heater is placed on a level surface with enough clearance from its surroundings.
WARNING: Do not place the heater on LONG PILE CARPET OR FLOKATI RUGS. Use a heat board
if necessary.

ASSEMBLY INSTRUCTIONS
This heater is intended for freestanding or wall mounting. It is not to be mounted on ceiling or floors.
Choose a location where there is at least 1m clearance of either side from drapery or any other
furnishing.
Freestanding Assembly Instructions
The heater must always be used in the upright position. When using as a freestanding, do not operate
without the feet in place.
1. Ensure the heater is unplugged and power is switched off.
2. Set the heater upside down, and remove the 2 screws that are already in the base.
3. Align the feet and place the screws in the hole and screw into position to secure each feet.
4. Turn the unit upside down again to an upright position, and place it on the floor after assembling. The
heater is now ready for use.
INSTALLATION CAUTIONS:
•Any electrical wiring required for installation, must be carried out by a qualified licensed
electrician.
•The heater must be mounted horizontally only.
•Do not mount directly below or in front of a socket outlet.
•Do not install behind doors.
•Do not install outdoors.

Wall Mounting Assembling Instructions
WARNING: The appliance must be installed at least 50cm away from floor, ceiling and to sides.
WARNING: Make sure there are no electrical cables or pipes behind the point in which you are drilling
the holes.
1. Ensure the heater is unplugged and power is switched off.
2. The distances between the two wall mounted brackets are 375mm (NP10), 575mm (NP15),
575mm (NP20). Check the assembly will be horizontal with a spirit level.
3. With a diameter of 8mm and depth of 40mm, insert the supplied anchors in the holes. Then use
a screwdriver to tighten in the screws supplied with anchors. The screws must protrude 6mm
from the anchor.
4. After positioning the screws into the unit, hang the hook holes on the back of the unit.
Model
Mounting Dimension
(Horizontal)
Mounting Dimension
(Vertical)
NP10
375mm
178mm
NP15
575mm
178mm
NP20
575mm
178mm

CONTROL PANEL & DISPLAY
CONTROL PANEL
1. Timer function: 0-6 hours of timing can be set
2. Increase setting: adjust temperature setting, timing setting, etc.
3. Power button: switch the heater on or put on standby
4. Child lock button
5. Decrease seetting: adjust temperature setting, timing setting, etc.
6. Child lock indicator
7. Timer indicator
8. WIFI indicator
9. Heating indicator
POWER SWITCH
On the side of the machine you will find the main power switch

OPERATING INSTRUCTIONS
NOTE: It is normal when the heaters are turned on for the first time or when they are turned on after
having not been used for a long period of time, the heaters may emit some smell and fumes. This will
disappear when the heater has been on a short while.
WARNING: The surface around the heating element gets hot during operation. DO NOT TOUCH the
surface while accessing the control panel.
MANUAL OPERATION
1. Before inserting the plug into an electrical outlet, make sure that the electrical supply in your area
matches that on the rating label on the unit. Plug the heater into a wall socket once this matches.
2. Place the heater on a flat, smooth and firm surface. If on carpet, ensure that the carpet does not
obstruct the air vents on the underside of the body.
3. Press the power ON/OFF switch on the side of the machine to the ON position, the display will show
for standby mode.
4. Press the button to switch the heater on, the default temperature setting of 25°C will be set.
How to set the Temperature:
By default the display shows the room temperature. You can adjust the temperature by pressing
to increase the temperature and by pressing to decrease the temperature, the temperature will
range from 5°C to 50°C.
How to set the Time Function:
Press the button to begin setting a time. Press the button until you reach your ideal time setting
(time ranges from 0 hour to 6 hours). The indicator will be lit when timer is on.
How to set the Child Lock Function:
Press the button for 3 seconds to enable child lock, the indicator will illuminate when child lock
is enabled. To disable child lock, keep hold of the button until the indicator light is off.
How to connect to the WIFI:
1. Download the app “Tuya Smart”available in both AppleAppstore and Google Play.After your
registration on the app, you can add the heater category in your equipment control list.
2. With the heater on keep hold of the button until the indicator light begins to flash red, (the
flashing means the heater is in a connectable state for WIFI).
3. On your smartphone start the Tuya Smart app and follow the instructions in the following section.
4. After connecting to the WIFI successfully, the WIFI indicator light on the heater will always be on.

Tuya Smart App:
1. Open the Tuya Smart app, register and log in, then select Add Device.
2. Select Small Home Appliances from the product categories and select Heater

3. Select the WIFI network you wish to connect to and enter your WIFI password. Press next, confirm
that the indicator on the heater is in a fast flashing state and press next again. When the heater is
successfully connected you will hear a beep from the heater.
4. After the connection is successful the indicator light will be in a steady green state, press finish to
enter the heater control interface.

CLEANING
The heater requires regular cleaning to ensure trouble free operation:
•Unplug the heater from the mains supply before cleaning.
•Ensure that the heater has been allowed to cool before cleaning.
•Use a damp cloth (not wet) to wipe the exterior of the heater to remove dust and dirt.
•Do not allow any water or other liquid to enter the housing or control panel.
•Ensure the heater is dry before plugging back into the mains supply.
CAUTION: Do not use harsh detergents, chemical cleaners or solvents as they may damage the
surface finish of the heater.
Warning: In order to avoid overheating, do not cover the heater.
WARNING - Fabric, clothing or other flammable materials may ignite if placed against or in close
proximity to the heater. No flammable materials should be placed near the heater. This appliance
is for indoor use only. Do not use outdoors.
STORING THE HEATER
When the heater is not used for long periods of time, it should be protected from dust and stored in a
clean dry place. Ensure the appliance and all parts are thoroughly cleaned and dried before storage. We
recommend storing the appliance in its original box or in a clean, dry place.
SPECIFICATIONS
Model
Voltage
Frequency
Wattage
NP10
220-240V~
50/60Hz
1000W
NP15
220-240V~
50/60Hz
1500W
NP20
220-240V~
50/60Hz
2000W
This manual suits for next models
2
Table of contents
Other CASTLE Heater manuals