www.catgenie.com 1-888-735-39272
TO PREVENT FIRE or shock hazard, do NOT expose
the CatGenie Processing Unit to rain or sources of
splashing water. Do NOT operate the CatGenie with
wet hands. NEVER USE AN EXTENSION CORD WITH
YOUR CATGENIE.
READ ALL INSTRUCTIONS BEFORE INSTALLING
AND USING YOUR CATGENIE. USE THE CATGENIE
ONLY FOR ITS INTENDED PURPOSE.
All modications or changes not explicitly described or
approved of in this manual could void your Warranty.
WARNING: Basic safety precautions must and should
always be followed to reduce the risk of personal injury.
ON SAFETY
Should any solid object fall on or into the Processing Unit
or should liquid penetrate the Processing Unit, unplug the
CatGenie and have it checked by PetNovations qualied
personnel before using.
Unplug the CatGenie Electric Cord from the outlet before
attempting to clear a clog or remove an object from the
Hopper’s processing area.
DO NOT put ngers or hands into the Hopper opening
while the CatGenie is operating.
ON OPERATION
Before connecting the CatGenie to the power source, be
sure to read this manual. NEVER, under any
circumstances, connect the CatGenie to a power source
unless the CatGenie Processing Unit is properly seated
and secure in its slot in the Base. Follow all instructions
and warnings in all CatGenie Manuals.
ON CLEANING
Clean the Processing Unit and Control Panel only with
a soft damp cloth slightly moistened with water. NEVER
immerse or spray it with water. Do NOT use any type of
abrasive pad, scouring powder, or solvent such as alcohol
or benzene. See Cleaning the CatGenie on page 19 for
further instructions.
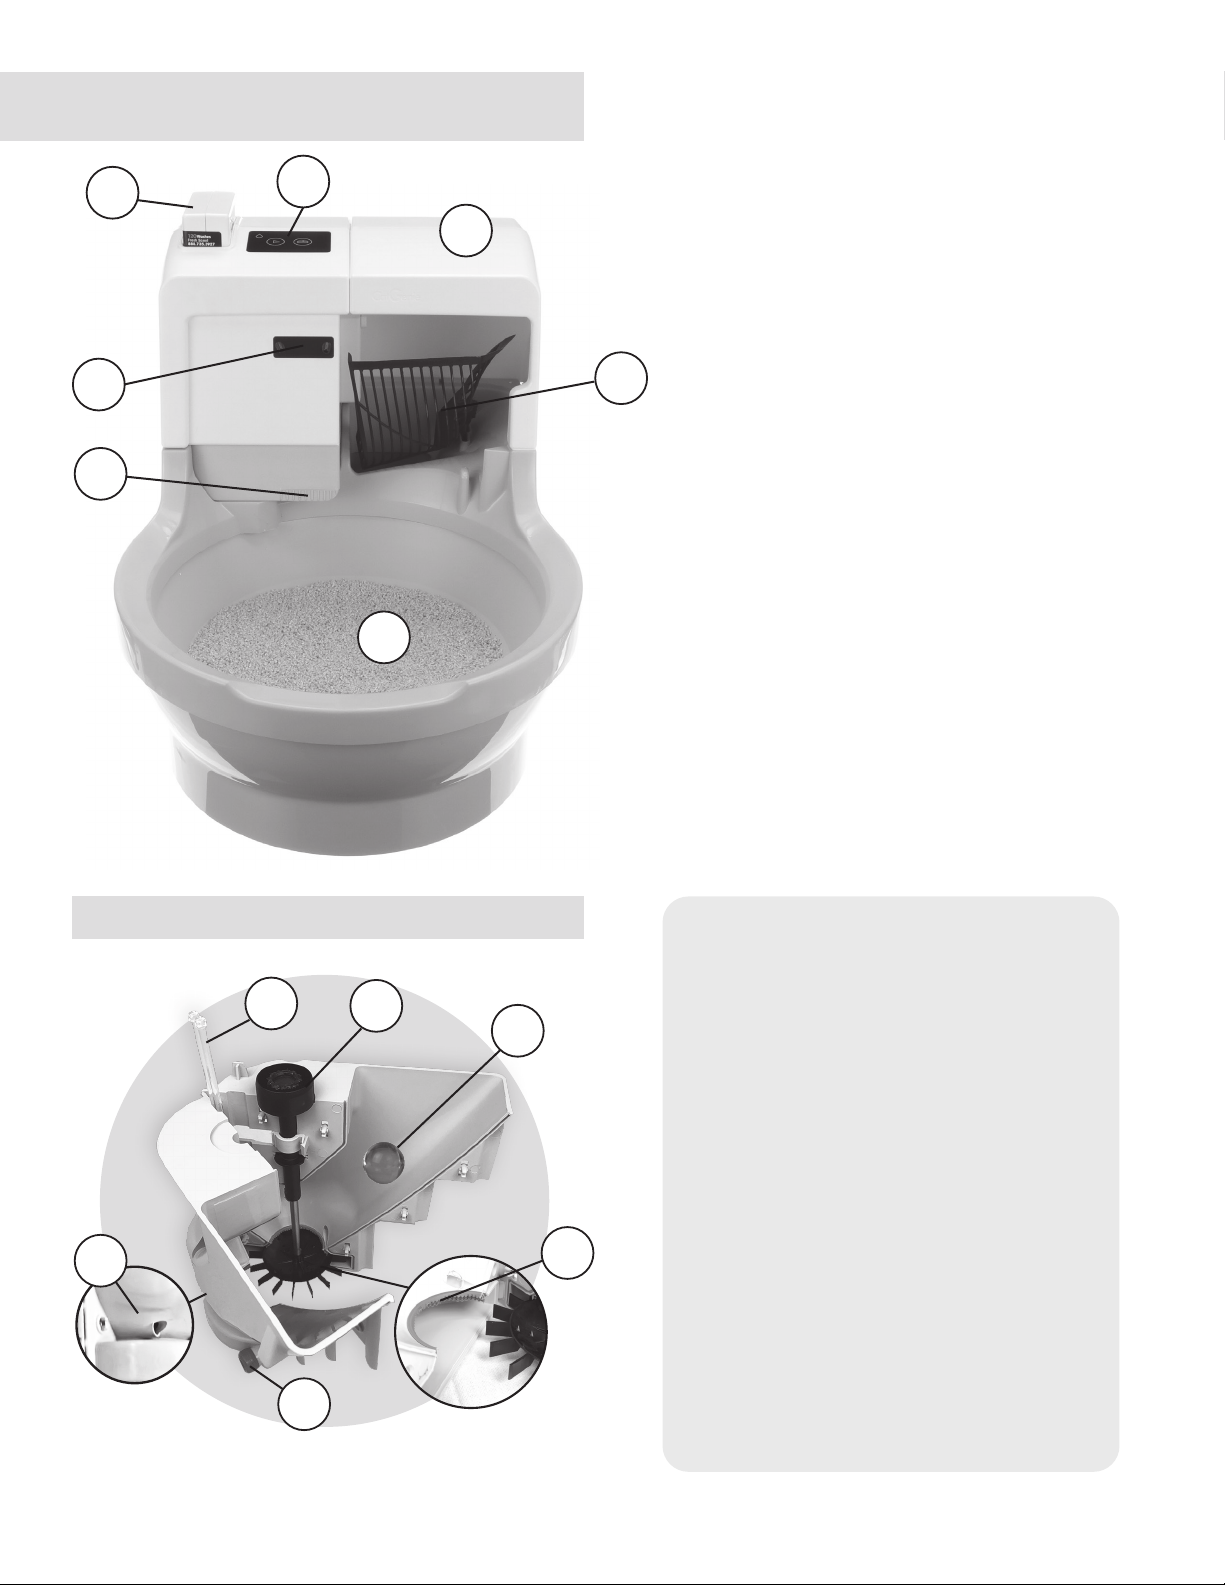
CLEAN THE AIR INTAKE VENT
Regularly, wipe the vent located on the side of the
Processing Unit with a cloth to remove any hair or debris.
CLEANING THE CATGENIE
Your CatGenie should be taken apart and cleaned twice a
year to keep it running smoothly. We recommend cleaning
more often if you have long-haired cats.
IMPORTANT SAFETY INSTRUCTIONS
ON POWER SOURCES
Before operating the CatGenie, check that your local power
supply is identical to the CatGenie operating voltage, which
is 120VAC. See complete specications below:
CATGENIE SPECIFICATIONS
FOR NORTH AMERICA
Power Requirements: 120 VAC, 60 Hz (10A Fused)
Power Consumption: 20 W (Cleaning Cycle- 20
Minutes); 1,000 W (Drying Cycle - 18 Minutes)
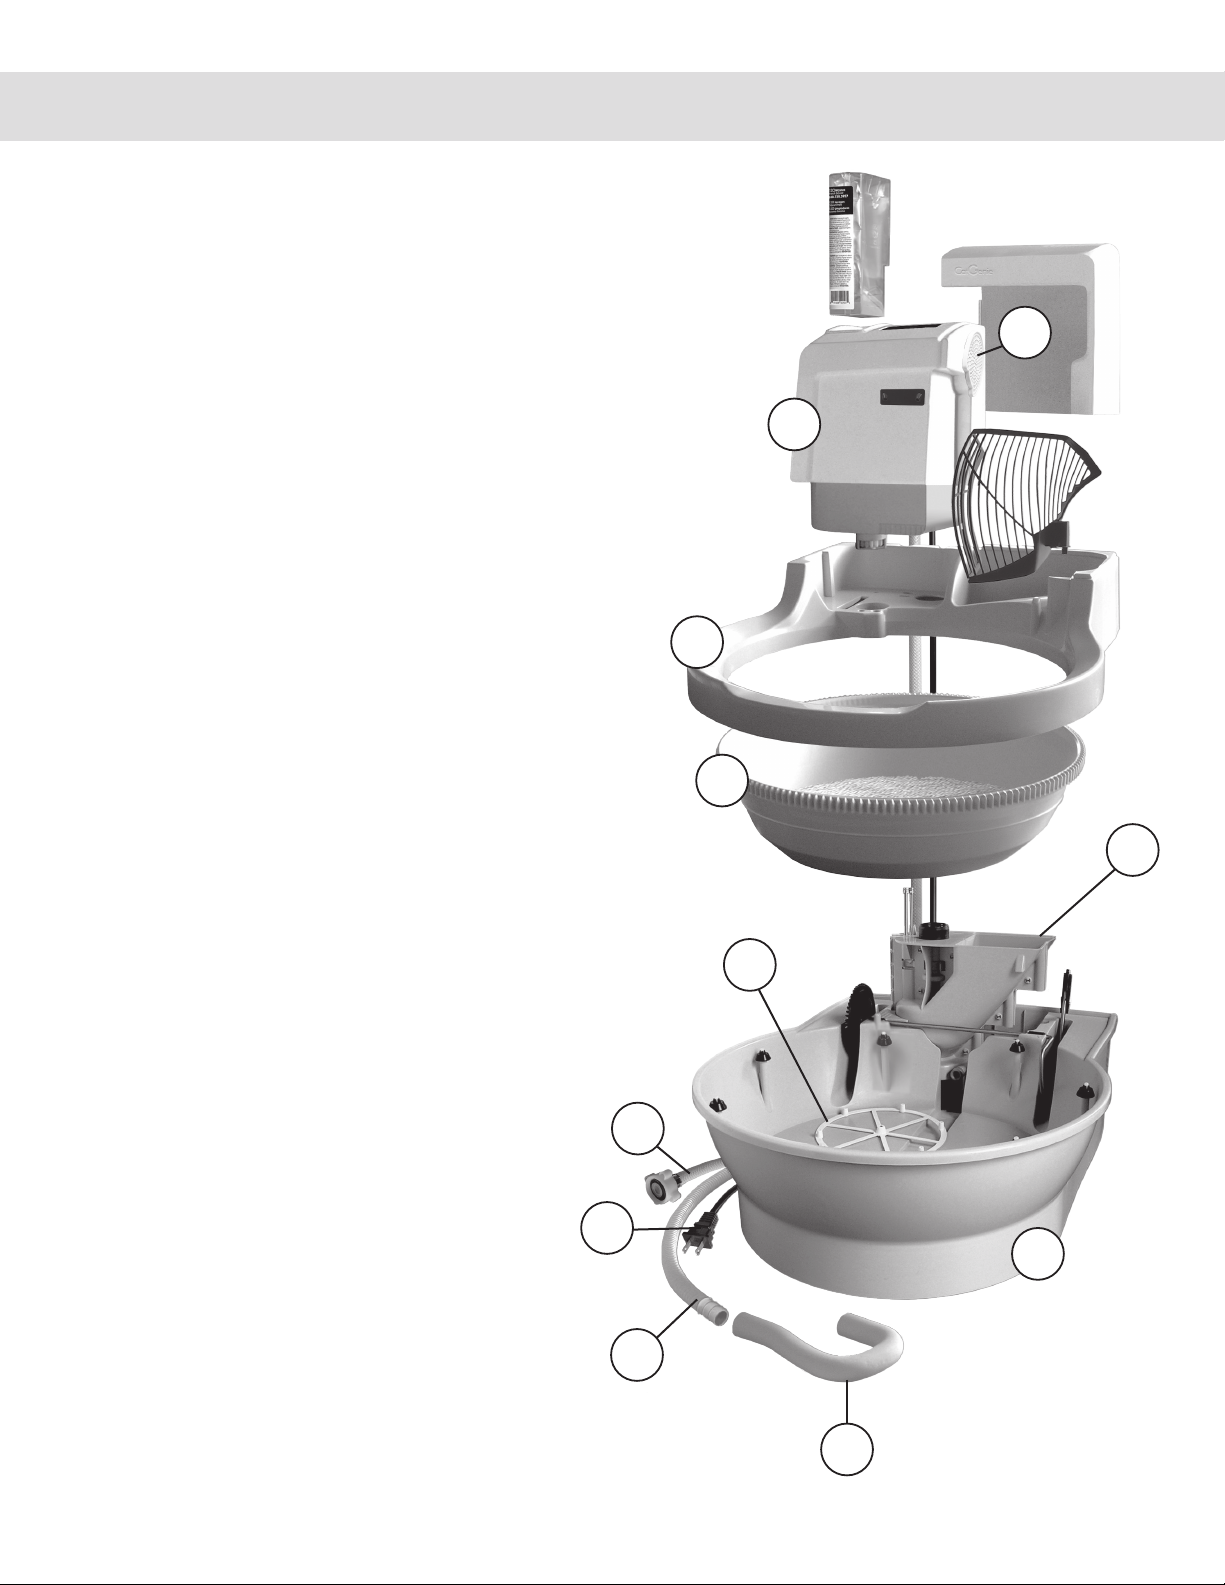
Approximate Weight: Total CatGenie: 25lbs.
(Includes Processing Unit, 11 lbs; Base Unit, 14 lbs.)
Supplied Accessories: Utility or Laundry Room
T-Adapter, Bathroom or Powder Room T-Adapter,
SaniSolution, and Washable Granules.
TO PREVENT RISK OF FIRE, ELECTRIC SHOCK, OR INJURY TO PEOPLE AND PETS.
If you have any questions or problems concerning
your CatGenie, please contact CatGenie Customer
Support at: 1-888-735-3927
PRODUCT CHANGES
While PetNovations, Inc. reserves the right to change design
and specications without notice, we do alert our customers
about upgrades and product improvements.
Unplug the CatGenie from its electric outlet before cleaning
the Processing Unit or washing any other CatGenie parts.
NOTE: Always be sure to unplug the Electric Cord before
lifting the Processing Unit from the Base.
If you are not going to use the CatGenie for an extended
period of time, disconnect the CatGenie from the electric
outlet and remove the SaniSolution Cartridges from the
Processing Unit. When disconnecting the CatGenie pow-
er cord, pull the plug. NEVER pull the cord. A damaged or
defective AC power cord should be repaired at a qualied
service shop.