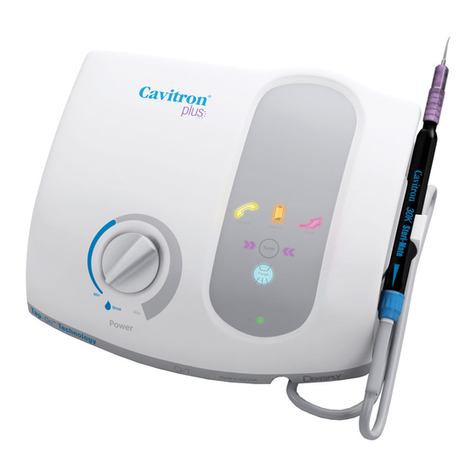
Cavitron JET Plus Manual

1
Cavitron® JET Plus
Ultrasonic Scaler &
Air Polishing Prophylaxis System
with
Détartreur ultrasonique et système combiné
de détartrage et de polissage à l‘air avec
Sistema combinado de escarificación ultrasónica &
pulido por aire con
Ultraschall-Zahnsteinentfernungsgerät &
Luftpolitur-Prophylaxe-System mit
Sistema scaler ultrasonico combination &
sistema di lucidatura ad aria con
Технологией
Tap-OnTM
-Technologie
Technologie Tap-OnTM
Tap-OnTM
tecnología
Tap-OnTM
tecnologia
Технология Tap-OnTM
Tap-OnTM
-Technologie
Technologie Tap-OnTM
Tap-OnTM
tecnología
Tap-OnTM
tecnologia
Технология Tap-OnTM
Tap-OnTM
-Technologie
Technologie Tap-OnTM
Tap-OnTM
tecnología
Tap-OnTM
tecnologia
Технология Tap-OnTM
Tap-OnTM
-Technologie
Technologie Tap-OnTM
Tap-OnTM
tecnología
Tap-OnTM
tecnologia
Технология Tap-OnTM
Tap-OnTM
-Technologie
Technologie Tap-OnTM
Tap-OnTM
tecnología
Tap-OnTM
tecnologia
Технология
Tap-OnTM
Please read carefully and completely before
operating unit.
Prière de lire attentivement et complètement
avant la première utilisation de l’appareil.
Por favor lea cuidadosamente y en su totalidad
antes de operar la unidad.
Bitte vor Inbetriebnahme der Einheit sorgfältig
und vollständig durchlesen.
Si prega di leggere attentamente e
completamente prima di utilizzare l’apparecchio.
,
.
Directions For Use
Mode d’emploi
Instrucciones de uso
Gebrauchsanweisung
Istruzioni per l’uso

2
Quick Start Installation Instructions
Set unit to OFF position.
Symbol: means o.
Connect POWER supply. Connect WATER supply by
pushing BLUE water hose into
water port.
Install BATTERIES in wireless
foot pedal unit.
Connect AIR supply (if equipped)
by pushing BLACK air hose
into air port.
Hold upright and depress foot
pedal until handpiece
FILLS WITH WATER.
TIP: adjust lavage control to higher
ow rate to increase water ow.
Tap-On™ Technology does not function
unless an insert is in the handpiece.
TIP: Handpiece is detachable and
autoclavable. Make sure the electrical
connections are dry before connecting.
Place ULTRASONIC INSERT
into handpiece.
Adjust LAVAGE CONTROL on
handpiece to desired setting.
Consult Directions For Use for
daily maintenance, usage
techniques and more.
30K Steri-Mate
30K Steri-Mate
30K Steri-Mate
1
2
3
4
Adjust POWER LEVEL.
Turbo
Purge
1 2 3
45Connect HANDPIECE to cable.
6
89
10 11 12
Water
Air
Set unit to ON position.
Symbol: means on.
The indicator light will be
green when unit is on.
Turbo
Purge
7
teri-Mate
1
2
3
4

3
To activate Tap-On™ Technology:
Tap wireless foot pedal one time quickly.
Relax foot as you scale or air polish. To deactivate Tap-On™ Technology:
Tap wireless foot pedal one time.
Turbo: When pressed,
increases power delivered
to the system by up to
25%; turbo power remains
on until the button is
pressed again.
Boost: Temporary, hands-
free activation by pressing
the foot pedal all the way to
the oor; enables quick
removal of tenacious calculus.
Tip: Quick release of pedal
from Boost will not deactivate
Tap-On™ Technology.
Purge: Remove insert
from Handpiece and
press Purge button; water
will purge through
system for two minutes
or until you press the foot
pedal or press the
Purge button again.
Finer Lavage Water Control:
Conveniently adjust lavage
water control directly on the
handpiece;
1 = lowest water ow
6 = highest water ow
> 6 = ush or purge
Prophy Mode Auto Cycles
(available on Cavitron® JET Plus
Systems): Automatically cycles
between air polish and rinse
without pumping the foot pedal.
Choose short, medium or long
prophy cycle times. Tap-On™
Technology will activate prophy
mode auto cycles.
User controls
Turbo Purge
Boost
30K Steri-Mate
1
2
3
4
Quick Start User Guide

4
ON/OFF
Illuminates when the Main Power
On/Off Power switch is in the “ON”
(I) position.
TURBO
Offers the ability to increase power
to the system by up to 25% with
the push of a button. Purple arrows
illuminate when in use.
BOOST
Illuminates when the Boost Mode
is activated by the Tap-On TM
Wireless Foot Pedal. To activate,
fully depress Tap-OnTM Foot Pedal
to the second position (all the way
to the floor). To deactivate, release
Tap-OnTM Foot Pedal to the first
position.
PURGE BUTTON
Illuminates when Purge function
is activated. To activate Purge,
remove insert from handpiece, turn
the Handpiece Lavage Control to
maximum water flow, press the
Purge Button on the Diagnostic
Display. Water will purge through
system lines for two minutes. To
deactivate during two minute cycle,
press Purge button again or press
Tap-OnTM Foot Pedal.
SERVICE
Illuminates when the system is not
functioning properly. This display
has three distinct modes:
• Slow blink (1 blink per
second) means the system is
not operating within factory
specifications.
• Fast blink (3 blinks per second)
indicates an improper set-up.
• Steady light indicates the system
is overheating.
LOW BATTERY
Illuminates when the Tap-OnTM
Foot Pedal battery power is
approaching end of life. Replace
batteries as instructed in
section 7.9.
Turn knob to select ultrasonic power
level for operation. Turning the knob
clockwise increases the distance the
insert tip moves (the stroke) without
changing frequency; turning knob
counter-clockwise decreases the distance
the insert tip moves (the stroke) without
changing the frequency.
RINSE
Rinse mode is used during an ultrasonic
scaling procedure when lavage is required
to flush the procedural area. To activate,
turn Power Level Control Knob fully
counter-clockwise until a “click” is heard.
BLUE ZONE
Provides an extended low-power range
for improved patient comfort when
subgingivally scaling.
RINSE
Rinse mode is used during an ultrasonic
scaling procedure when lavage is required

5
TM
TM
TM
English

6
Congratulations!
Your decision to add the Cavitron® JET Plus Ultrasonic
Scaler and Air Polishing Prophylaxis Combination System
with Tap-On™ Technology to your practice represents a wise
investment in good dentistry.
For over four decades, dental professionals have preferred
the clinical benefits and labor-saving advantages inherent in
Cavitron ultrasonic scalers. Clinical studies and independent
research have confirmed the speed, efficiency and versatility
of ultrasonic scaling.*
With the addition of air polishing capabilities in the Cavitron
JET Plus Combination System, your Cavitron JET Plus system
becomes a compact prophylaxis center that optimizes the
time spent performing scaling and polishing procedures and
minimizes the need for strenuous calculus and stain removal
with hand instruments. Clinical studies have proven that air
polishing is far superior to traditional cup and pumice for
stain and plaque removal.* With proper technique and simple
daily maintenance, your Cavitron® JET Plus™ Combination
System will immediately become an indispensable component
in your practice of modern preventive dentistry.
DENTSPLY Professional is an ISO 13485 registered
company. All DENTSPLY Professional medical devices sold
in Europe are CE marked in conformance with Council
Directive 93/42/EEC.
Website: www.professional.dentsply.com
CAUTION: United States Federal Law restricts this
device to sale by or on the order of, a licensed dental
professional.
The Cavitron® JET Plus Combination System is a precision
engineered and manufactured instrument. It contains
controls and components for ultrasonic scaling and air
polishing modes. In the scaling mode, the system produces
30,000 strokes per second at the ultrasonic insert’s working
tip that when combined with the cavitational effect of the
coolant lavage creates a synergistic action that is designed
to “power away” even the heaviest calculus deposits while
maintaining operator and patient comfort. In the air polishing
mode, the system delivers a precise air/water/powder
mixture at the JET air polishing insert tip that polishes the
tooth enamel without contact so there is less abrasion to
enamel and no physical pressure or heat build-up that could
cause discomfort in sensitive patients.
The Cavitron JET Plus Combination System is equipped with
the Sustained Performance System™ (SPS Technology),
which offers a constant balance between scaling efficiency
and patient comfort by maintaining power when the insert
tip encounters tenacious deposits, allowing the clinician to
effectively scale even at a decreased/lower power setting.
The Cavitron JET Plus System has extended the SPS
technology by expanding the Blue Zone range, providing finer
resolution to the power settings.
Advanced features that make the Cavitron JET Plus a wise
investment include a Tap-OnTM Wireless Foot Pedal with Tap-
On™ Technology, Turbo Mode, Prophy Mode Auto Cycles,
illuminated diagnostic display, rinse setting, automated purge
function, JET-Mate™ detachable sterilizable handpiece, and
330˚ swivel handpiece cable with more precise lavage water
control. These features combined with a low power range
(Blue Zone™) and hands-free Boost Mode are designed
to deliver a positive ultrasonic scaling and air polishing
experience for your patients while providing your practice
with the quality and reliability you’ve come to expect from
Cavitron brand ultrasonic systems.
The Cavitron JET Plus Combination System is UL/ULC
certified and approved. The Cavitron JET Plus Combination
System is classified by Underwriters Laboratories Inc.
with respect to electric shock, fire, mechanical hazards in
accordance with the IEC 60601 Standard. The Cavitron JET
Plus Combination System complies with Part 15 of the FCC
Rules. Operation is subject to the following two conditions:
1) this device may not cause harmful interference, and 2)
this device must accept any interference received, including
interference that may cause undesired operation. Cavitron
JET Plus base FCC certification/registration number: FCC
ID: TF3-DPD73227323; IC: 4681B-73227323. Cavitron
JET Plus Tap-OnTM Foot Pedal FCC certification/registration
number: FCC ID: TF3-DPD81675; IC: 4681B-81675. The
term IC before the certification/registration number signifies
that the Industry Canada technical specifications were met.
* data on file

7
For technical support and repair assistance in the U.S., call
the DENTSPLY Professional Cavitron CareSM Factory Certified
Service at 1-800-989-8826, Monday through Friday, 8:00
A.M. to 5:00 P.M. (Eastern Time). For other areas, contact
your local DENTSPLY® Professional representative.
To order supplies or replacement parts in the U.S., contact
your local DENTSPLY Professional Distributor or call
1-800-989-8826, Monday through Friday, 8:00 A.M. to 5:00
P.M. (Eastern Time). For other areas, contact your
local DENTSPLY Professional Representative.
• All general supra and subgingival scaling applications
• Periodontal debridement for all types of periodontal
diseases
• Endodontic procedures
• Removal of a variety of extrinsic stains, e.g. tobacco,
coffee, tea, chlorhexidine.
• Prophylaxis of orthodontic patients.
• Preparing tooth surfaces prior to bonding and sealant
procedures.
• Ultrasonic Systems should not be used for restorative
dental procedures involving the condensation of
amalgam.
• Cavitron® PROPHY-JET Prophy Powder is a water-soluble
Sodium Bicarbonate powder. Therefore, this powder is
not recommended for patients on a sodium restricted
diet. Cavitron® JET-Fresh Prophy Powder is a sodium
free powder and can be used on patients who are on
sodium restricted diets.
• Persons fitted with cardiac pacemakers, defibrillators
and other active implanted medical devices, have been
cautioned that some types of electronic equipment
might interfere with the operation of the device.
Although no instance of interference has ever been
reported to DENTSPLY, we recommend that the
handpiece and cables be kept 6 to 9 inches (15 to 23
cm) away from any device and their leads during use.
• There are a variety of pacemakers and other medically
implanted devices on the market. Clinicians should
contact the device manufacturer or the patient’s
physician for specific recommendations. This unit
complies with IEC 60601 Medical Device Standards.
• It is the responsibility of the Dental Healthcare
Professional to determine the appropriate uses of this
product and to understand:
– the health of each patient,
– the dental procedures being undertaken,
– and applicable industry and governmental agency
recommendations for infection control in dental
healthcare settings,
– requirements, and regulations for safe practice of
dentistry; and
– these Directions for Use in their entirety, including
Section 4 Precautions, Section 6 Infection Control, and
Section 10 System Care.
• The use of High Volume Saliva Evacuation to reduce
the quantity of aerosols released during treatment is
highly recommended.
• Do not direct the air polishing stream at soft tissue or
into the sulcus. Tissue emphysema has been reportedly
caused when the air/water/powder stream was directed
at the soft tissue or into the sulcus.
• Where asepsis is required or deemed appropriate in
the best professional judgment of the Dental Healthcare
Professional, this product should not be used.
• During boil-water advisories, this product should not
be operated as an open water system (e.g. connected
to a public water system). A Dental Healthcare
Professional should disconnect the system from the
central water source. The Cavitron DualSelect system
can be attached to this unit and operated as a closed
system until the advisory is cancelled. When the
advisory is cancelled, flush all incoming waterlines
from the public water system (e.g. faucets, waterlines
and dental equipment) in accordance with the
manufacturer’s instructions for a minimum of 5 minutes.
• Prior to beginning treatment, patients should rinse with
an antimicrobial such as Chlorhexidine Gluconate 0.12%.
Rinsing with an antimicrobial reduces the chance of
infection and reduces the number of microorganisms
released in the form of aerosols during treatment.

8
• Per FCC Part 15.21, changes or modifications not
expressly approved by the party responsible for
compliance could void the user’s authority to operate
this equipment.
• Failure to follow recommendations for environmental
operating conditions, including input water temperature,
could result in injury to patients or users.
• Insufficient water flow could result in elevated water
and tip temperature. When operated at the input water
temperature specified in the Water Line Requirements
Section 7.1 and with sufficient water flow, the water and
tip temperature should not exceed 50o C (122o F).
• Do not place the system on or next to a radiator or
other heat source. Excessive heat may damage the
system’s electronics. Place the system where air is free
to circulate on all sides and beneath it.
• The system is portable, but must be handled with care
when moving.
• Equipment flushing and dental water supply system
maintenance are strongly recommended. See Section
10: System Care.
• Close manual shut-off valve on the dental office water
supply every night before leaving the office.
• The use of an in-line water filter is recommended.
• The use of an air dryer on the compressor line supplying
the System will prevent condensation from forming in
the air line which in turn may cause “caking” of the air
polishing powder and clogging of the lines and air
polishing nozzle.
• Cavitron® Prophy Powders are specially formulated for
use in Cavitron® Air Polishing Systems. Do not use any
other materials in the air polishing powder reservoir.
• Empty the air polishing powder bowl at the end of the
day to prevent “caking” of the powder and clogging of
the lines and air polishing nozzle.
• Residual prophy powder in threads of the bowl and cap
can result in excessive wear and disengagement of
the cap during unit operation. Be sure to clean threads
regularly as per Section 10 System Care.
• As with all dental procedures, use universal precautions
(i.e., wear face mask, eyewear, or face shield, gloves and
protective gown).
• The Cavitron JET Plus unit works with Cavitron inserts
as a system, and was designed and tested to deliver
maximum performance for all currently available Cavitron
brand ultrasonic inserts. Companies that manufacture,
repair or modify inserts carry the sole responsibility for
proving the efficacy and performance of their products
when used as a part of this system. Users are cautioned
to understand the operating limits of their insert before
using in a clinical setting.
• Like bristles of a toothbrush, ultrasonic inserts “wear”
with use. Inserts with just 2 mm of wear lose about 50%
of their scaling efficiency. In general it is recommended
that ultrasonic inserts be discarded and replaced after
one year of use to maintain optimal efficiency and
avoid breakage. A DENTSPLY Professional Insert
Efficiency Indicator is enclosed for your use.
• If excessive wear is noted, or the insert has been
bent, reshaped or otherwise damaged, discard the insert
immediately.
• Ultrasonic insert tips that have been bent, damaged, or
reshaped are susceptible to in-use breakage and should
be discarded and replaced immediately.
• Retract the lips, cheeks and tongue to prevent contact
with the insert tip whenever it is placed in the patient’s
mouth.
• Patients should wear safety glasses or eye protection
during air polishing treatment.
• Patients wearing contact lenses should remove them
prior to air polishing treatment.
• Patients who have severe respiratory illness should
consult their physician before undergoing air polishing
prophylaxis procedures.
• Avoid use on cementum or dentin.
• Direct contact of prophy powder with surfaces and
marginal areas of dental restorations should be avoided.
• Set the air polishing powder flow control to the maximum
(H) position only when it is necessary to remove
particularly difficult stains. Return the powder flow
control to the medium position upon the completion of
the procedure.
• JET Air Polishing Insert nozzles that have been bent,
damaged or re-shaped, are susceptible to in-use
breakage and should be discarded and replaced
immediately.

9
• Check o-ring and threads on powder bowl cap to
ensure a tight seal. If o-ring or threads are worn,
replace immediately.
• Residual prophy powder in threads of the powder bowl
and cap can result in excessive wear and disengagement
of the cap during unit operation. Be sure to clean the
threads regularly as per Section 10: System Care.
None Known.
• For operator and patient safety, carefully practice the
infection control procedures detailed in the Infection
Control Information Booklet accompanying your
System. Additional booklets can be obtained by calling
Customer Service at 1-800-989-8826, Monday through
Friday, 8:00 A.M. to 5:00 P.M. (Eastern Time). For
areas outside the U.S., contact your local DENTSPLY
Professional representative.
• As with high speed handpieces and other dental devices,
the combination of water and ultrasonic vibration from
the Cavitron JET Plus Combination System will create
aerosols. Following the procedural guidelines in Section
9 of this manual can effectively control and minimize
aerosol dispersion.
• It is highly recommended that all dental water supply
systems conform to applicable CDC (Centers
for Disease Control and Prevention) and ADA
(American Dental Association) standards, and that all
recommendations be followed in terms of flushing,
chemical flushing, and general infection control
procedures. See Sections 7.1 and 10.
• As a medical device, this product must be installed
in accordance with applicable local, regional, and
national regulations, including guidelines for water quality
(e.g. drinking water). As an open water system, such
regulation may require this device to be connected to
a centralized water control device. The Cavitron®
DualSelect™ Dispensing System may be installed to allow
this unit to operate as a closed water system.
Anyone installing a Cavitron JET Plus System should
observe the following requirements and recommendations.
• A water supply line with user-replaceable filter is
supplied with your system. See Section 10 System Care
for replacement instructions.
• Incoming water supply line pressure to the system must
be 20 psi (138 kPa) to 40 psi (275 kPa). If your dental
water system’s supply line pressure is above 40 psi,
install a water pressure regulator on the water supply line
to your Cavitron JET Plus Combination System.
• A manual shut-off valve on the dental water system
supply line should be used so that the water can be
completely shut-off when the office is unoccupied.
• In addition to the water filter supplied, it is recommended
that a filter in the dental water system supply line be
installed so that any particulates in the water supply will
be trapped before reaching the Cavitron system.
• After the above installations are completed on the dental
water supply system, the dental office water line should
be thoroughly flushed prior to connection to the Cavitron
system.
• Incoming water temperature to the Cavitron System
should not exceed 25˚C (77˚F). If needed a device
should be installed to maintain a temperature within this
specification, or a Cavitron DualSelect Dispensing
System attached to allow this system to be operated
as a closed water system.
• An air supply line with a user-replaceable filter assembly
is supplied with your Cavitron JET Plus Combination
System. Refer to Section 7.8 Air Supply Line
Connection.
• Incoming air supply line pressure to the system must be
65 psig (448 kPa) to 100 psig (690 kPa). If your office
air line pressure is above 100 psig (690 kPa), install an
air pressure regulator on the supply line to your Cavitron
JET Plus Combination System.
• A manual shut-off valve on the office air supply line should
be used so that the air line can be completely shut-off,
and the line pressure relieved when the office is
unoccupied.
• The Cavitron System must be supplied with clean, dry
air to help prevent water condensation from forming
in the air supply line which may cause it to malfunction.
In addition to the air filter supplied with your System, it
is strongly recommended that an air dryer be used on
the compressor line supplying the Cavitron System.

10
• Incoming power to the system must be 100 volts AC to
240 volts AC, single phase 50/60 Hz capable of
supplying 1.0 amps.
• The system power should be supplied through the AC
power cord provided with your system.
Carefully unpack your Cavitron JET Plus Combination System
and verify that all components and accessories are included:
1. Cavitron® JET Plus™ Combination System with
Handpiece Cable Assembly with swivel
2. Air Line Assembly (Black) with Filter and Quick
Disconnect
3. Water Line Assembly (Blue) with Filter and Quick
Disconnect
4. Additional Water Line Filter
5. Detachable AC Power Cord (not shown)
6. Cavitron® Tap-OnTM Wireless Foot Pedal
7. “AA” Batteries (4-Pack)
8. Auxiliary Cable for Tap-OnTM Foot Pedal
9. Cavitron® JET Air Polishing Insert with cleaning tool
10. JET-Mate Detachable Sterilizable Handpiece
11. Prophy Handpiece Cleaning Wire (not shown)
12. Cavitron® Ultrasonic Inserts (quantity optional)
13. Efficiency Indicator for Cavitron Inserts
14. Literature Packet
15. PROPHY-JET® Sodium Bicarbonate Prophy Powder
16. JET-Fresh® Aluminum Trihydroxide Prophy Powder
(may not be included in all kits)
17. Powder Removal Container
• The Cavitron JET Plus Combination System is designed
to rest on a level surface. Be sure unit is stable and
resting on four feet.
• Placing unit in direct sunlight may discolor plastic
housing.
• The system has been equipped with a Cavitron® Tap-OnTM
Wireless Foot Pedal which was factory synchronized
to operate with the system’s base unit. If your office
has more than one Cavitron JET Plus system, it is
recommended that you mark the Tap-OnTM Foot Pedal
and base unit for easy reference as to which Tap-
OnTM Foot Pedal operates with which base unit. Should
resynchronization be necessary, follow the instructions in
section 7.10.
• Verify the Main Power ON/OFF switch, located at the
center front underside of the System, is set to the OFF
(O) position before proceeding.
• Insert the AC power cord into the power input on the
back of the System.
• Insert the pronged plug into an AC wall outlet.
• Grasp the Water Supply Line (blue hose) by the end
opposite the quick-disconnect and insert it into the water
inlet connector until fully seated.
• Connect the quick-disconnect to the dental office water
supply or a Cavitron DualSelect Dispensing System.
• Inspect all connections to make certain there are no
leaks.
• To remove the water line from the Cavitron JET Plus
Combination System, turn off the dental office water
supply. Disconnect the water supply line from the dental
office water supply. If a quick-disconnect connector is
attached to the end of the hose, relieve the water

11
pressure by pressing the tip of the connector in an
appropriate container and allow water to drain. To
remove the hose from the system, push on the outer ring
of the system’s water inlet and gently pull out the water
line.
• Grasp the Air Supply Line (black hose) by the end
opposite the quick-disconnect and insert it into the air
inlet connector until fully seated.
• Connect the quick-disconnect to the dental office air
supply or a Cavitron DualSelect Dispensing System.
• Inspect all connections to make certain there are no
leaks.
• A filter mounting bracket is included for hanging the air
filter. Mount the bracket to a suitable vertical surface
and slide the filter onto the bracket. The clear bowl
should hang downward allowing for moisture separation
and drainage of water from the air filter. See Section 10
System Care for replacement instructions.
• To remove the air supply line from the Cavitron JET
Plus Combination System, turn off the dental office air
supply. Disconnect the air supply line from the dental
office air supply, then push on the outer ring of the
system’s air inlet and gently pull out the air line. If a
quick-disconnect connector is attached to the end of the
hose, relieve the air pressure by pressing the tip of the
connector and allowing the air to escape.
• Turn Tap-OnTM Wireless Foot Pedal over and using a
Philips screwdriver carefully remove battery cover
screw and battery cover. If applicable, remove used
batteries and install two new “AA” batteries as shown.
Do not depress Tap-OnTM Foot Pedal while installing
batteries.
• The communication light will blink for approximately
two seconds to indicate the Tap-OnTM Foot Pedal’s ability
to communicate with the unit. If the light does not blink,
check the batteries. If the batteries are good and the
light doesn’t blink, a communications error may exist.
To re-establish communication with Tap-OnTM Foot Pedal
review Synchronization procedure, section 7.10.
• The remote frequency communication can be bypassed
using the auxillary Tap-OnTM Foot Pedal cable. Refer to
Section 11.2 Technical Support and Repair for further
action.
• Replace the battery cover and screw and hand tighten
cover with Philips screwdriver.
• Remove batteries if Tap-OnTM Foot Pedal is to be stored
for an extended period of time.
TM
The Tap-OnTM Wireless Foot Pedal supplied with your
system has been factory synchronized with the base unit.
Should a replacement Tap-OnTM Foot Pedal be necessary,
synchronization will be required prior to system operation.
Perform the following steps to synchronize the Tap-OnTM Foot
Pedal with the base unit.
1.Turn the MainPower switch located at the center front
underside of the system to the OFF (O) position.
Press ring to release
water supply tube.
Press ring to release
air supply tube.
Look for blinking
communications
light.

12
2. Install a new set of “AA” batteries into the foot
control (see section 7.9). Leave the battery cover of
the Tap-OnTM Foot Pedal open so the red push button
is accessible.
3. Maintain a distance of no more than 10 feet (3
meters) between the base unit and Tap-OnTM Foot
Pedal during the synchronization process.
4. Remove any inserts from the handpiece and adjust
the Power Level Control out of Rinse Mode. Turn the
Main Power switch to the ON (I) position and wait for
the Diagnostic Display graphics to light (refer to
Section 8.2).
5. While all graphics are lit, press the Purge button,
located on the Diagnostic Display.
The graphics will begin to blink in a sequential
pattern, representing the synchronization mode.
This mode will last 5 to 6 seconds.
6. During this mode, press the red button located in the
battery compartment of the Tap-OnTM Foot Pedal. This
will complete the synchronization process.
7. Synchronization is successful when all graphic lights
blink at the same time.
8. To verify proper communication, press the foot
control to the Boost position (Tap-OnTM Foot Pedal
fully depressed – 2nd position) and ensure the Boost
graphic on base unit illuminates.
9. Attach battery cover and tighten the screw.
10. In the event communication cannot be established,
temporarily use the supplied Auxillary Tap-OnTM Foot
Pedal Cable to connect the Tap-OnTM Foot Pedal
directly to the unit.
PURGE

13
Main Power ON/OFF Switch
ON/OFF Switch located at the center front
underside of the system.
Prophy Mode Auto Cycles
Automatically cycle between air polish and rinse
without pumping foot pedal. Choose short, medium
or long prophy cycle times. See section 9.8 for
more details.
Ultrasonic Power Level Control
Turn knob to select the ultrasonic power level for operation. Turning the knob clockwise
increases the distance the insert tip moves (stroke) without changing the frequency;
turning the knob counterclockwise decreases the distance the insert tip moves (stroke)
without changing the frequency.
The Blue Zone is an extended low-power range for improved patient comfort when
subgingivally scaling.
Rinse
Turn the ultrasonic power level control knob fully counterclockwise until a “click” is heard.
Rinse mode is for use during an ultrasonic scaling procedure when lavage is desired with
minimal cavitation.
Diagnostic
Display
See section
8.2 for more
details.
Rinse
Blue Zone
JET-Mate™
Handpiece
Accepts all
Cavitron® 30K™
Ultrasonic inserts
and Cavitron
JET Air Polishing
Inserts. Auto-
matically selects
air polishing or
scaling mode.
See section 8.3 for
more details.
Handpiece Holder
Securely holds the
system’s handpiece,
or cable connector
when handpiece is not
installed.
Tap-OnTM Wireless Foot
Pedal
Eliminates the need to hold down
or pump foot pedal.
See section 8.6 for more details.
Powder Flow Control
Rotate clear Powder Flow
Control to adjust powder
flow rates. For minimum
powder flow turn control
clockwise to “L”. For
maximum flow turn to “H”.

14
Power Indicator
Illuminates (3 sec. delay)
when the Main Power ON/
OFF Control Switch is ON
(“I” position).
Low Battery
Indicator
Illuminates when
the Tap-OnTM Foot
Pedal battery power
is approaching end of
life. Replace batteries
as instructed in
section 7.9.
Service Indicator
Illuminates when the system
is not functioning properly.
This display has three
distinct modes.
• A fast blink (3 blinks per
second) indicates an
improper set-up.
• A slow blink (1 blink per
second) means the
system is operating out
of factory specifications.
• A steady light indicates
the system is overheating.
Refer to section 11.1 for
Troubleshooting guidelines.
Boost Indicator
Illuminates when the
Boost Mode has
been activated with
the Tap-OnTM Foot Pedal.
Turbo Mode
When pressed, extra
power is delivered to the
system, up to 25%. This
will increase the stroke
of the tip. Turbo power
remains on until the
button is pressed again
or unit is turned off.
(Purple arrows illuminate
when Turbo Mode is on).
Purge Control
Illuminates when the Purge function is activated.
To activate Purge, remove insert from the
handpiece, turn the handpiece lavage control
to maximum water flow and press the Purge
button. Water will purge through system for
2 minutes. To deactivate mode during the 2
minute cycle, press Purge button again or press
Tap-OnTM Foot Pedal.
The Purge Control is also used during the Tap-
OnTM Foot Pedal Synchronization process. See
section 7.10 for more details.

15
Lavage Control
Turn the Lavage Control to select flow rate during system
operation. Flow rate is based on a scale from 1 to 6. Turn
clockwise toward 6 to increase flow at insert tip. Turn
counter-clockwise toward 1 to decrease flow. The flow rate
through the handpiece also determines the temperature of
the lavage. Lower flow rates produce warmer lavage. Higher
water flow rates produce cooler lavage.
If the handpiece becomes warm, increase the flow rate.
With experience the Dental Healthcare Professional will be
able to determine the best flow rate setting for optimum
operating efficiency and patient comfort.
Swivel Feature
Reduces cable drag as handpiece rotates during procedures.
Soft Nozzle Grip
Ergonomically designed to provide for a comfortable grasp
of the handpiece. The grip is a replaceable wear component.
Prior to use, verify that the grip is flush with the hard plastic
of the insert port.
Powder Delivery Port
Creates an airtight seal between the air polishing insert and
the handpiece. Replace when wear is noticed or powder is
leaking at nozzle interface.
Insert Port
The Cavitron® JET-Mate Sterilizable Handpiece accepts all
Cavitron® 30K Ultrasonic Inserts and JET Air Polish inserts.
O-Ring
Provides seal for handpiece coolant.
O-ring should be replaced when worn.
Connecting Body
Transfers and amplifies mechanical
motion of stack to insert tip.
Magnetostrictive Stack
Converts energy provided by the handpiece into
mechanical oscillations used to activate the insert
tip.
Insert Marking
Manufacturer,
Date (YDDD=Single digit
year and triple digit day
of year), Frequency,
Type, Tip Lot Number
(if applicable).
Finger Grip
Insert Tip
Shape and size of tip
determines access and
adaptation. Preheated
Lavage directed to tip.
The many styles of Cavitron and Cavitron Bellissima 30K Ultrasonic Inserts are easily interchangeable for various procedures
and applications. See enclosed literature for specific information.

16
simultaneously holding the Purge and Turbo buttons for a
period of approximately 5 seconds. The two buttons will blink
approximately 6 times to confirm Tap-OnTM has been enabled.
Using Foot Pedal without Tap-OnT M Mode
For scaling operation, the first position activates both the
ultrasonic energy and lavage at the insert tip. The second
position activates the Boost Mode. The Boost Mode (fully
depressed Tap-OnTM Foot Pedal) increases the ultrasonic
power level for quick removal of tenacious deposits without
adjusting the power level knob. To deactivate Boost Mode,
release Tap-OnTM Foot Pedal to first position.
For prophy operation, the first position activates Rinse
Mode. The second position activates Air Polishing Mode.
(Boost Indicator will not illuminate.)
8.7.1
1. AC Power Cord
2. Tap-OnTM Technology Wireless Foot Pedal
3. Auxiliary Tap-OnTM Foot Pedal Power Cable
4. Cavitron JET-Mate Sterilizable Handpiece
5. Prophy Handpiece Cleaning Wire
6. Cavitron 30K Ultrasonic Inserts
7. Cavitron DualSelect Dispensing system
8. Cavitron JET Air Polishing Insert
9. Cavitron JET Nozzle Cleaning Tool
8.7.2
1. Powder Bowl Cap O-Ring, Part Number 628052001
2. Powder Bowl Cap, Part Number 81728
3. Cavitron Insert Replacement O-ring Kits, 12/packs
Part Number 62351 (black) for plastic and soft grips
Part Number 62605 (green) for metal grips and air
polishing insert
4. Handpiece Cable O-Ring, Part Number 79357
5. JET-Mate Handpiece Nozzle Grip, 81717
6. Lavage (Water) Filter, 10/Pack, Part Number 90158
For detailed information, contact your local DENTSPLY
Professional Representative or authorized DENTSPLY
Professional Distributor.
™
Using Foot Pedal in Tap-OnT M Mode
For scaling procedures,Tap-OnTM Technology eliminates the
need to hold the pedal down. Tapping the foot pedal once
activates ultrasonic power or rinse mode for approximately
4 minutes. Tapping the foot pedal while in Tap-OnTM mode
disables the ultrasonic power and water flow. Boost is still
available while scaling in Tap-OnTM mode. To use boost, simply
depress the foot pedal to the second position (all the way to
the floor) to activate and hold as long as boost is desired.
Release foot pedal to return to Tap-On T M mode.
For prophy procedures, Tap-OnT M Technology and Prophy
Mode Auto Cycles eliminate the need to pump the pedal by
automatically cycling between rinse and polish. Tapping the
foot pedal once will enable an automatic air polishing/rinse
cycle that lasts for approximately 1 minute. Tapping the
pedal a second time disables the automatic air polishing/
rinse cycle. See Prophy Mode Auto Cycles in section 9.8 for
cycle details.
TIPS:
Tap-OnTM Technology will not run water unless an
insert or air polishing insert is in the handpiece
A sensor in the handpiece holder will prevent
Tap-OnTM Technology from operating when the
handpiece is in the holder.
If the foot pedal is not tapped quickly, it will
function in a conventional manner.
How to Disable and Enable Tap-OnTM Technology
Tap-OnTM Technology feature can be disabled by
simultaneously holding the Purge and Turbo buttons for a
period of approximately 5 seconds. The two buttons will blink
approximately 6 times. When the buttons are released, they
will blink an additional 6 times to confirm Tap-OnTM has been
disabled.
Tap-OnTM Technology feature can be enabled by
NON-DEPRESSED DEPRESSED
1st POSITION
DEPRESSED
2nd POSITION
Prophy Powder Delivery Tube: Directs
air/powder flow to insert tip.
O-Ring:
Seals water when Insert is fully seated in
Handpiece. O-ring should be replaced when
worn.
Insert Heater Rod: Heats
the delivered water for patient
comfort.
Air Polishing Insert Nozzle:
Tube-in-a-tube design delivers
precise air/water/powder mixture
at point of delivery.
Insert Marking:
Manufacturer, Date (YDDD=Single digit
year and triple digit day of the year).

17
• Follow Precautions listed in the general and ultrasonic
sections of 4.2 Procedural precautions. This handpiece
is sterilizable. Refer to Infection Control Information
Booklet for sterilization instructions prior to using
handpiece.
• Connect the Handpiece to the Cable Assembly by
aligning the electrical connections. If Cable Assembly
does not seat into the handpiece, gently rotate the
handpiece until contacts align, then fully insert handpiece.
• Hold empty handpiece in a semi-upright position over a
sink or drain. Activate the Tap-OnTM Foot Pedal until
water exits to release any air bubbles that might be
trapped inside the handpiece. Avoid letting water into the
Powder Delivery Port as clogging may result. NOTE: Tap-
OnTM Technology only operates when an insert or an air
polishing insert is in the handpiece.
• Lubricate the O-ring on the insert with water before
placing it into the handpiece. Fully seat insert with a
gentle push-twist motion. DO NOT FORCE. If using the air
polishing insert, align the powder delivery tube with
the powder delivery port and gently push into the
handpiece until fully seated. DO NOT FORCE.
• Turn the Lavage Control to select flow rate during
system operation. Flow rate is placed on a scale from 1
to 6. Turn control clockwise toward 6 to increase flow
at insert tip. Turn control counter-clockwise toward 1
to decrease flow. The flow rate through the handpiece
also determines the temperature of the lavage. Lower
water flow rates produce warmer lavage. Higher flow
rates produce cooler lavage. If the handpiece becomes
warm, increase the flow rate. With experience the Dental
Healthcare Professional will be able to determine the
best flow rate setting for optimum operating efficiency
and patient comfort.
Pressing the “Turbo” button on the scaling unit increases
the unit’s ultrasonic power up to 25%. When you need more
power for an extended period of time, simply press the Turbo
button on the display panel (arrows will illuminate to show you
are in “Turbo” mode).
DENTSPLY recommends that the clinician familiarize
themselves with the available power levels throughout the
power knob rotation in both normal and turbo modes. To do
this, simply hold your favorite insert over the sink and adjust
the power knob while observing the inserts spray pattern and
toggling between both normal and turbo modes.
Boost provides a temporary increase in ultrasonic scaling
power for quick removal of tenacious calculus without
touching the unit. Boost is activated by fully depressing the
Tap-OnTM Foot Pedal to second position (all the way to the
floor). When boost is activated, the boost icon will illuminate
on the display panel. Boost remains on as long as the
clinician has the foot pedal pressed all the way down. In
order to deactivate boost, release the Tap-OnTM Foot Pedal to
first position.
For optimal access to both the upper and lower arches, the
backrest of the chair should be adjusted as for other dental
procedures. This assures patient comfort and clinician
visibility. Have the patient turn his/her head to the right or
left. Also position chin up or down depending upon the
quadrant and surface being treated. Evacuate irrigant using
either a saliva ejector or High Volume Evacuator (HVE).
Note: Refer to the Infection Control Information
booklet supplied with your system and Section 10 of
this manual for general procedures to be followed at
the beginning of each day and between patients.
• Follow precautions listed in the General and Ultrasonics
sections of 4.2 Procedural Precautions.
• The edges of Cavitron Ultrasonic Inserts are intentionally
rounded so there is minimal danger of tissue laceration

18
with proper ultrasonic scaling technique. Whenever the
insert tip is placed in the patient’s mouth, the lips,
cheek and tongue should be retracted to prevent
accidental (prolonged) contact with the activated tip.
• Turn Power Level Control to select ultrasonic power level
for operation. Clockwise increases system power.
Power level will increase throughout the full range of the
control. Hold the handpiece over a sink or drain. While
in Tap-OnTM mode, simply tap the Tap-OnTM Foot Pedal
to activate the system. (If Tap-OnTM mode is turned off,
press and hold the Tap-OnTM Foot Pedal down to activate
the system.) Check water spray to verify fluid is reaching
the working end of the insert tip. Adjust the water lavage
control until the water (lavage) flows with a rapid drip or
small spray. Higher water flow settings provide cooler
irrigation.
• It may be necessary to adjust lavage with the system in
“Boost” mode (Tap-OnTM Foot Pedal fully depressed)
so adequate fluid will be available to cool tip to tooth
interface.
• In general, it is suggested that a “feather-light-touch” be
used for ultrasonic scaling. The motion of the activated
tip and acoustic effects of the irrigating fluid, in most
cases, are adequate to remove even the most tenacious
calculus.
• Periodically check the Cavitron Ultrasonic Insert for wear
with the Cavitron Insert Efficiency Indicator.
• The use of a saliva ejector or High Volume Evacuator
(HVE) is recommended during all procedures.
• Set the system’s Power Level Control to the lowest
efficient power setting for the application and the
selected insert.
• Keep the foot pedal near your foot to make it convenient
to access.
Reasons for sensitivity
• Incorrect tip placement. The point should never be
directed toward tooth root surfaces.
• Not keeping tip in motion on tooth. Do not allow the
insert to remain in a static position on any one area of
the tooth. Change the insert’s path of motion.
• Applying excessive pressure. Use a very light grasp
and pressure, with a soft tissue fulcrum whenever
possible, especially on exposed cementum.
If sensitivity persists, decrease power setting and/or move
from the sensitive tooth to another and then return.
• Use only Cavitron® Prophy Powders in your Cavitron JET
Plus Combination System. Any other substance or
additives may clog the system and will void the warranty.
For your convenience, the prophy powders are supplied
in bottles. Keep stored in a location that does not
exceed 95o F.
• A special container is provided with your System for use
in emptying the powder bowl.
• It is strongly recommended that the powder bowl be
emptied at the end of each day. This will reduce
moisture absorption and minimize clogging.
To fill, or refill, the powder bowl:
• Turn the System OFF.
• Unscrew the Powder Bowl Cap.
• With the cap of the powder bottle closed, shake the
powder bottle vigorously to break up any lumps that may
have formed from settling. Carefully pour powder into
the bowl until the level reaches the top of the center
tube.
• Using a soft dry cloth, remove powder adhering to the
cap and bowl threads. Secure the cap on the powder
bowl.
• Turn the System ON.
NOTE: Use only Cavitron® Prophy Powders in the
system. Powder should be kept dry and stored
between 32oF/0oC and 95oF/ 35oC.
To adjust the flow of powder:
• Adjust the powder flow rate by positioning the control
pointer on the cap at H (12 o’clock), M (9 o’clock) or L
(6 o’clock).
• For heavy stain removal, set the control to H.
• For light stain removal, set the control to L.
• The control can be set at any position between H and L.
• The view window at the center of the pointer lets you
observe the powder flow (small white circle of powder)
during operation. If no flow is seen, check for clogging
or add prophy powder.
• Follow precautions listed in the General and Air Polishing
sections of 4.2 Procedural Precautions.
• Place a 2 x 2 gauze on lip.
• Select the proper amount of powder and water to create
the slurry needed using the Powder Flow Control on
the powder bowl cap and the Lavage Control on the
handpiece cable. Ensure that the system’s Power
Level Control is in the “Prophy Mode” range. Use more
powder for heavy stains and less powder for light stains.
With experience the Dental Healthcare Professional will
be able to determine the best flow rate settings for
optimum efficiency and patient comfort. Never operate
the system with powder only.

19
• Flush the patient’s tongue with water to help reduce the
saline taste.
• The recommended normal procedure is to clean 1-3
teeth with the air polishing spray and then rinse the
area with water in order to inspect the work site before
proceeding to the next 1-3 teeth. When using Tap-OnTM
Technology and Prophy Mode Auto Cycle, the system will
automatically cycle between rinse and air polish. When
Tap-OnTM Technology is turned off, the air polishing spray
is activated when Tap-OnTM Foot Pedal is depressed to
the second position (all the way to the floor) and rinse
is activated when the Tap-OnTM Foot Pedal is in the first
position. If desired, the bleed air passing through the
air polishing insert tip can be used to dry the work site
during inspection (bleed air occurs when the Tap-OnTM
Foot Pedal is released).
• Use your free hand and the patient’s cheeks or lips to
form a cup to contain aerosols. Tilt the patient’s head
toward you to help prevent puddling in the cupped lip and
minimize aerosol dispersion. Rinse excessive slurry from
the patient’s mouth thoroughly and often.
• Maintain a 2 to 4 mm tip-to-tooth operating distance.
Keep the tip in constant circular motion and maintain a
sweeping motion from interproximal to interproximal.
When air polishing the anteriors, center the spray on the
middle third of the tooth. The edge of the spray will
clean the teeth to the gingiva. Refer to section 9.9
Proper Angulations for all tooth surfaces.
• Use adequate evacuation. Use of a high-speed suction
(High-Volume Evacuator) with the aid of a dental assistant
is recommended. When performing air polishing without
the aid of a dental assistant, the use of a saliva ejector
and/or aerosol-reduction device is recommended.
• Do not aim directly at the soft tissue.
• Avoid use on surfaces and marginal areas of dental
restorations.
• Prophy Mode Auto Cycles: When performing air polishing
procedures, it is recommended to clean 1-3 teeth with
air polishing spray and then rinse the area with water
in order to inspect the work site before proceeding to
the next 1-3 teeth. Prophy Mode Auto Cycles allow for
automatic cycling between air polishing and rinse while
the foot pedal is in Tap-On™ mode. A small burst of air
is released before the Prophy Mode Auto Cycle begins to
alert the clinician that the cycle is beginning.
• If at any time continuous air polishing is needed, simply
depress the foot pedal all the way to the floor. Release of
the foot pedal will disable Prophy Mode Auto Cycle.
Recommended angulation on the
anterior teeth is 60o with the tip aimed
at the middle third of the tooth surface.
Recommended angulation on the buccal
and lingual surfaces of posterior teeth is
80o with the tip aimed slightly distally.
Recommended angulation to occlusal
surfaces is 90o
Air Polish
0.75 sec
2.0 sec
3.0 sec
Rinse
1.25 sec
1.0 sec
2.0 sec
Approximate Cycle Times
Prophy Mode
NONE*
SHORT**
MEDIUM **
LONG**
CONVENTIONAL
*The ‘NONE’ selection does not cycle between air polish and rinse, it
allows user to air polish conventionally.
**‘SHORT’, ‘MEDIUM’, and ‘LONG’ selections will cycle between air polish
and rinse at approximately the times listed in the table to the left.

20
It is recommended that you perform the following
maintenance procedures.
1. Open the manual shut-off valve on the dental office
water supply system.
2. With the Cavitron JET Plus Combination System OFF,
unscrew the powder bowl cap. Verify the powder bowl
is empty. Turn the system ON for 15 seconds to
eliminate residual moisture in the lines. Turn the
system OFF.
3. Shake the powder bottle well to create an even
consistency of powder mixture.
4. Pour enough powder into the bowl for the procedure
to be performed. With experience the Dental
Healthcare Professional will be able to determine the
amount of powder required. Do not fill above the top
of the center tube.
5. Secure the cap on the powder bowl.
6. Install a sterilized JET-Mate Handpiece onto the
handpiece cable.
7. Set the Power Level Control to minimum and the
Lavage Control to maximum.
8. Turn the system ON.
9. If powder fluffing is observed when the Tap-OnTM Foot
Pedal is not in use, this would indicate an air leak. To
correct, turn the System OFF, remove the Powder Cap,
clean any residual powder from the O-ring seal and
threads,replace the Powder Cap, tighten, and turn the
System back ON.
10. Hold the sterilized handpiece (without an insert or
nozzle insert installed) over a sink or drain. Activate
the Purge Control button.
• The Purge button will light for two minutes indicating
proper activation of the purge function.
• If the Purge button is activated with an insert present
in the handpiece, the button will blink for 3 seconds
and disable. Remove the insert from the handpiece
and press the Purge button again.
• The Purge function can be interrupted at any time
during the two minute cycle by pressing the Purge
button again or by pressing the Tap-OnTM Foot Pedal.
11. After completing the purge cycle, place a sterilized
30kHz Cavitron® Ultrasonic Insert into the handpiece
and set the Power Level Control and Lavage Control to
your preferred operating position for ultrasonic
scaling. For air polishing, place a sterilized JET Air
Polishing Insert into the handpiece and adjust the
Power Level Control to Prophy Mode, and the Powder
Flow and Lavage Controls to your preferred operating
positions.
1. Remove the used Cavitron® Ultrasonic Insert or JET
Air Polishing Insert. Clean and sterilize following the
Infection Control Procedures that were enclosed with
your insert.
2. Hold the handpiece over a sink or drain and activate
Purge function as described in Step 10 of the Start-Up
procedure.
3. After the purge cycle is complete, turn the System
to the OFF (0) position.
4. Remove the JET-Mate handpiece, clean and sterilize
following the procedures outlined in the Cavitron
Systems Infection Control Procedures booklet that was
enclosed with your system.
5. Disinfect the surfaces of the cabinet, Power Cord,
Handpiece Cable, Tap-OnTM Foot Pedal and Cable
assembly (if applicable), Water Supply and Air Supply
lines by applying an approved non-immersion type
disinfectant solution* carefully following the instructions
provided by the disinfectant solution manufacturer.
To clean the system, generously spray disinfectant
solution on a clean towel and wipe all surfaces.
Discard used towel. Dry with a clean cloth. To disinfect
the system, generously spray disinfectant on a clean
towel and wipe all surfaces. Allow disinfectant solution
to air dry. Never spray disinfectant solution directly on
the system.
6. Inspect the handpiece cable for any breaks or tears.
7. If using a closed water supply or DualSelect Dispensing
System, check for adequate fluid volumes for the next
patient.
8. Check the powder bowl for sufficient powder for the
next procedure.
9. When ready to use, place a sterilized JET-Mate
Handpiece onto the handpiece cable assembly and
insert a sterilized ultrasonic insert or air polishing
insert into the handpiece and adjust system controls as
preferred.
*NOTE: Water-based disinfection solutions are
preferred. Some alcohol-based disinfectant solutions
may be harmful and may discolor plastic materials.
Table of contents
Languages:
Other Cavitron Dental Equipment manuals
Popular Dental Equipment manuals by other brands

Amanngirrbach
Amanngirrbach Artex CP user manual

Pac-Dent
Pac-Dent PROMATE CL instruction manual

Guilin Woodpecker Medical Instrument
Guilin Woodpecker Medical Instrument Endo Radar Pro instruction manual

Renfert
Renfert Basic classic instruction manual

PhotoCentric
PhotoCentric Wash 15 User manual and installation guide

NSK
NSK Viva Ace Operation manual

Schick Dental
Schick Dental C1-Master operating instructions

IDC
IDC MIKRO ic user manual

Ticonium
Ticonium Premium 100 TECHNIQUE MANUAL

Durr Dental
Durr Dental CA 4 Installation and operating instructions

Dentsply Sirona
Dentsply Sirona inEos X5 operating instructions

Morita
Morita Signo T500 Operation instructions