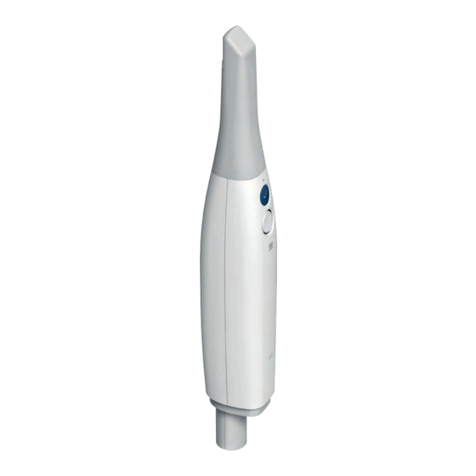
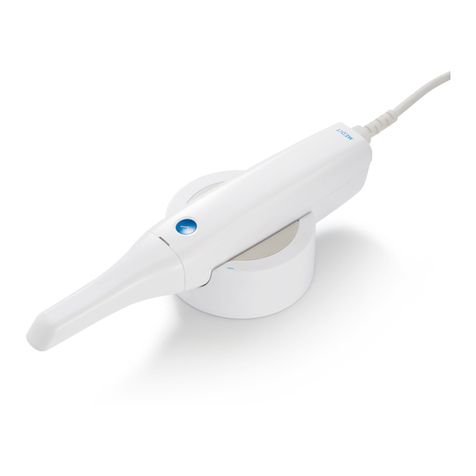
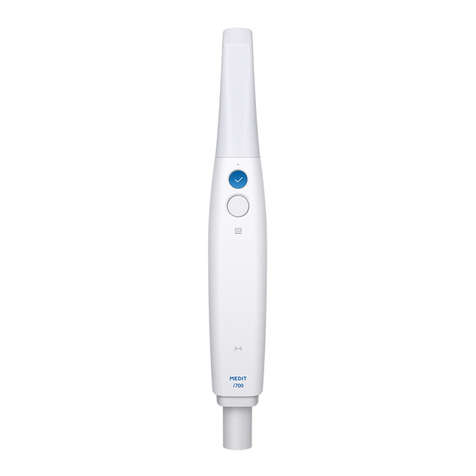
Medit i500 Parts list manual

Function Manual
Intraoral Scanner i500
Revised Date: Feb 2019
Revision No.: 0

2
Contents
1Introduction and overview ........................................................................................................................................3
1.1 Intended Use.....................................................................................................................................................................................3
1.2 Indication for use .............................................................................................................................................................................3
1.3 Contraindications..............................................................................................................................................................................3
1.4 Qualifications of the operating user ................................................................................................................................................3
2Image Acquisition Software Overview ......................................................................................................................4
2.1 Introduction ......................................................................................................................................................................................4
2.2 Installation........................................................................................................................................................................................4
2.2.1 System Requirement ...................................................................................................................................................................................... 4
2.2.2 Installation Guide ........................................................................................................................................................................................... 4
2.3 Model Control in View Screen Using Mouse....................................................................................................................................7
3User Interface ............................................................................................................................................................8
3.1 Title Bar .............................................................................................................................................................................................9
3.2 Scan Stage....................................................................................................................................................................................... 15
3.2.1 Scan Pre-Operation For Maxilla.....................................................................................................................................................................16
3.2.2 Scan Pre-Operation For Mandible .................................................................................................................................................................17
3.2.3 Scan Maxilla ...................................................................................................................................................................................................18
3.2.4 Scan Mandible................................................................................................................................................................................................20
3.2.5 Scan Scanbody ...............................................................................................................................................................................................21
3.2.6 Scan Occlusion...............................................................................................................................................................................................22
3.2.7 Complete........................................................................................................................................................................................................24
3.3 Main Toolbar ................................................................................................................................................................................... 24
3.3.1 Trimming........................................................................................................................................................................................................24
✓Polyline Trimming ..............................................................................................................................................................................................24
✓Brush Trimming ..................................................................................................................................................................................................25
✓Quick Trimming ..................................................................................................................................................................................................25
3.3.2 Tools...............................................................................................................................................................................................................26
✓Lock Area ............................................................................................................................................................................................................26
✓HD Camera..........................................................................................................................................................................................................29
✓Occlusion Analysis..............................................................................................................................................................................................30
✓Undercut Area Analysis ......................................................................................................................................................................................33
✓Swap Maxilla & Mandible ...................................................................................................................................................................................35
✓Result Preview....................................................................................................................................................................................................35
✓Scan Replay ........................................................................................................................................................................................................37
✓Model Display Mode ...........................................................................................................................................................................................38
3.3.3 Overview ........................................................................................................................................................................................................38
3.3.4 Device Status .................................................................................................................................................................................................39
3.4 Side Toolbar .................................................................................................................................................................................... 39
3.5 Scan Information ............................................................................................................................................................................ 41
3.6 Guide Message ................................................................................................................................................................................ 41
3.7 Command Option ............................................................................................................................................................................ 42
3.8 Model View Screen.......................................................................................................................................................................... 42
4Useful Tips ................................................................................................................................................................ 42
4.1 Indication during scanning ............................................................................................................................................................ 42
4.2 Pre-Operation Scan Stage .............................................................................................................................................................. 43
4.3 High Resolution Scan...................................................................................................................................................................... 44
4.4 Impression Scan ............................................................................................................................................................................. 45
✓Replace the margin of intra-oral data with impression data ............................................................................................................................49
✓Post & Core case.................................................................................................................................................................................................50
✓Occlusion case ....................................................................................................................................................................................................52
5Updates to Image Acquisition Software.................................................................................................................. 53

3
1Introduction and overview
1.1 Intended Use
The i500 system is a dental 3D scanner intended to be used to digitally record topographical characteristics of teeth
and surrounding tissues. The i500 system produces 3D scans for use in computer-aided design and manufacturing of
dental restorations.
1.2 Indication for use
The i500 system should be used on patients who require 3D scanning for dental treatments such as:
➢Single custom abutment
➢Inlays & Onlays
➢Single Crown
➢Veneer
➢3 Unit Implant Bridge
➢Up to 5 Unit Bridge
➢Orthodontics
➢Implant Guide
➢Diagnosis Model
1.3 Contraindications
The device is not intended to be used to create images of the internal structure of teeth or the supporting skeletal
structure.
It is not intended to be used for cases with more than four (4) subsequent edentulous tooth positions.
1.4 Qualifications of the operating user
This device is designed for use by persons with professional knowledge in dentistry and dental laboratory technology.
The user of this device is solely responsible for determining whether or not this device is suitable for a particular
patient case and circumstances. The user is solely responsible for the accuracy, completeness and adequacy of all
data entered into this device and the provided software. The user has to check the correctness and accuracy of the
results and to assess each individual case. The i500 system must be used in accordance with its accompanying user
guide. The user is not allowed to modify the i500 system. Improper use or handling of the i500 system will void its
warranty, if any. If you require additional information on the proper use of the i500 system, please contact your local
distributor.

4
2Image Acquisition Software Overview
2.1 Introduction
The image acquisition software provides a user-friendly working interface to digitally record topographical
characteristics of teeth and surrounding tissues using the i500 scanner.
2.2 Installation
2.2.1 System Requirement
Laptop
Desktop
CPU
Above
Intel Core i7-8750H
Above
Intel Core i7-8700K
RAM
Above 16 GB
Above 16 GB
Graphic
Above Nvidia Geforce GTX 1060
Above Nvidia Geforce GTX 1060
OS
Window 10 64 bit
Use PC and monitor certified by IEC 60950, IEC 55032, IEC 55024
2.2.2 Installation Guide
➢Run Medit_iScan_X.X.X.X.exe

5
➢Select the setup language then click “Next”
➢Select the installation path

6
➢Read the “License terms and conditions” carefully before checking “I agree to the License ~” then click Install
➢If the scanner is connected, please disconnect the scanner from the PC by removing the USB cable.
➢It may take up to several minutes to finish the recommended installation process. Please do not shut down the
PC until installation is completed.

7
➢After installation is completed, we recommend restarting the PC to ensure optimal program operation.
2.3 Model Control in View Screen Using Mouse
Button
Action
Usage
Left
Click
Starts selection or deletion of entities in view screen when using the polyline
selection or polyline trimming tool.
Drag
-Selects or deletes entities in view screen when using the Brush selection or
Brush trimming tool.
Wheel
Drag
Moves model in view screen.
Scroll
-Zooms in/out the model in view screen.
Right
Click
-Completes selection or deletion of entities in view screen when using the
polyline selection or polyline trimming tool.
Drag
-Rotates model in view screen.

8
3User Interface
A. Title Bar
B. Main Toolbar
C. Guide Message
D. Scan Stage
E. Scan Information
F. Side Toolbar
G. Model View Screen
H. Command Option

9
3.1 Title Bar
The Title Bar consists of the Menu, Minimize/Maximize/Restore Window, Exit for the image acquisition software. It also
shows patient information.
Menu
The Menu includes the tools to manage the project, such as New, Open, Save, as well as the
tools to change settings and to exit the application.
It also shows the information for the application.
Patient information
Shows information of the current patient.
Minimize
Minimizes the application.
Maximize or Restore
Maximizes or restores the application to its normal size.
Exit
Saves the current model and terminates the application.
Menu
Click the button to show all commands in the Menu.
New
Creates new case.
This function is available when the image acquisition software is used as a
standalone.
Open
Opens existing case.
This function is available when the image acquisition software is used as a
standalone.
Save
Saves all changes in current case.
Export
Exports the results to general file formats.
Additional license is needed to use this function.
Exit
Saves the current model and terminates the scanning application.
Setting
Provides options for setting environment such as scanning options.
Help
Loads the help contents.
About
Shows program information, version number and copyright.

10
Setting

11
Show Scan Time
Shows scan time during scanning process in the upper right corner of the View
Screen.
Show Scan Number
Shows the number of images taken during scanning process in the upper right
corner of the View Screen.
Show Scan Speed
Shows the current scan speed in the upper right corner of the View Screen.
Use Automatic Scanning Start
The system starts scanning automatically:
•When the tip is close to the teeth, the system starts capturing images.
•When the tip is away from the teeth, the system stops capturing images.
If this option is set to “Off”, the scanning start process is performed by the button
on the device.
Maxilla And Mandible
Applies automatic scanning start to maxilla and mandible.
Occlusion
Applies automatic scanning start to occlusion.
Use Audio Feedback
Indicates the status of the scanner through various sounds.
Connect
Sound when i500 and image acquisition software are connected.
Scanning
Sound during optimal scanning.
HD Camera
Sound when taking 2D images using HD Camera.
Occlusion Alignment
Sound when occlusion alignment succeeded.
Use Auto Backup
Saves current work temporarily.
The backup data will be used for the recovery when the program is stopped
unexpectedly without saving.
Send Anonymous Usage
Statistics
Sets whether to start/stop sending anonymous usage statistics to Medit.
About collection of anonymous statistics
Medit is striving to constantly improve the product and user experience by collecting certain information such
as :
➢Hardware and software configurations such as OS, graphic card, etc.
➢Patterns and trends in how our software is used, such as frequency and performance
➢Diagnostic information
The usage statistics will help the development team to better understand user requirements and prioritize
improvements in future releases.
We will never collect personal information such as your name, company name, MAC address, or any other
personally identifiable information.
We cannot and will not reverse-engineer any collected data to find specific details concerning your projects.
Advanced Rendering
Displays the 3D model more realistically with shadow effect.

12
Adjust Color Texture
Adjusts the brightness of the 3D model.
The color of the 3D model is optimized in the i500 image acquisition software.
When viewing data using other software, the resulting colors may be slightly
different from the i500 image acquisition software.
Calibration Period(Days)
Sets the calibration period of i500.
Language
Selects the display language.
This function is available when the image acquisition software is used as a
standalone.
Calibration
Performs the calibration process to use device in optimal condition.
Default
Restores all settings to system default.
Use GPU (Beta)
Improves overall computing performance using the GPU of a graphics card.
Global Soft Tissue Filtering
(Beta)
Deletes the soft tissue globally.
Deleting process is performed during scanning and when exiting or changing the
scan stage.
Scan Light (Beta)
The blue light is generally applied to most cases.
If the case has a lot of red series color such as blood, white light can help to
acquire the data.
Scanner Button
Double-Click (Beta)
Defines the command to be used by double click of function button of scanner.
Calibration procedure of i500
The calibration process is essential in producing precise 3D models.
You should perform the calibration process periodically.
Calibration is required when:
➢The quality of the 3D model is not reliable or accurate as compared to previous results.
➢Environmental conditions such as temperature has changed.
➢Calibration period has expired.
You can set the calibration period as detailed in Menu > Setting > Calibration Period(Days)
The calibration panel is delicate component. Do not touch the panel directly. When the calibration process does
not perform properly, check the panel. If the calibration panel is contaminated, please contact your service provider.
We recommend performing the calibration process periodically.
You can set the calibration period via Menu > Setting > Calibration Period(Days).
The default calibration period is set to 14 days.
How to calibrate the i500
➢Turn on the i500 and connect the device to the software.
➢Run Calibration Wizard from Menu > Setting > Calibration
➢Prepare the Calibration Tool and i500.

13
➢Turn the dial of the calibration tool to the position .
➢Put the handpiece into the calibration tool.
➢Click “Next” to start calibration process.
➢When the handpiece is mounted in the correct position, the system will automatically acquire the data at the
position .

14
➢When data acquisition is completed at the position , turn the dial to the next position.
➢Repeat the steps for positions ~ and position.
➢When data acquisition is completed at the position, the system will automatically calculate and show
the calibration result.

15
3.2 Scan Stage
The Scan Stage indicates the current working stage.
Pre-Operation For
Maxilla
Acquires the 3D image of the Pre-Operation For Maxilla
The data in this stage is usually acquired for pre-operation condition of
maxilla.
If the Pre-Operation For Maxilla is acquired, this data will be used for the
reference of the “Maxilla”.
Pre-Operation For
Mandible
Acquires the 3D image of the Pre-Operation For Mandible.
The data in this stage is usually acquired for pre-operation condition of
mandible.
If the Pre-Operation For Mandible is acquired, this data will be used for the
reference of the “Mandible”.
Maxilla
Acquires the 3D image of the maxilla.
Maxilla Scanbody
Acquires the 3D image of the scanbody for maxilla.
Mandible
Acquires the 3D image of the mandible.
Mandible Scanbody
Acquires the 3D image of the scanbody for mandible.
Occlusion
Acquires the 3D image of the occlusion alignment.
Complete
Completes the scanning process then generates the result data.

16
3.2.1 Scan Pre-Operation For Maxilla
Acquires the 3D image of the Pre-Operation For Maxilla.
The data in this stage is usually acquired for pre-operation condition of maxilla.
If the Pre-Operation For Maxilla is acquired, this data will be used for the reference of the “Maxilla”.
Command Option Detail
Start Scan
Starts the scanning process.
You can also start the scanning process using the function button on the device.
Stop Scan
Stops the scanning process.
You can also stop the scanning process using the function button on the device.
Optimize
Aligns 3D images for more accurate scanning.
All noise will be deleted after optimization process.
High
Resolution
Scan
Acquires the data with high resolution for entire or partial area.
When the high resolution and standard resolution area are mixed, result will be
merged smoothly during post-processing.
Delete
Deletes the whole 3D images to start over.
If the related data with current stage exists, these data will be deleted also.
Undo
Undo previous scanning.
Redo
Redo previous scanning.

17
Filtering
Controls the level of filtering during scanning.
Scanning with low level filtering acquires more amount of data than high level
filtering.
On the other hand, noisy data such as tongue/cheek/small cluster is acquired also.
Scanning with high level filtering acquires less amount of data than low level filtering.
You need more time to complete the scanning of whole model, but the final scan data
will be noise-free than the scan data with low level filtering.
3.2.2 Scan Pre-Operation For Mandible
Acquires the 3D image of the Pre-Operation For Mandible.
The data in this stage is usually acquired for pre-operation condition of mandible.
If the Pre-Operation For Mandible is acquired, this data will be used for the reference of the “Mandible”.
Command Option Detail
Start Scan
Starts the scanning process.
You can also start the scanning process using the function button on the device.
Stop Scan
Stops the scanning process.
You can also stop the scanning process using the function button on the device.
Optimize
Aligns 3D images for more accurate scanning.
All noise will be deleted after optimization process.
High
Resolution
Scan
Acquires the data with high resolution for entire or partial area.
When the high resolution and standard resolution area are mixed, result will be merged
smoothly during post-processing.

18
Delete
Deletes the whole 3D images to start over.
If the related data with current stage exists, these data will be deleted also.
Undo
Undo previous scanning.
Redo
Redo previous scanning.
Filtering
Controls the level of filtering during scanning.
Scanning with low level filtering acquires more amount of data than high level
filtering.
On the other hand, noisy data such as tongue/cheek/small cluster is acquired also.
Scanning with high level filtering acquires less amount of data than low level filtering.
You need more time to complete the scanning of whole model, but the final scan data
will be noise-free than the scan data with low level filtering.
3.2.3 Scan Maxilla
Acquires the 3D image of the maxilla.
Command Option Detail
Start Scan
Starts the scanning process.
You can also start the scanning process using the function button on the device.

19
Stop Scan
Stops the scanning process.
You can also stop the scanning process using the function button on the device.
Optimize
Aligns 3D images for more accurate scanning. All noise will be deleted after optimization
process.
Impression
Scan
Acquires the data of impression model.
Impression data is aligned to intra-oral data in real-time.
High
Resolution
Scan
Acquires the data with high resolution for entire or partial area.
When the high resolution and standard resolution area are mixed, result will be merged
smoothly during post-processing.
Delete
Deletes the whole 3D images to start over.
If the related data with current stage exists, these data will be deleted also.
Undo
Undo previous scanning.
Redo
Redo previous scanning.
Filtering
Controls the level of filtering during scanning.
Scanning with low level filtering acquires more amount of data than high level
filtering.
On the other hand, noisy data such as tongue/cheek/small cluster is acquired also.
Scanning with high level filtering acquires less amount of data than low level filtering.
You need more time to complete the scanning of whole model, but the final scan data
will be noise-free than the scan data with low level filtering.

20
3.2.4 Scan Mandible
Acquires the 3D image of the mandible.
Command Option Detail
Start Scan
Starts the scanning process.
You can also start the scanning process using the function button on the device.
Stop Scan
Stops the scanning process.
You can also stop the scanning process using the function button on the device.
Optimize
Aligns 3D images for more accurate scanning.
All noise will be deleted after optimization process.
Impression
Scan
Acquires the data of impression model.
Impression data is aligned to intra-oral data in real-time.
High
Resolution
Scanning
Acquires the data with high resolution for entire or partial area.
When the high resolution and standard resolution area are mixed, result will be merged
smoothly during post-processing.
Delete
Deletes the whole 3D images to start over.
If the related data with current stage exists, these data will be deleted also.
Undo
Undo previous scanning.
Other manuals for i500
5
Table of contents
Other Medit Dental Equipment manuals
Popular Dental Equipment manuals by other brands
FKG
FKG Rooter S Quick start instructions
Rapid Shape
Rapid Shape RS wash operating instructions

Zhermack
Zhermack freealgin manual
NSK
NSK Endo-Mate TC2 Operation manual
Aseptico
Aseptico AEU-525S Operation & maintenance manual

Renfert
Renfert Silent compactCAM Translation of the original instructions for use
Aseptico
Aseptico AEU-14CF OPERATION, SERVICE MANUAL & PARTS LIST

EKOM
EKOM DUO Installation, operation and maintanance manual

RAM PRODUCTS
RAM PRODUCTS BP50 owner's manual
NSK
NSK Ti-Max NL400 CDE installation manual

Zubler
Zubler VARIOstar Series instructions
Ortho Technology
Ortho Technology OT-8920 Instructions for use
