manuals.online logo
Brands
  1. Home
  2. •
  3. Brands
  4. •
  5. Cavius
  6. •
  7. Security System
  8. •
  9. Cavius CO ALRM User manual

Cavius CO ALRM User manual

Carbon monoxide alarm device
Model no.: 4002
This Cavius carbon monoxide (CO) alarm is de-
signed and tested to detect CO in private homes. It will
provide early warning of the presence of CO.
PLEASE READ THE USER GUIDE
CAREFULLY BEFORE INSTALLATION AND
RETAIN FOR FUTURE USE.
SAFETY INSTRUCTIONS:
The device comes with a 3V lithium battery. Batteries
are to be handled with care and battery powered de-
vices should be kept out of reach of children. Do not
try to recharge or burn the batteries.
INFORMATION ABOUT CARBON MONOXIDE:
CO - Carbon monoxide - is known as the “silent killer”
because it is odourless, tasteless and colourless.
It can kill in few minutes.This apparatus may not
prevent the chronic effects of Carbon Monoxide ex-
posure.
All people are at risk for CO poisoning. Unborn ba-
bies, infants, the elderly, and people with chronic
heart disease, anemia, or respiratory problems are
generally more at risk than others. The apparatus will
not fully safeguard individuals at special risks
Breathing CO can cause headache, dizziness, vom-
iting, and nausea. If CO levels are high enough, you
may become unconscious or die.
1. TECHNICAL INFORMATION:
Diameter: 40mm Height: 38mm.
Type of alarm: EN 50291-1:2018 type B appa-
ratus with electro-chemical CO sensor.
Battery: Powered by a non-replaceable 3V CR123
Lithium battery with 10-year life (included).
IMPORTANT: Do not try to replace the bat-
tery. Replace the product if the battery fails.
Product Life: 10 years after manufacturing date.
Working condition: -10 to +400C, 30 to 95% non-con-
densing.
Storage/Transport: -20 to +500C, 10 to 95% non-
condensing.
Alarm Sound Level: The minimum sound level is 85
dB at 3 meters.
2. THE BEST AREAS TO INSTALL YOUR CO ALARM:
• Ideally, an apparatus should be installed in every
room containing a fuel-burning appliance.
• Near bedrooms and living areas.
• On each level of your home.
• 1 to 3 meter away from all fuel burning appliances.
• At eye level to allow optimum monitoring of the
in dicator lights.
• Install as High as possible as CO rises when mixed
with heat.
• You can t on a wall but as high as possible.
3. AREAS WHERE NOT TO INSTALL CO ALARMS:
• In an enclosed space (for example in a cupboard or
behind a curtain).
• Where it can be obstructed (for example by
furniture).
• Directly above a sink.
• Next to a door or window.
• Next to an extractor fan.
• Next to an air vent or other similar ventilation
openings.
• In an area where the temperature may drop below -10
°C or exceed 40 °C.
• Where dirt and dust may block the sensor.
• In a damp or humid location.
• In the immediate vicinity of a cooking appliance.
4. PLACEMENT:
The CO alarm is designed to be installed on the wall
or a ceiling.
UK
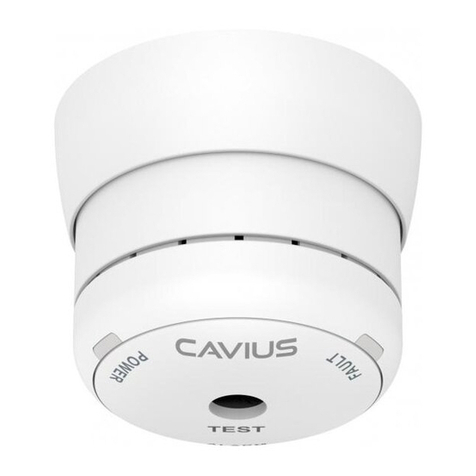
Sounder
Yellow LED
Fault indicator
Green LED
Power indicator
Test/ hush
button
Mounting
base
Red LED
Alarm indicator
Siting of CO alarms
CO
Minimum 15cm from ceiling
Wall
Ceiling
Minimum 1,20m to 1,50m from the oor
Floor
5. INSTALLING YOUR CO ALARM:
CAUTION: This alarm should be installed by a
competent person.
The installation of this device should not be
used as a substitute for proper installation, use
and maintenance of fuel burning appliances,
including appropriate ventilation and exhaust
systems.
It does not replace a smoke alarm.
Installation with screw and plug:
Detach the alarm from the mounting base by twisting
counter clockwise.
Use the mounting base to mark up horizontally the
screw holes on the wall.
Attach the alarm by twisting clockwise.
Please note: The label in the product must not be
removed as it contains important information regard-
ing the product.
6. TEST FUNCTION:
After installation and at least once per quarter, test
your alarm to make sure it is operating correctly.
It is recommended to check visually every week if the
green LED ashes correctly (every minute)
When the top button is pressed the alarm sounder
will sound, and when the button is released, the
alarm will make a self-test of the sensor and battery
for approximately 9 seconds. During this delay the
three LEDs will be ashed in sequence. The result
of the test will be indicated after the test has been
completed.
If the test passes, the green LED will emit for 3 sec.
If the test fails, a fault indication will be given (See
section 7).
After the test function is performed, the alarm will
need to recover for one minute before the next test
can be done (to allow the sensor chamber to re-set-
tle after the test current is applied).
The alarm will also do a self-test every 24 hour and
test the sensor for faulty sensor, drift or short circuit.
TIP: It is safe to cover the sound output hole with
your nger during the testing to minimize the sound
level emitted.
7. FAULT WARNINGS:
Battery fault: Battery low condition is indicated by a
very short tone burst “beep” every 60 seconds with
yellow LED ashing. Your CO alarm battery is low
voltage.
Sensor fault: Sensor fault is indicated by two very
short tone burst “beeps” every 60 seconds with yel-
low LED ashing. Your CO alarm will not respond to
CO.
End of life: End of sensor life is indicated by three
very short tone burst “beeps” every 60 seconds with
yellow LED ashing. Your CO alarm needs to be re-
placed.
8. OTHER INFORMATION:
Do not paint the alarm.
Disposal: Please dispose the product properly at the
end of life. This is electronic waste which should be
handled properly.
WARNING: Batteries shall not be exposed to exces-
sive heat such as shine, re, or the like. Note the
local country regulations regarding installation.
WARNING: To prevent injury, this apparatus must be
permanently xed to the ceiling/wall in accordance
with the installation instructions.
The CE mark affixed to this product confirms its
compliance with the European Directives which
apply to the product.
Carrier assumes no responsibility for any errors,
which may appear in this manual. Furthermore, Car-
rier reserves the right to alter the hardware, software,
and/or specications detailed herein at any time
without notice, and Carrier does not make any com-
mitment to update the information contained herein.
©2023 Carrier. All Rights Reserved. All trademarks
and service marks referred herein are property of
their respective owners.
Manufacturer: Carrier Fire & Security Danmark A/S,
Ellekær 9A, 2. Th, DK-2730. Manufactured in P.R.C.
Contact: [email protected]. www.cavius.com
400148 rev7
Mark up screw holes with a pen
Use the enclosed screws
and plugs for installation
Peak ceiling
Minimum 30cm
from peak
Minimum 30cm
from wall
Wall
Ceiling
1 to 3m from replace
Wall

This manual suits for next models

1

Other Cavius Security System manuals

Cavius 3004-001 User manual

Cavius

Cavius 3004-001 User manual

Cavius 4002 User manual

Cavius

Cavius 4002 User manual

Cavius HEAT User manual

Cavius

Cavius HEAT User manual

Cavius 5103 User manual

Cavius

Cavius 5103 User manual

Cavius CV3106 User manual

Cavius

Cavius CV3106 User manual

Cavius CV4002 User manual

Cavius

Cavius CV4002 User manual

Cavius FLOOD User manual

Cavius

Cavius FLOOD User manual

Cavius FLOOD User manual

Cavius

Cavius FLOOD User manual

Popular Security System manuals by other brands

E2S STExS2 instruction manual

E2S

E2S STExS2 instruction manual

Vasco DIGIPASS user manual

Vasco

Vasco DIGIPASS user manual

Witura WT-1672B user manual

Witura

Witura WT-1672B user manual

Risco Agility 4 Quick user guide

Risco

Risco Agility 4 Quick user guide

Yacht Devices YDAB-01 user manual

Yacht Devices

Yacht Devices YDAB-01 user manual

Cobalt Digital Inc +EAS Manual supplement

Cobalt Digital Inc

Cobalt Digital Inc +EAS Manual supplement

Lorex LW2311 Brochure & specs

Lorex

Lorex LW2311 Brochure & specs

Safety Technology International STI-SA5000 SERIES manual

Safety Technology International

Safety Technology International STI-SA5000 SERIES manual

SecurityMan SECURITYBARPD user manual

SecurityMan

SecurityMan SECURITYBARPD user manual

Honeywell X-618 installation manual

Honeywell

Honeywell X-618 installation manual

Atmel AT88SC-DK1 WELCOME AND QUICK START GUIDE

Atmel

Atmel AT88SC-DK1 WELCOME AND QUICK START GUIDE

Sonora SONFL1X instructions

Sonora

Sonora SONFL1X instructions

First Alert FA1600C user guide

First Alert

First Alert FA1600C user guide

SMARSECUR WS-S7B user manual

SMARSECUR

SMARSECUR WS-S7B user manual

urmet domus 1092 instructions

urmet domus

urmet domus 1092 instructions

Panduit ACF05 installation guide

Panduit

Panduit ACF05 installation guide

SecurityMan SM-GSMdialer user manual

SecurityMan

SecurityMan SM-GSMdialer user manual

Inter-m EP-616 Operation manual

Inter-m

Inter-m EP-616 Operation manual

manuals.online logo
manuals.online logoBrands
  • About & Mission
  • Contact us
  • Privacy Policy
  • Terms and Conditions

Copyright 2025 Manuals.Online. All Rights Reserved.