CCTV CSP-750ADV User manual

SONY EFFIO-A Security Camera
With On-Screen Display
Model CSP-750ADV
FEATURES:
1/3 Sony Ex-View HAD II CCD
Sony Effio-A DSP
750TVL High Resolution
30 Infrared LEDs’
IR Distance up to 90ft/30m
2.8~12.0mm Varifocal Lens
On-Screen Display (OSD)
Waterproof IP66 Rating
3-AXIS Lens Rotation
1AMP
12V DC
The CSP-750ADV is a “New Generation” camera with SONY EFFIO-A DSP. It was designed to
provide the user with stunningly clear images in both day and night. The camera has a
Day/Night auto-switch which automatically produces a black and white/infrared image in low
light. This camera is an excellent choice for low light or complete darkness. The camera is
also equipped with many advanced features including a digital on-screen display (OSD) menu
which enables the user to adjust camera settings in order to achieve the highest quality
image.

CAUTION:
Do not attempt to service this video product by yourself as taking apart camera
may expose you to dangerous voltage or other hazards.
Please comply with all electrical safety standards during installation and
operation.
In order to prevent damage caused by fire or electric shock, please do not
submerse camera in water or expose any open parts to liquid.
Make sure to use the appropriate power supply and that the power is plugged
into the camera correctly and securely. Do not switch on power until after
camera connection is complete. This camera requires 12volt DC power.
Do not expose the lens directly to the sun or to strong light as this may damage
the pick-up device.
There are some sophisticated parts inside this camera, therefore, always handle
with care in order to avoid any internal damage to the camera.

Frequently Asked Questions:
No Image?
Check the power cable to the power box or wall outlet. Make sure video
and power connections are secure. Do not switch on power until camera
connection is complete.
If using a multiple output power box, make sure the power switch is in the
“ON” position & all of the fuses are illuminated.
If using a multiple output power box, make sure the POSITIVE (+) and
NEGATIVE (-) wires are connected correctly.
If using a spool of cable (not premade), make sure outer copper wire is not
touching the center pin.
Make sure the BNC video from connection from the camera is plugged into
the video input on the DVR or display.

Interface
1
ENTER
Use this button to display the Main Menu and to Enter the
Submenus when they are available.
UP/DOWN
Select the desired feature by using Joystick with Up / Down
direction
LEFT/RIGHT
Change the status of the selected feature by using Joystick with
Left / Right direction
2
VIDEO TEST/
VIDEO OUT
Additional video out for Test Monitor
3
LED LEVEL
Adjusts brightness of the IR LEDs

III OSD
Press “Enter” button for 2 seconds, the Camera screen will display the OSD Main
menu.
Users can select different options according to the camera environment, including
Automatic, Indoor, Outdoor, Backlight, Traffic Monitoring, user-defined.

3.1.1 Shutter/AGC
Move the cursor to the main menu function "Scene Select", press the " Enter "
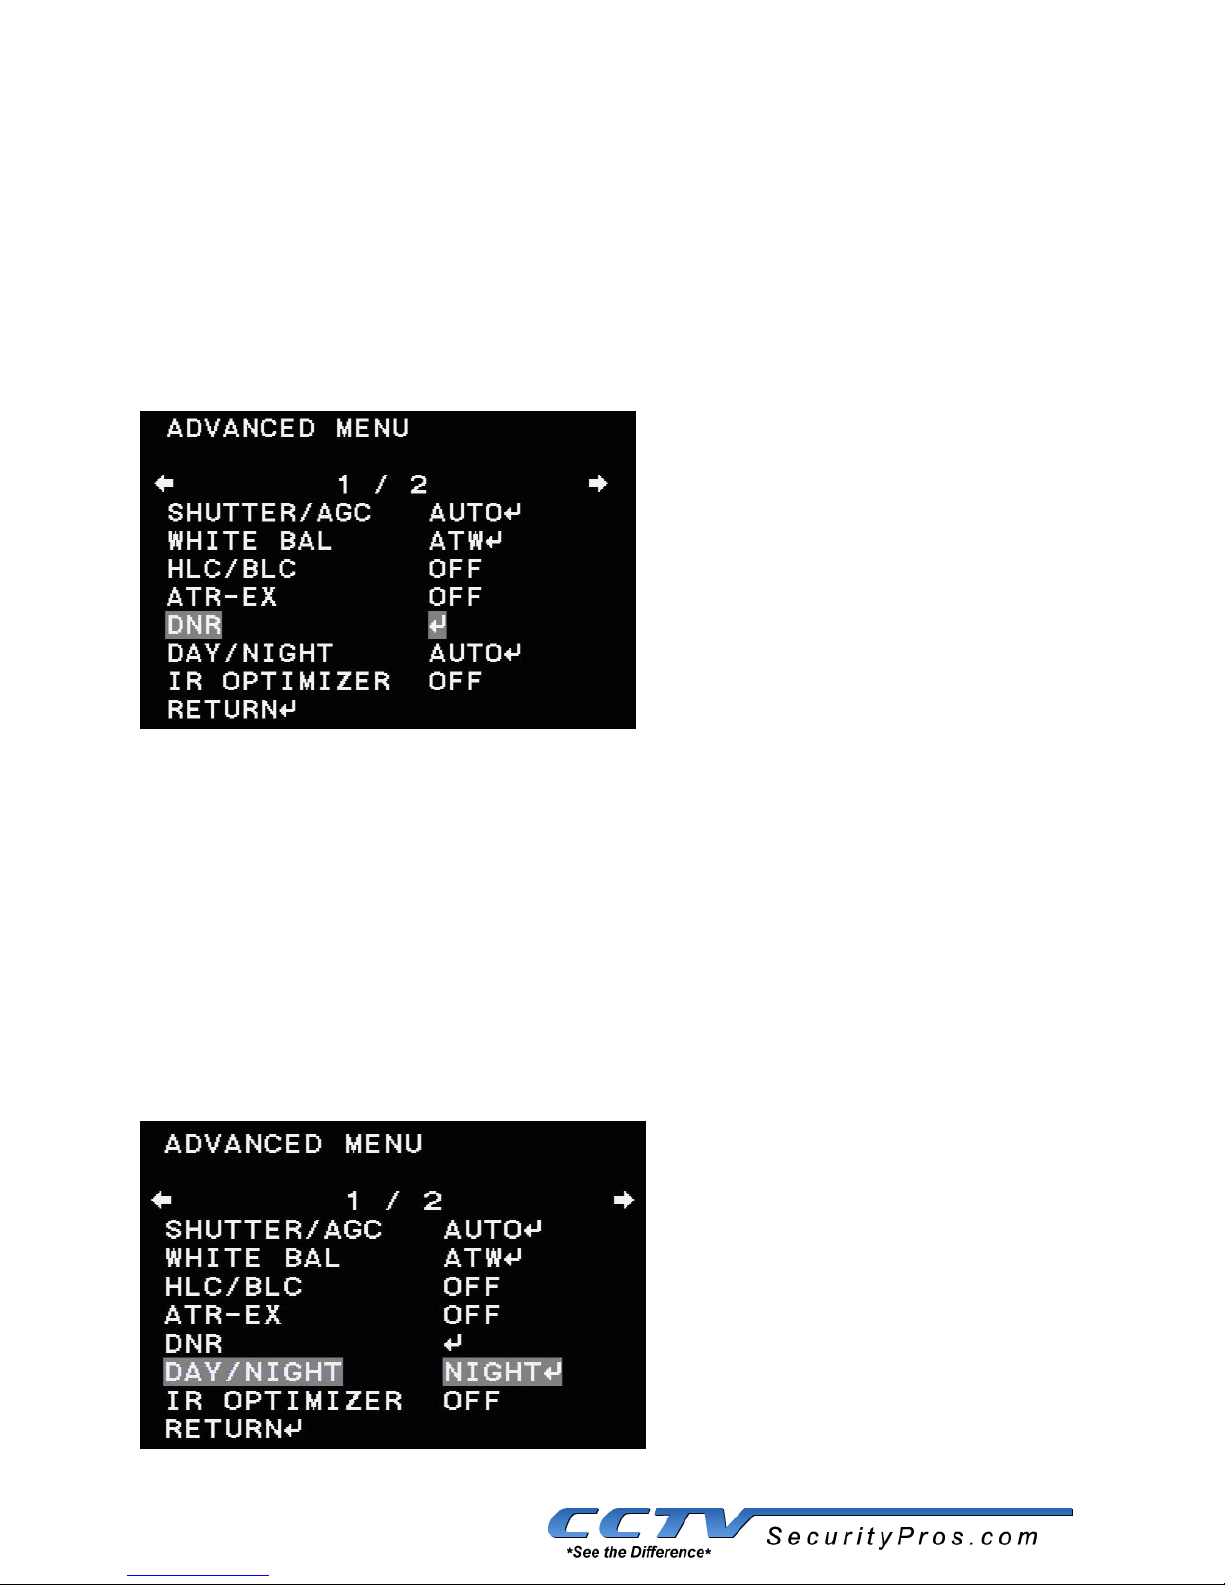
button to display the " Advanced Settings" sub-menu, move the cursor to "
Shutter / AGC " item , this function can be divided into "Automatic" control,
"Manual" control, and "Fixed" control. The user can use the "Left and Right”
button to adjust the Settings.
Select "Auto”, press the “Confirm“ button to enter the sub-menu of Automatic
Control. Inside Auto Iris setting submenu, there have “AE LEVEL", “AGC MAX ",
“SENS UP" three settings.
“AGC” can adjust the peak value, the bigger the value, the brighter the picture,
but the noise will be much greater.

In “Sens Up”, there is “On” and “Off ” as an option.
Manual Setup, user can adjust the Shutter Mode Shutter Speed and AGC
.
3.1.2 WHITE BAL
White Balance can restore the authenticity of the color when it is affected by the
change of temperature. The user can choose different white balance mode
accordingly,
ATW/PUSH/USER1/USER2/ MANUAL/PUSH LOCK.

Normally, only when you choose “user defined” setting you can adjust the mood,
otherwise the white balance is fixed.
3.1.3 HLI/BLC
In the main menu, press the cursor to “Scene Selection”, press “Enter” button to
enter “advanced settings” sub-menu. In the “HLI/BLC” menu, press “left” “right”
key to select “off” “HLI” “BLC”, only the “Scene Selection” is “user defined”, you
can select “BLC”.

3.1.4 Adaptive Tone Reproduction
The ATR (Adaptive Tone Reproduction) function provides gradation compensation
to improve the contrast of subjects whose gradation has been lost in cases where,
for instance, both low-luminance areas and high-luminance areas exist in the
same picture.
"Clear Face" and" contrast "values can be chose between the "low, medium,
high", User can choose an appropriate value to achieve the best image quality.

3.1.5 DNR
In the main menu, press the cursor to “Scene Selection”, press “Enter” button to
enter “advanced settings” sub-menu. In the "noise reduction" menu press "enter"
button to enter the "noise reduction" sub-menu. You can adjust the level of noise
reduction, the bigger the value, the higher the noise reduction level .
3.1.6 DAY/NIGHT
Day/night switching function is mainly for the user to use the camera for different
occasions. There are three modes for day/night: Day mode, Night mode and auto
mode.
In the main menu, press the cursor to “Scene Selection”, press “ENTER” button to
enter “advanced settings” sub-menu. In the “Day/Night”, use “left” “right” key to
select “white mode”, “black mode”, “auto mode”.

A. Auto mode
In the “Day/Night”menu, press “left”“right”key to select “Auto mode”and press
“ENTER” button to “Auto mode”sub-menu, this function controls the camera
output color or black and white image according to the strength of the light. User
can set the parameter according to the environment.
B. Day mode
Image will always be color
C. Night
Image will always be black and white
3.1.7 DEFOG
You can choose the Defog function according the environment, Defog can be used
to help improve the captured image in poor weather conditions that display
smog, fog, or smoke. The visibility of the cameras can be enhanced in any
weather condition.
Select Off/Low/Middle/High to display the best picture.

3.2 PICT ADJUST
Select to bring up the PICT ADJUST sub-menu for further settings.
Function
Option
BRIGHTNESS
000-255
CONTRAST
000-255
SHARPNESS
000-255
HUE
000-255
COLOR GAIN
000-255

3.3 EZOOM
In the OSD main menu to choose " EZOOM", Press “ENTER” button to bring up the
setup sub-menu, in the EZOOM SETUP, users can setup according to the needs of
area size and position.
3.4 DIS (Digital image stabilization)
Digital image stabilization (DIS) is a family of techniques used to reduce blurring
associated with the motion of a camera during exposure. Specifically, it
compensates for pan and tilt (angular movement, equivalent to yaw and pitch) of
a camera or other imaging device. It is used in image-stabilized binoculars, still
and video cameras, and astronomical telescopes. With still cameras, camera
shake is particularly problematic at slow shutter speeds or with long focal length
(telephoto) lenses.

3.5 Privacy
15 areas optional, user can adjust the size, position, color, transparency of the
chosen area.
Privacy shield can be setup for 1-15 areas, when mode is set to open, users can
press the “up” “down” "left" "right" “ENTER” to select the parameter of areas’
DISPLAY, POSITION, COLOR, TRANSP.

3.6 Motion detection
In the OSD main menu to choose “MOTION DETECTION "press the "left" "right" to
select "On", and press “ENTER” button to bring up the MOTION DETECTION sub-
menu.
In the motion detection sub-menu, users can do setup according to the needs of
detection sense, interval, mask area, monitor area
The detect sense: 0-127.
Interval:0-127
Block DISP: there is on/off two choices. There is a diagram displaying when you
choose on, otherwise, there is not diagram
Mask area: Set whether to participate in the relevant area motion detection,
when the block selected area, this area will be involved in motion detection.
Monitoring area: Four visual surveillance area and users can adjust the parameter
value to adjust the surveillance area location.

3.7 SYS Setting
Move the cursor to “system setting” press “enter” to set the submenu.
3.7.1 Sync Camera
The system default is "Internal synchronization" mode
3.7.2 Lens
Lens Type can be set to "Auto” lens, "manual" Lens 2 types, the user can select
the type of lens by the menu "left and right”. When using the optional auto iris
lens can select "DC / VIDEO" lens type, the user can adjust the "speed" value to
adjust the speed of the auto iris open. The smaller the value, the slower the
aperture opens, the greater the value, the faster the aperture opens . Auto iris
lens adjustment function, move the cursor to “adjust “item, press the enter
button, the camera will automatically set the relevant parameters to match the
different types of lenses.

3.7.3 Image Flip Function
Move the cursor to "flip" item, press left and right to select "off" to "flip" turn
"vertical" "horizontal vertical flip" option.
3.7.4 Communication
In the System Settings sub-menu, move the cursor to the "Communication", press
"ENTER" to enter the communication settings sub-menu, the user can set up
"address", "baud rate" and other settings according to their needs.

3.7.5 Camera ID
In system settings submenu, move the cursor to "CAMERA ID SETUP" option,
press the "ENTER" key to enter into the camera set up submenu. You can now set
the camera name.
You can set the camera code as numbers, uppercase letters, and related symbols..
“←↑↓→” Cursor for left and right
“CLR” Clear camera name
“POS” for position.
“RETURN” return to the upper menu.
3.8 Language
Move to the first line of the main menu, press left or right to enter the next page
to set.\
The “Language” function were designed for the Surveillance camera’ menu, there
are eight Languages “English, Chinese, Japanese, German, French, Russian,
Portuguese, Spanish” , user can press left or right bottom to choose.

3.9 MAINTENANCE
Maintenance is for WHITE PIXEL MASK and CAMERA RESET
3.9.1 White Pixel Mask
When used in high-temperature environment, there might be dead pixel on CCD
sensor. With this function on, the dead pixel is to be masked so as to improve the
picture quality.
There are three options--- Manual, Auto and clear data
3.9.2 Camera Reset
“Camera Reset” designed to delete all the configuration that was set before,
please confirm before this operation, or it will restore factory setting.

3.10 EXIT / SAVE ALL
Press to restore all the settings to the default values.
SAVE ALL
Press to save all the settings made.
NOTE:
There will be no prompt windows while the settings are being saved.
EXIT
Press to exit the OSD menu.
NOTE:
Before exiting the OSD menu, please press SAVE ALL<┘ to save all the settings made. If
you fail to do this, all the settings will not take effect once the power is reconnected.
Table of contents
Other CCTV Security Camera manuals