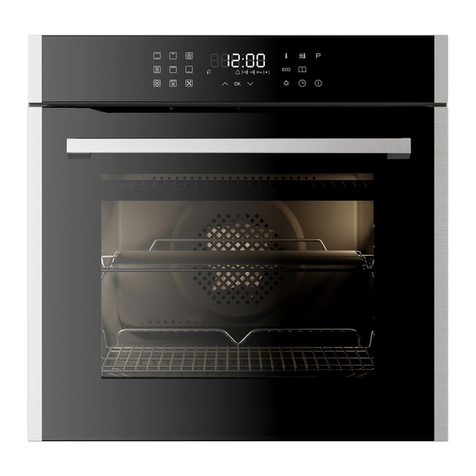
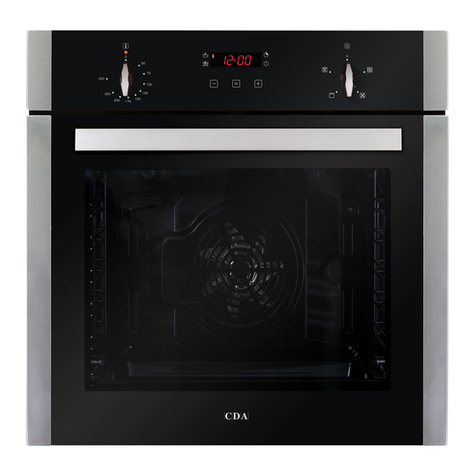
CDA SL100SS User guide

SL100SS
Seven function electric oven
Use and maintenance

2| Instruction Manual
3 Important information
5 First use of the oven
6 Oven functions and operation
8 Using the grill
9 ECO heating
10 Practical tips
11 Cleaning and maintenance
17 Changing the oven light bulb
18 Installation
20 Mains electrical connection
22 Technical assistance
23 Specifications
24 Product fiche
25 Product information
Contents
IMPORTANT: Please read the user instructions carefully before
using the appliance for the first time and before installing it.
Failure to install the oven, or to have it installed, as per the
instruction manual could invalidate the warranty. Any service
calls relating to misue or incorrect installation could incur a
service charge.

Instruction Manual | 3
Important information
This appliance must only be used for the purpose for which it is
intended, i.e. domestic cooking. Any other use could be dangerous
and may lead to premature failure of the appliance.
The CDA Group Ltd. cannot be held responsible for injuries or losses
caused by incorrect use or installation of this product. Please note
that CDA reserves the right to invalidate the guarantee supplied with
this product following incorrect installation or misuse of the appliance.
Under no circumstances should any external covers be removed for
servicing or maintenance except by suitably qualified personnel.
User information
• The appliance and its accessible parts become hot during use.
Care should be taken to avoid touching heating elements
• The appliance can be used by children aged from 8 years
and above. Persons with reduced physical, sensory or
mental capabilities must be given instruction or supervision
concerning safe operation of the appliance and understand the
hazards involved
• Do not allow anyone unfamiliar with the contents of this instruction
manual to operate the oven
• Do not use harsh cleaning agents or sharp metal objects to clean
the door as they can scratch the surface potentially resulting in
cracking or shattering of the glass
• Take care when opening the oven door during or after a cooking
cycle as hot steam may escape
• Do not use the oven in the event of a technical fault. Any faults
must be fixed by an appropriately qualified and authorised person
• In the event of an incident due to a technical fault, disconnect the
power and report the fault to CDA Customer Care
• The appliance has been designed only for cooking, any other use
may invalidate your warranty and cause danger
• Do not place anything weighing over 15kg on the opened oven
door
4| Instruction Manual
Appliance information
Please enter the details on the appliance rating plate below for
reference, to assist CDA Customer Care in the event of a fault with your
appliance and to register your appliance for guarantee purposes.
Appliance Model
Serial Number
EU Declarations of Conformity:
This appliance has been manufactured to the strictest standards and
complies with all applicable legislation and the following European
Directives.
• The Low Voltage Directive 2014/35/EU
• Electromagnetic Compatibility Directive 2014/30/EU
• ErP Directive 2009/125/EU
The product has been marked with the symbol and the
Declaration of Conformity has been issued to the manufacturer and is
available to the competent authorities regulating the market
IMPORTANT INFORMATION FOR CORRECT DISPOSAL OF THE
PRODUCT IN ACCORDANCE WITH EC DIRECTIVE 2012/19/EU.
At the end of its working life, the product must be taken to a special
local authority waste collection centre or to a dealer providing
appliance recycling services.
Disposing of a household appliance separately avoids possible
negative consequences for the environment and health. It also
enables the constituent materials to be recovered, saving both energy
and resources. As a reminder of the need to dispose of household
appliances separately, the product is marked with a crossed-out
wheeled dustbin .

Instruction Manual | 5
First use of the oven
In order to remove oil residues accumulated during the manufacturing
process and dust accumulated during storage and transport, we
recommend a preliminary cleaning before first use. This is to protect
your health and provide optimum quality in cooking.
Preliminary heating
1. Remove any packaging elements from the oven cavity
2. Turn on ventilation or extractor fan in the room or open a window
3. Set the oven to 250°C using the fan oven function
4. Allow to heat for approximately 30 minutes
5. Turn oven o and allow to cool
6. To clean the oven use a well wrung-out cloth with warm water and
a small amount of washing up liquid
7. Dry with a clean cloth
A slightly unpleasant smell may be emitted during this process due to
the vaporising of oil residue used to protect the oven during storage.
Do not use corrosive or abrasive powders when cleaning the
appliance as they can damage the surface

6| Instruction Manual
Oven functions and operation
The ovens operations are controlled by the function selector knob on
the right side of the control panel and the temperature selector knob
on the left side.
Please note:
Only when the temperature has been selected will the oven begin to
heat up.
Switching on the oven is indicated by two signal lights, Land R.
When R is illuminated it signifies the oven is working. The Llight
indicates the temperature has been set; once this light goes out it
means the desired temperature setting has been reached. If a recipe
recommends placing dishes in a preheated oven, this should not be
done until the Llight goes out for the first time. When baking, the L
light will temporarily come on and go out indicating temperature is
being maintained inside the oven.
L R

Instruction Manual | 7
Oven functions and operation
Oven is o
Eco heating
This is an optimised heating function designed to save energy.
When using this function the oven light is intentionally left o.
Light
The oven light will be turned on.
Fan oven
This function uses the circular heating element with a
temperature between 50°C and 250°C. The fan then
circulates the hot air which helps to achieve uniform
heat distribution.
Defrost
This function uses the fan to circulate air at ambient
temperature within the oven which helps to accelerate
the defrosting process.
/
Half grill
This function radiates heat from the grill element. This fully
temperature variable grill can be set between 50°C and 250°C
maximum.
Fanned full grill
This function radiates heat from the grill element and the
top element but also uses the fan to circulate the hot air. The
hot air is distributed over and under the food that you are
grilling. This fully temperature variable grill is ideal for grilling
fish or other foods where the appearance could be spoiled by
a normal grill function. It can be set between 50°C and 190°C
maximum.
Full grill
This function radiates heat from the grill element and the
top element. This fully temperature variable grill is ideal for
grilling a full family meal. It can be set between 50°C and
250°C maximum.

8| Instruction Manual
Using the grill
Important!
When using any grill function the oven door should be kept
closed. When the grill is in use accessible parts can become
hot; it is advisable to keep children away from the oven.
In order to switch on the grill you need to:
• Set the function selector knob to the desired grill setting
• Heat the oven for approximately 5 minutes with the oven door
shut
• Insert a tray on to the appropriate cooking level; if you are grilling
food directly on the wire shelf, place a tray on the level immedi-
ately below
• Close the oven door
When using the half grill or full grill functions the maximum
temperature that can be set is 250
°C. The maximum the fanned
full grill can be set to is 190°C.

Instruction Manual | 9
Type of dish Oven
function Temperature °C Level Time (min)
Sponge cake 180 - 200 2-3 50 -70
Muns 180 - 200 250 -70
Fish 190 - 210 2-3 45 - 60
Beef 200 - 220 290 - 120
Pork 200 - 220 290 - 160
Chicken 180 - 200 280 - 100
ECO heating
ECO heating is an optimised heating function designed to save
energy when preparing food. You cannot reduce the cooking
time by setting a higher temperature; preheating the oven is not
recommended. Do not change the temperature setting and do not
open the oven door during cooking. The levels listed in the table
below can be found around the edge of the oven cavity when the
door is open

10 | Instruction Manual
Type of dish Heating Function Level Time [Min] Temperature [°C]
Muns 3 25 - 40 155 - 170
Fish 2 - 3 45 - 60 160 - 180
Fish 2 - 3 60 -70 190
Sausages 4 14 - 18 220
Beef 2 120 - 160 160 - 180
Pork 2 90 - 120 160 - 190
Chicken 2 70 - 90 180 - 190
Chicken 2 60 - 70 175 - 190
Vegetables 3 40 - 50 170 - 190
Practical tips
The times given in the table below apply to a dish that is placed in to
a cold oven. For a preheated oventhe times should be reduced by
5 - 10 minutes. The figures given below are approximate and can be
altered based on your own experience and cooking preferences. The
levels listed in the table below can be found around the edge of the
oven cavity when the door is open

Instruction Manual | 11
Keeping your oven clean and well maintained helps to prolong
it's fault-free lifespan. It is important that, before any cleaning or
maintenance is performed, you switch o the oven at the mains
supply. Do not start any cleaning or maintenance until the oven has
been allowed to cool completely.
We recommend always wearing PPE (Personal Protective
Equipment) when carrying out any cleaning or maintenance.
Cleaning the oven exterior
Stainless steel, aluminium and glass surfaces can all be cleaned using
a dilute solution of water and mild detergent. They must be cleaned
very carefully using a soft or microfibre cloth to avoid scratching and
abrasions. Any abrasive cleaner (including Cif) will scratch the surface
and could erase the control panel markings. Always dry thoroughly
with a soft dry cloth.
Cleaning and maintenance
Cleaning the oven interior
The oven should always be cleaned after use when it has been
allowed to cool down. The cavity should be cleaned using a mild
detergent solution and warm water and then wiped dry with a suitable
clean cloth.

12 | Instruction Manual
Cleaning and maintenance
IMPORTANT:
• Steam cleaners must not be used when cleaning this
appliance
•Once care and maintenance is complete, ensure that all parts
are correctly replaced before using the oven
Abrasive cleaning agents or scouring pads/cloths should not be used
on the cavity surface.
Removing the appliance door
In order to allow easier access into the oven cavity for cleaning, it is
possible to remove the door. Before removing the door, ensure that
you have an area prepared in which you can place the removed door.
This area should ideally be protected by something like a folded, dirt-
free, towel to help prevent damage to surfaces and the door.
• Open the door fully
• Lift and tilt the safety catch
part of the hinge (Fig. 1) so that
it is fully extended and points
towards the door
• Close the door most of the
way, lift it slightly and then pull
it, safely but firmly, towards you Fig. 1

Instruction Manual | 13
Cleaning and maintenance
Replacing the appliance door
• Hold the door to the appliance in
the closed position and manoeuvre
the hinges so that the part of the
hinge, highlighted by the star in fig.
2, inserts into the hinge slot in the
cavity frame
• Next, ensure the notch on the
underside of the hinge sits on the
lip of the hinge slot. Open the door
fully. Each hinge should be seated
in the same way as the hinge in
fig. 3. If it is not, follow the steps for
removing the door and try replacing
it again
• Finally, lift the safety catch part of
the hinges back into place so that
they are lying flat against the hinges
Please note: If the hinge safety catches are not in the correct
place then the door and/or appliance may receive damage when
attempting to close the door.
Fig. 2
Fig. 3

14 | Instruction Manual
Cleaning and maintenance
Important: Do not disassemble
the door without it having been
removed from the oven. Weight
dierences could cause the door to
snap shut, causing damage to the
oven and/or the user
Removing the inner door glass
With the door removed, the inner
glass can also be taken out for
cleaning purposes.
• Squeeze the locking tabs on
either side of the oven door,
freeing the door slat as per fig. 4
• Remove the door slat, as per fig.
5, and place it somewhere safe
where it will neither receive nor
cause damage
• Remove the inner glass from
the blocks it is seated within
(near to the hinges) and place
this somewhere safe also. Pay
attention to the way that the glass
is facing as it will need to be
replaced in the same direction.
The smooth surface of the glass
should be facing upwards (inwards
if the door was back in place) with
the patterned side facing the oven
door handle
• Clean the door glass with warm, soapy water and wipe dry with a
clean microfibre cloth
Fig. 4
Fig. 5

Instruction Manual | 15
Cleaning and maintenance
• There are a number of rubber guides attached to the inner pane
and these must be returned to their original positions when
reassembling the door. Fig. 6 shows these guides and their
position on and around the inner glass
• Simply reverse these steps in order to reassemble the door. Take
care when reattaching the upper door slat. Place the left side on
first until you hear a ‘click’ as it connects and then attach the right
side. This will help to avoid damaging the door and/or glass
1
2
3
1
2
3
1
2
3
Upper glass
guides (both
sides)
Lower glass
guides (both
sides)
Fig. 6
• The middle pane of glass can also be removed but it is important
that this pane is reinserted facing the same way that it was when
removed

16 | Instruction Manual
Cleaning and maintenance
Fig. 7
Important:
Always remember to allow the oven to cool suciently, if it has
been in use, before carrying out any maintenance.
To remove the shelf supports
• Take a firm hold of the shelf
support in the middle. Place
your thumb against the oven
wall and lever the support
out of the support holes
(Fig. 7)
• Tilt the shelf support
outwards (Fig. 8) and you
should then be able to
remove the shelf support
arms that secure it into the
cavity walls at the back
To replace the shelf supports
• Simply carry out the above
steps, but in reverse order
Please note:
Take care not to damage the enamel walls of the oven, particularly
around the shelf support arm holes.
Fig. 8

Instruction Manual | 17
Changing the oven light bulbs
Important:
Before any maintenance is started involving electrical parts, the
appliance must be disconnected from the power supply.
If the oven has been in use, let the oven cavity and the heating
elements cool down before attempting any maintenance.
Never use screwdrivers or other utensils to remove the light cover.
This could damage the enamel of the oven or the lamp holder.
Remove only by hand.
Never replace the bulb with bare hands as contamination from
your fingers can cause premature failure. Always use a clean
cloth or gloves. Old bulbs may also be hot!
Changing the bulb (Fig. 9)
• Remove any cookware, shelves and shelf supports as shown
on page 16
• Carefully detach the glass cover by
applying pressure with your thumb to
one side whilst holding the other side
with your fingers.
•Carefully remove the old bulb and
insert a new bulb suitable for high
temperatures (300°C) of the following
specification; 230-240V~, 50Hz, 25W,
G9 fitting
•Refit the glass cover
Please note:
The bulb replacement is not covered by
your guarantee. Fig. 9

18 | Instruction Manual
Installation
Important! If installing this oven below a hob, ensure that the
required air gap between the two appliances is observed.
This gap is usually detailed in the hob’s manual.
The installation of this appliance must be carried out by a suitably
qualified person. We recommend seeking the help of another
person for the installation process.
If the oven is being installed into a built under oven housing unit
ensure that the front rail at the top of the unit is not installed as it
could restrict ventilation.
Ensure that air can flow freely around
the housing area. If the oven is being
installed into a fully enclosed built-under
oven housing unit it may be necessary
to cut a small slot in the top of the plinth
fitted under the unit. Cut a section
400mm wide and a minimum of 15mm high to allow air to pass under
the unit. Alternatively cut a section 400 x 450 mm in the base of the
carcass as indicated in fig. 10. Failure to allow adequate ventilation to
the appliance may result in overheating or damage to adjacent units
and could invalidate the warranty.
This appliance is type X installation.
Fig. 10
400
450
600

Instruction Manual | 19
Installation
The walls of the kitchen units must be able to withstand temperatures
of 75˚C above ambient (typically this is between 90˚C and 100˚C).
When correctly installed ensure that there is a gap of 4mm minimum
between the sides of the oven and adjacent furniture doors.
How to install your oven
You will need the housing area in fig. 11 to fit your oven correctly.
The oven is designed to fit into a cabinet of 600 mm width. The oven
can be built in or built under the kitchen units, but you must ensure
that it is properly ventilated. In the diagram below the built-in oven
is ventilated by means of a space at the top of the kitchen cabinet.
There are many
other methods of
ventilating your oven
- consult a qualified
engineer for advice.
Lift the oven carefully
into position on the
shelf, taking care
NOT to lift it by the
door handle. If you
lower the oven door,
you will see 4 screw
holes, 2 on each
side of the oven (image B fig. 11). The oven should then be secured
to the housing by securing screws into these holes. Remember the
housing should not be free-standing but be secured to the wall and/or
adjacent fittings.
595
560
560
40
560
560
.nim 83
min. 600
06 0
A
B
C
Fig. 11

20 | Instruction Manual
Mains electrical connection
Warning! This appliance must be earthed.
ON
USE A 13 AMP FUSE
DOUBLE POLE SWITCHED FUSED
SPUR OUTLET
This appliance must be connected by
a competent person, using fixed wiring
via a double pole switched fused spur
outlet, protected by a 13A fuse.
GREEN AND YELLOW = EARTH
BLUE = NEUTRAL
BROWN = LIVE
As the colours of the wires in the mains lead for the appliance may
not correspond with the coloured markings identifying the terminals
in your spur box, proceed as follows:
We recommend that the appliance is
connected by a qualified
electrician, who is a member of the
N.I.C.E.I.C. and who will comply
with the I.E.T. and local regulations. The
wires in the mains lead are
coloured in accordance with the
following code:
1. The wire which is coloured green and yellow must be connected
to the terminal marked E (Earth) or coloured green
2. The wire which is coloured blue must be connected to the
terminal marked N (Neutral) or coloured black
3. The wire which is coloured brown must be connected to the
terminal marked L (Live) or coloured red
FUSE
This manual suits for next models
1
Table of contents
Other CDA Oven manuals

CDA
CDA SA116 for Reference manual

CDA
CDA DC740 Reference manual

CDA
CDA sk380 Series User manual

CDA
CDA SK451 User manual

CDA
CDA sk650 Reference manual

CDA
CDA SC223SS Quick start guide

CDA
CDA SC210 Series Reference manual

CDA
CDA DC740 Safety guide

CDA
CDA DV1180 Series Reference manual

CDA
CDA SC309 Series Reference manual

CDA
CDA SL200BL User guide

CDA
CDA CD 900 Operation instructions

CDA
CDA SV 210 for Reference manual

CDA
CDA 9Q6 Series Reference manual

CDA
CDA rv961 Reference manual

CDA
CDA SA117 Reference manual

CDA
CDA SL550SS User guide

CDA
CDA SK110 Quick start guide

CDA
CDA SVA 100 PP Reference manual

CDA
CDA SC211 Reference manual