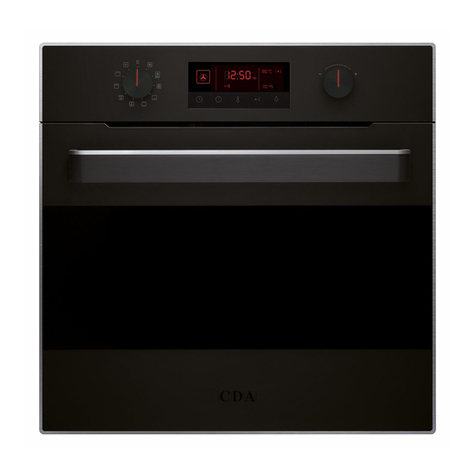
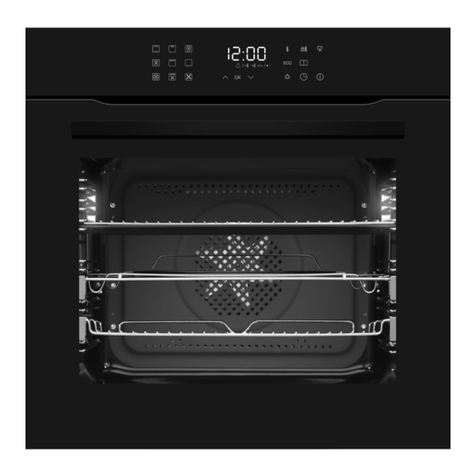
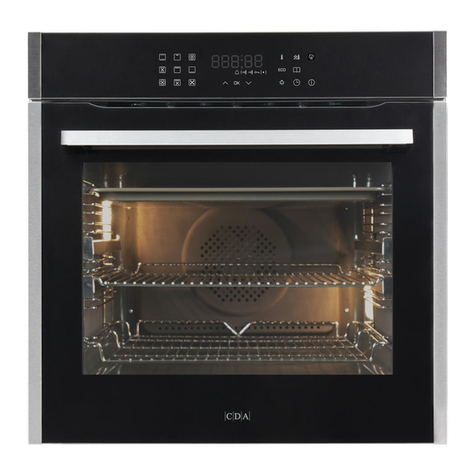
CDA SL500SS User guide

1
SL500SS
Thirteen function pyrolitic oven
Use and maintenance

2| Instruction Manual
3 Important information
5 First use of the oven
6Setting the time
6 Minute minder
7 Semi automatic cooking
8 Automatic cooking
9 Settings
10 Oven functions and operation
13 Using the grill
14 ECO heating
15 Practical tips
16 Pyroltic cleaning
18 Cleaning and maintenance
24 Changing the oven light bulbs
25 Installation
27 Mains electrical connection
Contents
IMPORTANT: Please read the user instructions carefully before
using the appliance for the first time and before installing it.
Failure to install the oven, or to have it installed, as per the
instruction manual could invalidate the warranty. Any service
calls relating to misue or incorrect installation could incur a
service charge.
29 Technical assistance
30 Specifications
31 Product fiche
32 Product information

Instruction Manual | 3
Important information
This appliance must only be used for the purpose for which it is
intended, i.e. domestic cooking. Any other use could be dangerous
and may lead to premature failure of the appliance.
The CDA Group Ltd. cannot be held responsible for injuries or losses
caused by incorrect use or installation of this product. Please note
that CDA reserves the right to invalidate the guarantee supplied with
this product following incorrect installation or misuse of the appliance.
Under no circumstances should any external covers be removed for
servicing or maintenance except by suitably qualified personnel.
User information
• The appliance and its accessible parts become hot during use.
Care should be taken to avoid touching heating elements
• The appliance can be used by children aged from 8 years
and above. Persons with reduced physical, sensory or mental
capabilities must be given instruction or supervision
concerning safe operation of the appliance and understand the
hazards involved
• Do not allow anyone unfamiliar with the contents of this instruction
manual to operate the oven
• Do not use harsh cleaning agents or sharp metal objects to clean
the door as they can scratch the surface potentially resulting in
cracking or shattering of the glass
• Take care when opening the oven door during or after a cooking
cycle as hot steam may escape
• Do not use the oven in the event of a technical fault. Any faults
must be fixed by an appropriately qualified and authorised person
• In the event of an incident due to a technical fault, disconnect the
power and report the fault to CDA Customer Care
• The appliance has been designed only for cooking, any other use
may invalidate your warranty and cause danger
• Do not place anything weighing over 15kg on the opened oven
door
4| Instruction Manual
Appliance information
Please enter the details on the appliance rating plate below for
reference, to assist CDA Customer Care in the event of a fault with
your appliance and to register your appliance for guarantee purposes.
Appliance Model
Serial Number
EU Declarations of Conformity:
This appliance has been manufactured to the strictest standards and
complies with all applicable legislation and the following European
Directives.
• The Low Voltage Directive 2014/35/EU
• Electromagnetic Compatibility Directive 2014/30/EU
• ErP Directive 2009/125/EU
The product has been marked with the symbol and the
Declaration of Conformity has been issued to the manufacturer and
is available to the competent authorities regulating the market
IMPORTANT INFORMATION FOR CORRECT DISPOSAL OF THE
PRODUCT IN ACCORDANCE WITH EC DIRECTIVE 2012/19/EU.
At the end of its working life, the product must be taken to a special
local authority waste collection centre or to a dealer providing
appliance recycling services.
Disposing of a household appliance separately avoids possible
negative consequences for the environment and health. It also
enables the constituent materials to be recovered, saving both energy
and resources. As a reminder of the need to dispose of household
appliances separately, the product is marked with a crossed-out
wheeled dustbin .

Instruction Manual | 5
First use of the oven
In order to remove oil residues accumulated during the manufacturing
process and dust accumulated during storage and transport, we
recommend a preliminary cleaning before first use. This is to protect
your health and provide optimum quality in cooking.
IMPORTANT!
Remove the protective foil from the telescopic runners before using
the oven.
Preliminary heating
1. Remove any packaging elements from the oven cavity
2. Turn on ventilation or extractor fan in the room or open a window
3. Set the oven to 250°C using the rapid preheating function
4. Allow to heat for approximately 30 minutes
5. Turn oven o and allow to cool
6. To clean the oven use a well wrung-out cloth with warm water and
a small amount of washing up liquid
7. Dry with a clean cloth
A slightly unpleasant smell may be emitted during this process due to
the vaporising of oil residue used to protect the oven during storage.
Using the electronic programmer
This oven’s electronic timer is equipped with touch control sensors.
Each registered touch of the sensor is confirmed by a single beep. It
is recommended to keep the touch sensors clean at all times for ease
of operation.
- Select the mode of operation
- Increase setting sensor
- Decrease setting sensor
- Appliance on indicator
- Minute minder
- Duration
- End time

6| Instruction Manual
Setting the time
When first connected to the power supply, the digital display will flash
0.00
.
The oven will not operate until the time is set.
• Simultaneously touch
and
until you see the dot below the
symbol flashing
• Touch or
within 7 seconds to set the current time. Once the
desired time is set, allow 7 seconds for the dot to stop flashing
followed by a beep. The time can be adjusted again at any time by
pressing
and
simultaneously and following the same steps
Minute minder
You can activate the minute minder at any time regardless of the
status of other functions. It can be set from 1 minute up to a maximum
of 23 hours and 59 minutes.
To set the minute minder:
• Touch and hold and the display will show a flashing
• Use the
and
sensors to set the time desired. The display will
show the set time and the symbol will be visible
• Once the set time elapses an alarm will sound and the icon
flashes. Touch and hold either
/
or to mute the alarm.
After approximately 7 seconds the will be o and the display will
show the current time
Please note:
If no sensor is touched the alarm will turn o automatically after
approximately 7 minutes.

Instruction Manual | 7
Semi-automatic cooking
This function allows for a cooking time to be set. When the set time
elapses the oven will switch the set function o and an acoustic signal
will sound to alert the user. The cooking time available ranges from
between 1 minute and 10 hours.
To switch on semi-automatic cooking
• Set the desired oven function and temperature
• Touch repeatedly until the display shows
dur
(duration) and the
symbol is flashing
• Set the desired duration from between 1 minute and 10 hours
using the
/
sensors
• The set duration will be memorised after 7 seconds and the
display will show the current time and the symbol
• Once the duration time has elapsed the oven will turn o
automatically. You will hear an alarm and the and symbols will
flash
• Set the function and temperature selection knobs to the o
position
• Touch and hold the
/
or to mute the alarm
• The and will go o and the display will revert to the current
time after approximately 7 seconds

8| Instruction Manual
Automatic cooking
This function allows for a duration and an end time to be set for
cooking. For example, if you set the cooking duration to 1 hour, and
the end time to 15:00, then the oven will activate the function at 14:00.
To switch on automatic cooking
• Touch repeatedly until the display shows
dur
(duration) and the
symbol is flashing
• Set the desired duration using the
/
• Touch repeatedly until the display shows
End
and the symbol
is flashing
• Using the
/
set the end time of the cycle up to a maximum of
23 hours and 59 minutes
• Set the function selector knob and temperature selector knob
to the desired settings. The and will be illuminated on the
display and are now active. The appliance will now switch on at
the end time minus the duration set
Once the duration time has elapsed the oven will turn o
automatically. The alarm will be heard and the and symbols will
flash. Set the function and temperature selector knobs to the o
position then touch and hold the
/
or to mute the alarm. The
and will be o and the display will show the current time after
approximately 7 seconds.

Instruction Manual | 9
Cancel settings
Timer and function settings can be cancelled at any time regardless
of the status of the operation. Simultaneously touch
/
to cancel.
In order to cancel the minute minder function, first hold down and
then simultaneously touch
/
to cancel.
Changing the beep tone
• Simultaneously touch and hold
/
• Touch repeatedly until the display shows
Ton1
• Touch
/
to select between
Ton1, Ton2
and
Ton3
Adjusting the display brightness
You can adjust the brightness of the display from 1 to 9, 1 being the
darkest and 9 the brightest. The brightness setting applies when no
controls are touched for 7 seconds.
You can adjust display brightness as follows:
• Simultaneously touch and hold the
/
• Touch repeatedly until
Bri
shows on the display
• Use the
/
sensors to select between 1 and 9
Night mode
The display is dimmed during the hours of 22:00 - 06:00

10 | Instruction Manual
Oven functions and operation
The ovens operations are controlled by the function selector knob on
the right side of the control panel and the temperature selector knob
on the left side.
Please note:
Only when the temperature has been selected will the oven begin to
heat up.
Switching on the oven is indicated by two signal lights, Land R.
When R is illuminated it signifies the oven is working. The Llight
indicates the temperature has been set; once this light goes out it
means the desired temperature setting has been reached. If a recipe
recommends placing dishes in a preheated oven, this should not be
done until the Llight goes out for the first time. When baking, the L
light will temporarily come on and go out indicating temperature is
being maintained inside the oven.
L R

Instruction Manual | 11
Oven functions and operation
Oven is o
Light
The oven light will be turned on.
Fan assisted oven
This setting is most suitable for baking cakes.
Conventional oven
The thermostat enables the user to set the temperature within
a range of 100°C to 250°C. This setting is ideal for
baking cakes, meat, fish and bread. For best results
preheat the oven and use a baking tray on one level.
Half grill
This function radiates heat from the grill element. This fully
temperature variable grill can be set between 50°C and 250°C
maximum.
Full grill
In this setting both the grill and top element are engaged. This
increases the temperature in the top part of the oven chamber
making it suitable for browning and roasting larger portions of
food.
Fanned full grill
This function radiates heat from the grill element and the
top element but also uses the fan to circulate the hot air. The
hot air is distributed over and under the food that you are
grilling. This fully temperature variable grill is ideal for grilling
fish or other foods where the appearance could be spoiled by
a normal grill function. It can be set between 50°C and 190°C
maximum.
Pyrolytic cleaning
The self-cleaning pyrolytic function heats the oven up to
approximately 480°C. Residue built up within the oven cavity is
burnt into an ash that can be wiped out with a damp cloth.
Important! Before starting pyrolitic cleaning please read
the pyrolytic cleaning section on pages 16 & 17

12 | Instruction Manual
Warming oven
This function radiates heat from the bottom element, baking
cakes from underneath until done.
Defrost
This function uses the fan to circulate air, at ambient
temperature within the oven which helps to accelerate
the defrosting process.
Rapid preheating
Use to preheat the oven.
Eco heating
This is an optimised heating function designed to save energy.
When using this function the oven light is intentionally left o.
Fan cooking with lower heat
With this setting the convection fan and bottom heater are on,
which increases the temperature at the bottom of the cooked
dish. It provides intense heat from the bottom, ideal for moist
cakes and pizza.
Fan oven
This function uses the circular heating element with a
temperature between 50°C and 250°C. The fan then
circulates the hot air which helps to achieve uniform
heat distribution.

Instruction Manual | 13
Using the grill
Important!
When using any grill function the oven door should be kept
closed. When the grill is in use accessible parts can become
hot, it is advisable to keep children away from the oven.
In order to switch on the grill you need to:
• Set the function selector knob to the desired grill setting
• Heat the oven for approximately 5 minutes with the oven door shut
• Insert a tray on to the appropriate cooking level; if you are grilling
food directly on the wire shelf, place a tray on the level immediately
below
• Close the oven door
When using the half grill or full grill functions the maximum
temperature that can be set is 250
°C. The maximum the fanned
grill can be set to is 190°C.

14 | Instruction Manual
ECO heating
ECO heating is an optimised heating function designed to save
energy when preparing food. You cannot reduce the cooking
time by setting a higher temperature; preheating the oven is not
recommended. Do not change the temperature setting and do not
open the oven door during cooking. The levels listed in the table
below can be found around the edge of the oven cavity when the
door is open
Type of dish Oven
function Temperature °C Level Time (min)
Sponge cake 180 - 200 2-3 50 -70
Muns 180 - 200 250 -70
Fish 190 - 210 2-3 45 - 60
Beef 200 - 220 290 - 120
Pork 200 - 220 290 - 160
Chicken 180 - 200 280 - 100

Instruction Manual | 15
Practical tips
The times given in the table below apply to a dish that is placed in to
a cold oven. For a preheated oven the times should be reduced by
5 - 10 minutes. The figures given below are approximate and can be
altered based on your own experience and cooking preferences. The
levels listed in the table below can be found around the edge of the
oven cavity when the door is open
Type of dish Heating Function Level Time [Min] Temperature [°C]
Sponge cake 2 - 3 30 - 50 160 - 200
Muns 3 25 - 40 160 - 170
Muns 3 25 - 40 155 - 170
Pizza 2 - 3 15 - 25 200 - 230
Fish 2 45 - 60 210 - 220
Fish 2 - 3 45 - 60 160 - 180
Fish 2 - 3 60 -70 190
Sausages 4 14 - 18 220
Beef 2 120 - 150 225 - 250
Beef 2 120 - 160 160 - 180
Pork 2 90 - 120 160 - 230
Pork 2 90 - 120 160 - 190
Chicken 2 70 - 90 180 - 190
Chicken 2 45 - 60 160 - 180
Chicken 2 60 - 70 175 - 190
Vegetables 2 40 - 50 190 - 210
Vegetables 3 40 - 50 170 - 190

16 | Instruction Manual
Pyrolytic cleaning
This function heats the oven to approximately 480°C which will burn
o or loosen any stubborn grease, stains or dirt inside the oven,
leaving behind an ash that simply has to be wiped up or swept from
the interior afterwards.
The cleaning process
• Remove all items from the oven (baking trays and side racks) as
these can be damaged during the process
• Close the oven door
• Set the function selector knob to the position
• Pyrolytic cleaning duration (
P2.00
) and the symbol will show on
the display. The door indicator light will come on
• Touch for approximately 3-4 seconds until the display shows
0:00
• Touch again, the display will flash
Pdur
• Touch the
/
sensors to select the duration. You can choose
2 hours, 2 and a half hours or 3 hours. Once you have made your
choice, wait for the beep which confirms the duration has been set
• The cleaning process will start and the oven will be locked
•
P0.00
will show on the display once cleaning is complete
• The door will remain locked until the oven chamber cools down to
160°C. Once the temperature is reached the door will be unlocked
and the door lock indicator light will go out
• When the door lock indicator light is o set the function selector
knob to
• When the door is unlocked and you turn o the oven, you can
remove ash from the oven chamber with a soft, damp cloth
• Replace the the side racks and other accesories and your oven is
ready to use

Instruction Manual | 17
Pyrolytic cleaning
Cancelling the process
Pyrolytic cleaning is an automatic process that should not be
interrupted. If you need to stop the process turn the function selector
knob to . Depending on the time you interrupt the process, the oven
may still be hot and must first cool down to °C before the door will
unlock.
Opening the door in an emergency
If the oven has suciently cooled down yet the door remains locked,
the door can be unlocked as follows:
• Set the function selector knob to
• Wait 4 minutes
• Set the function selector knob to and the oven door will unlock
after 10 minutes

18 | Instruction Manual
Keeping your oven clean and well maintained helps to prolong
it's fault-free lifespan. It is important that, before any cleaning or
maintenance is performed, you switch o the oven at the mains
supply. Do not start any cleaning or maintenance until the oven has
been allowed to cool completely.
We recommend always wearing PPE (Personal Protective
Equipment) when carrying out any cleaning or maintenance.
Cleaning the oven exterior
Stainless steel, aluminium and glass surfaces can all be cleaned using
a dilute solution of water and mild detergent. They must be cleaned
very carefully using a soft or microfibre cloth to avoid scratching and
abrasions. Any abrasive cleaner (including Cif) will scratch the surface
and could erase the control panel markings. Always dry thoroughly
with a soft dry cloth.
Cleaning and maintenance
Cleaning the oven interior
The oven should always be cleaned after use when it has been
allowed to cool down. The cavity should be cleaned using a mild
detergent solution and warm water and then wiped dry with a suitable
clean cloth.

Instruction Manual | 19
Cleaning and maintenance
IMPORTANT:
• Steam cleaners must not be used when cleaning this
appliance
•Once care and maintenance is complete, ensure that all parts
are correctly replaced before using the oven
Abrasive cleaning agents or scouring pads/cloths should not be used
on the cavity surface.
Removing the appliance door
In order to allow easier access into the oven cavity for cleaning, it is
possible to remove the door. Before removing the door, ensure that
you have an area prepared in which you can place the removed door.
This area should ideally be protected by something like a folded, dirt-
free, towel to help prevent damage to surfaces and the door.
• Open the door fully
• Lift and tilt the safety catch
part of the hinge (Fig. 1) so that
it is fully extended and points
towards the door
• Close the door most of the
way, lift it slightly and then pull
it, safely but firmly, towards you
Fig. 1

20 | Instruction Manual
Cleaning and maintenance
Replacing the appliance door
• Hold the door to the appliance in
the closed position and manoeuvre
the hinges so that the part of the
hinge, highlighted by the star in fig.
2, inserts into the hinge slot in the
cavity frame
• Next, ensure the notch on the
underside of the hinge sits on the
lip of the hinge slot. Open the door
fully. Each hinge should be seated
in the same way as the hinge in
fig. 3. If it is not, follow the steps for
removing the door and try replacing
it again
• Finally, lift the safety catch part of
the hinges back into place so that
they are lying flat against the hinges
Please note: If the hinge safety catches are not in the correct
place then the door and/or appliance may receive damage when
attempting to close the door.
Fig. 2
Fig. 3
Table of contents
Other CDA Oven manuals

CDA
CDA SK410 Installation and operating instructions

CDA
CDA RV 700 Series User manual

CDA
CDA SL570BL User guide

CDA
CDA 9Q6 Series Reference manual

CDA
CDA SC621 User manual

CDA
CDA DC741 Quick start guide

CDA
CDA SK210 Specification sheet

CDA
CDA SV 980 User manual

CDA
CDA SK420 Installation and operating instructions

CDA
CDA SVA 150 Series Reference manual