manuals.online logo
Brands
  1. Home
  2. •
  3. Brands
  4. •
  5. cecotec
  6. •
  7. Vacuum Cleaner
  8. •
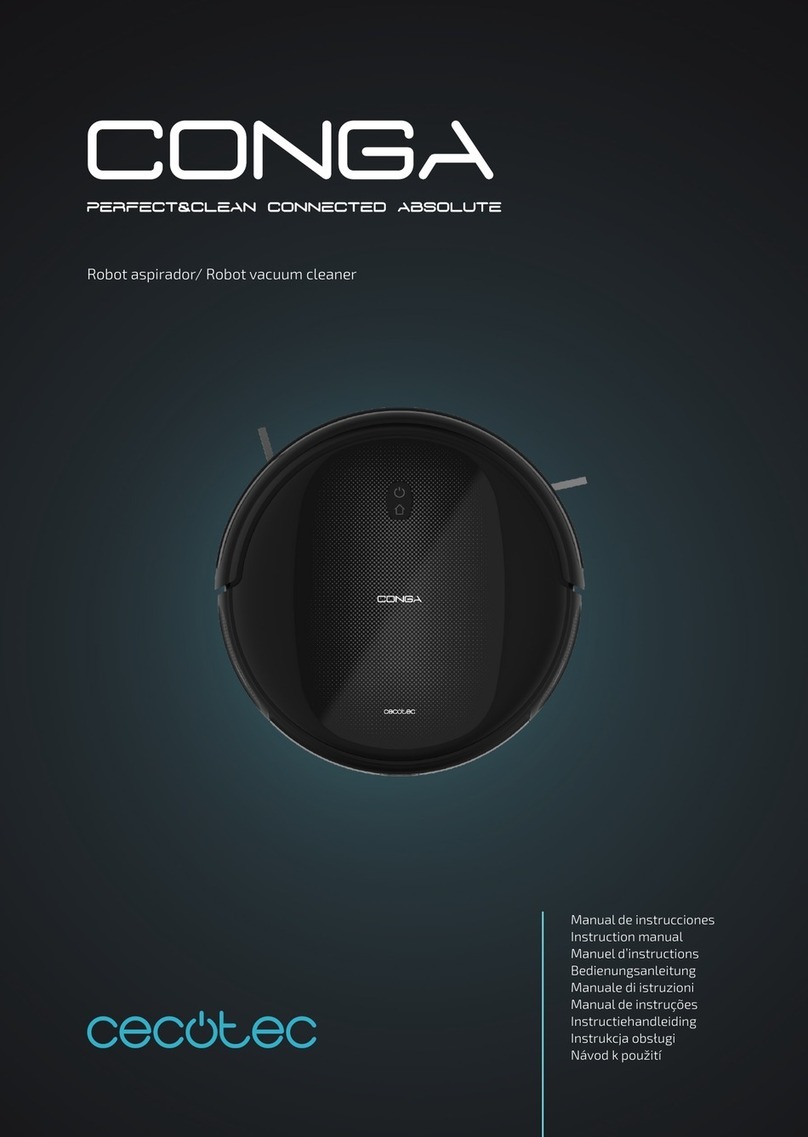
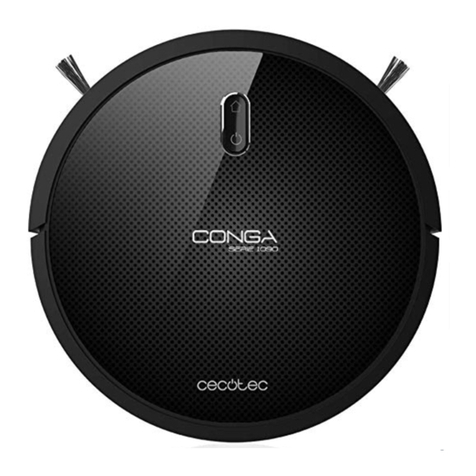
  9. cecotec Conga 7090 User manual

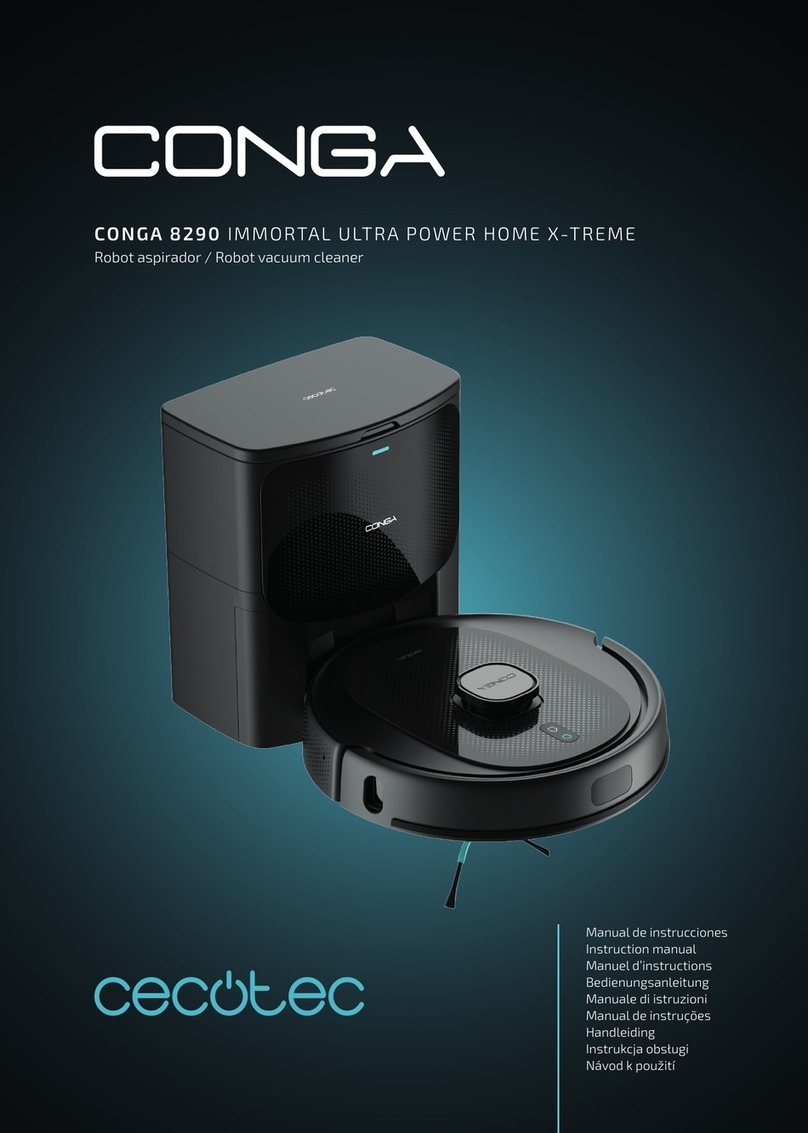
cecotec Conga 7090 User manual

myRobotcenter
The expert for robots in your home
With one click to the online shop
myRobotcenter.eu myRobotcenter.co.uk
Guía Rápida
Quick Start Guide
Guide rapide
Kurzanleitung
Guida rapida
Guia rápido
Snelle Gids
Szybki przewodnik
Rychlý průvodce
AI
7090
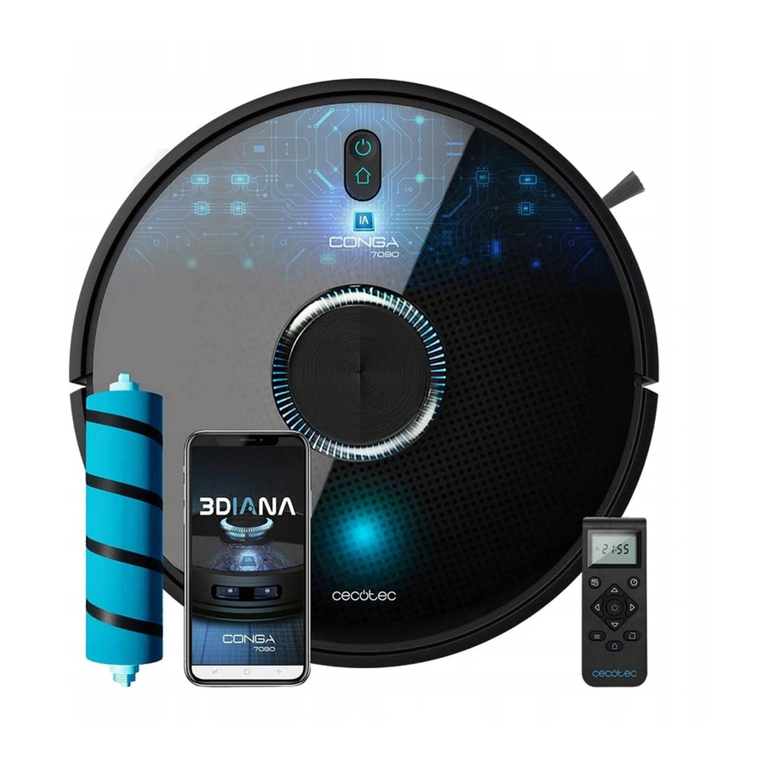
Conga 7090
http://soporte.cecotec.es/robots-aspiradores
ES
EN
FR
DE
IT
PT
NL
PL
CZ
No utilizar sobre una supercie encharcada
Do not use in water-logged in water-logged environment
Ne pas utiliser sur des surfaces inondées
Nicht auf nassen Oberächen benutzen
Non usare sulle superci bagnate
Não utilizar sobre superfícies encharcadas
Niet gebruiken op een ondergelopen oppervlak
Nie używaj na zalanych powierzchniach
Nepoužívat na podmáčeném povrchu
ES DESCARGA LA ÚLTIMA VERSIÓN DEL
MANUAL DE LAAPP EN NUESTRA WEB DE
SOPORTE
Consulta la web de Soporte Cecotec
para acceder a la última versión del
manual de la aplicación.
Descarga la App Conga 7090 desde App
Store o Play Store.
EN DOWNLOAD THE LATEST VERSION OF
THE APP MANUAL IN OUR SUPPORT WEBSITE
Check the latest version of the App
manual in our Cecotec Support website.
Download the Conga 7090 App from
App Store or Play Store.
FR TÉLÉCHARGEZ LA DERNIÈRE VERSION
DU MANUEL DE L’APPLICATION DEPUIS
NOTRE SITE D’ASSISTANCE TECHNIQUE
Veuillez visiter le site d’assistance
technique pour accéder à la dernière
version du manuel de l’application.
Téléchargez l’App Conga 7090 depuis
l’App Store ou Play Store.
DE LADEN SIE DIE NEUESTE VERSION DES
APP-LEITFADEN VON UNSERER SUPPORT-
WEBSITE HERUNTER
Konsultieren Sie die Support-Website
von Cecotec, um auf die neueste Version
der App-Leitfaden zu gelangen.
Laden Sie die App Conga 7090 aus dem
App Store oder Google Play runter.
IT SCARICARE L’ULTIMA VERSIONE DEL
MANUALE DELLA APP NEL NOSTRO SITO DI
SUPPORTO
Consultare il sito di Supporto Cecotec
per accedere all’ultima versione del
manuale della App.
Scaricare la App Conga 7090 dalla App
Store o Play Store.
PT DESCARREGUE A ÚLTIMA VERSÃO
DO MANUAL DA APP NO NOSSO SÍTIO DE
SUPORTE
Consulte o sítio web de Suporte Cecotec
para aceder à última versão do manual
da aplicação.
Descarregue a App Conga 7090 desde a
App Store ou Play Store.
NL DOWNLOAD DE LAATSTE VERSIE VAN
DE HANDLEIDING VAN DE APPLICATIE OP
ONZE ONDERSTEUNINGSWEBSITE
Bezoek onze ondersteuningswebsite
om de laatste versie van de handleiding
van de applicatie te downloaden.
Download de applicatie Conga 7090 in
Google Play of App Store.
PL POBIERZ NAJNOWSZĄ WERSJĘ
INSTRUKCJI APLIKACJI NA NASZEJ STRONIE
WSPARCIA
Sprawdź witrynę pomocy technicznej
Cecotec, aby uzyskać dostęp do
najnowszej wersji instrukcji aplikacji.
Pobierz aplikację Conga 7090 z App
Store lub Play Store.
CZ STÁHNĚTE POSLEDNÍ VERZI MANUÁLU
APLIKACE Z NAŠEHO WEBU PODPORY
Podívejte se na web Soporte Cecotec,
abyste stáhli nejnovější verzi manuálu
aplikace.
Stáhněte aplikaci Conga 7090 z App
Store nebo Play Store.
ES ÍNDICE
REGISTRO EN LA APP
RECUPERAR CONTRASEÑA
INICIAR SESIÓN
VINCULACIÓN
VINCULACIÓN AUTOMÁTICA (ANDROID)
VINCULACIÓN MANUAL (ANDROID & IOS)
BIENVENIDA
PRIMERA LIMPIEZA
GUARDAR MAPA
MAPAS
ROOM PLAN
PLANES
PANTALLA PRINCIPAL
AI
CONOCERTE MÁS
QUÉ PUEDO HACER POR TI
NOTIFICACIONES AI
ACTIVIDAD
NOVEDADES AI
AJUSTES
DIAGNOSTICO DEL ROBOT
CONSUMIBLES
EN INDEX
APP REGISTRATION
RECOVER PASSWORD
LOG IN
LINKING
AUTOMATIC LINKING (ANDROID)
MANUAL LINKING (ANDROID & iOS)
WELCOME
FIRST CLEANING
SAVE MAP
MAPS
ROOM PLAN
PLANS
MAIN SCREEN
AI
KNOW YOU BETTER
WHAT CAN I DO FOR YOU?
AI NOTIFICATIONS
ACTIVITY
AI NEWS
SETTINGS
ROBOT DIAGNOSIS
CONSUMABLE PARTS
FR SOMMAIRE
S’INSCRIRE SUR L’APP
RÉCUPÉRER LE MOT DE PASSE
SE CONNECTER
CONNECTER LE ROBOT
CONNEXION AUTOMATIQUE (ANDROID)
CONNEXION MANUELLE (ANDROID ET
iOS)
ACCUEIL
PREMIER NETTOYAGE
ENREGISTRER UNE CARTE
CARTES
ROOM PLAN
PLANS
ÉCRAN PRINCIPAL
IA
MIEUX VOUS CONNAÎTRE
QU’EST-CE QUE JE PEUX FAIRE POUR
VOUS ?
NOTIFICATIONS AI
ACTIVITÉ
NOUVEAUTÉS AI
RÉGLAGES
DIAGNOSTIQUE DU ROBOT
PIÈCES DE RECHANGE
DE INHALT
APP-REGISTRIERUNG
PASSWORT WIEDERHERSTELLEN
ANMELDEN
VERBINDUNG
AUTOMATISCHE VERBINDUNG (ANDROID)
MANUELLE VERBINDUNG (ANDROID &
IOS)
WILKOMMEN
ERSTE REINIGUNG
KARTE SPEICHERN
KARTEN
ROOM PLAN
PLÄNE
HAUBTBILDSCHIRM
AI
BESSER KENNENLERNEN
WAS KANN ICH FÜR SIE TUHEN
BENACHRICHTIGUNGEN AI
AKTIVITÄT
NEUIGKEITEN AI
EINSTELLUNGEN
ROBOTERDIAGNOSE
ERSATZTEILE
IT INDICE
REGISTRAZIONE ALLA APP
RECUPERARE LA PASSWORD
INIZIARE SESSIONE
CONNESSIONE
CONNESSIONE AUTOMATICA (ANDROID)
CONNESSIONE MANUALE (ANDROID &
iOS)
BENVENUTO
PRIMA PULIZIA
SALVARE LA MAPPA
MAPPE
ROOM PLAN
PIANI
DISPLAY PRINCIPALE
AI
CONOSCERTI MEGLIO
COSA POSSO FARE PER TE
NOTIFICHE AI
ATTIVITÀ
NOVITÀ AI
IMPOSTAZIONI
DIAGNOSTICA DEL ROBOT
RICAMBI
PT ÍNDICE
REGISTAR-SE NA APP
RECUPERAR SENHA
INICIAR SESSÃO
LIGAÇÃO
LIGAÇÃO AUTOMÁTICA (ANDROID)
LIGAÇÃO MANUAL (ANDROID & iOS)
BEM-VINDO
PRIMEIRA LIMPEZA
GUARDAR MAPA
MAPAS
ROOM PLAN
PLANOS
ECRÃ PRINCIPAL
AI
SOBRE SI
O QUE POSSO FAZER POR SI
NOTIFICAÇÕES AI
ATIVIDADE
NOVIDADES AI
AJUSTES
DIAGNÓSTICO DO ROBOT
CONSUMÍVEIS
NL INHOUD
REGISTREREN IN DE APPLICATIE
WACHTWOORD HERSTELLEN
SESSIE STARTEN
KOPPELEN
AUTOMATISCHE KOPPELING (ANDROID)
HANDMATIGE KOPPELING (ANDROID &
IOS)
WELKOM
EERSTE SCHOONMAAK
PLATTEGROND OPSLAAN
PLATTEGRONDEN
ROOM PLAN
PLANNEN
BEGINSCHERM
AI
U BETER LEREN KENNEN
WAT KAN IK VOOR U DOEN
NOTIFICATIES AI
ACTIVITEIT
AI NIEUWS
INSTELLINGEN
ROBOTDIAGNOSE
VERBRUIKSARTIKELEN
PL SPIS TREŚCI
REJESTRACJA W APLIKACJI
ZALOGUJ SIĘ
WINKULACJA
ŁĄCZENIE AUTOMATYCZNE (ANDROID)
ŁĄCZENIE AUTOMATYCZNE (ANDROID &
IOS)
WITAMY
PIERWSZE SPRZĄTANIE
ZAPISZ MAPĘ
MAPY
ROOM PLAN
PLANY
EKRAN GŁÓWNY
AI
POZNAĆ CIĘ LEPIEJ
CO MOGĘ DLA CIEBIE ZROBIĆ
POWIADOMIENIA AI
AKTYWNOŚĆ
NOWOŚCI AI
USTAWIENIA
DIAGNOZA ROBOTA
MATERIAŁY EKSPLOATACYJNE
CZ OBSAH
ZAREGISTROVÁNÍ V APLIKACI
ZAPOMENUTÉ HESLO
PŘIHLÁŠENÍ
SPÁROVÁNÍ
AUTOMATICKÉ SPRÁROVÁNÍ (ANDORID)
MANUÁLNÍ SPÁROVÁNÍ (ANDROID A iOS)
VÍTEJTE
PRVNÍ ÚKLID
ULOŽIT MAPU
MAPA
ROOM PLAN
PLÁNY
ZÁKLADNÍ OBRAZOVKA
AI
VÍCE VÁS POZNAT
CO PRO VÁS MOHU UDĚLAT
OZNÁMENÍ AI
AKTIVITA
NOVINKY AI
NASTAVENÍ
DIAGNOSTIKA ROBOTA
SPOTŘEBNÍ ČÁSTI
06
08
10
12
16
18
22
24
26
32
34
38
40
46
48
50
52
54
56
68
60
62
06
08
10
12
16
18
22
24
26
32
34
38
40
46
48
50
52
54
56
68
60
62
06
08
10
12
16
18
22
24
26
32
34
38
40
46
48
50
52
54
56
68
60
62
06
08
10
12
16
18
22
24
26
32
34
38
40
46
48
50
52
54
56
68
60
62
06
08
10
12
16
18
22
24
26
32
34
38
40
46
48
06
08
10
12
16
18
22
24
26
32
34
38
40
46
48
50
52
54
56
68
60
62
06
08
10
12
16
06
08
10
12
16
18
22
24
26
32
34
38
40
46
48
50
52
54
56
68
60
62
06
08
10
12
16
18
22
24
26
18
22
24
26
32
34
38
40
46
48
50
52
54
56
68
60
62
50
52
54
56
68
60
62
32
34
38
40
46
48
50
52
54
56
68
60
62
67090 7090
ES REGISTRO EN LA APP
Regístrate en la App pulsando sobre
“Registrar”. En la siguiente pantalla,
introduce un correo electrónico y una
contraseña.
Luego, introduce el código de
vericación que se te ha enviado al
correo registrado.
EN APP REGISTRATION
Tap “Register” to sign up. Enter an
e-mail address and a password.
Then, enter the verication code that
has been sent to the registered e-mail.
FR S’INSCRIRE SUR L’APP
Inscrivez-vous sur l’App en appuyant
sur « S’inscrire ». Ensuite, introduisez un
e-mail et un mot de passe.
Puis introduisez le code de vérication
que nous avons envoyé à l’e-mail
enregistré.
DE APP-REGISTRIERUNG
Registrieren Sie sich in der App, indem
Sie auf “Registrieren” Drücken Geben
Sie auf dem nächsten Bildschirm eine
E-Mail und ein Passwort ein.
Danach, geben Sie dann den
Verizierungscode ein, der an Ihre
registrierte E-Mail gesendet wurde.
IT REGISTRAZIONE ALLA APP
Registrati alla App premendo su
“Registrati”. Sul seguente display,
introduci e-mail e password.
Inserisci il codice di verica che è stato
inviato all’ indirizzo e-mail registrato.
PT REGISTAR-SE NA APP
Registe-se na App pressionando sobre
“Registar”. No seguinte ecrã, introduza
um e-mail e uma senha.
A seguir, introduza o código de
vericação que foi enviado ao seu
e-mail.
NL REGISTREREN IN DE APPLICATIE
Druk op “Registreren” om u te
registreren in de applicatie. Voer in het
volgende scherm uw e-mailadres in en
een wachtwoord.
Voer daarna de bevestigingscode in die
u per e-mail hebt ontvangen.
PL REJESTRACJA W APLIKACJI
Zarejestruj się w aplikacji, klikając
„Zarejestruj się”. Na następnym ekranie
wprowadź adres e-mail i hasło.
Następnie wprowadź kod
werykacyjny, który został wysłany na
zarejestrowany e-mail.
CZ ZAREGISTROVÁNÍ V APLIKACI
Registrujte se v aplikaci stisknutím
“Registrovat”. Na další obrazovce vložte
vaši emailovou adresu a heslo.
Potom vložte kontrolní kód, který vám
byl zaslán na registrovaný email.
7
87090 7090 9
ES RECUPERAR LA CONTRASEÑA
Si has olvidado la contraseña, pulsa
sobre “¿Olvidaste la contraseña?”,
introduce tu correo para recibir un
código de vericación y cambia la
contraseña.
EN RECOVER PASSWORD
If you have forgotten the password, tap
“Forgot password?”, enter your e-mail to
receive a verication code and change
the password.
FR RÉCUPÉRER LE MOT DE PASSE
Si vous avez oublié le mot de passe,
appuyez sur « Mot de passe oublié ?
» et écrivez votre e-mail pour pouvoir
recevoir un code de vérication, puis
changez le mot de passe.
DE PASSWORT WIEDERHERSTELLEN
Wenn Sie Ihr Passwort vergessen
haben, drücken Sie auf “Passwort
vergessen”, geben Sie Ihre
E-Mail-Adresse ein, um einen
Verizierungscode für die
Passwortänderung zu erhalten.
IT RECUPERARE LA PASSWORD
Se hai dimenticato la password, premi
su “Hai dimenticato la password?”,
introduci la tua e-mail per ricevere un
codice di verica e cambia la password.
PT RECUPERAR SENHA
Se esqueceu a senha, pressione sobre
“Esqueceu a sua senha?”, introduza o
seu e-mail para receber um código de
vericação e mude a senha.
NL WACHTWOORD HERSTELLEN
Als u uw wachtwoord vergeten bent
klikt u op “Wachtwoord vergeten?”, voer
uw e-mailadres in en u zal een nieuwe
bevestigingscode ontvangen om uw
wachtwoord opnieuw in te stellen.
PL ODZYSKIWANIE HASŁA
Jeśli zapomniałeś hasła, kliknij „Nie
pamiętasz hasła?”, Wpisz swój adres
e-mail, aby otrzymać kod werykacyjny
i zmienić hasło.
CZ ZAPOMENUTÉ HESLO
Pokud jste zapomněli heslo, klikněte
na “Zapomněli jste heslo?”, zadejte vaši
emailovou adresu, abyste mohli obdržet
ověřovací kód a heslo změnit.
10 7090 7090 11
ES INICIO DE SESIÓN
Para inciar sesión, introduce el correo y
la contraseña registrada.
EN LOGIN
To log in, enter the e-mail address and
password used for the registration.
FR SE CONNECTER
Pour se connecter, introduisez l’e-mail
et le mot de passe enregistré.
DE ANMELDEN
Um sich einloggen, geben Sie Ihre
registrierte E-Mail und Ihr Passwort ein.
IT INIZIARE SESSIONE
Per iniziare sessione, introdurre e-mail e
password registrate.
PT INICIO DE SESSÃO
Para iniciar sessão, introduza o e-mail e
a senha registada.
NL INLOGGEN
Om in te loggen, voer uw e-mailadres en
wachtwoord in.
PL ROZPOCZĘCIE SESJI
Aby się zalogować, wprowadź
zarejestrowany adres e-mail i hasło.
CZ PŘIHLÁŠENÍ
Pro přihlášení zadejte email a
registrované heslo.
12 7090 7090 13
ES VINCULACIÓN
Antes de iniciar el proceso de vinculación,
activa el WiFi del dispositivo móvil, desactiva
los datos móviles y activa la ubicación.
Enciende el robot pulsando el botón de
encendido durante 5 segundos y espera
a que la luz azul deje de parpadear y el
conga emita dos pitidos. Tras seguir todas
las recomendaciones, mantén pulsados
los botones vuelta a casa y ON durante 3
segundos hasta que parpadee.
EN LINKING
Before starting the linking process, enable the
device’s Wi-Fi, disable your mobile data and
activate the location.
Turn the robot on by holding down the
power button for 5 seconds, and wait
until the blue light stops blinking and your
Conga beeps twice. After following all the
recommendations, hold down the Back home
and ON buttons for 3 seconds until it blinks.
FR CONNECTER LE ROBOT
Avant de connecter le robot, activez les
réseaux Wi-Fi de votre smartphone, puis
désactivez les données mobiles et activez la
localisation.
Allumez le robot en appuyant sur le bouton de
connexion pendant 5 secondes et attendez à
ce que la lumière bleue arrête de clignoter et
Conga émette deux bips. Après avoir suivi ces
recommandations, maintenez appuyés les
boutons « Retour à la base » et ON pendant 3
secondes jusqu’à ce qu’il clignote.
DE VERBINDUNG
Bevor Sie mit dem Verbindungsprozess
beginnen, aktivieren Sie das WiFi auf ihrem
Handy, deaktivieren Sie die mobilen Daten und
aktivieren Sie den Standort.
Schalten Sie den Roboter an, indem Sie den
Einschaltknopf 5 Sekunden lang drücken und
warten Sie, bis das blaue Licht aufhört zu
blinken und der Conga zwei Pieptöne abgibt.
Drücken und halten Sie die Tasten „Back-
Home“ und „ON“ 3 Sekunden lang, bis das
Licht blinkt.
IT CONNESSIONE
Prima di iniziare il processo di connessione,
eliminare tutte le reti Wi-Fi memorizzate
sul proprio dispositivo mobile, disattivare la
connessione dati e attivare la posizione.
Accendere il robot e premere il tasto di
accensione per 5 secondi e attendere
che la luce blu smetta di lampeggiare e il
Conga emetta due bip. Dopo aver seguito i
suggerimenti forniti, mantenere premuti i
tasti di ritorno alla base e ON per 3 secondi
no a che inizi a lampeggiare.
PT LIGAÇÃO
Antes de iniciar o processo de ligação, elimine
as redes Wi-Fi guardadas no seu dispositivo
móvel, desative os dados móveis e ative a
localização.
Ligue o robot premindo o botão de energia
durante 5 segundos e espere até a luz azul
parar de piscar e a Conga emitir dois bipes.
Depois de seguir todas as recomendações,
mantenha pressionados os botões regresso
à base e ON, durante 3 segundos até que
pisque.
NL KOPPELEN
Voordat u het koppelingsproces start, activeer
het Wi-Fi-netwerk op de mobiele telefoon,
schakel de mobiele data uit en activeer de
locatie.
Zet de robot aan door de aanknop 5 seconden
in te drukken en wacht tot het blauwe
lampje stopt met knipperen en de conga
twee piepjes geeft. Na het volgen van alle
aanbevelingen houd u de knoppen Back home
en ON gedurende 3 seconden ingedrukt tot ze
knipperen.
PL WINKULACJA
Przed rozpoczęciem procesu parowania
włącz Wi-Fi w urządzeniu mobilnym, wyłącz
komórkową transmisję danych i włącz
lokalizację.
Włącz robota, naciskając przycisk zasilania
przez 5 sekund i poczekaj, aż niebieskie
światło przestanie migać, a kontroler wyda
dwa sygnały dźwiękowe. Po wykonaniu
wszystkich zaleceń naciśnij i przytrzymaj
przyciski powrotu do domu i WŁ. Przez 3
sekundy, aż zacznie migać.
CZ SPÁROVÁNÍ
Před zahájením procesu spárování zapněte
WiFi vašeho mobilního zařízení, vypněte
mobilní data a zapněte určování polohy.
Zapněte robota stisknutím vypínače na 5
sekund a počkejte, až modré světlo přestane
blikat a conga dvakrát pípne. Poté, co jste
následovali doporučení, držte stisknutá
tlačítka návratu na základnu a ON po dobu 3
vteřin, až začne blikat.
14 7090 7090 15
ES
Seguidamente, selecciona la red Wi-Fi
a la que deseas conectar el robot e
introduce la contraseña.
*Este modelo es compatible con las
redes 2,4 GHz y 5 GHz
EN
Then, select the Wi-Fi network you want
the robot to connect to and enter the
password.
*This Conga is compatible with 2.4 GHz
and 5 GHz networks.
FR
Ensuite, sélectionnez le réseau Wi-Fi
auquel vous souhaitez connecter le
robot et introduisez le mot de passe.
*Ce robot est compatible avec les
réseaux 2,4 GHz et 5 GHz.
DE
Danach, Wählen Sie das Wi-Fi-
Netzwerk, mit dem Sie den Roboter
verbinden möchten, und geben Sie das
Passwort ein.
*Dieses Modell ist mit 2,4 GHz y 5 GHz
kompatibel.
IT
Successivamente, selezionare la
rete Wi-Fi a cui connettere il robot e
introdurre la password.
*Questo modello è compatibile con reti
da 2,4 GHz e 5 GHz.
PT
Depois selecione a rede Wi-Fi a que
pretende ligar o robot e introduza a
senha.
*Este robot é compatível apenas com
redes de 2,4 GHz e 5 GHz
NL
Vervolgens, kies het Wi netwerk
waarmee u de robot wil verbinden en
voer het wachtwoord in.
*Dit model is compatibel met 2,4 GHz
en 5 GHz netwerken
PL
Następnie wybierz sieć Wi-Fi, do której
chcesz podłączyć robota i wprowadź
hasło.
*Este modelo es compatible con las
redes 2,4 GHz y 5 GHz
CZ
Potom zvolte síť Wi-Fi, ke které chcete
robota připojit a zadejte heslo.
*Tento robot je kompatibilní jen se
sítěmi 2,4 GHz a 5 GHz
16 7090 7090 17
ES VINCULACIÓN AUTOMÁTICA (ANDROID)
El proceso de vinculación del robot
comenzará automáticamente.
Una vez vinculado, podrás nombrar al
robot.
EN AUTOMATIC LINKING (ANDROID)
The robot linking process will start
automatically.
Once it is linked, name the robot.
FR CONNEXION AUTOMATIQUE (ANDROID)
Le processus de connexion du robot
commencera automatiquement.
Une fois connecté, vous pouvez nommer
votre robot.
DE AUTOMATISCHE VERBINDUNG
(ANDROID)
Die Verbindung mit dem Roboter wird
automatisch gestartet.
Sobald die Verbindung hergestellt ist,
können Sie dem Roboter einen Namen
geben.
IT CONNESSIONE AUTOMATICA
(ANDROID)
Il processo di connessione del robot
comincerà automaticamente.
Una volta connesso, potrai assegnare
un nome al robot.
PT LIGAÇÃO AUTOMÁTICA (ANDROID)
O processo de ligação do robot
começará automaticamente.
Uma vez ligado, poderá dar o nome ao
robot.
NL AUTOMATISCHE KOPPELING (ANDROID)
Het verbindingsproces van de robot zal
automatisch starten.
Eenmaal gekoppeld, kan u de robot een
naam geven
PL ŁĄCZENIE AUTOMATYCZNE (ANDROID)
Proces parowania robota rozpocznie się
automatycznie.
Po połączeniu możesz nazwać robota.
CZ AUTOMATICKÉ SPRÁROVÁNÍ (ANDROID)
Proces připojení robota začne
automaticky.
Po spárováná můžete robota
pojmenovat.
18 7090 7090 19
ANDROID IOS
ES VINCULACIÓN MANUAL (ANDROID &
IOS)
En sistemas operativos Android solo
se podrá utlizar la vinculación manual
cuando falle la vinculación automática.
En sistemas operativos iOS solamente
se podrá utilizar la vinculación manual
para vincular el robot.
EN MANUAL LINKING (ANDROID & IOS)
When using devices with Android
operating systems, the manual linking
process is only available when the
automatic linking fails.
When using devices with iOS operating
systems, the robot can only be linked
manually.
FR CONNEXION MANUELLE (ANDROID ET
IOS)
Avec les systèmes d’exploitation
Android, la connexion manuelle pourra
s’utiliser seulement si la connexion
automatique défaille.
Avec les systèmes d’exploitation iOS la
connexion manuelle pourra être utilisée
seulement pour connecter le robot.
DE MANUELLE VERBINDUNG (ANDROID &
IOS)
In Android können Sie die manuelle
Verbindung nur verwenden, wenn die
automatische Verbindung einen Fehler
anzeigt.
In iOS kann nur die manuelle
Verbindung des Roboters verwendet
werden.
IT CONNESSIONE MANUALE (ANDROID &
IOS)
In sistemi operativi Android è possibile
utilizzare la connessione manuale
in caso di errore di collegamento
automatico.
In sistemi operativi iOS è possibile
utilizzare solamente il collegamento
manuale per collegare il robot.
PT LIGAÇÃO MANUAL (ANDROID & IOS)
Em sistemas operativos Android só será
possível efetuar a ligação manual caso
falhe a ligação automática.
Em sistemas operativos iOS só será
possível efetuar a ligação manual para
conectar o robot.
NL HANDMATIGE KOPPELING (ANDROID
EN IOS)
Op Android-besturingssystemen kunt u
alleen gebruik maken van handmatige
koppeling wanneer automatische
koppeling mislukt.
In iOS-besturingssystemen kan u de
verbinding enkel handmatig instellen.
PL RĘCZNE ŁĄCZENIE (ANDROID I IOS)
W systemach operacyjnych Android
z ręcznego łączenia można korzystać
tylko w przypadku niepowodzenia
automatycznego łączenia.
W systemach operacyjnych iOS do
połączenia robota można użyć tylko
ręcznego łączenia.
CZ MANUÁLNÍ SPÁROVÁNÍ (ANDROID A
IOS)
Na přístrojích, které fungují s Android,
je možné pouze manuální spárování
v případě, pokud selže automatické
spárování.
Na přístrojích, které fungují s iOS je
možné pouze manuální spárování s
robotem.
20 7090 7090 21
ES
Para conectar el robot manualmente debes
seguir los siguientes pasos para ambos
sistemas operativos:
- Accede a los ajustes Wi-Fi de tu dispositivo
móvil y selecciona la red Wi-Fi “CongaLaser_
XXXXX”.
- Luego, vuelve a la aplicación y la vinculación
del robot comenzará automáticamente.
Una vez vinculado, podrás nombrar al robot.
EN
To connect the robot manually, follow the
below steps when using either operating
system:
- Go to your device’s Wi-Fi settings and select
“CongaLaser_XXXXX” network.
- Then, return to the App and the robot linking
process will start automatically.
Once it is linked, name the robot.
FR
An de connecter le robot manuellement,
vous devez suivre les étapes suivantes avec
les deux systèmes d’exploitation :
- Accédez aux réglages du Wi-Fi depuis votre
dispositif mobile et sélectionnez le réseau
Wi-Fi “CongaLaser_XXXXX”.
- Ensuite, retournez à l’application pour
que la connexion automatique démarre
automatiquement.
Une fois connecté, vous pouvez nommer votre
robot.
DE
Um den Roboter manuell verbinden,
führen Sie die folgenden Schritte für beide
Betriebssysteme aus:
- Gehen Sie auf die Wi-Fi-Einstellungen Ihres
Handys und wählen Sie das Wi-Fi-Netzwerk
“CongaLaser_XXXXX” aus.
- Danach kehren Sie zur APP zurück und
die Verbindung mit dem Roboter startet
automatisch.
Sobald die Verbindung hergestellt ist, können
Sie dem Roboter einen Namen geben.
IT
Per connettere il robot manualmente è
necessario seguire i seguenti passaggi per
entrambi i sistemi operativi:
- Accedi alle impostazioni del Wi-Fi del
tuo Smartphone e seleziona la rete Wi-Fi
“CongaLaser_XXXXX”.
- Torna alla App, la connessione del robot
inizierà automaticamente.
Una volta connesso, potrai assegnare un
nome al robot.
PT
Para ligar o robot manualmente, siga estes
passos para ambos os sistemas operativos:
- Acede aos ajustes Wi-Fi do seu dispositivo
móvel e selecione a rede Wi-Fi “CongaLaser_
XXXXX”.
- Depois disto, regresse à aplicação e a
ligação do robot começará automaticamente.
Uma vez ligado, poderá dar o nome ao robot.
NL
Om de robot handmatig aan te sluiten, volgt u
deze stappen voor beide besturingssystemen:
- Open de wi-instellingen van uw
smartphone en kies het winetwerk
“CongaLaser_XXXXX”.
- Hierna keert u terug naar de applicatie en
de koppeling van de robot wordt automatisch
gestart.
Eenmaal gekoppeld, kan u de robot een naam
geven.
PL
Aby podłączyć robota ręcznie, należy
wykonać następujące kroki dla obu systemów
operacyjnych:
- Uzyskaj dostęp do ustawień Wi-Fi swojego
urządzenia mobilnego i wybierz sieć Wi-Fi
„CongaLaser_XXXXX”.
- Następnie wróć do aplikacji, a parowanie
robota rozpocznie się automatycznie.
Po połączeniu możesz nazwać robota.
CZ
Pro manuální připojení robota s přístrojem s
jakýmkoli operačním systémem následujte
tyto kroky:
- Vstupte do nastavení Wi-Fi vašeho
mobilního přístroje a zvolte síť Wi-Fi
“CongaLaser_XXXXX”
- Poté přejděte zpět do aplikace a spárování
robotů se automaticky spustí.
Po spárováná můžete robota pojmenovat.
22 7090 7090 23
ES BIENVENIDA
Tras realizar el proceso de vinculación,
nuestro asistente 3Diana te rebicirá
para poder conocerte un poco más.
EN WELCOME
Once the robot is linked, our assistant
3Diana will welcome you in order to
know you better.
FR ACCUEIL
Après le processus de connexion, notre
assistant virtuel 3Diana vous accueillera
et essayera de mieux vous connaître.
DE WILKOMMEN
Nach der Verbindung wird Sie unsere
3Diana-Assistentin willkommen
heissen, um Sie ein wenig besser
kennen zu lernen.
IT BENVENUTO
Dopo aver eettuato il processo di
connessione, il nostro assistente 3Diana
sarà lieto di conoscerti meglio.
PT BEM-VINDO
Após o processo de ligação, o nosso
assistente 3Diana tentará familiarizar-
se melhor consigo.
NL WELKOM
Na het koppelingsproces zal onze
3Diana assistent u welkom heten om u
wat beter te leren kennen.
PL WITAMY
Po zakończeniu procesu łączenia, nasz
asystent 3Diana poprosi Cię o spotkanie.
CZ VÍTEJTE
Po dokončení procesu propojení vás
náš asistent 3Diana požádá, abyste se s
námi trochu seznámili.
7090 7090 2524
ES PRIMERA LIMPIEAZA
El robot explorará y limpiará tu
casa para poder crear el mapa
correctamente, mientras tanto, debes
introducir el nombre de tu casa y el
nombre que le deseas dar al mapa.
Además, podrás ver qué objetos está
detectando el robot en cada momento.
EN FIRST CLEANING
The robot will start exploring and
cleaning your house as it creates the
map, and in the meanwhile, you can
name the house and the map.
You will also see which objects the
robot detects at every moment.
FR PREMIER NETTOYAGE
Le robot explorera et nettoiera
votre maison an de créer la carte.
Cependant, vous devez nommer votre
maison et la carte que le robot vient de
créer.
De plus, vous pouvez voir les objets que
le robot détecte à chaque moment.
DE ERSTE REINIGUNG
Der Roboter wird Ihr Haus erkunden
und säubern, um die Karte korrekt zu
erstellen. In der Zwischenzeit müssen
Sie den Namen Ihres Hauses und
den Namen, den Sie der Karte geben
möchten, eingeben.
Außerdem können Sie sehen, welche
Gegenstände der Roboter zu jeder Zeit
erkennt.
IT PRIMA PULIZIA
Il robot esplorerà e pulirà la tua casa
per creare correttamente la mappa,
nel frattempo devi introdurre il nome
di casa tua e il nome da assegnare alla
mappa.
Inoltre, potrai visualizzare quali oggetti
sta rilevando il robot in ogni momento.
PT PRIMEIRA LIMPEZA
O robot irá explorar e limpar a sua
casa para criar o mapa corretamente.
Entretanto, deve introduzir o nome da
sua casa e o nome que deseja dar ao
mapa.
Além disso, é possível ver que objetos o
robot está a detetar em qualquer altura.
NL EERSTE SCHOONMAAK
De robot zal uw huis verkennen en
schoonmaken om de plattegrond
correct te maken. In de tussentijd moet
u de naam van uw huis en de naam die u
aan de plattegrond wilt geven, invoeren.
Bovendien kunt u zien welke
voorwerpen de robot op een bepaald
moment detecteert.
PL PIERWSZE SPRZĄTANIE
Robot będzie badał i sprzątał Twój
dom, aby poprawnie stworzyć mapę,
tymczasem musisz wpisać nazwę
swojego domu i nazwę, którą chcesz
nadać mapie.
Ponadto przez cały czas będziesz mógł
zobaczyć, jakie obiekty wykrywa robot.
CZ PRVNÍ ÚKLID
Robot prozkoumá a vyčistí váš dům, aby
vytvořil mapu správně. Mezitím musíte
zadat název vašeho domu a jméno,
které chcete mapě dát.
Kromě toho budete moci vždy vidět,
jaké objekty robot detekuje.
7090 7090
7090 7090 2726
ES GUARDAR MAPA
El primer paso para guardar un mapa
nuevo es rotar el mapa para dejarlo en
la posición deseada. Puede rotarlo de
90 en 90 grados.
EN SAVE MAP
The rst step to save the map is to
rotate it and leave it in the desired
position. It can be rotated from 90 to 90
degrees.
FR ENREGISTRER UNE CARTE
La première étape à suivre pour
enregistrer une nouvelle carte est de
faire pivoter la carte jusqu’à la position
souhaitée. Vous pouvez la faire pivoter
de 90 à 90 degrés.
DE KARTE SPEICHERN
Der erste Schritt wenn Sie eine neuen
Karte Speichern, besteht darin, die Karte
an die gewünschte Position zu drehen.
Sie können ihn von 90 bis 90 Grad
drehen.
IT SALVARE LA MAPPA
Il primo passaggio per salvare una
mappa nuova è ruotare la mappa
no alla posizione desiderata. Puoi
eettuare la rotazione di 90 in 90 gradi.
PT GUARDAR MAPA
O primeiro passo para salvar um novo
mapa é rodar o mapa para a posição
desejada. Pode rodá-lo 90 em 90 graus.
NL PLATTEGROND OPSLAAN
De eerste stap bij het opslaan van
een nieuwe plattegrond is het draaien
van de plattegrond naar de gewenste
positie. U kunt hem van 90 tot 90
graden draaien.
PL ZAPISZ MAPĘ
Pierwszym krokiem do zapisania nowej
mapy jest obrócenie mapy do żądanej
pozycji. Możesz go obracać od 90 do 90
stopni.
CZ ULOŽIT MAPU
Prvním krokem při ukládání nové mapy
je otočení mapy do požadované polohy.
Můžete ji otáčet po 90 stupních.
7090 7090
7090 7090 2928
ES
El siguiente paso es ver si las habitaciones
detectadas son las deseadas, si no, puedes
realizar estas dos acciones:
- Para combinar habitaciones, selecciona
las habitaciones que deseas juntar y pulsa
sobre aplicar. Estas habitaciones deben de ser
contiguas.
- Para añadir nuevas divisiones, selecciona
el área que deseas dividir, traza la línea por
donde quieres dividir la habitación y pulsa
sobre aplicar.
Una vez que hayas editado el mapa a tu gusto,
pulsa sobre “Finalizar”.
EN
The next step is to check if the rooms
detected are the correct ones, and if not, you
may:
- Join rooms by selecting the rooms to be
joined and tapping “apply”. These rooms must
be next to each other.
- Add new divisions by selecting the are you
want to divide. Draw a line on the map where
you want to divide the room and tap “apply”.
Once the map has been edited as desired, tap
“Finish”.
FR
L’étape suivante consiste à vérier si les
pièces détectées sont celles que vous
souhaitiez. Si ce n’est pas le cas, vous pouvez
réaliser ces deux actions :
- Si vous souhaitez combiner les pièces,
sélectionnez celles que vous voulez combiner
et appuyez sur « Appliquer ». Ces pièces
doivent être à côté l’une de l’autre.
- Si vous souhaitez diviser des zones,
sélectionnez la zone à diviser, tracez une ligne
de démarcation et appuyez sur « Appliquer ».
Après avoir édité votre carte, appuyez sur «
Terminer ».
DE
Der nächste Schritt besteht darin, zu prüfen,
ob die erkannten Räume die gewünschten
sind. Wenn dies nicht der Fall ist, können Sie
diese beiden Aktionen durchführen:
- Für Räume zu kombinieren, wählen Sie die
Räume aus, die Sie anschließen möchten,
und klicken Sie auf „Anwenden“ Diese Räume
müssen nebeneinander sein.
- Um neue Abteilungen hinzuzufügen,
wählen Sie den Bereich, den Sie teilen
möchten, ziehen Sie die Linie, an der Sie den
Raum teilen möchten, und klicken Sie auf
“Anwenden”.
Nachdem Sie die Karte nach Ihren Wünschen
bearbeitet haben, klicken Sie auf “Fertig”.
IT
Il seguente passaggio è vedere se le stanze
rilevate sono quelle desiderate, se no puoi
eettuare queste due azioni:
- Per combinare stanze, seleziona le stanze
da unire e premi su applicare. Queste stanze
devono essere adiacenti.
- Se desideri aggiungere nuove divisioni,
selezionare l’area, traccia la linea di
separazione della stanza e premi su
applicare.
Una volta modicata la mappa, premi su
“Terminare”.
PT
O passo seguinte é ver se as salas detetadas
são as desejadas, se não, pode realizar estas
duas ações:
- Para combinar divisões, selecione as
divisões que pretende juntar e clique em
aplicar. Estas divisões devem ser contíguas.
- Para adicionar novas divisões, selecione
a área que pretende dividir, desenhe a linha
onde pretende dividir a divisão e clique em
aplicar.
Depois de ter editado o mapa ao seu gosto,
clique em “Finalizar”.
NL
De volgende stap is om te controleren of de
gedetecteerde kamers de gewenste zijn, zo
niet, dan kunt u deze twee acties uitvoeren:
- Als u kamers wilt samenvoegen, selecteert
u de kamers die u wilt samenvoegen en
klikt u op toepassen. Deze kamers moeten
aangrenzend zijn.
- Als u nieuwe divisies wilt toevoegen,
selecteert u het gebied dat u wilt verdelen,
trekt u de lijn waar u de kamer wilt verdelen
en klikt u op toepassen.
Nadat u de plattegrond naar wens hebt
bewerkt, klikt u op “Voltooien”.
PL
Następnym krokiem jest sprawdzenie, czy
wykryte pokoje są pożądane, jeśli nie, możesz
wykonać te dwie czynności:
- Aby połączyć pokoje, wybierz pokoje, do
których chcesz dołączyć i kliknij Zastosuj.
Pokoje te muszą przylegać do siebie.
- Aby dodać nowe podziały, wybierz obszar,
który chcesz podzielić, narysuj linię, w której
chcesz podzielić pokój i kliknij zastosuj.
Po dokonaniu edycji mapy według własnych
upodobań kliknij „Zakończ”.
CZ
Dalším krokem je zjistit, zda jsou detekované
místnosti správné, pokud ne, můžete provést
tyto dvě akce:
- Chcete-li spojit místnosti, vyberte místnosti,
které chcete spojit, a klikněte na Použít. Tyto
místnosti musí být sousedící.
- Chcete-li přidat nová rozdělení, vyberte
oblast, kterou chcete rozdělit, nakreslete
čáru, kde chcete rozdělit místnost, a klikněte
na Použít.
Jakmile mapu upravíte podle svých představ,
klikněte na „Dokončit“.
7090 7090
7090 7090 3130
ES
Una vez las habitaciones de tu casa estén
bien denidas, podrás editar el tipo de
estancia que es, indicar el tipo de suelo que
tiene la habitación (Moqueta, Baldosas,
Liso, Madera) y nombrar las habitaciones
como desees, o utilizar el nombre por
defecto pulsandro encima de cada
habitación y aplicando los cambios.
Además, podrás editar o eliminar
alfombras pulsando sobre ellas. Nota: si
se elimina la alfombra, no podrás volver a
añadirla.
Puedes guardar hasta 10 mapas
EN
When all the rooms of the house have
been dened, you will be able to edit the
type of room, indicate the type of oor
(Carpet, Tiles, Smooth, Wood) and name
the rooms, either entering a specic name
or using default names, by tapping on the
room and applying changes.
Plus, edit or delete carpets by tapping
them on the map. Note: When a carpet is
deleted, it cannot be added back.
You can save up to 10 maps
FR
Une fois que les pièces de votre maison
sont bien dénies, vous pouvez modier
le type de pièce, indiquer le type de sol
(Tapis, Carrelage, Plain, Bois) et nommer
les pièces comme vous le souhaitez, ou
utiliser le nom par défaut en appuyant au-
dessus de chaque pièce.
De plus, vous pouvez éditer ou supprimer
des tapis en appuyant sur eux.Note : si
vous éliminez un tapis, vous ne pourrez
pas l’ajouter de nouveau.
Vous pouvez enregistrer jusqu’à 10 cartes.
DE
Wenn die Räume in Ihrem Haus gut
deniert sind, können Sie den Raumtyp
bearbeiten, d.h. die die Bodenart angeben,
den der Raum hat (Teppich, Fliesen, Glatt,
Holz) und die Räume nach Ihren Wünschen
benennen oder den Standardnamen
verwenden, indem Sie auf jeden Raum
klicken und die Änderungen anwenden.
Sie können Teppiche auch bearbeiten oder
löschen, indem Sie sie anklicken. Hinweis:
Wenn Sie den Teppich entfernen, können
Sie diesen nicht wieder hinzufügen.
Sie können bis zu 10 Karten speichern
IT
Una volta denite le stanze della tua
casa, potrai modicare il tipo, indicare il
pavimento (moquette, piastrelle, liscio,
legno) e assegnare un nome oppure
utilizzare il nome per difetto premendo
sopra ogni stanza e applicare le modiche.
Inoltre, potrai modicare o eliminare
tappeti premendo sugli stessi. Nota: se
elimini un tappeto, non potrai aggiungerlo
di nuovo.
Puoi salvare no a 10 mappe
PT
Uma vez bem denidas as divisões da sua
casa, pode editar o tipo de quarto, ou seja,
indicar o tipo de piso que tem (Carpete,
Azulejos, Liso, Madeira) e nomear os
quartos como desejar, ou usar o nome
padrão pulsando acima de cada quarto e
aplicando as alterações.
Também é possível pode editar ou apagar
tapetes clicando neles. Nota: se eliminar o
tapete, não poderá voltar a adicioná-lo.
Pode guardar até 10 mapas
NL
Zodra de kamers in uw huis goed
gedenieerd zijn, kunt u het type kamer
bewerken, het type vloer aangeven dat de
kamer heeft (Tapijt, Tegel, Vlak, Hout) en de
kamers een naam geven zoals u dat wilt,
of de standaardnaam gebruiken door op
elke kamer te klikken en de wijzigingen toe
te passen.
U kunt ook tapijten bewerken of
verwijderen door erop te klikken. Let op:
als u het tapijt verwijdert, kunt u het niet
meer toevoegen.
U kan tot 10 plattegronden bewaren
PL
Po dokładnym zdeniowaniu pomieszczeń
w domu możesz edytować typ pokoju,
wskazać rodzaj podłogi (dywan, płytki,
gładkie, drewno) i nazwać pokoje według
uznania lub użyć nazwy przez Domyślnie
naciskając nad każdym pokojem i stosując
zmiany.
Ponadto możesz edytować lub usuwać
dywaniki, klikając je. Uwaga: jeśli usuniesz
dywanik, nie będziesz mógł go ponownie
dodać.
Możesz zapisać do 10 map
CZ
Jakmile jsou pokoje ve vašem domě dobře
denované, můžete upravit typ místnosti,
o kterou se jedná, označit typ podlahy,
kterou má místnost (koberec, dlaždice,
hladká, dřevěná) a pojmenovat místnosti, jak
si přejete, nebo použít název podle výchozí
stisknutím každé místnosti a provedením
změn.
Kliknutím na ně navíc můžete upravit nebo
odstranit koberce. Poznámka: Pokud koberec
odstraníte, nebudete jej moci přidat zpět.
Můžete uložit až 10 map
7090 7090
7090 7090 3332
ES MAPAS
Desde esta sección podrás organizar los
mapas como desees y agruparlos por casas.
Para editar el nombre de la casa, pulsa sobre
el icono de editar que aparece al lado de
este. En cambio, si quieres editar el nombre
del mapa o eliminarlo, desplázalo hacia la
izquierda.
En el caso de que quieras editar el mapa,
pulsa sobre este para abrir el editor de
mapas.
Por último, si deseas crear un nuevo mapa,
pulsa sobre el “+” que hay en la parte superior
derecha.
EN MAPS
From this section, you may organise maps as
you wish and group them together by houses.
To edit the name of the house, tap on the edit
icon next to the name. To edit or delete the
name of the map, swipe it to the left.
To edit the map, tap on it to open map editor.
Finally, if you want to create a new map, tap
on the “+” icon on the top right-hand corner.
FR CARTES
Depuis cette section vous pouvez organiser
les cartes à votre goût et les regrouper par
maisons.
Si vous souhaitez modier le nom de la
maison, appuyez sur l’icône d’éditer qui
apparaît juste à côté de celle-ci. Par contre,
si vous souhaitez éditer le nom de la carte ou
l’éliminer, balayez celle-ci vers la gauche.
Au cas où vous souhaiteriez éditer la carte,
appuyez sur elle pour ouvrir l’éditeur de
cartes.
Finalement, si vous souhaitez créer une
nouvelle carte, appuyez sur l’icône « + » qui
se trouve au niveau de la partie supérieure
droite.
DE KARTEN
Von diesem Abschnitt aus können Sie die
Karten nach Belieben organisieren und nach
Häusern gruppieren.
Um den Namen des Hauses zu bearbeiten,
klicken Sie auf das Bearbeiten-Symbol neben
dem Haus. Wenn Sie stattdessen den Name
der Karte bearbeiten oder löschen möchten,
verschieben Sie ihn einfach nach links.
Falls Sie die Karte bearbeiten möchten,
klicken Sie darauf, um die Kartenbearbeitung
zu önen.
Wenn Sie schliesslich eine neue Karte
erstellen möchten, klicken Sie auf das “+”
oben rechts.
IT MAPPE
Da questa sezione potrai organizzare le
mappe come desideri e raggrupparle in base
alle case.
Per modicare il nome della casa, premi
sull’icona di modica che appare al lado della
stessa. Se desideri modicare il nome della
mappa o eliminarlo, spostalo verso sinistra.
Per modicare la mappa, premi sulla stessa
per aprire il revisore delle mappe.
Inne, se desideri creare una nuona mappa,
premi su “+” in alto a destra.
PT MAPAS
A partir desta secção pode organizar os
mapas como desejar e agrupá-los por casas.
Para editar o nome da casa, clique no ícone
editar que se encontra ao seu lado. Em vez
disso, se quiser editar o nome do mapa ou
apagá-lo, desloque-o para a esquerda.
Caso pretenda editar o mapa, clique sobre o
mesmo para abrir o editor de mapas.
Finalmente, se quiser criar um novo mapa,
clique no “+” no canto superior direito.
NL PLATTEGRONDEN
Vanuit deze sectie kunt u de plattegronden
naar wens organiseren en groeperen per huis.
Om de naam van het huis te wijzigen, klikt
u op het edit-icoontje ernaast. Als u de
naam van de plattegrond wilt wijzigen of
verwijderen, verplaats deze dan naar links.
Als u de plattegrond wilt bewerken, klikt u
erop om de bewerker van de plattegrond te
openen.
Tot slot, als u een nieuwe plattegrond wilt
maken, klikt u op de “+” rechtsboven.
PL MAPY
Z tej sekcji będziesz mógł organizować mapy
tak jak będziesz chciał i pogrupować je na
domy.
Aby edytować nazwę domu, kliknij ikonę
edycji, która pojawi się obok. Zamiast tego,
jeśli chcesz edytować nazwę mapy lub ją
usunąć, przewiń ją w lewo.
Jeśli chcesz edytować mapę, kliknij ją, aby
otworzyć edytor map.
Wreszcie, jeśli chcesz utworzyć nową mapę,
kliknij „+” w prawym górnym rogu.
CZ MAPA
V této části můžete mapy uspořádat podle
svého přání a seskupit je podle domů.
Chcete-li upravit název domu, klikněte na
ikonu úprav, která se zobrazí vedle něj. Místo
toho, pokud chcete upravit název mapy nebo ji
smazat, posuňte ji doleva.
Chcete-li mapu upravit, kliknutím na ni otevřete
editor mapy.
Nakonec, pokud chcete vytvořit novou mapu,
klikněte na „+“ vpravo nahoře.
7090 7090
7090 7090 3534
ES ROOM PLAN
Una vez editado el mapa de la casa, en la
sección de planes de limpieza, encontrarás
unos planes de limpieza recomendados
por 3Diana o tendrás la opción de crear uno
nuevo.
Si quieres utilizar un plan sugerido, pulsa en
“Añadir” para comprobar si los parámetros
de limpieza son los deseados. Selecciona
los días y la hora de limpieza para activar la
programación y, por último, añade un área
restringida si lo deseas.
EN ROOM PLAN
Once you are done editing the house map, go
to the cleaning plans section. You will nd
cleaning plans recommended by 3Diana or
you will be able to create a new one.
To use a suggested cleaning plan, tap “Add”
to check if the cleaning parameters suit
you. Select the days and time to activate the
schedule a, lastly, add a restricted area if
required.
FR ROOM PLAN
Une fois la carte de la maison éditée,
vous trouverez dans la section de plans
de nettoyage des plans de nettoyage
recommandés par 3Diana. Néanmoins, vous
aurez aussi l’option de créer de nouveaux
plans de nettoyage.
Si vous souhaitez utiliser un plan
recommandé, appuyez sur « Ajouter » pour
voir si les paramètres de nettoyage sont ceux
que vous souhaitez appliquer. Choisissez les
jours et l’heure de nettoyage an d’activer
la programmation et, si vous le souhaitez,
appliquez des zones restreintes pour que le
robot ne les nettoie pas.
DE ROOM PLAN
Nachdem Sie die Karte des Hauses
bearbeitet haben, nden Sie im Abschnitt
„Reinigungspläne“ einige Reinigungspläne
die von 3Diana empfohlen werden oder Sie
haben auch die Möglichkeit, einen neuen
Reinigungsplan zu erstellen.
Wenn Sie einen empfohlener Plan verwenden
möchten, klicken Sie auf “Hinzufügen”, um
zu prüfen, ob die Reinigungsparameter die
gewünschten sind. Wählen Sie die Tage
und die Uhrzeit der Reinigung aus, um die
Programmierung zu aktivieren, und fügen Sie
schließlich einen begrenztes Bereich hinzu,
wenn Sie möchten.
IT ROOM PLAN
Una volta modicata la mappa della casa,
nella sezione dei piani di pulizia potrai trovare
alcuni piani di pulizia suggeriti da 3Diana o
avrai l’ozione di crearne dei nuovi.
Se vuoi utilizzare un piano suggerito, premi
su “Aggiungere” per vericare se i parametri
di pulizia sono quelli desiderati. Seleziona
i giorni e l’ora di pulizia per attivare la
programmazione e aggiungere un’area
limitata se lo desideri.
PT ROOM PLAN
Uma vez editado o mapa da casa, na secção
de planos de limpeza, encontrará alguns
planos de limpeza recomendados pela 3Diana
ou terá a opção de criar um novo plano.
Se quiser utilizar um plano sugerido,
clique em “Adicionar” para vericar se os
parâmetros de limpeza são os desejados.
Selecione os dias e o tempo de limpeza para
ativar a programação e nalmente adicione
uma área restrita, se desejar.
NL ROOM PLAN
Zodra u de plattegrond van het huis
hebt bewerkt, vindt u in de sectie
schoonmaakplannen enkele door 3Diana
aanbevolen schoonmaakplannen of hebt u de
mogelijkheid om een nieuwe aan te maken.
Als u een voorgesteld plan wilt gebruiken,
klikt u op “Toevoegen” om te controleren of
de reinigingsparameters de gewenste zijn.
Selecteer de dagen en het tijdstip van de
reiniging om de programmering te activeren
en voeg desgewenst een beperkt gebied toe.
PL ROOM PLAN
Po wyedytowaniu mapy domu w sekcji plany
sprzątania znajdziesz kilka planów sprzątania
zalecanych przez 3Diana lub będziesz mieć
możliwość stworzenia nowego.
Jeśli chcesz skorzystać z sugerowanego
planu, kliknij „Dodaj”, aby sprawdzić, czy
parametry czyszczenia są odpowiednie.
Wybierz dni i godzinę sprzątania, aby
aktywować harmonogram, a na koniec dodaj
obszar o ograniczonym dostępie, jeśli chcesz.
CZ ROOM PLAN
Po úpravě mapy domu najdete v sekci plány
čištění některé plány čištění doporučené
3Diana, nebo budete mít možnost vytvořit
nový.
Pokud chcete použít navrhovaný plán,
klikněte na „Přidat“ a zkontrolujte, zda jsou
parametry čištění podle potřeby. Vyberte dny
a čas čištění, abyste aktivovali plán, a nakonec
přidejte omezenou oblast, pokud si přejete.
7090 7090
7090 7090 3736
ES
Si quieres añadir un plan personalizado,
elige qué habitaciones deseas que limpie el
robot. Luego, el robot te recomendará unos
parámetros de limpieza para cada habitación.
En el caso de que los parámetros no sean los
deseados, podrás editarlos cuando quieras.
También podrás elegir el orden de limpieza
de las habtaciones, activar/desactivar la
programación cuando desees y ponerle un
nombre al plan para poder identicarlo más
rápidamente.
Por último, podrás añadir un área restringida
si lo deseas.
EN
To add a customised plan, choose the rooms
you want the robot to clean. The robot will
suggest cleaning parameters for each room.
If those parameters do not suit your cleaning
requirements, edit them when desired.
You may also choose the room cleaning
order, activate or deactivate the scheduled
cleaning plans when you wish, and name each
plan to nd it easily.
Finally, add a restricted are if required.
FR
Si vous souhaitez ajouter un plan de
nettoyage personnalisé, vous n’avez qu’à
sélectionner les pièces que vous souhaitez
que le robot nettoie.Ensuite, le robot vous
orira des paramètres de nettoyage pour
chacune des pièces. Au cas où vous ne
souhaiteriez pas appliquer ces paramètres,
vous pourrez les éditer quand vous le
souhaitez.
Vous pouvez aussi choisir l’ordre de
nettoyage des pièces, activer/désactiver
la programmation et nommer le plan pour
pouvoir l’identier plus rapidement.
Finalement, vous pouvez aussi ajouter une
zone restreinte si vous le souhaitez.
DE
Wenn Sie einen benutzerdenierten Plan
hinzufügen möchten, wählen Sie die Räume
aus, die der Roboter reinigen soll. Der Roboter
empehlt dann Reinigungsparameter für
jeden Raum. Falls die Parameter nicht die
gewünschten sind, können Sie sie jederzeit
bearbeiten.
Sie können auch die Reihenfolge wählen, in
der die Räume gereinigt werden, den Plan
jederzeit aktivieren/deaktivieren und dem
Plan einen Namen geben, um ihn schneller
zu nden.
Schließlich können Sie ein begrenztes Bereich
hinzufügen, wenn Sie dies wünschen.
IT
Se vuoi aggiungere un piano personalizzato,
scegli quale stanza desideri che il robot
pulisca. Il robot suggerisce parametri di
pulizia per ogni stanza. Nel caso in cui i
parametri non fossero quelli desiderati, potrai
modicarli quando lo desideri.
Potrai scegliere l’ordine di pulizia
delle stanze, attivare/disattivare la
programmazione quando lo desideri e
assegnare un nome al piano per identicarlo
più velocemente.
Potrai aggiungere un’area limitata se lo
desideri.
PT
Se quiser acrescentar um plano
personalizado, escolha que divisões quer que
o robot limpe. O robot irá então recomendar
parâmetros de limpeza para cada divisão.
No caso de os parâmetros não serem os
desejados, pode editá-los sempre que quiser.
Pode também escolher a ordem de limpeza
das divisões, ativar/desativar o horário
sempre que quiser e dar um nome ao plano
para que este possa ser identicado mais
rapidamente.
Finalmente, pode adicionar uma área restrita,
se desejar.
NL
Als u een aangepast plan wilt toevoegen,
kies dan welke kamers u wilt dat de
robot schoonmaakt. De robot zal dan de
reinigingsparameters voor elke kamer
aanbevelen. Als de parameters niet de
gewenste zijn, kunt u ze bewerken wanneer
u maar wilt.
U kunt ook de volgorde kiezen waarin de
kamers worden gereinigd, de programmering
activeren/deactiveren wanneer u dat wilt en
het plan een naam geven zodat het sneller
kan worden geïdenticeerd.
Tot slot kunt u desgewenst een beperkt
gebied toevoegen.
PL
Jeśli chcesz dodać niestandardowy plan,
wybierz pokoje, które robot ma wyczyścić.
Następnie robot zaleci parametry czyszczenia
dla każdego pomieszczenia. W przypadku, gdy
parametry nie są zgodne z oczekiwaniami,
możesz je edytować w dowolnym momencie.
Możesz także wybrać kolejność sprzątania
pomieszczeń, aktywować / dezaktywować
harmonogram w dowolnym momencie i
nadać planowi nazwę, aby móc go szybciej
zidentykować.
Wreszcie, jeśli chcesz, możesz dodać obszar
o ograniczonym dostępie.
CZ
Chcete-li přidat vlastní plán, vyberte, které
místnosti chcete, aby robot vyčistil. Poté
robot doporučí parametry čištění pro každou
místnost. V případě, že parametry nejsou
podle vašich představ, můžete je kdykoli
upravit.
Budete také moci zvolit pořadí úklidu pokojů,
aktivovat / deaktivovat plán, kdykoli budete
chtít, a pojmenovat plán, abyste jej mohli
rychleji identikovat.
Nakonec můžete přidat omezenou oblast,
pokud si přejete.
7090 7090

Other manuals for Conga 7090

2

Other cecotec Vacuum Cleaner manuals

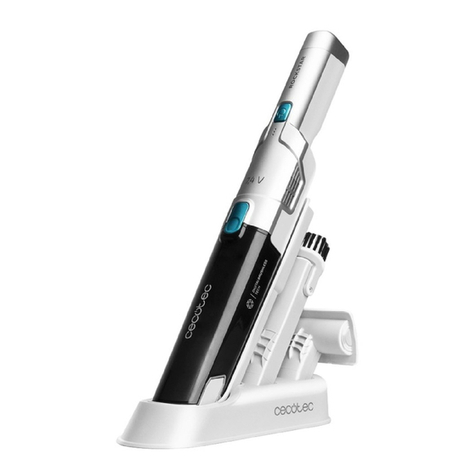
cecotec Conga Immortal ExtremeSuction 14,8 V Hand User manual

cecotec

cecotec Conga Immortal ExtremeSuction 14,8 V Hand User manual

cecotec CONGA 1390 Series User manual

cecotec

cecotec CONGA 1390 Series User manual

cecotec CONGA ROCKSTAR 500 X-TREME ERGOWET User manual

cecotec

cecotec CONGA ROCKSTAR 500 X-TREME ERGOWET User manual

cecotec Conga 3790 User manual

cecotec

cecotec Conga 3790 User manual

cecotec CONGA ROCKSTAR 900 ULTIMATE User manual

cecotec

cecotec CONGA ROCKSTAR 900 ULTIMATE User manual

cecotec Conga Flash Connected Vital User manual

cecotec

cecotec Conga Flash Connected Vital User manual

cecotec CONGA ROCKSTAR MICRO ESSENTIAL User manual

cecotec

cecotec CONGA ROCKSTAR MICRO ESSENTIAL User manual

cecotec POWERBAG 2000 COMPACT User manual

cecotec

cecotec POWERBAG 2000 COMPACT User manual

cecotec CONGA HAND CARPET&SPOT CLEAN 2500 User manual

cecotec

cecotec CONGA HAND CARPET&SPOT CLEAN 2500 User manual

cecotec CONGA 1590 User manual

cecotec

cecotec CONGA 1590 User manual

cecotec Conga Rockstar Wet&Dry Steel User manual

cecotec

cecotec Conga Rockstar Wet&Dry Steel User manual

cecotec CONGA POWERBAG 4000 XL User manual

cecotec

cecotec CONGA POWERBAG 4000 XL User manual

cecotec CONGA POPSTAR 3000 X-TREME PRO User manual

cecotec

cecotec CONGA POPSTAR 3000 X-TREME PRO User manual

cecotec Conga 1490 User manual

cecotec

cecotec Conga 1490 User manual

cecotec CONGA ROCKSTAR 3700 GLASS User manual

cecotec

cecotec CONGA ROCKSTAR 3700 GLASS User manual

cecotec Conga Popstar Glass Titanium User manual

cecotec

cecotec Conga Popstar Glass Titanium User manual

cecotec CONGA THUNDERBRUSH 520 User manual

cecotec

cecotec CONGA THUNDERBRUSH 520 User manual

cecotec Conga Eternal Laser X-Treme User manual

cecotec

cecotec Conga Eternal Laser X-Treme User manual

cecotec Conga Rockstar Vital User manual

cecotec

cecotec Conga Rockstar Vital User manual

cecotec CONGA 3390 User manual

cecotec

cecotec CONGA 3390 User manual

cecotec CONGA ROCKSTAR MULTICYCLONIC XL User manual

cecotec

cecotec CONGA ROCKSTAR MULTICYCLONIC XL User manual

cecotec CONGA 1590 User manual

cecotec

cecotec CONGA 1590 User manual

cecotec CCTC-05542 User manual

cecotec

cecotec CCTC-05542 User manual

cecotec CONGA THUNDERBRUSH 750 User manual

cecotec

cecotec CONGA THUNDERBRUSH 750 User manual

Popular Vacuum Cleaner manuals by other brands

Bissell LittleGreen Proheat 1425 Series user guide

Bissell

Bissell LittleGreen Proheat 1425 Series user guide

Craftsman CMCVS001D1 instruction manual

Craftsman

Craftsman CMCVS001D1 instruction manual

Rowenta SILEE FORCE EXTREME manual

Rowenta

Rowenta SILEE FORCE EXTREME manual

Eureka 6850 Series owner's guide

Eureka

Eureka 6850 Series owner's guide

Bissell POWERFORCE 1668 Series user guide

Bissell

Bissell POWERFORCE 1668 Series user guide

LG VC4916N Series owner's manual

LG

LG VC4916N Series owner's manual

Philips FC8209/01 Service manual

Philips

Philips FC8209/01 Service manual

Panasonic MCV5268 - UPRIGHT VACUUM-PLATI operating instructions

Panasonic

Panasonic MCV5268 - UPRIGHT VACUUM-PLATI operating instructions

Columbus IDV 60 operating manual

Columbus

Columbus IDV 60 operating manual

Fagor FG736 user manual

Fagor

Fagor FG736 user manual

Enviromaster P4511HVAF-R Operating/safety instructions

Enviromaster

Enviromaster P4511HVAF-R Operating/safety instructions

LG VK8928 Series owner's manual

LG

LG VK8928 Series owner's manual

FXA CP-T299-3 instruction manual

FXA

FXA CP-T299-3 instruction manual

Hyundai HHE203203 user manual

Hyundai

Hyundai HHE203203 user manual

Shark Rocket UV345CCO owner's guide

Shark

Shark Rocket UV345CCO owner's guide

Tornado TO 4210 user manual

Tornado

Tornado TO 4210 user manual

Minuteman CRV Parts and instruction manual

Minuteman

Minuteman CRV Parts and instruction manual

ulsonix ASHCLEAN 20B 18V user manual

ulsonix

ulsonix ASHCLEAN 20B 18V user manual

manuals.online logo
manuals.online logoBrands
  • About & Mission
  • Contact us
  • Privacy Policy
  • Terms and Conditions

Copyright 2025 Manuals.Online. All Rights Reserved.