INSTALLATION AND OPERATING INSTRUCTIONS
4211-75 3-24-08
7013618
314 SKPS 12
WARNING
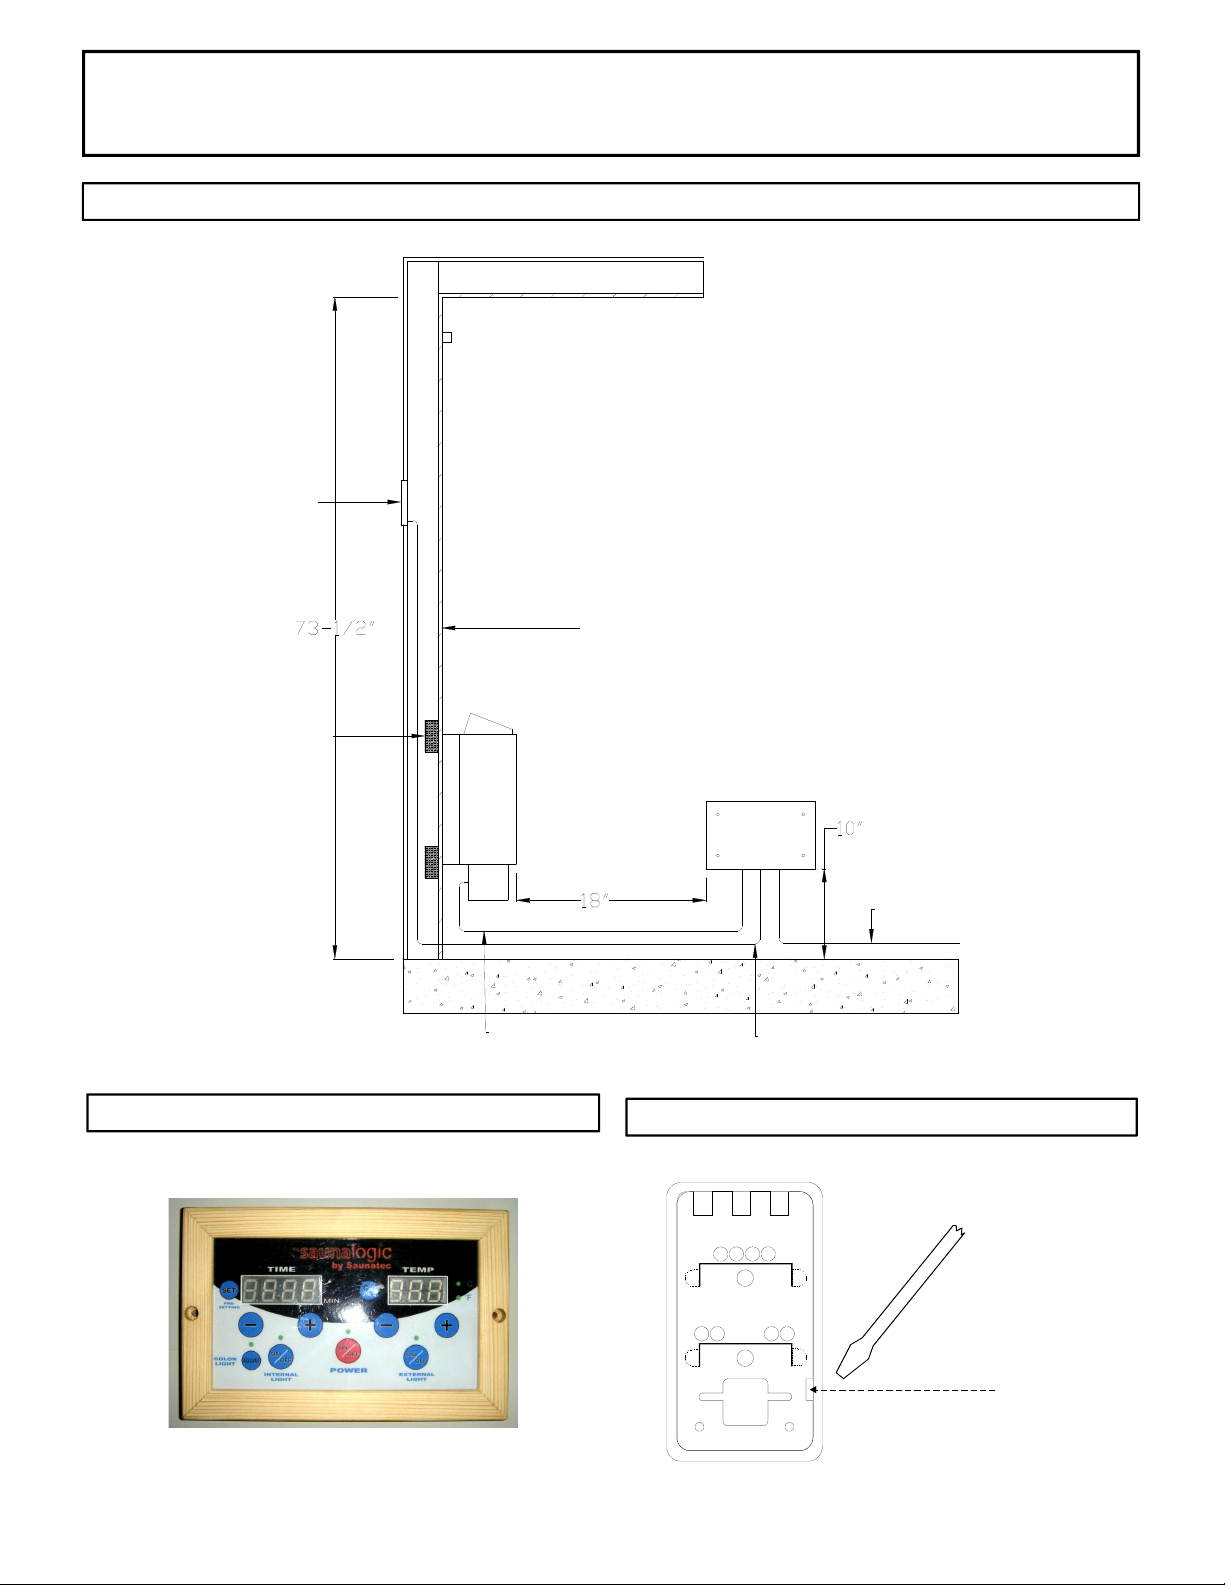
SECTION 2: MOUNTING OF SAUNA HEATER AND PK CB-1 BOX
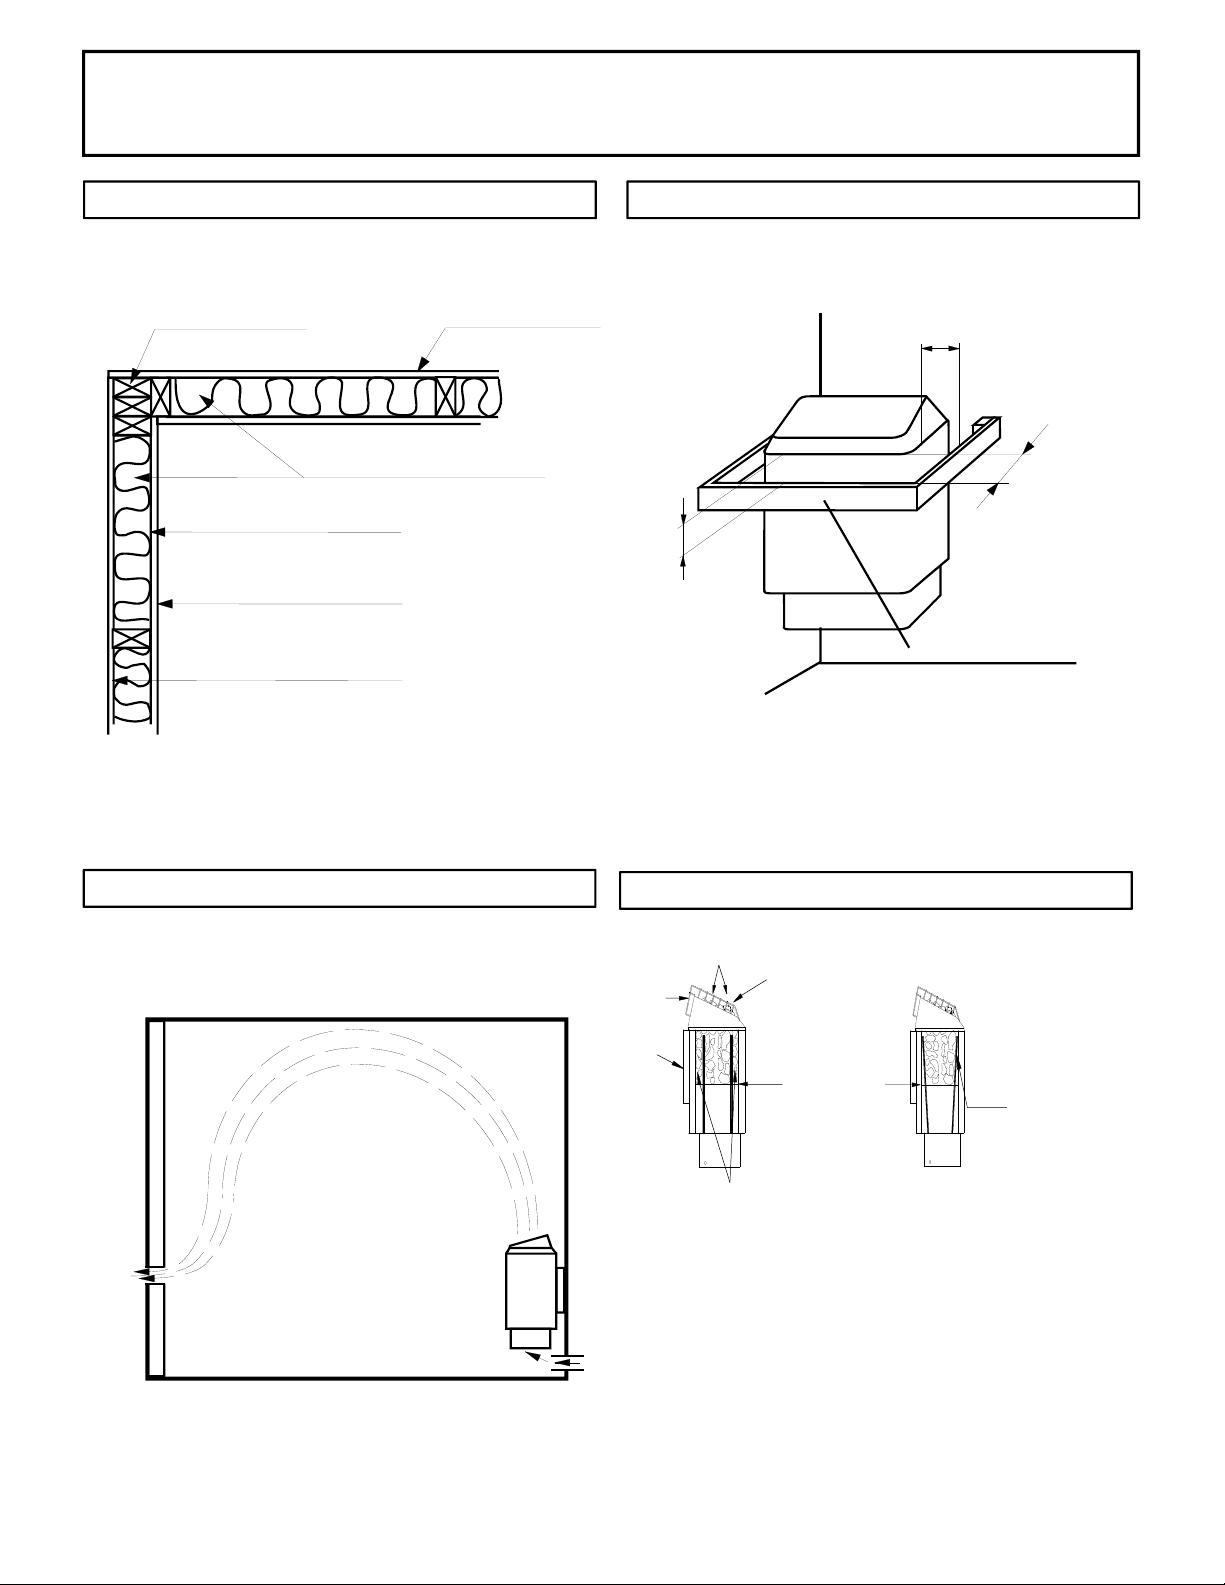
SECTION 3: PLACING OF ROCKS
(SEE DIAGRAM #10)
HANGINGTHEHEATER Remove the mounting bracket from the heater (two
screws behind the rockgrill. Using the pattern from the mounting bracket, drill
four 9/64" holes to fasten the heater to the wall. Install four ¼" x 1 ½" hex
head lag screws (supplied with the heater) into the four holes. Tighten these
screws until secure. The screws must be threaded through the wall into a
framing member or backing board to support the heater weight. Hang the
heater on the mounting bracket. Place the two screws behind rock grill to
secureto mounting bracket. SeeDiagram 1 for theheater location details and
the necessary clearances to combustible materials.
Remove the cover of the CB PK-1 Control Box to gain access to the 4 mounting
holes in the back of the box. The control box can be mounting inside the sauna
room on a wall according to Diagram 3. Or it can be mounted outside the
sauna roo
m. Locate the 4 screws
3/16 x 3/4"
supplied into the 4 mounting
holes. (See Diagram 3)
The rocks supplied with the heater have been chosen to provide the best heater
performance. Use of any other type of rock may void the heater
s warranty. Never
operate the heater without rocks in place!
Rinse the rocks with water before
placing in the heater. Carefully place the rocks loosely so that the air can circulate
through the heater. Packing the rocks too tightly may cause the heater high limit
switch to trip. The rocks must fully cover the heating elements. Atta
ch the guard
with the screws provided.
Fire sprinkler systems used
inside any sauna room should
be properly rated for sauna
room temperatures.
Do not pour chlorinated pool
or spa water on heater.
Excessive water use on
heater may cause damage
and void warranty.
Electric Shock Hazard - High
voltage exists within this
equipment. There are no
user serviceable parts in this
equipment. All installation
and service to this equipment
should be performed by
qualified licensed personnel
in accordance with local and
na
tional codes.
Do not construct sauna room
so as to restrict air flow
through the bottom of the
heater.
Packing the rocks too tightly
may cause the heater high
limit switch to trip.
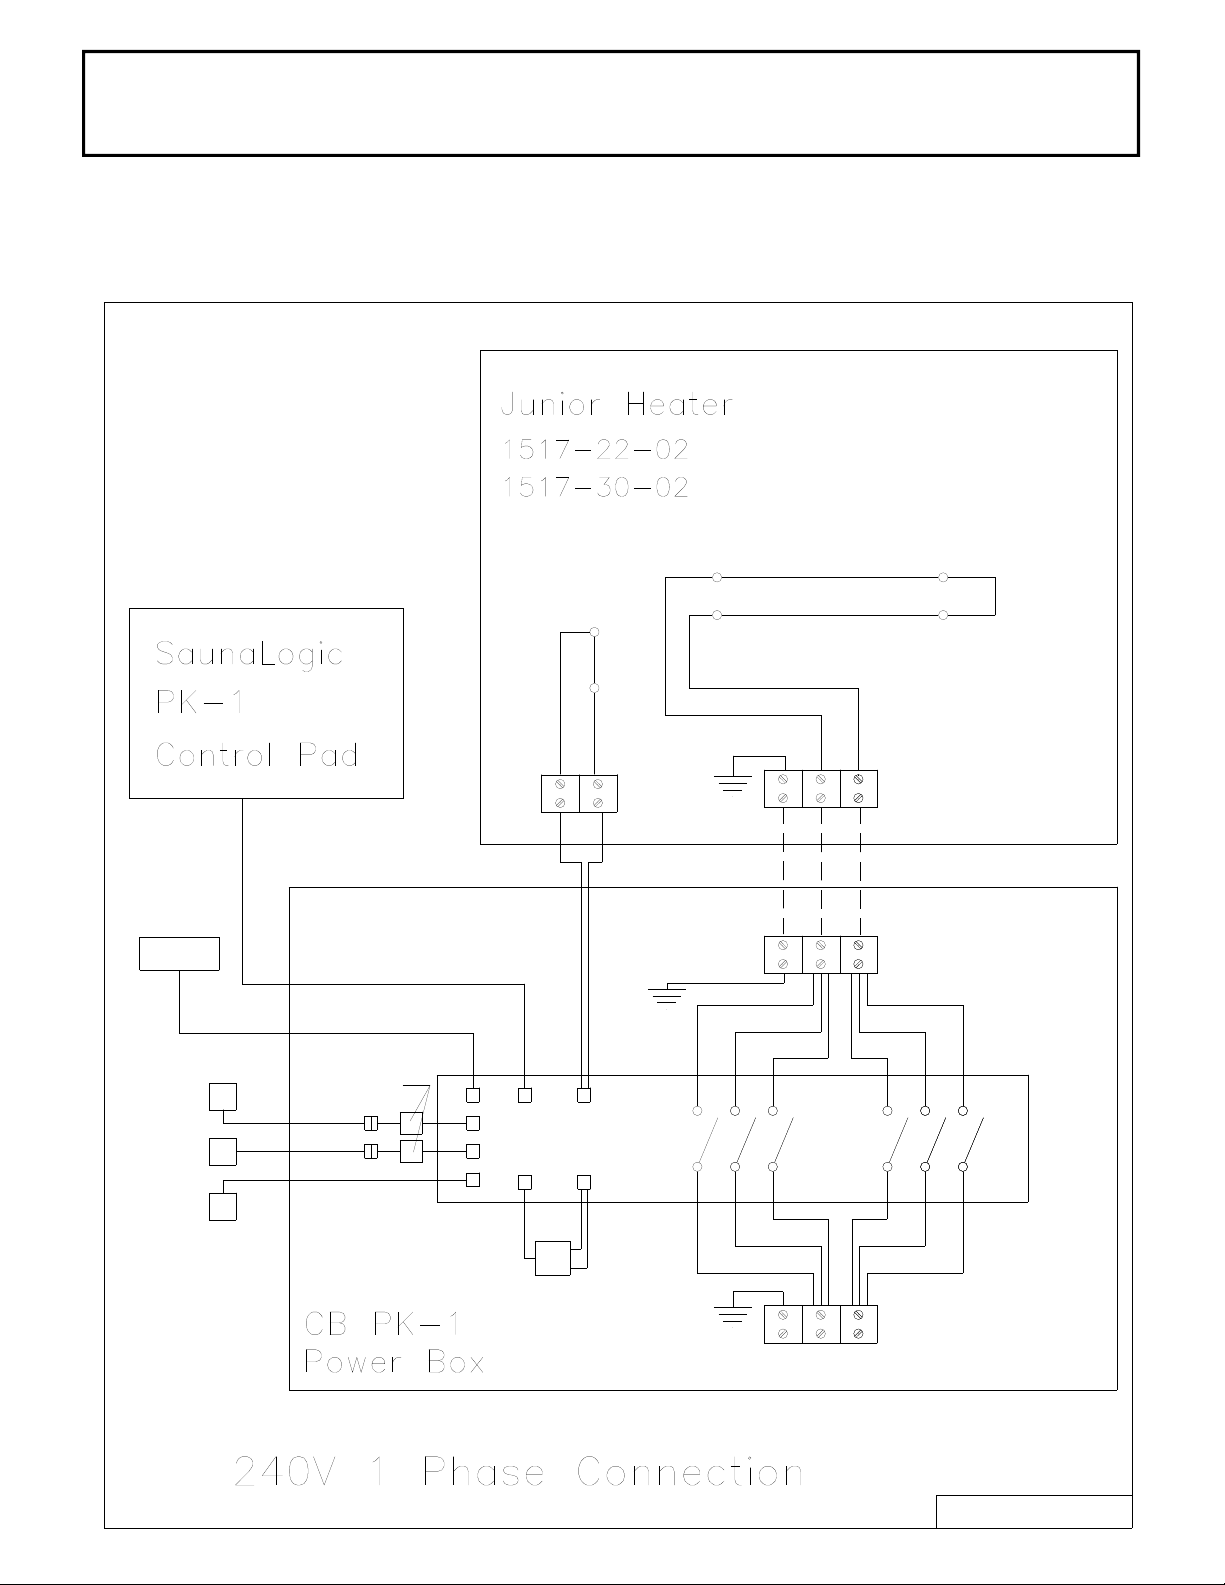
SECTION 4: ELECTRICAL HOOK-UP
Electrical installation must be made by a licensed electrician in accordance
with the National Electrical Code and local regulations.
Remove the screws from the CB PK-1 control box to access the electrical
connections. Route the wires through the holes provided on the bottom
of the
control box and connect the wires to the terminal block. To determine the
correct wire size, refer to
Diagram 2
. Use copper supply wire only, suitable for
minimum 90 degrees C. The heater must be grounded! See Diagram 6 f
or
proper connections.
SECTION 5: TEMPERATURE SENSOR
Page 3
Feed the 17 ft "low voltage" sensor wire from the sensor location to the control
box (
CB
PK-1) location. Sensor wire must be routed completely separate (as
per low voltage electrical wiring codes) from any wiring carrying over 50 volts.
It may be necessary to drill holes to string the wire through the studs or ceiling
joists.
Using a flat tip screwdriver, unsnap sensor cover from sensor. Mount sensor
to a finished wall directy above heater and two (2) inches down from ceiling
using two (2) screws (provided) as sho
wn
in Diagrams 1, 3 & 5
.
Connect wires into CB PK-1 on High Limit position of the circuit board.