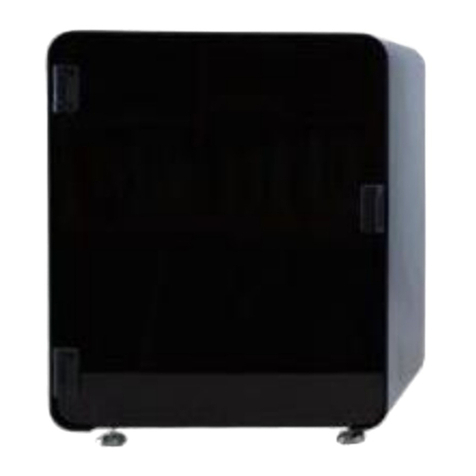
Cell Dynamics W8 User manual

Work instruction:
W8 PHYSICAL CYTOMETER UNBOXING
AND FIRST INSTALLATION

1. Purpose of the document
This document provides the guidelines for the unboxing and first installation of the W8 Physical Cytometer.
2. Conventions: Decimal and Thousands Separators
The period is used to indicate the decimal place. The comma is used to separate groups of thousands. E.g., 1.50
indicates one and a half while 10,000 indicates ten thousand.
Before starting
To minimize biological risk, wear the Personal Protective Equipment (PPE) required by your laboratory’s safety
regulations.
GLOVES GOGGLES/FACE MASKS PROTECTIVE CLOTHING
3. Work Instruction
3.1 Unboxing
The CellDynamics W8 package includes the following items:
• W8 Physical Cytometer (assembled)
• W8 Power source cable
• Power supplier
• One USB 3.1 SuperSpeed cable
• W8 Caps (two standard for Vessel A and Vessel B, one for the Sample Holder tube and one for the 50 mL W8
Analysis Solution)
• 250 mL Waste bottle (including lid and connection tube)
• One 0.45 µm air filter
• One standing legs regulation key
• One optic regulation key
• LIBRA software
• The W8 Physical Cytometer User Manual

• The W8 Physical Cytometer Quick Start Guide
One CellDynamics W8 Kit is shipped with the instrument, containing:
• Two W8 Analysis Solution bottles (250 mL)
• One W8 Chip
CellDynamics W8 Kit can be purchased from CellDynamics or authorized distributors.
The optional offer with the computer (PC) includes all of the above-mentioned listed items, plus:
• PC case
• PC power source supply and cable
• PC monitor
• PC monitor power cable
• HDMI cable
• Keyboard and mouse
Items NOT provided:
• Microsoft® Office™ or equivalent
• Anti-virus software. This system is intended for use as a stand-alone station, not as part of a network.
Please follow the instructions described below for a proper unboxing of CellDynamics W8 package. The tutorial video
for the W8 system unboxing is available at the W8 Academy page on CellDynamics website.
Step 1
The instrument, and its accessories are shipped into a protective wooden case specifically designed.
Based on the customer's request, the case could be also shipped securely positioned onto a wooden
pallet. The packaging is provided by CellDynamics and it must be used uniquely.
Inspection of the delivery. Carefully inspect the entire packaging upon receipt of the W8 Physical
Cytometer. In case of signs of mishandling or damage, file a claim with the carrier immediately. If the
shipment is separately insured, file a claim with the insurer.
For proper and secure handling, the case includes two
handles, positioned on two opposite sides, as graphically
described in Fig. 1 below.
In case the pallet is included in the shipment, the
transportation of the entire packaging (case and pallet), from
the collection center to the laboratory, must occur using a
trans-pallet. Once reached the location, the wooden case
can be lifted and repositioned by hand.
Differently, when the instrument is shipped without the
palled (wooden case only), it can be transported by hand.
Fig. 1. Graphical representation of the wooden case and pallet.

Step 2
Open the wooden shipping case.
Step 3
Take out the W8 Physical Cytometer User Manual and the W8 Physical Cytometer Quick Start Guide.
Step 4
Carefully remove the couple of Styrofoam boxes and placed them vertically on a table.
The first one includes:
• 250 mL Waste bottle
• W8 Power source cable
• Power supplier
• One USB 3.1 SuperSpeed cable
• One standing legs regulation key
• One optic regulation key
The second one includes:
• Three Corning® 15 mL centrifuge tubes (Vessel A, Vessel B and Sample Holder tube)
• One Corning® 50 mL centrifuge tubes to be used for the W8 Analysis Solution
• the W8 Chip box. NOTE: This box is empty: the W8 Chip is already inserted in the W8 Physical
Cytometer to prevent any damage throughout the shipment.
• Two W8 Analysis Solution bottles (250 mL)
Step 5
The W8 Physical Cytometer is shipped as already assembled. The instrument is safely packaged
inside a carton box and protected with cushioning material.
• Carefully take out the carton box and placed it vertically on a table.
• Open the box and carefully take out the W8 instrument.
• Place the W8 Physical Cytometer vertically onto an anti-vibration support (i.e. Atomic Force
Microscopy benchtop).
NOTE: The vertical position is achieved by orienting the
instrument in a manner that the “UP” arrow in Fig. 2 remains
upwards and orthogonally with respect to the horizontal
plane. The instrument must be maintained vertical at any
moment. Never incline the instrument on any side for any
reason. A bubble level, on the top panel, would help to
maintain the correct inclination.
Fig. 2. W8 Physical Cytometer orientation.
NOTE: Vessel A, Vessel B, the Sample Holder tube and the 50 mL W8 Analysis Solution tube are
already closed with their specific W8 Caps and inserted in their relative lodgings inside the W8
Physical Cytometer.
NOTE: the W8 Chip is already inserted in the W8 Physical Cytometer to prevent any damage
throughout the shipment.
NOTE: One 0.45 µm air filter and the connection tube for the 250 Waste bottle are already mounted.
Step 6
Transport the instrument with care. Excessive vibrations can cause damages as well as dropping
the instrument. This may occur even when it is packed. In any case, handle and transport the
instrument following the safety guidelines for heavyweight transportation in order to prevent injuries.

3.2 System Installation
This section thoroughly describes how to install the W8 Physical Cytometer with a straightforward procedure that
requires few simple steps. Please refer to the W8 Physical Cytometer User Manual for any further information.
Step 1
First, define the area of use and the position of the instrument.
• The W8 Physical Cytometer is designed to be positioned onto a fixed laboratory benchtop.
• Its highest performance can be reached when placed onto an anti-vibration support (i.e.
Atomic Force Microscopy benchtop).
• The device should not be located onto a normal table or any surface or support in close
proximity of a source of vibration (i.e. pumps, sonic baths etc..).
• In the case of analyzing or operating with hazardous or unknown materials/substances,
the instrument must be placed and used under a Class II / III Biological Safety Cabinet.
• Do not use the instrument in a wet location or environment. Particularly, do not place the
instrument on areas with high humidity.
• Maintain at least 15 cm of distance between the W8 Physical Cytometer and any wall, object or
PC. This distance is also needed for proper ventilation.Moreover, keep a free area in front of the
instrument to allow the opening of the safety door for proper use (Fig. 3). The main switch button
of the instrument and the plug of the power cable must be easily accessible to the operator.
This is crucial in case of emergency when the instrument needs to be turned off and the power source
needs to be unplugged.
Fig. 3. Schematic representation of the positioning. Distances from walls, objects and/or PC for safety and proper
ventilation.
Step 2
Susbsequently proceed as follow:
• Connect the power source supplier with its cable (keep the cable unplugged from the main
power source at this stage).
• Connect the power supply cable to the power supply plug on the rear of the instrument.

Step 2
• Connect one side of the USB 3.1 SS to the back of the instrument.
• Connect the the other side of the USB 3.1 SS to the PC (while the PC is switched off).
• Adjust the horizontal position of the instrument from the four standing legs (using the
regulation key), until the bubble level at the top panel of the instrument is centered.
• Finally, connect the power supply plug to the main power source.
Step 3
PC Requirements
The W8 Physical Cytometer uses the LIBRA software to operate.
Here the PC requirements needed:
• Processor i7 or equivalent, 16 GB RAM, SSD 256, USB 3.1 SS.
• Windows 10 (home, pro or business edition).
LIBRA software installation
• Turn on the PC.
• Open the received LIBRA.zip file and extract it. Search and double click the LIBRA.exe icon.
• A control window, with coding lines, will appear. Wait until the LIBRA launching screen is
displayed. Once installed, the software creates a new folder on the Desktop named Libra, which
contains all the folders and data related to the experiments.
Step 4
Air Filter connection
The 0.45 µm air filter is used for the air-flushing function during several procedures.
Do not use the system without the air filter.
NOTE: For proper daily use of the W8 Physical Cytometer replace the Filter once a month.
To insert a new Filter into the appropriate slot, simply screw the Luer-Lock connector (Fig. 4).
Fig. 4. Left) 0.45 µm air filter positioning. Right) 0.45 µm air filter area overview.
Step 5
Waste Bottle positioning and connection
The 250 mL Waste Bottle has the function to collect the waste liquids during each experiment.
NOTE: Remember to empty the Waste Bottle at the end of each experiment.
NOTE: Based on the used products, the liquid contained inside the Waste Bottle must be disposed
according to the specific biological waste regulations.

To connect the 250 mL Waste bottle proceed as follow (Fig. 5):
• Screw the Luer-lock connection at the top of the bottle, and connect it with the Connection
Tube (do not pull the Connection Tube excessively).
• Place the 250 mL Waste Bottle on the designed position.
Fig. 5. Left) Filter and Waste Area overview. Center) Waste tube connection. Right) Waste bottle position.
Step 6
W8 Caps positioning, W8 Chip positioning and centrifuge tubes insertion
Please refer to the W8 Physical Cytometer User Manual 6.4, 6.5 and 6.6 sections for the complete
procedures.
Alternatively, please consult the W8 Physical Cytometer Quick Start Guide STARTING UP THE
INSTRUMENT section for all information.
Other manuals for W8
1
Table of contents
Other Cell Dynamics Measuring Instrument manuals
Popular Measuring Instrument manuals by other brands

Siemens
Siemens VDO modulcockpit II product manual

ROOKS
ROOKS OK-03.0027 user manual

Bender
Bender isoMED427P manual

CONTINENTAL CONTROL SYSTEMS
CONTINENTAL CONTROL SYSTEMS WattNode BACnet WNC-3Y-208-BN installation manual

Dakota Digital
Dakota Digital MLX-9X04 Series manual

Agilent Technologies
Agilent Technologies X Series user guide