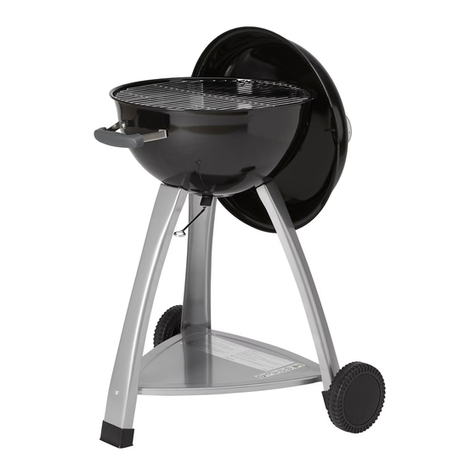
Cello BULLET SMOKER 18 User manual

BULLET SMOKER 18
(502099676 / 6438313544111)

GB
GENERAL INSTRUCTIONS
This grill/smoker can be used as a smoker for hot
smoking, making barbeque, grilling with hot smoke
and as a traditional charcoal grill.
Read the instructions before operating the appliance.
Keep these instructions for later use.
This charcoal grill is produced according to standard
EN1860-1.
Important
Before the use of the grill/smoker, read through all
the instructions and advice. Follow exactly the
instructions relating to ignition, extinguishing and
operation. Disregard of the instruction may cause
material damage or result in a hazardous situation.
Keep the instructions for future reference, so that
they can be used later.
ASSEMBLY INSTRUCTIONS
Before assembly
Open the sales package carefully, and before
assembly of the grill/smoker take all the packaging
materials away. Take care that the packaging
materials are destroyed in a prescribed manner. Do
not allow children to play with the packaging material.
Check before assembling the grill/smoker against the
list of parts so that all the required parts are available
and not damaged. If there are any defective parts or
they are missing, contact the distributor directly.
Put together the barbeque in a sequence prescribed
in the instructions, in a well-lit area and on a flat
surface. Do not assemble the grill/smoker on a
terrace because the pieces thereof can fall through
the spaces between the boards.
Sheet metal parts can cause injury. Use gloves on the
assembly of the grill/smoker. Be particularly careful at
the assembly.
2
Start the assembly of the grill/smoker at the beginning
of the instructions and operate step by stepin the
provided sequence until the end of the assembly.
Install the parts always the way as shown in the
drawing and use for installing the parts, the screws,
nuts and washers shown in the instructions.
Note!Do not ever use a cordless screwdriver on
assembling. This can damage the screws and the
surfaces. Tighten all screws only by hand.
The damage caused by the use of a cordless
screwdriver and the overstraining of the screws are
not covered by the warranty.
WARNINGS AND SAFETY
INSTRUCTIONS ON THE GRILL/GRILL/
SMOKER
1. The grill/smoker is intended for outdoor use only.
2. The grill/smoker should not be used indoors.
3. Use only charcoal or briquettes as a fuel for the
grill/smoker. Do not use billets.
4. Use for ignition of the grill/smoker, the lighter bits,
rapeseed oil-based lighter fluid or an electric lighter.
You can also use a fire starter to ignite the coals or
briquettes.
5. WARNING: Do not use petrol or spirits for ignition
or for the increase of the flames. Use only the ignition
means according to standard 1860-3.
6. Do not use lighter fluidif you are using an electric
lighter for igniting the grill/smoker.
7. Do not add lighter fluid to burning coals or
briquettes or hot coals.
8. Do not use or store flammable materials, liquids or
gasses nearthe grill/smoker.
9. Do not use the grill/smoker under a canopy, by a
wall, in a garage, in a motor caravan or a trailer, on a
boat, in a closed room or indoors. Check that there
are no flammable or combustible materials in the
vicinity. Around the grill/smoker should be at least two
meters of free space in all directions, but more is
recommended.
10. WARNING: The grill/smoker gets hot when being
used. The grill/smoker cannot be moved during use,
or when it is still hot.

11. Do not allow children to use the grill/smoker.
12. Do not leave the grill/smoker unattended during
use even for a moment.
13. WARNING: Keep children and pets away from
the grill/smoker.
14. Do not use the grill/smoker where there is
something wrong with it.
15. Place the grill/smoker on a strong and flat heat-
tolerant ground.
16. When choosing a place oflocation, take into
consideration emergence of smoke. Do not use the
grill/smoker near open windows. The smoke can
come into the room through the windows.
17. The grill/smoker also heats up on the bottom.
Do not place the grill/smoker onto the lawn.
18. Under thegrill/smoker can be placed a concrete
slab, for the purpose of protection of sensitive
materials.
19. Place the grill/smoker in a location where the
wind cannot overturn it.
20. Put coals or briquettes on the rack intended for
that purpose. Do not put them on the bottom ash
container.
21. Light the grill/smoker always and only when
uncovered.
22. Remove the ash from the bottom of the ash
container only when it has cooled.
23. Do not put the ashes in a plastic container or a
container of any other combustible material.
24. Do not touch the hot grill/smoker or its racks.
25. Use heat-resistant barbequegloves and strong,
long-stemmed barbequetools as aids when using
the grill/smoker.
26. To not use water for extinguishing the grill/
smoker. Water damages the enamel surfaces of the
hot grill/smoker.
27. Extinguish the embers by closing the air inlet
valves on the bottom and on the lid of the grill/
smoker.
28. The grill/smoker should be cleaned after use.
Use the barbequecleaning brush for cleaning the
grates. A steel brush can damage the enameled
grates of the grill/smoker.
29. Be prepared for a possible accident by knowing
where the first aid kit and fire extinguisher are and
ensure that you know how to use them.
1. Put at the bottom of the fire starter a couple of
BEFORE IGNITION OF THE GRILL/SMOKER
Placement of the grill/smoker
On placement of the grill/smoker should be taken into
account the following circumstances:
• The grill/smoker should be placed in a place where the
smoke cannot cause damage.
• Do not use the grill/smoker near open windows.
• Do not use or store flammable materials, liquids or
gasses nearthe grill/smoker.
• Do not place the grill/smoker on top of combustible
materials, such as patio tables.
• Do not use the grill/smoker under a canopy, by a wall,
in a garage, in a motor caravan or a trailer, in a boat, in a
closed room or indoors. Check that there are no
flammable or combustible materials in the vicinity. Around
the grill/smoker should be at least two meters of free
space in all directions, but more is recommended.
• The grill/smoker should be placed on a flat, horizontal
surface.
• The grill/smoker gets hot when being used. It radiates
heat also downwards. Keep this in mind when choosing a
place to put it.
• Do not place the grill/smoker onto the lawn.
• It is preferable to place the grill/smoker on a concrete
slab. The size of the slab should be at least 50 x 50 cm.
Preparations before lighting of the grill/smoker
Before lighting of the grill/smoker follow these
instructions:
• Remove the lid and the center part of the grill/smoker.
• Take the ashes of the previous smoking out of the
ashcontainer.
• Put the ash container back into place and the coal grille
on top of it.
• Open the air regulation valves (3 pieces) of the bottom
part completely.
LIGHTNING
Fuels used
3

The acceptable fuels of this grill/smoker are:
• Hardwood charcoal
• Briquettes
We recommend that you use briquettes, the burning
time of which is much longer than that of hardwood
charcoal. They do not need to be added to the grill/
smoker as often as hardwood charcoal. Take that in
account in particular in the case of long-term
smoking. Some of the briquettes smoke even up to
240 minutes.
Note!Do not use billets or other timbers as fuel. Their
calorific value is too high and too much heat can
damage the grill/smoker.
The damage caused by the use of billets or other
timber are not covered by the warranty.
Different ignition methods
The grill/smoker can be ignited by different methods.
• By using a firestarter.
• By using paraffin-based lighting bits.
• By using lighter fluids. Use lighter fluids based on
rapeseed oil, which does not leave side flavoursto the
products to be smoked. It can be used to ignite
hardwood charcoal.
• Using an electric lighter. It can be used to ignite
hardwood charcoal and briquettes.
WARNING: Do not use petrol or spirits for ignition or
for theincrease of the flames. Use only the ignition
means according to standard 1860-3.
All kindling materials and tools are sold separately.
Ignition
When the grill/smoker is ready, it can be ignited as
follows.
Ignition of hardwood charcoal with a
firestarter:
1. Put at the bottom of the fire starter a couple of
crumpled newspapers or some paraffin based
lighter bits on the charcoal grate.
2. Fill the top part of the fire starter with hardwood
charcoal.
3. Put the fire starter in the center of the charcoal
grate.
4. Light the newspaper or the lighter bits with a
match or a lighter.
5. When all the hardwood charcoal is glowing red,
pour the contents of the fire starteronto the charcoal
grate.
Ignition of briquettes with a fire starter:
1. Put 3-5 paraffin based lighter bits on the
charcoal grate.
2. Fill the top part of the fire starterwith briquettes.
3. Put the fire starterin the center of the charcoal
grate.
4. Light the lighter bits with a match or a lighter.
5. When all the briquettes are glowing red, pour the
contents of the fire starter to the charcoal grate.
Ignition with lighter bits:
1. Make a pyramid shaped pile of hardwood
charcoal or briquettes on the charcoal grate.
2. Put 3-5 paraffin based lighter bits among the
hardwood charcoal or briquettes.
3. Light the lighter bits with a match or a lighter.
Ignition with lighter fluid:
1. Make a pyramid-shaped pile of the hardwood
charcoal on the charcoal grate.
2. Dampen the charcoal with lighter fluid. We
recommend to use lighter fluids based on rapeseed
oil. It does not leave side flavoursto the products
being smoked.
3. Rapeseed based lighter fluid can be ignited
directly with a match or a lighter.
4. If you use any other lighter fluid, let it be
absorbed in the hardwood charcoal before ignition.
For absorption time, look at the lighter fluid
packaging.
4

5
Note!Never use gasoline or spirits for ignition of
the grill/smoker.
Be careful when you put lighter fluid on the
hardwood charcoal. Check that lighter fluid would
not seep down under the grill/smoker. A hot grill/
smoker can ignite the lighter fluid spilled
underneath it.
The warranty does not cover damage to the grill/
smoker or its environment, resulting from ignition
of the lighter fluid spilled out of the grill/smoker.
Ignition with an electrical lighter:
1. Put the lighter on the charcoal grate.
2. Make a pyramid shaped pile of hardwood
charcoal or briquettes on the lighter.
3. Turn on the lighter.
4. When the coals are glowing red, turn off the
lighter and remove the lighter from under the
charcoal.
Note!Never use lighter fluid when lighting
hardwood charcoal or briquettes with an electric
lighter.
If using an electric lighter, observe the following
things:
• Always follow the lighter’s manufacturer's
instructions.
• Make sure that the power cord of the lighter
does not come into contact with the hot grill/
smoker.
• Take care that no one trips over the power cord
of the lighter.
USING THE GRILL/SMOKER
Preparations before you begin to smoke
When the hardwood charcoal or briquettes have
turned light greyand are covered with ash, the
grill/smoker is ready for use. Spread the coals
evenly on the charcoal grate. Then assemble the
grill/smoker as follows:
1. Place the center part of the grill/smoker on top
of the bottom part. Make sure that the hatch in
the center part is shut.
2. Close the three locking clipsthat holdsthe
center part in place firmly.
3. Put a liquid bowlon the lower retainers.
• The liquid bowlis aimed to harmonize the
temperature on long-term barbeque grilling or
baking with smoke.
•Note! In the case of conventional hot smoking, a
liquid bowldoes not have to be used.
• The liquid bowlis filled with hot water so that
the internal temperature of the grill/smoker would
not fall. Pour the water into the liquid bowlusing a
jug.
•Note!Check that water does not come into
contact with the charcoals. The ash can give off
dust which can contaminate the products being
smoked or barbequed.
• In the liquid bowlcan also be placed beer, wine,
flavouredbroth and herbs in the liquid. Upon
boiling of the fluid, the vapoursreleased flavourthe
products to be smoked or barbequed.
4. Put the barbequegrate without handles directly
onto the liquid bowl.
5. Put the products to be smoked or barbequed
onto the grate.
6. If you have a lot of products to be smoked or
barbequed, put another barbequegrate onto the
top holders of the center part. Then you can
prepare food on two different levels.
7. Put the lid in place.
Smoking, barbequegrill or barbeque
smoke
In this grill/smoker, the smoking dust or the
smoking chips are placed wetted on the charcoal.
The smoking dust should be soaked in water for
at least 30 minutes before it is put on charcoal.
1. Open the hatch in the center part.
2. Put the wet smoking dust or smoking chips
onto the charcoal.
• At the beginning of the smoking more smoking
dust or smoking chips must be placed on the
charcoal. In the course of smoking, the amount of
the dust or chips to be added can be reduced.

• Note!The grill/smoker and its components are hot.
In the smoking process, use heatresistant
barbequegloves and longstemmed
barbequeaccessories.
• At the same time you add smoking dust or smoking
chips, check the liquid bowl. If necessary, add fluid.
• Tip! Try pre-wetted herbs on the charcoal.
3. Close the hatch in the center part.
Well-equipped grocery stores and hardware stores
Regulation of temperature
OPENHIGH TEMPERATURE LOWER THE TEMPERATURE CLOSED -EXTINGUISH
The temperature is regulated by opening and closing the air regulating valves at the bottom of the grill/smoker and on
the lid. Opening the valves increases the temperature of the grill/smoker. Accordingly, their closing lowers the
temperature. Check on the temperature with a thermometer on the lid. Check the temperature regularly and, where
necessary, regulate the valves.
Note!Air regulating valves heat up during the use of the grill/smoker. Use protective gloves when regulating them.
If the temperature is too high, even though it has been triedto reduce with air regulating valves, decrease the amount
of hardwood charcoal or briquettes on the charcoal grate. Use the help of long barbequetongs and heat-resistant
barbequegloves.
Note!Put the hot hardwood charcoal or briquettes into a heat resistant container. Neverput them into a plastic bucket.
sell a wide variety of smoking dust and chips. The
wood givethe products being smoked or barbequed
their own fragrance. Experiment to find your best
fitting fragrances.
Generally available smoking dust and chips in the
stores.
• Alder
• Apple
• Cherry
• Maple
• Pecan
• Mesquite
• Hickory
6

7
Temperature recommendations
The selection of temperature depends on the method
of preparation and on the products being prepared.
Here are examples of various temperatures in case of
different methods of preparation.
• Hot smoking: 70-100 ° C, preparation time 20
minutes -2 hours.
• Barbequegrilling: 80-115 ° C, preparation time 4
minutes -14 hours.
• Smoke cooking: 150 –230 C°, preparation time 1
–5 hours.
• Charcoal grilling: Hold yourhand about 15 cm
above the charcoal. If you can keep your hand above
the charcoal for 4-5 seconds, the temperature of the
charcoal is appropriate.
Adding hardwood charcoal or briquettes
In long term barbequegrilling or smoke cooking, a
need emerges to add more hardwood charcoal or
briquettes to the charcoal grate. Add hardwood
charcoal or briquettes to the charcoal grate as
follows:
1. Open the hatch in the center part.
2. Add hardwood charcoal or briquettes to the
charcoal grate, using long barbequetongs and heat-
resistant barbequegloves.
• Check also the liquid bowl. If necessary, add fluid.
3. Close the hatch in the center part.
Note!Always, when the hatch of the center part or the
lid of the grill/smoker is open, the temperature of the
grill/smoker drops. This extends the cooking time.
USING THE GRILL/SMOKER AS A
CHARCOAL GRILL
This grill/smoker can also be used as a traditional
charcoal grill.
If you want to use the grill/smoker as a charcoal grill,
the center part is left uninstalledon the bottom part.
1. Ignite the hardwood charcoal or briquettes
according to the instructions.
2. When the charcoal has turned light gray, distribute
them evenly on the charcoal grate.
• In case of indirect grilling put coals to the other site
of the grate, and grill the products on the other side,
under the closed lid.
3. Place the grill grate on the holders.
4. Start grilling.
EXTINGUISHING THE GRILL/SMOKER
When the smoking, barbequegrilling, hot smoke
baking or grilling is completed, the grill/smoker is
extinguished by closing all the air regulating valves.
Put the grill/smoker lid in place and then close all the
air regulating valves at the bottom and on the lid of
the grill/smoker.
Keep the lid shut and the air regulating valves closed
until the following day, after which the ash container
can be emptied.
CLEANING AND MAINTENANCE OF THE
GRILL/SMOKER
So that the grill/smoker could be used as long as
possible, it should regularly be cleaned.
Grilling grates
Grilling grates should be cleanedafter each use. Clean
the grates when they are still warm. For cleaning use
a grill cleaning brush with soft bristles. A steel brush
can damage the enamel surfaces of the grill grates.
Grill grates can also be washed in the sink. Do not put
grill grates in the dishwasher.
The damage caused by the use of a steel brush are
not covered by the warranty.
Other steel parts of the grill/smoker
Other steel parts of the grill/smoker are cleaned with a
damp cloth and soapy water. Dry the surfaces
thoroughly after cleaning.

Maintenance
Check regularly the tension of the screws of the legs,
the hatch, the door handles, the locking bolts and
grate holders of the grill/smoker. If necessary,
tighten the screws.
Note!Never use a cordless screwdriver when
assembling the grill/smoker. This can damage the
screws and the surfaces of the parts. Tighten all
screws only by hand.
The damage caused by the use of a cordless
screwdriver and the overstraining of the screws are
not covered by the warranty.
STORAGE
Keep the grill/smoker always cleaned in a dry place.
Never leave the grill/smoker exposed to rain.
WARRANTY AND MANAGEMENT OF
WARRANTY ISSUES
Warranty
The grill/smoker and its components have a oneyear
manufacturing and materials warranty. Keep a proof
of purchase, make a copy thereof and add to this
manual as proof of warranty. In case of warranty
issues, the purchase date and place must be firmly
verified.
The warranty does not cover normal wear of parts,
damage resulting from rusting of components or
surfaces, as well as errors or traces caused by
improper handling or maintenance of the device.
The steel surfaces discoloration, spots formation,
corrosion, and darkening is normal during operation
and over time. On steel surfaces can develop rust
spots in extremely humid and salty environments.
Use of steel care substances according to
instructions is of particular importance. These
potential rust spots do not prevent the use of the
device and are a normal phenomenon on steel
surfaces. Therefore, the possible emergence of those
spots on the surfaces of parts is not covered under
warranty.
Arrangement of warranty aairs
If on the product, or some of its components, errors
occur during the warranty period, or parts are missing
from the assembly of the grill/smoker, contact the
place of purchase of the grill/smoker.
Prior to submission of warranty claims read these
instructions carefully and make sure that the warranty
claim does not result from failure to follow instructions
or failure to perform maintenance.
With regard to the warranty claim, the following data
must be submitted to the place of purchase:
• The grill/smoker make and model
• Reason for thewarranty claim
• The number of the faulty part according to the parts
list
• A copy of the sales receipt or an explanation from
the place of purchase and the date of purchase
• Name, phone number, address, and postal code of
the user
8

FI
Huomio! Älä milloinkaan käytä kokoamisessa
akkuruuvinväännintä. Se saattaa rikkoa ruuvit ja
osienpinnat. Kiristä kaikki ruuvit ainoastaan käsivoimin.
Akkuruuvinvääntimen käytöstä ja ruuvien liiallisesta
kiristyksestä johtuvat vauriot eivät kuulu takuun piiriin.
SAVUSTIMEEN LIITTYVÄT VAROITUKSET
JA TURVAOHJEET
1. Savustin on tarkoitettu ainoastaan ulkokäyttöön.
2. Savustinta ei saa käyttää sisätiloissa.
3. Käytä ainoastaan grillihiiliä tai brikettejä savustimen
polttoaineena.Älä käytä puuhalkoja.
4. Käytä savustimen sytytykseen sytytyspaloja,
rapsiöljypohjaista sytytysnestettä tai sähköistä
sytytinvastusta.Voit myös käyttää sytytyspiippua hiilien
tai brikettien sytyttämiseen.
5. VAROITUS: Älä käytä bensiiniä tai spriitä
sytyttämiseen tai liekkien kohentamiseen. Käytä vain
standardin 1860-3 mukaisia sytykkeitä.
6. Älä käytä sytytysnestettä, jos käytät sähköistä
sytytysvastusta savustimen sytyttämiseen.
7. Älä lisää sytytysnestettä palviin hiiliin tai briketteihin,
tai kuumaan hiillokseen.
8. Älä käytä tai säilytä palavia materiaaleja, nesteitä tai
kaasuja savustimen läheisyydessä.
9. Älä käytä savustinta katoksen alla, seinän vieressä,
autotallissa, matkailuautossa tai – vaunussa, veneessä,
suljetussa tilassa tai sisätiloissa. Tarkista ettei lähettyvillä
ole palavia tai syttyviä materiaaleja. Vapaata tilaa täytyy
olla savustimensivuilla joka suuntaan vähintään kaksi
metriä, mielellään enemmän.
10. VAROITUS: Savustin kuumenee käytössä. Savustinta
ei saa siirtää käytön aikana tai kun se on vielä kuuma.
11. Älä anna lasten käyttää savustinta.
12. Älä jätä savustinta hetkeksikään vartioimatta käytön
aikana.
13. VAROITUS: Pidä lapset ja lemmikkieläimet poissa
savustimen läheisyydestä.
14. Älä käytä savustinta,jos siinä on vikaa.
15. Sijoita savustin tukevalle ja tasaiselle lämpöä
kestävälle alustalle.
16. Ota huomioon savunmuodostuminen sijoituspaikkaa
valittaessa. Älä käytä savustinta avoimien ikkunoiden
läheisyydessä. Savu voi kulkeutua ikkunoiden kautta
asuntoon sisälle.
9
YLEISET OHJEET
Tätä hiilisavustinta voidaan käyttää savustimena
lämminsavustukseen, barbequegrillaamiseen,
grillaamiseen kuumalla savulla sekä perinteisenä
hiiligrillinä.
Lue ohjeet huolella ennen savustimen käyttöönottoa ja
säilytä ohjeet myöhempää tarvetta varten.
Tämä hiiligrilli on valmistettu standardin EN1860-1
mukaisesti.
Tärkeää
Lue kaikki ohjeet ja neuvot ennen kuin käytät
savustinta. Seuraa tarkoin sytytykseen,
sammutukseen ja käyttöön liittyviä ohjeita. Ohjeiden
noudattamatta jättäminen voi aiheuttaa vaaratilanteen
tai aiheuttaa aineellista vahinkoa.
Säilytä ohjeet myöhempää tarvetta varten.
ASNNUSOHJEET
Ennen asentamista
Pura myyntipakkaus huolella ja poista kaikki
pakkausmateriaali ennen grillin kokoamista. Huolehdi
pakkausmateriaalin asianmukaisesta hävittämisestä.
Älä anna lasten leikkiä pakkausmateriaalilla.
Tarkista ennen grillin kokoamista osalistan avulla, että
kaikki kokoamiseen tarvittavat osat ovat olemassa ja
että ne ovat kunnossa. Osien ollessa viallisia tai niiden
puuttuessa ota yhteys suoraan ostopaikkaan.
Kokoa grilli ohjeiden mukaisessa järjestyksessä
hyvässä valaistuksessa ja puhtaalla tasaisella alustalla.
Älä kokoa grilliä terassilla, osia voi tippua
terassilaudoituksen alle.
Peltiosista voi tulla haavoja. Käytä työkäsineitä grilliä
asentaessasi. Ole erittäin huolellinen kokoonpanotyössä.
Aloita grillin kasaaminen ohjeen alusta ja etene kohta
kohdalta järjestyksessä kasausohjeen loppuun. Aseta
osat aina kuten kuvassa ja käytä osien kiinnitykseen
ohjeessa esitetty määrä ruuveja, muttereita ja
aluslevyjä.

17. Savustin lämpenee myös alaspäin. Älä sijoita
savustinta suoraan nurmikon päälle.
18. Savustimen alle voi laittaa betonilaatan
suojaamaan arkoja materiaaleja.
19. Sijoita savustin paikkaan, jossa tuuli ei pääse
kaatamaan sitä.
20. Sijoita hiilet tai briketit niille varatulle ritilälle. Älä
laita niitä tuhka-astianpohjalle.
21. Sytytä savustin aina ilman kantta.
22. Poista tuhka tuhka-astianpohjalta vasta kun se
on jäähtynyt.
23. Älä laita tuhkaa muoviseen tai muuhun
syttyvään astiaan.
24. Älä koske kuumaan savustimeen tai sen
ritilöihin.
25. Käytä kuumaa kestäviä grillihanskoja ja tukevia
pitkävartisia grillaustarvikkeita apuvälineenä kun
käytät savustinta.
26. Älä käytä vettä savustimen sammuttamiseen.
Vesi voi vaurioittaa kuuman savustimen
emalipintoja.
27. Tukahduta hiillos sulkemalla ilmansäätöventtiilit
savustimen pohjasta sekä kannesta.
28. Savustin täytyy puhdistaa käytön jälkeen. Käytä
ritilöiden puhdistamiseen grillin puhdistusharjaa.
Teräsharjan käyttö voi vaurioittaa savustimen
emaloituja ritilöitä.
29. Valmistaudu mahdolliseen onnettomuuteen
niin,että tiedät missä ensiapupakkaus ja
käsisammutin ovat, ja että osaat käyttää niitä.
ENNEN SAVUSTIMEN SYTYTTÄMISTÄ
Savustimen sijoituspaikka
Savustimen sijoittelussa tulee ottaa huomioon
seuraavat asiat:
• Savustin tulee sijoittaa paikkaan, jossa savu ei
pääse aiheuttamaan vahinkoa.
• Älä käytä savustinta avoimien ikkunoiden
läheisyydessä.
• Älä käytä tai säilytä palavia materiaaleja, nesteitä
tai kaasuja savustimen läheisyydessä.
• Älä sijoita savustinta syttyvien materiaalien,
kuten terassilaudoitus, päälle.
• Älä käytä savustinta katoksen alla, seinän
vieressä, autotallissa, matkailuautossa tai –
vaunussa, veneessä, suljetussa tilassa tai
sisätiloissa. Tarkista ettei lähettyvillä ole palavia tai
syttyviä materiaaleja. Vapaata tilaa täytyy olla
savustimen sivuilla joka suuntaan vähintään kaksi
metriä, mielellään enemmän.
• Savustin tulee sijoittaa tasaiselle, vaakasuorassa
olevalle alustalle.
• Savustin kuumenee käytössä. Se säteilee lämpöä
myös alaspäin. Ota tämä huomioon sijoituspaikkaa
valittaessa.
• Älä sijoita savustinta suoraan nurmikon päälle.
• Savustin kannattaa sijoittaa betonilaatan päälle.
Laatan koko on oltava vähintään 50 x 50 cm.
Valmistelut ennen savustimen
sytyttämistä
Ennen savustimen sytyttämistä toimi seuraavasti:
• Poista savustimen kansi ja keskiosa.
• Poista tuhka-astiastaedellisen savustuskerran
tuhkat.
• Laita tuhka-astiatakasin paikoilleen sekä hiiliritilä
tuhka-astianpäälle.
• Avaa pohjaosan ilmansäätöventtiilit (3 kpl)
kokonaan auki.
SYTYTTÄMINEN
Käytettävät polttoaineet
Tämänsavustimen hyväksytyt polttoaineet ovat:
• Lehtipuuhiili
• Briketti
Suosittelemme käytettävän brikettejä, joiden
palamisaika on selkeästi pidempi, kuin
lehtipuuhiilillä.Niitä ei tarvitse lisätä niin usein
savustimeen, kuin lehtipuuhiiliä. Ota asia huomioon
ainakin pitkäaikaisessa savustamisessa. Osa
briketeistä palaa jopa 240 minuuttia.
10

Huomio! Älä koskaan käytä puuhalkojatai muuta
puutavaraa savustimen polttoaineena. Niiden
lämpöarvo on hyvin korkea, ja liian suuri lämpö voi
vaurioittaa savustinta.
Puuhalkojen tai muun puutavaran käytöstä aiheutuvat
vauriot eivät kuulu takuun piiriin.
Eri sytytystavat
Savustin voidaan sytyttää eri tavoin.
• Käyttämällä sytytyspiippua.
• Käyttämällä parafiinipohjaisia sytytyspaloja.
• Käyttämällä sytytysnestettä. Käytä rapsiöljypohjaista
sytytysnestettä, joka ei jätä sivumakua savustettaviin
tuotteisiin. Voidaan käyttää lehtipuuhiilille.
• Käyttämällä sähköistä sytytysvastusta.Voidaan
käyttää lehtipuuhiilien ja brikettien sytyttämiseen.
VAROITUS: Älä käytä bensiiniä tai spriitä
sytyttämiseen tai liekkien kohentamiseen. Käytä vain
standardin 1860-3 mukaisia sytykkeitä.
Kaikki sytytysmateriaalit ja apuvälineet myydään
erikseen.
Sytyttäminen
Kun savustimen esivalmistelut on tehty, voidaan
savustin sytyttää seuraavasti.
Lehtipuuhiilien sytyttäminen sytytyspiipulla
1. Laita sytytyspiipun alaosaan pari rypistettyä
sanomalehden aukeamaatai muutama
parafiinipohjainen sytytyspala hiiliritilälle.
2. Täytä sytytyspiipun yläosa lehtipuuhiilillä.
3. Sijoita täytetty sytytyspiippu hiiliritilän keskelle.
4. Sytytä sanomalehtipaperi tai sytytyspalat tulitikulla
tai sytyttimellä.
5. Kun kaikki lehtipuuhiiletovat hehkuvan punaisia,
kaada sytytyspiipun sisältö hiiliritilälle.
Brikettien sytyttäminen sytytyspiipulla
1. Laita 3 –5 parafiinipohjaista sytytyspalaa
hiiliritilälle.
2. Täytä sytytyspiipun yläosa briketeillä.
3. Sijoita täytetty sytytyspiippu hiiliritilän keskelle.
4. Sytytä sytytyspalat tulitikulla tai sytyttimellä.
5. Kun kaikki briketit ovat hehkuvan punaisia, kaada
sytytyspiipun sisältö hiiliritilälle.
Sytyttäminen sytytyspaloilla
1. Tee pyramidin muotoinen keko lehtipuuhiilistä tai
briketeistä hiiliritilälle.
2. Aseta 3-5 parafiinipohjaista sytytyspalaa
lehtipuuhiilien tai brikettien joukkoon.
3. Sytytä sytytyspalat tulitikulla tai sytyttimellä.
Sytyttäminen käyttämällä sytytysnestettä
1. Tee pyramidin muotoinen keko lehtipuuhiilistä
hiiliritilälle.
2. Kostuta hiilet käyttämällä sytytysnestettä.
Suosittelemme käytettäväksi rapsiöljypohjaista
sytytysnestettä. Tästä ei jää sivumakua savustettaviin
tuotteisiin.
3. Rapsiöljypohjaisen sytytysnesteen voi sytyttää
välittömästitulitikulla tai sytyttimellä.
4. Jos käytät muuta sytytysnestettä, anna sen
imeytyä lehtipuuhiiliin ennen sytyttämistä. Katso
imeytymisaika sytytysnestepakkauksen kyljestä.
Huomio! Älä koskaan käytä savustimen sytyttämiseen
bensiiniätai spriitä.
Ole huolellinen kun laitat sytytysnestettä
lehtipuuhiilille.Katso, ettei sytytysnestettä pääse
valumaan maahan, savustimen alapuolelle. Kuuma
savustin voi sytyttää alapuolelle valuneen
sytytysnesteen tuleen.
Takuu ei kata savustimen tai sen ympäristön
vaurioita, jotka ovat aiheutuneet savustimen
ulkopuolelle valuneen sytytysnesteen syttymisestä
palamaan.
Sytyttäminen sähköisellä
sytytysvastuksella
1. Aseta sytytysvastus hiiliritilälle.
2. Tee pyramidin muotoinen keko lehtipuuhiilistä tai
briketeistä sytytysvastuksen päälle.
11

Huomio! Älä koskaan käytä sytytysnestettä, kun
käytät sähköistä sytytysvastusta lehtipuuhiilien
tai brikettien sytyttämiseen.
Kun käytät sähköistä sytytysvastusta ota
huomioon seuraavat asiat:
SAVUSTIMEN KÄYTTÄMINEN
Valmistelut ennen savustamisen
aloittamista
Kun lehtipuuhiillos tai briketit ovat muuttuneet
vaalean harmaiksija ovat tuhkan peitossa,on
savustin käyttövalmis.Levitä hiillos tasaiseksi
kerrokseksi hiiliritilälle. Kokoa savustin sen
jälkeen valmiiksi seuraavasti:
Savustaminen, barbeque grillaaminen
tai savulla grillaaminen
Tässä savustimessa savustuspurut tai –lastut
laitetaan kostutettuina hiilloksen päälle.
Savustuspuruja on liotettava vedessä vähintään
30 minuuttia, ennen niiden laittamista hiillokselle.
nestekulhoa ei tarvitse käyttää.
12
3. Kytke sytytysvastus päälle.
4. Kun hiillos on hehkuvan punainen,sammuta
sytytysvastus ja poista se hiilien alta.
• Nestekulhoon voidaan laittaa myös olutta,
viiniä, mausteliemiä sekä yrttejä nesteen
joukkoon. Nesteen kiehuessa, vapautuvat höyryt
maustavat savustettavat/grillattavat tuotteet.
• Noudata aina sytytysvastuksen valmistajan
käyttöohjeita.
• Katso, ettei sytytysvastuksen sähköjohto ota
kiinni kuumaan savustimeen.
• Huolehdi, ettei kukaan pääse kompastumaan
sytytysvastuksen sähköjohtoon.
4. Aseta ilman kahvoja olevagrillausritilä suoraan
nestekulhon päälle.
5. Laita savustettavat tai grillattavat tuotteet
ritilälle.
6. Jos savustettavia tai grillattavia tuotteita on
paljon, laita toinen grillausritilä paikoilleen
keskiosan ylempiin pidikkeisiin.Tällöin voit
valmistaa ruoan kahdessa eri tasossa.
7. Laita kansi paikoilleen.
1. Aseta savustimen keskiosa pohjaosan
päälle. Katso, että keskiosassa oleva luukku on
kiinni.
2. Sulje 3 kpl lukitussalpaa, jotka pitävät
keskiosan tukevasti paikoillaan.
3. Aseta nestekulho alempiin pidikkeisiin.
• Nestekulhon tarkoitus ontasata lämpötilaa
pitkäaikaisessa barbeque grillaamisessa tai
savulla kypsentämisessä.
• Huomio! Normaalissa lämminsavustuksessa
• Nestekulho täytetään kuumalla vedellä, jottei
lämpötila savustimen sisällä lähde laskemaan.
Kaada vesi kannun avulla nestekulhoon.
• Huomio! Katso, ettei vettä roisku hiillokselle.
Tuhka voi pöllytä savustettaviin/grillattaviin
tuotteisiin.

Erilaiset savustuspurut
Hyvinvarustetuistaelintarvikeliikkeistä ja
rautakaupoista löytyy laaja valikoima erilaisia
savustuspuruja ja –lastuja. Eri puusta olevat
savustuspurut ja –lastut tuovat oman arominsa
savustettaviin ja grillattaviin tuotteisiin. Kokeilemalla
löydät itsellesi parhaiten sopivat aromit.
Kaupoissa yleisesti olevia savustuspuruja ja –
lastuja.
3.. Sulje keskiosan luukku
Lämpötilan säätäminen
Lämpötilan säätäminen tapahtuu avaamalla ja sulkemalla savustimen pohjassa ja kannessa olevia ilmansäätöventtiileitä.
Ilmansäätöventtiilien avaaminen nostaa lämpötilaa savustimessa. Vastaavasti niiden sulkeminen laskee lämpötilaa
savustimessa. Tarkkaile lämpötilaa kannessa olevan lämpömittarin avulla. Tarkista lämpötilaa säännöllisesti, ja säädä
ilmansäätöventtiileitä tarvittaessa.
Huomio! Ilmansäätöventtiilit kuumenevat savustimen käytön aikana. Käytä suojakäsineitä, kun säädät
ilmansäätöventtiileitä.
Jos lämpötila pysyy liian korkeana, vaikka lämpötilaa on yritetty säätää ilmansäätöventtiileistä, poista lehtipuuhiiliä tai
brikettejä hiiliritilältä. Käytä apuna pitkävartisia grillauspihtejä sekä kuumuutta kestäviä grillaushanskoja.
Huomio! Laita kuumat lehtipuuhiilet tai briketit kuumuutta kestävään astiaan. Älä koskaan laita niitä maahan tai
muoviämpäriin.
3
1. Avaa keskiosassa oleva luukku
2. Lisää kostutettuja savustuspuruja tai –lastu
hiillokselle.
• Savustamisen alussa savustuspuruja tai – lastuj
täytyy laittaa hiillokselle enemmän. Tuotteiden
kypsentyessä lisättävien savustuspurujen tai –lastujen
määrää voidaan vähentää.
• Huomio! Savustin ja sen osat ovat kuumia. Käytä
kuumaa kestäviä grillihanskoja ja tukevia pitkävartisia
grillaustarvikkeita apuvälineenä kun käytät savustinta.
• Samalla kun lisäät savustuspuruja tai – lastuj
hiillokselle, tarkista nestepinta nestekulhossa. Lisää
tarvittaessa nestettä.
• Vinkki! Kokeile myös kostutettuja yrttejä hiilloksella
• Leppä (Alder)
• Omenapuu (Apple)
• Kirsikkapuu (Cherry)
• Vaahtera (Maple)
• Pecan pähkinäpuu (Pecan)
• Mesquitopuu (Mesquite)
• Hikkori (Hickory)

Lämpötilasuosituksia
Lämpötilan valintaan vaikuttaa
valmistusmenetelmä sekä valmistettavat tuotteet.
Tässä esimerkkilämpötiloja eri
valmistusmenetelmille.
• Lämminsavustus: 70–100 C°, valmistusaika 20
minuuttia –2 tuntia.
• Barbeque grillaus: 80–115 C°, valmistusaika 4
–14 tuntia.
• Savulla kypsentäminen: 150–230 C°,
valmistusaika 1 –5 tuntia.
• Hiiligrillaaminen: Pidä kättä noin 15 cm
korkeudella hiilloksesta. Jos pystyt pitämään kättä
paikoillaan 4–5 sekuntia, on hiilloksen lämpötila
sopiva.
Lehtipuuhiilien tai brikettien lisääminen
Pitkäaikaisessa barbeque grillaamisessa tai savulla
kypsentämisessä on tarpeen lisätä lehtipuuhiiliä tai
brikettejä hiiliritilälle. Lisää lehtipuuhiilet tai briketit
hiiliritilälle seuraavasti:
1. Avaa keskiosan luukku.
2. Lisää lehtipuuhiilet tai briketit hiiliritilälle
käyttäen pitkävartisia grillauspihtejä sekä
kuumuutta kestäviä grillaushanskoja.
• Tarkista samalla nestepinta nestekulhossa. Lisää
tarvittaessa nestettä.
3. Sulje keskiosan luukku.
Huomio! Aina kun keskiosan luukku tai savustimen
kansi on avoinna, laskee lämpötila savustimessa.
Tämä lisää kypsennysaikaa.
SAVUSTIMEN KÄYTTÄMINEN
HIILIGRILLINÄ
Tätä savustinta voidaan käyttää myös perinteisenä
hiiligrillinä.
Kun savustinta halutaan käyttää hiiligrillinä,
jätetään keskiosa asentamatta pohjaosan päälle.
1. Tee hiillos lehtipuuhiilistä tai briketeistä
ohjeidenmukaisesti
14
2. Hiilloksen ollessa vaalean harmaa, levitä hiillos
tasaiseksi kerrokseksi hiiliritilälle.
• Epäsuorassa grillaamisessa levitä hiillos ritilän
toiseen reunaan, ja tee grillaaminen vastakkaisella
reunalla, kannen ollessa suljettuna.
3. Aseta grillausritilä pidikkeisiin.
4. Aloita grillaaminen.
SAVUSTIMEN SAMMUTTAMINEN
Kun savustaminen, barbeque grillaus, kuumalla
savulla kypsentäminen tai grillaaminen on tehty,
sammutetaan savustin sulkemalla kaikki
ilmansäätöventtiilit.
Laita savustimen kansi paikoilleen, ja sulje sen
jälkeen kaikki ilmansäätöventtiilit savustimen
pohjaosasta sekä kannesta.
Pidä kansi paikoillaan ja ilmansäätöventtiilit
suljettuina seuraavaan päivään, jonka jälkeen
tuhka-astianvoi tyhjentää.
SAVUSTIMEN PUHDISTUSJA HUOLTO
Jotta savustimelle saadaan mahdollisimman pitkä
käyttöikä, on sitä säännöllisesti puhdistettava.
Grillausritilät
Grillausritilät on puhdistettava jokaisen käytön
jälkeen. Puhdista ritilät niiden ollessa vielä
lämpimiä. Käytä puhdistamiseen
pehmeäharjaksista grillin puhdistusharjaa.
Teräsharjan käyttö voi vaurioittaa grillausritilöiden
emalipintoja.
Grillausritilät voidaan pestä myös tiskialtaassa. Älä
laita grillausritilöitä astianpesukoneeseen.
Teräsharjan käytöstä aiheutuneet vauriot eivät
kuulu takuun piiriin.
Savustimen muut teräsosat
Savustimen muut teräsosat puhdistetaan
käyttämällä kosteaa puhdistusliinaa ja

saippuavesiseosta. Kuivaapinnat huolellisesti
puhdistuksen jälkeen.
Huolto
Tarkista säännöllisesti savustimen jalkojen, luukun,
kahvojen, lukitussalpojen ja ritiläpidikkeiden
ruuvien kireys. Kiristä ruuvit tarvittaessa.
Huomio! Älä milloinkaan käytä kokoamisessa
akkuruuvinväännintä. Se saattaa rikkoa ruuvit ja
osien pinnat. Kiristä kaikki ruuvit ainoastaan
käsivoimin.
Akkuruuvinvääntimen käytöstä ja ruuvien liiallisesta
kiristyksestä johtuvat vauriot eivät kuulu takuun
piiriin.
SÄILYTYS
Säilytä savustin aina puhdistettuna kuivassa
paikassa. Älä koskaan jätä savustinta
vesisateeseen.
TAKUU JA TAKUUASIOIDEN
KÄSITTELY
Takuu
Tällä savustimella ja sen osilla on yhden vuoden
valmistus-ja materiaalitakuu. Säästä ostokuitti,
otasiitä kopio ja liitä se näihin käyttöohjeisiin
takuutodistuksena. Takuuasioissa on ostopaikka ja
ostopäivämäärä kyettävä osoittamaan luotettavasti
toteen.
Takuu ei kata normaalia kulumista, osien tai
pintojen ruostumista, ruostumisesta johtuvia vikoja,
laitteen väärinkäyttöä tai huollon laiminlyönnistä
johtuvia vikoja ja jälkiä.
Teräspintojen värimuutos, pilkuttuminen ja
tummeneminen on normaalia käytössä ja ajan
kuluessa. Teräspinnoilla saattaa varsinkin
kosteassa ja suolaisessa ympäristössä esiintyä
korroosiopilkkuja, Nämä mahdolliset
15
korroosiopilkut eivät estä laitteen käyttöä ja ne ovat
aivan normaali ilmiö teräspinnoilla, joten niiden
mahdollinen esiintyminen osien pinnoilla ei kuulu
takuun piiriin.
Jos tuotteessa tai tuotteen osassa ilmenee vika
takuuaikana, ole yhteydessä suoraan grillin ostopaik-
kaan. Myyjä hoitaa kaikki takuukäsittelyt. Viallisen tai
puuttuvan osan tilalle myyjä tai hänen edustaja
lähettää uuden osan, mutta ei vastaa viallisen tai
puuttuvan osan vaihdosta grilliin. Itse koottavissa
grilleissä asiakas vastaa aina itse osan vaihtamisesta
grilliin ohjeiden mukaan. Näiden ohjeiden noudatta-
matta jättämisen takia takuu raukeaa eikä käyttö
vastaa tuotetodistusta..
Takuu ei ole voimassa, mikäli tuotetta käytetään
kaupallisessa valmistus-,myynti-tai
vuokraustarkoituksessa. Takuu ei heikennä millään
tavalla Suomessa voimassa olevaa
kuluttajansuojalakia.
Takuuasioiden käsittely
Jos tuotteessa tai tuotteen osassa ilmenee vikaa
takuuaikana tai osia puuttuu grilliä kasattaessa, ole
yhteydessä suoraan grillin ostopaikkaan. Myyjä
hoitaa kaikki takuukäsittelyt.
Ennen takuuvaatimusten esittämistä lue käyttöohje
huolella läpi ja tarkista, että takuuvaatimus ei johdu
käyttöohjeiden vastaisesta käytöstä tai huollon
laiminlyönnistä.
Takuuasioissa seuraavat tiedot on toimitettava maah-
antuojalle:
- Grillin merkki ja mallinimi
- Reklamaation syy
- Viallisen osan osanumero
osaluettelon mukaisesti
- Kopio ostokuitista tai selvitys
ostopaikasta sekä ostopäivämäärä
- Kuluttajan nimi, puhelinnumero,
katuosoite, postinumero
Yllämainitut tiedot tulee toimittaa reklamaation tai
takuuvaatimuksen yhteydessä. Usein myös valokuvat
asiasta auttavat reklamaation ja takuu-asian nope-
assa hoitamisessa. Ota reklamoidusta tuotteesta tai
sen osasta/viasta 1-3 valokuvaa ja näytä niitä
ostopaikassa reklamaation tekemisen yhteydessä

SE
ALLMÄN RÅD
Denna rökugn får användas endast till varmrökning,
berbeque grillning, grillning med het rök samt som
normal kolgrill.
För säkerhetskull, läs bruksanvisningar före montaget
eller innan rökugnen tas i bruk. Spara manualen för
senare bruk.
Viktigt
Läs alla anvisningar och råd innan ni börjar använda
rökugnen. Följ noggrant tändnings, släcknings samt
användnings råden. Om man inte följer råden kan det
orsaka fara och materiella skador.
Spara bruksanvisningen för senare bruk.
MONTERINGSANVISNIN
Före montaget
Avlägsna all förpackningsmaterial noggrant före
montaget. Låt ej barn leka med
förpackningsmaterialet.
Innan du börjar montaget på grillen kontrollera att du
har allt material med del listan och att de är hela. Om
det finns söndriga delar eller om delar fattas kontakta
importören
Montera grillen i den ordning som det är visat i bra
belysning på en ren och slät yta. Montera inte grillen
på en terrass, delar kan falla under terrassen.
Plåtdelarna kan orsaka sår. Använd hanskar under
montaget. Var noggrann med montaget.
Montera grillen i den ordningen som det är visat i
bilderna. Montera delarna så som bilderna visar och
använd skruvar, muttrar och brickor enligt anvisning.
Obs!Använd aldrig en batteridriven skruvmaskin
under monteringen. Den kan söndra skruvarna och
ytorna. Spänn skruvarna för hand.
Skador och fel somuppstått att man använt en
skruvmaskin eller att man spänt skruvar för hårt
hör inte till garantin.
VARNING OCH SÄKERHETSRÅD FÖR
RÖKUGNEN
1. Rökugnen är endast för utomhusbruk.
2. Rökugnen får inte användainomhus.
3. Använd endast grillkol eller briketter som
bränsle. Du får inte använda ved.
4. För tändning kan du använda tändningsbitar,
rapsolja baserad tändningsvätska eller elresistor.
Du kan också använda en tändingspipa för
tändning av kol och briketter.
5. VARNING! Använd inte bensin eller alkohol för
tändning eller åter tändning. Använd endast
tändningsmedel enligt standard EN 1860-3.
6. Använd aldrig tändningsvätska om du tänder
rökugnen med en elresistor.
7. Tillägg aldrig tändningsvätska på brinnande kol
eller briketter, eller om glöden är het.
8. Använd eller förvara inte brinnande material,
vätska eller gaser nära rökugnen.
9. Använd inte rökugnen under tak, brevid en vägg,
i bilstall, i en husvagn/bil, i en båt eller i andra
stängda utrymmen eller inomhus. Det skallfinnas
minst två meter fritt utrymme på båda sidorna av
rökugnen, helst mera.
10. VARNING! Rökugnen är het under
användning.Flytta aldrig grillen då den är i
användningeller het.
11. Låt inte barn använda rökugnen.
12. Lämna aldrig rökugnen oövervakad när den är
ibruk.
13. VARNING! Håll barn och djur på avstånd.
14. Använd inte rökugnen om det finns fel på den.
15. Placera rökugnen på ett stabilt och stadigt
underlag som håller hetta.
16. Beakta rökbildning när du placerar rökugnen.
Placera den inte I närhet av öppna fönster och
dörrar. Rökkankomma in ibostaden.
17. Rökugnen blir het på undersidan, lägg den inte
direkt på gräsmattan.
18. Man kan skydda ömtåliga underlag med
betongplattor.
19. Placera rökugnen så att inte vinden kan fälla
den.
16

Det lönar sig att placera rökugnen på en
betongplatta. Plattans storlek måste vara minst 50
x 50 cm
Förberedning för tändningen
Före tändningen gör följande:
• Avlägsna rökugnens lock och mellandel.
• Avlägsna gammal aska från askbehållaren.
• Lägg askbehållaren på sin plats samt kolgallret
över askbehållaren.
• Öppna ventilationsluckorna (3 st.) i bottnen på
rökugnen.
TÄNDNING
Bränslenmankananvända
Godkända bränslen i denna rökugn är:
•Lövträdskol
• Briketter
Vi rekommenderar att använda briketter, de har
tydligt längre glödtid än lövträds kolen. Man
behöver inte fylla på briketter så ofta. Beakta detta
när du röker längre tider. En del av briketterna
brinner hela 240 minuter.
OBS!Använd aldrig ved eller annan trävara i
rökugnen. Deras temperatur är mycket hög och kan
skada rökugnen.
Skador som uppstått att man använt ved i rökugnen
hör inte till garantin.
Olikatändningsmetoder
Man kan tända rökugnen på flera olika sätt.
• Tändmed en tändningspipa.
• Genom att använda parafin baserade
tändningsbitar.
• Använd tändningsvätska. Använd en rapsolja
baserad vätska, den lämnar ingen sidosmak i
maten. Kananvändastilllövträdskol
20. Lägg kolen eller briketterna på kolgallret. Lägg
dem inte i bottnen på askbehållaren.
21. Tänd rökugnen alltid utan lock.
22. Avlägsna askan från askbehållaren först när
den är sval.
23. Lägg inte askan i en plastbehållare eller i annan
lättantändlig behållare.
24. Rör inte rökugnen eller gallren när de är heta.
25. Använd alltid skyddshandskar vid hantering av
rökugnen och långskaftade grillningstillbehör när du
tillreder mat.
26. Använd inte vatten för att släcka rökugnen.
Vatten kan skada den heta rökugnens emaljerade
yta.
27. Kväv glöden i rökugnen genom att stänga
ventilationsluckorna i bottnen samt på locket.
28. Rökugnen måste rengöras efter användning.
Använd till rengöring av gallren grillborste,
stålborste kan skada ytorna.
29. Förbered för möjlig olycka så att du vet var
förstahjälpmedel och släckaren är och att du vet
hur man använder dem.
FÖRE TÄNDNINGEN AV RÖKUGNEN
Placeringavrökugnen
Beakta följande saker vid placeringen:
• Rökugnen måste placeras så att röken inte
orsakar skada.
• Använd inte rökugnen vid öppna fönster.
• Använd eller förvara inte brinnande material,
vätska eller gaser nära rökugnen.
• Placera inte rökugnen på ett lättantändligt
underlag, t.ex. terrassbräder.
• Använd inte rökugnen under tak, brevid en vägg, i
bilstall, i en husvagn/bil, i en båt eller i andra
stängda utrymmen eller inomhus. Det skall finnas
minst två meter fritt utrymme på båda sidorna av
rökugnen, helst mera.
• Rökugnen placeras på ett stabilt, jämnt och
vågrätt underlag.
• Rökugnen blir het under bruk. Hettan sprider sig
också neråt, ta detta i beakta under placeringen
• Placera inte rökugnen direkt på gräsmattan
17

• Genom att använda en elresistor. Kan användas till
lövträdskol och briketter.
VARNING! Använd inte bensin eller alkohol för
tändning eller åter tändning. Använd endast
tändningsmedel enligt standard EN 1860-3.
Alla tändningsmaterial och hjälpmedel säljs skilt.
Tändning
När alla förberedelser är gjorda kan man tända
rökugnen.
Lövträds kol tändning med en
tändningspipa
1. Lägg lite tidningspapper eller några tändningsbitar
i bottnen på tändningspipan.
2. Fyll tändningspipan med lövträds kol.
3. Placera pipan i mitten på gallret.
4. Tänd pappret eller tändningsbitarna med en
tändsticka eller tändare.
5. När all kol är glödande häll dem på kolgallret.
Briketters tändning med en tändningspipa
1. Lägg 3-5 parafin baserade tändningsbitar i
bottnen av pipan.
2. Fyll pipanmed briketter.
3. Placera pipan i mitten på gallret.
4. Tänd tändningsbitarna med en tändsticka eller
tändare.
5. När alla briketterna är glödande häll dem på
kolgallret
Tändning med tändningsbitar
1. Gör en pyramid av lövträds kol eller briketter på
kolgallret
2. Lägg 3-5 parafin baserade tändningsbitar bland
kolen eller briketterna
3. Tänd tändningsbriketterna med en tändsticka
eller med en tändare.
Tändning med hjälp av tändningsvätska
1. Gör en pyramid av lövträds kol på kolgallret.
2. Fukta kolet med tändningsvätska Vi
rekommenderar att använda rapsolja baserad
tändningsvätska. Denna ger ingen sidosmak i
maten.
3. Rapsbaserad tändningsvätska kan genast tändas.
4. Om du använder annan tändningsvätska, låt den
först sugas in i kolet före du tänder rökugnen.
Kontrolleratidenfrån tändningsvätskansförpackning.
Obs!Använd aldrig bensin elleralkohol för att tända
rökugnen. Var försiktig när du sätter
tändningsvätska på kolen. Se till att det inte rinner
under rökugnen. Hettan från rökugnen kan antända
vätskan under rökugnen
Garantin täcker ej de skador som uppstått av brand
som tänds av tändningsvätskans rinnande utanför
rökugnen.
Tändningmedelresistor
1. Läggelresistornpåkolgallret.
2. Gör en pyramid av lövträds kol eller briketter på
kolgallret.
3. Läggelresistorn på.
4. När glöden är röd, släck elresistorn och avlägsna
den från rökugnen.
OBS!Använd aldrig för tändning en elresistor om du
använder tändningsvätska
Beakta följande saker när du använder en elresistor:
• Följ noga bruksanvisningen för elresistorn.
• Kontrollera att inte elkabeln rör rökugnens heta
delar.
• Se till att ingen kan snubbla i elkabeln.
BRUK AV RÖKUGNEN
Förberedning före rökning
När kolen eller briketterna har fått en ljus grå färg är
rökugnen färdig för bruk. Bred ut glöden jämnt över
kolgallret. Montera nu färdigt rökugnen enligt
följande steg:
18

kan du tillreda mat i två lager
7.. Lägg locket på.
Rökning, barbeque grillning och
grillning med rök
I denna rökugn läggs de fuktade rökningsflisorna
direkt på glöden. Rökningsflisorna skall stå i
vatten minst 30 minuter före dem läggs i
rökugnen.
3.. Stänglucka
Olika rökningsflisor
Det finns ett stort urval av rökningsflisor och
spån. Olika träd avsöndrar olika aromer till
maten som tillreds. Genom att pröva sig fram
hittar man den arom som man tycker om.
I butikerna säljs oftast:
19
1.. Lägg rökugnens mittersta del på bottendelen.
till att ventilationsluckorna är fast.
2.. Stäng de 3 låsgångjärnen som fäster mitters
delen i bottendelen.
3.. Lägg vätskebehållaren i de nedersta stöde
• Vätskebehållaren håller en mer stabil värme
rökugnen under långvarig barbeque grillning eller
med mattillredning med rök.
•Obs!Vid normal varmrökning behöver man int
använda vätskebehållaren.
• Vätskebehållaren fylls med hett vatten så att int
temperaturen inne i rökugnen sjunker.
Hällvattnetmed hjälpaven kanna.
•Obs!Se till att inte vatten spills på glöden. Askan
kan komma i kontakt med maten.
• Man kan också lägga öl, vin, kryddlag samt örter i
vätskan. När vätskan kokar, smaksätter den maten.
1.. Öppna luckan i den mittersta dele
2.. Lägg de fuktade rökningsflisorna på glöde
• I början av rökningen måste man använd
mera rökningsflisor. Under tillredningen kan man
minska på mängden av flisor som läggs till.
• Obs!Rökugnen och dess delar är heta. Använ
alltid skyddshandskar vid hantering av rökugnen
och långskaftade grillningstillbehör när du
tillreder mat.
• Samtidigt när du lägger till flisor kontroller
vätskemängden och fyll på mera vätska vid
behov.
• Ide’! Pröva också fuktade örter på glöden
•Äpple (Apple)
•Körsbär (Cherry)
•Lönn (Maple)
•Pecan nöt (Pecan)
•Mesquito (Mesquite)
•Amerikansk nöt
(Hickory)
4.. Lägg grillgallret utanhandtag direkt öv
vätskebehållaren.
5.. Läggmatenpågrillgallre
6.. Om du har mycket mat att tillreda kan du läg
ett annat grillgaller i den mittersta delen. Nu

Justering av temperaturen
Att fylla på lövträds kol och briketter
20
Temperaturer
This manual suits for next models
2
Table of contents
Languages:
Other Cello Grill manuals

Cello
Cello PREMIUM 47 User manual

Cello
Cello RODIUM 3 BLACK User manual

Cello
Cello Platinum 6 User manual

Cello
Cello OFFSET SMOKER 30 User manual

Cello
Cello KAMADO 21 User manual

Cello
Cello CABIN 6i User manual

Cello
Cello Box 502209011 User manual

Cello
Cello READY 4i User manual

Cello
Cello Classic 3i User manual