Cellularline Interphone Connect User manual

1
USER GUIDE

2
Chap. 1 - Introduction 3
1.1 Presentation 3
1.2 Warnings 3
1.3 Main specifications 3
1.4 Package contents 3
Chap. 2 - Getting started 4
2.1 Installation instructions 4
2.2 Main commands 4
2.3 - Battery charging 5
2.4 LED indication 5
2.5 Initial ignition (only dual unit version) 5
2.6 Initial ignition (only single unit version) 5
2.7 Voice guide language setting: 5
2.8 Listening priority 5
Chap. 3 - Settings 6
3.1 System settings 6
Chap. 4 – Intercom 6
4.1 Pairing 6
4.1.1: Manual pairing 6
4.1.2: Pairing to a PREVIOUS SERIES INTERCOM device 6
4.1.3: Pairing with a NON-Interphone (ANYCOM™) device 6
4.2 Two-unit intercom conversation 6
4.3 Warnings and suggestions 6
Chap. 5 - Phone/GPS 7
5.1 Pairing 7
5.2 Telephone use 7
5.3 Warnings and tips for using the phone 7
5.4 GPS 7
Chap. 6 – FM RADIO 8
6.1 Listening to FM radio 8
6.2 “FM radio” function warnings and suggestions 8
Chap. 7 - Music 8
7.1 Playing music 8
7.2 Sharing music 8
7.3 “MUSIC” function warnings and suggestions 8

3
1.1 Presentation
Thank you for choosing this product. CONNECT Interphone is a Bluetooth®helmet device for wireless
entertainment and communication between multiple motorcyclists.
CONNECT Interphone can be installed on most helmets with a quick attachment/detachment bracket.
CONNECT Interphone is certified to withstand harsh weather, with “IP67” protection level.
1.2 Warnings
Fully charge the battery before using the product for the first time.
Do not store the Product without charging it. Failure to do so may cause irreversible damage to the
battery capacity. Charge the battery every TWO months.
The external unit (control unit), connected to the audio kit, is classified IP67 according to the IEC60529
standard. The control unit, connected to the audio kit, can therefore be immersed in a metre of fresh
water for a maximum of 30 (thirty) minutes.
Despite this classification, the device is not immune to greater stress, such as prolonged immersions or
high pressure water jets.
Using the product during intense meteorological phenomena, at high speeds, may be equivalent to
subjecting the product to a high pressure jet.
Do not immerse the product in fresh water which is more than a metre deep for more than 30 minutes.
Do not store the product when still wet: dry it with a clean, soft cloth. Dry any water or moisture present
in the connector of the control unit and/or audio kit with hot air for at least 10 minutes, so as to prevent
the oxidation of the contacts.
Do not expose the product to salt water or ionised water, drinks or other liquids. If the device is exposed
to liquids other than fresh water, wash the device with cold fresh water and dry it carefully with a clean,
soft cloth.
Do not expose the product to high pressure water jets.
Make sure that the audio kit connector is completely inserted in the control unit. If not, complete pro-
tection against water and dust is not guaranteed.
1.3 Main specifications
CONNECT Interphone allows communication between two motorcyclists of up to a maxi-
mum distance of 1 km (in open field). The communication between three or four motorcyclists in con-
ference is also possible.
CONNECT Interphone can be connected simultaneously to a maximum of two devices
(mobile phone/GPS navigators).
CONNECT Interphone has an integrated FM-RDS receiver for the 88-108 MHz band. It is
possible to store up to 8 stations.
CONNECT Interphone can play music from Bluetooth® devices, through A2DP and AVRCP pro-
files (smartphones, MP3 player etc.).
CONNECT Interphone features a Quick touch™ interface consisting of four keys for
direct access to the functions. The single pressing of a button will activate the corresponding function,
quickly and intuitively, without the need for a menu.
1.4 Package contents
In the dual version, the material shown in the red box is present in the quantities of two pieces for each
component.
X 2
Microphone for full face helmet
Speaker kit
Microphone for ip-up/jet helmet
USB cable for charging and data
Velcro and spare sponges
Clamp bracketAdhesive bracket
QUICK GUIDE
CHECK FOR SOFTWARE UPDATESON WEBSITE
www.interphone.com

4
Follow the sequence shown in the figures below for installation of the components.
2.2 Main commands
Locate the area in correspondence
with the ear
If possible, remove the two
cushions or padding
Position the strips of Velcro
for the speakers
Filp-up/jet helmet Full face helmet
Choose the microphone to use:
Place the speakers
1
3
2
4
5
Power On Press until the blue LED comes on
Power Off Hold pressed until the red LED comes on and
the device turns off
Press the buttons “Volume +” to increase and
“Volume –” to decrease the volume.
Intercom, FM radio, phone and music functions Press to directly activate (or deactivate) the
intercom communication.
Press to directly activate (or deactivate) FM
radio.
Press to directly access the functions of the
phone.
Press to directly activate (or deactivate) the
playing of music.
These commands are via direct access. It is
therefore possible to move from one function to
another with the pressing of a button. It is not
necessary to disable a function before moving
on to another.
Phone Intercom / On-O
Bluetooth unit
Volume +
Volume -
Music
FM Radio
Up (<)
Down (>)

5
2.3 - Battery charging
Insert the micro USB charging cable into the relevant intercom connector, as shown in the figure. Con-
nect the cable to a standard USB charger.
LED indications:
- red LED: charging.
- mgreen LED: fully charged.
2.4 LED indication
Standby The BLUE LED flashes approximately every 3
seconds.
The LED turns BLUE with button intensity.
Device connected with phone/GPS The LED emits a double BLUE flash approxima-
tely every 3 seconds.
The LED emits an alternate BLUE flash.
Device in pairing mode The LED flashes RED/BLUE alternately.
The LED flashes RED/BLUE rapidly and alternately.
The LED lights up PURPLE.
Charging The LED comes on RED during charging. The LED
comes on GREEN when charging is complete.
Dead battery The LED lights up RED.
Press on both the units to switch on the devices. The units are already paired by default.
Press to turn the unit on. The device will go into “PAIRING MODE”. These are the possible choices:
- pairing with Cellularline Interphone devices (see chapter 4.1).
- pairing with intercoms of other manufacturers (see chapter 4.1.4).
- phone or GPS navigation pairing (see chapter 5.1).
• With the device turned on, press and hold the UP button (<) until the third beep. The LED will be purple.
• Press +to select the desired language.
• Keep pressing the UP button (<) until the third beep to save the selection. The LED will flash blue.
2.8 Listening priority
The device uses the following priorities in managing the various functions:
1. Mobile phone
2. Intercom (communication with other intercoms)
3. Bluetooth®A2DP audio source (Music from smartphone/Google Maps, MP3 Player etc.)
4. FM radio
This sequence is used by the device to manage the simultaneous use of multiple functions and to cho-
ose which function to stop.
Examples:
• if a call is received while listening to music, the latter will be interrupted, automatically switching to
the phone audio.
• If an intercom call is received while engaged in a phone call, the latter will not be interrupted.

6
With the device turned on, press and hold the UP button (<) until the third beep. The LED will be purple.
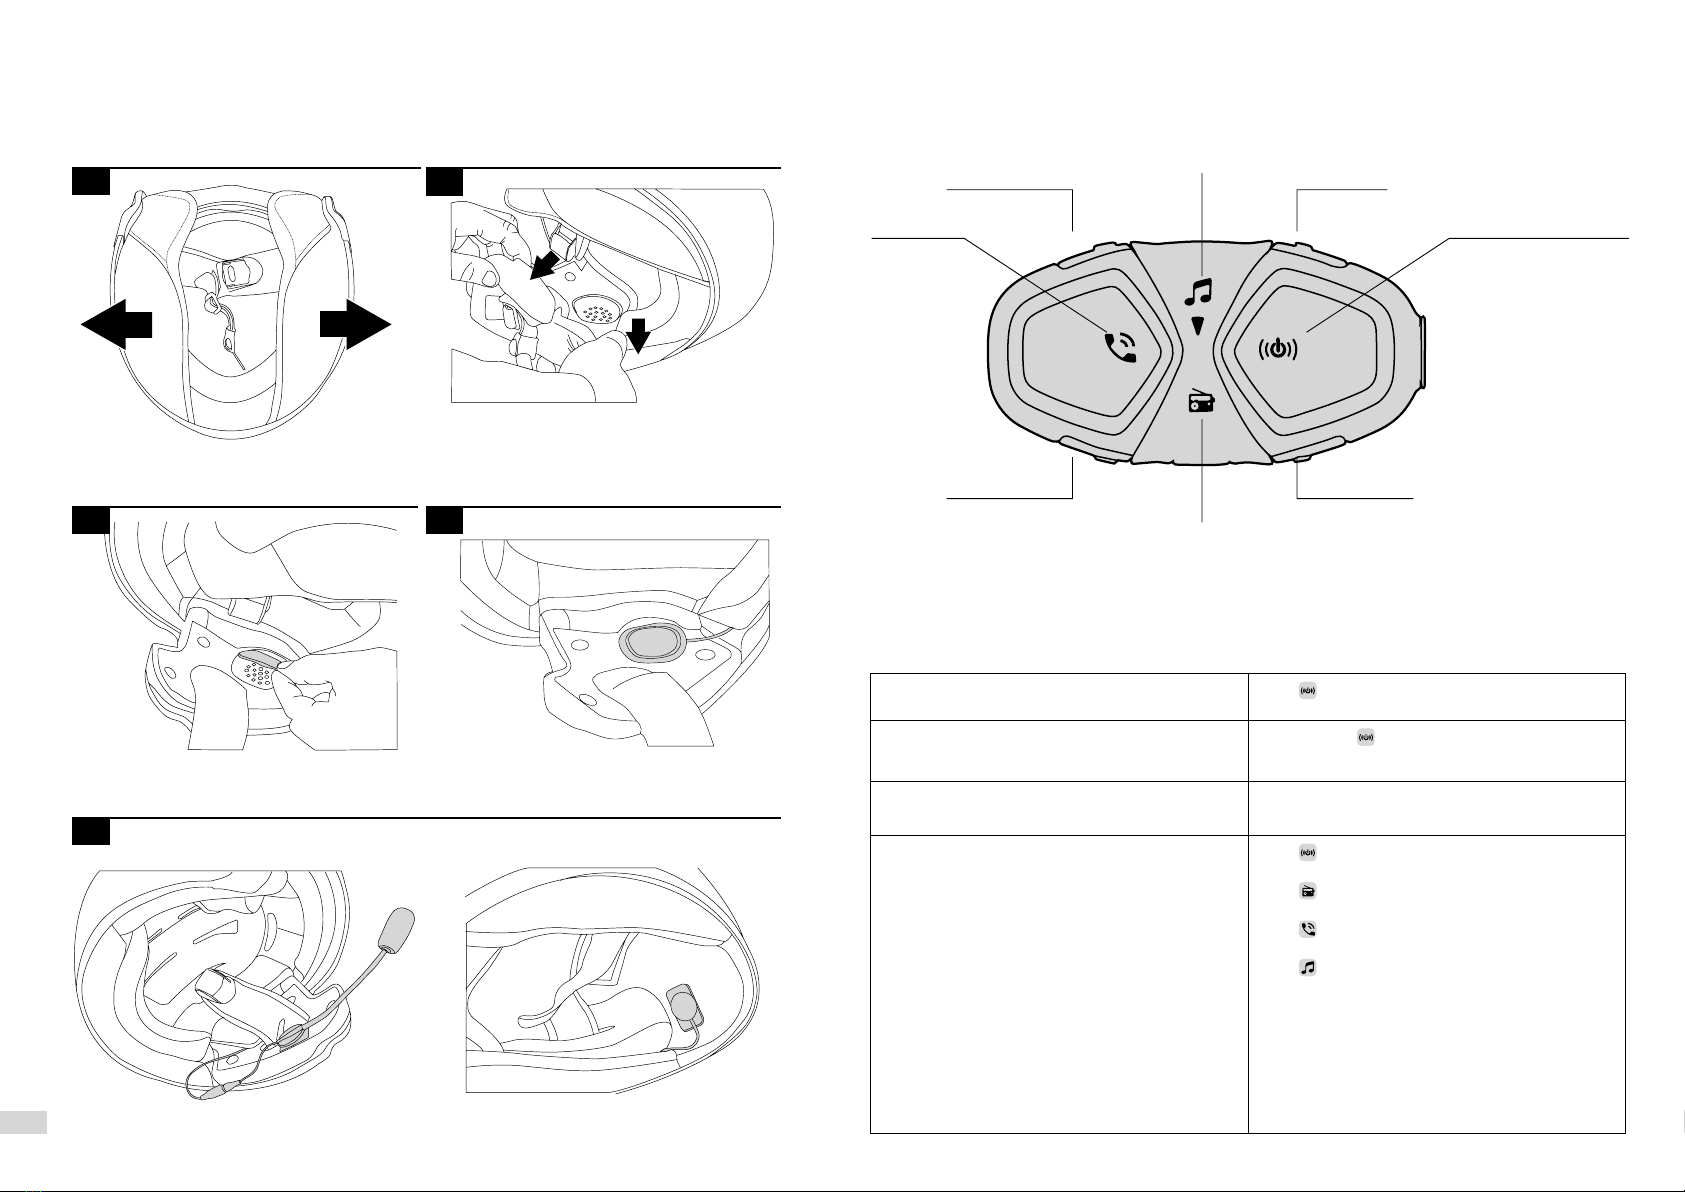
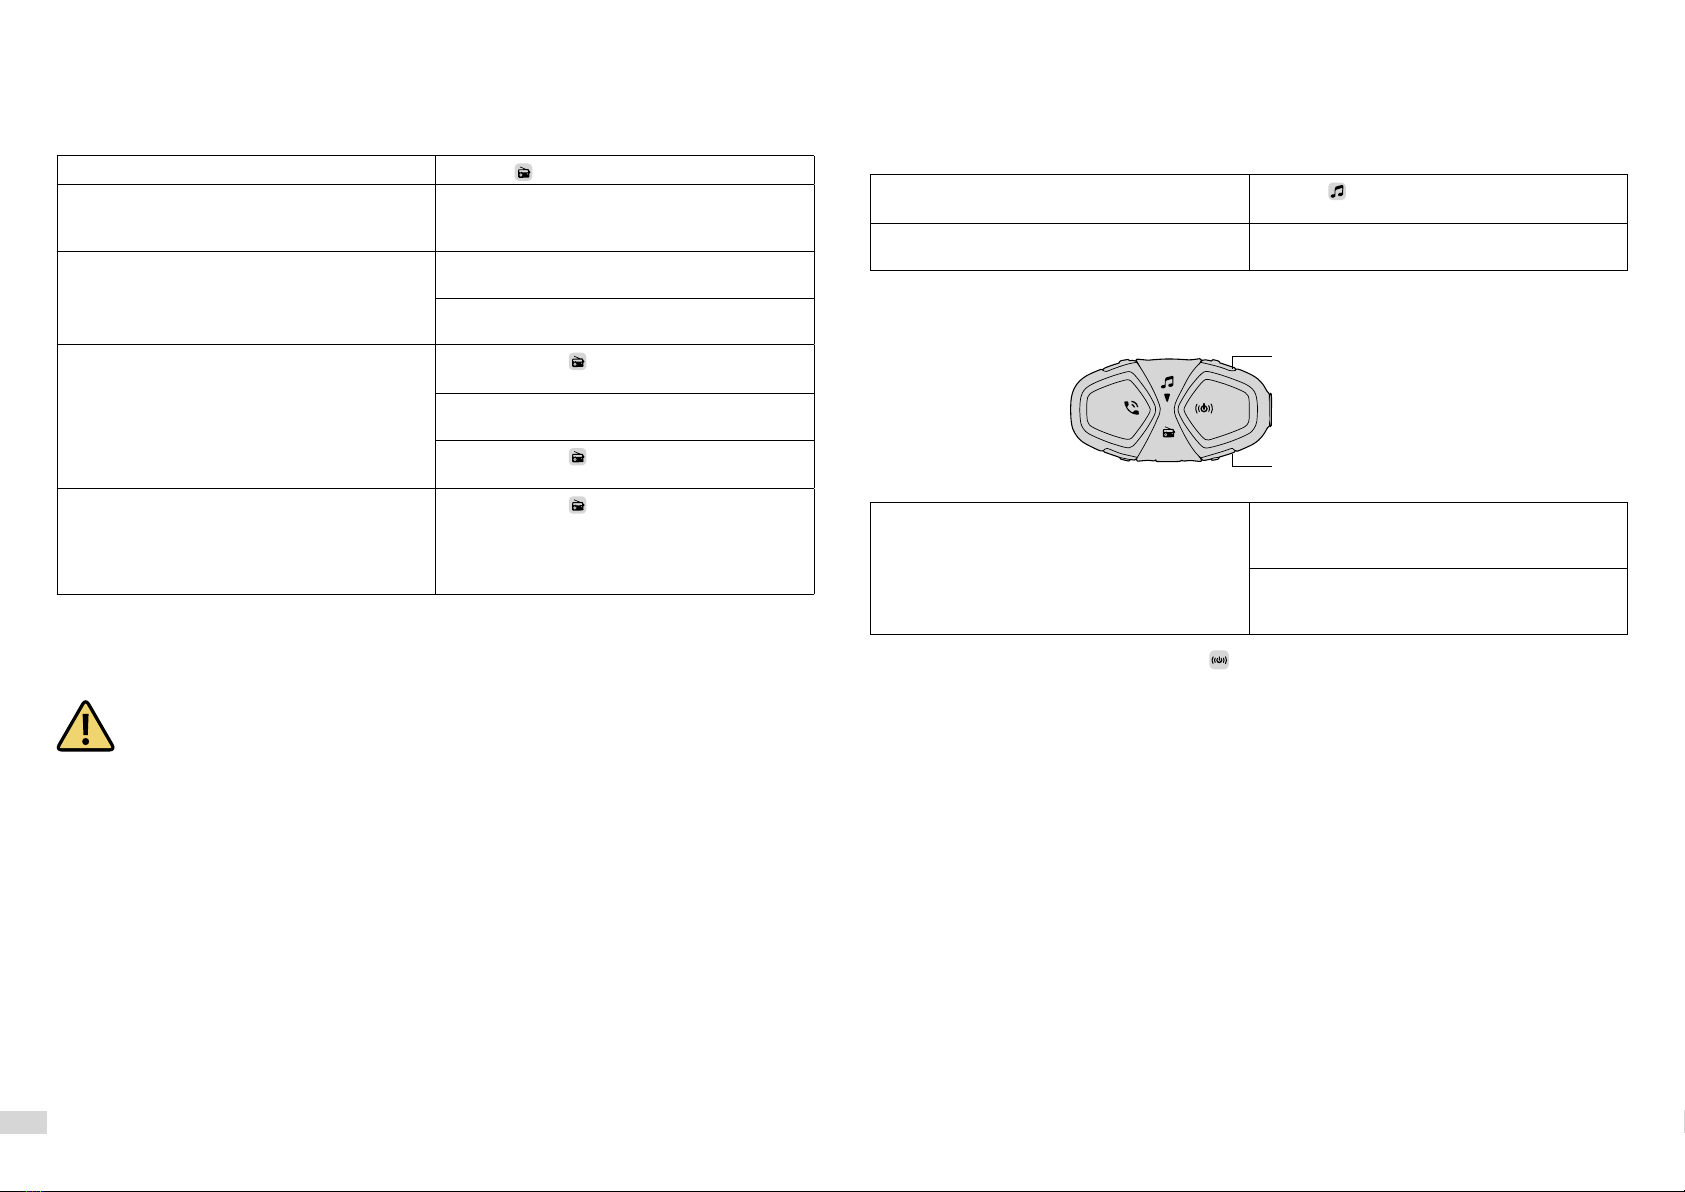
Pressing each button will change a parameter, according to the figure shown below.
To save the parameters set simply exit the settings mode by keeping pressed the UP button (<) until the
third beep. The LED will flash blue.
3.1 System settings
each press of the button selects a different language for the voice guidance.
the device can automatically adjust the listening volume,
depending on the type of helmet being used. The function can be completely disabled, in which case
the user will manually adjust the volume. The maximum audio level possible can be obtained with the
AUTOMATIC VOLUME OFF.
Each press of the button switches the function on/off. See Chap. 4.6 for further details.
press this button for 5 seconds to delete from the memory all previously paired
Bluetooth devices. When erasing the pairings, exiting the Settings mode, the device will automatically
enter pairing mode, shown in Chap. 2.6.
this service allows the device to tune to an alternative frequency when the signal beco-
mes too weak. Each press of the button activates/deactivates the function.
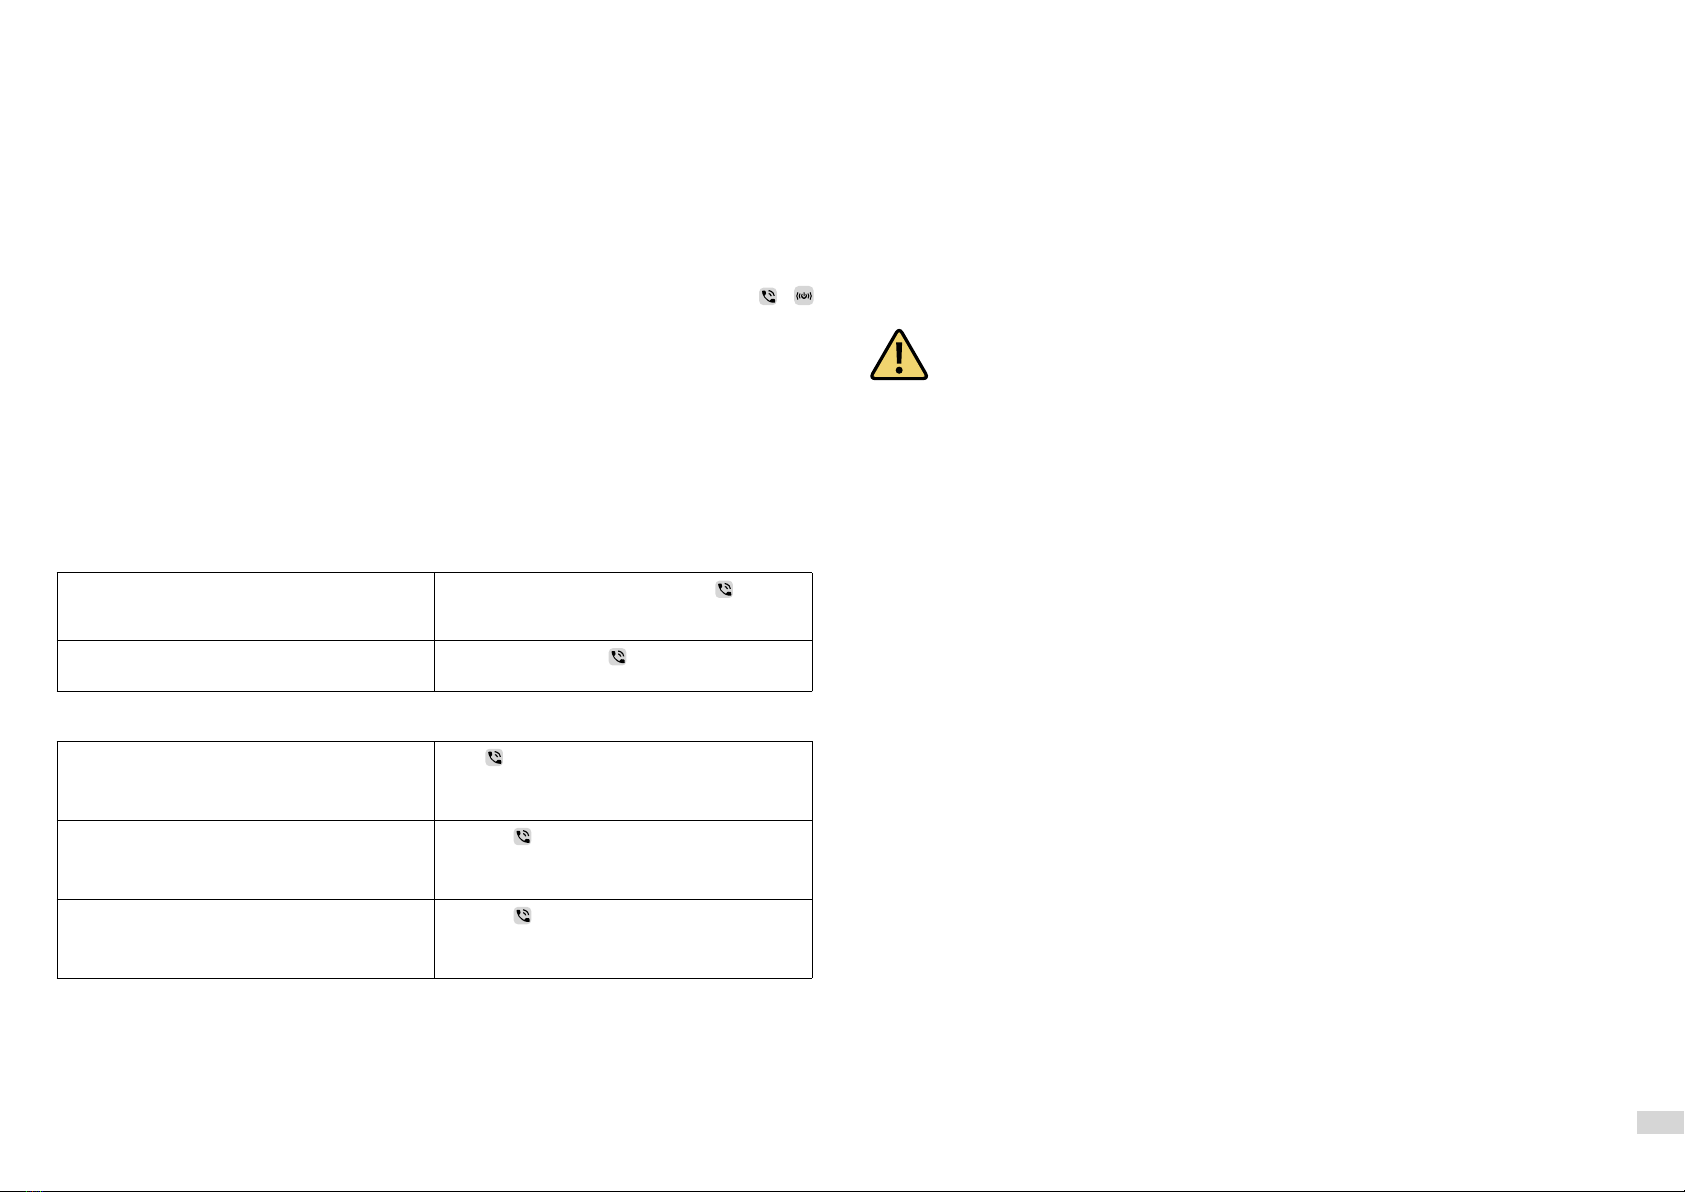
Where a phone call is received, it is possible to answer the call with a simple voice
command. This function can be switched on/off.
The device enables the interphone communication (function named “INTERCOM”) across multiple de-
vices in conference (several people talking at once).
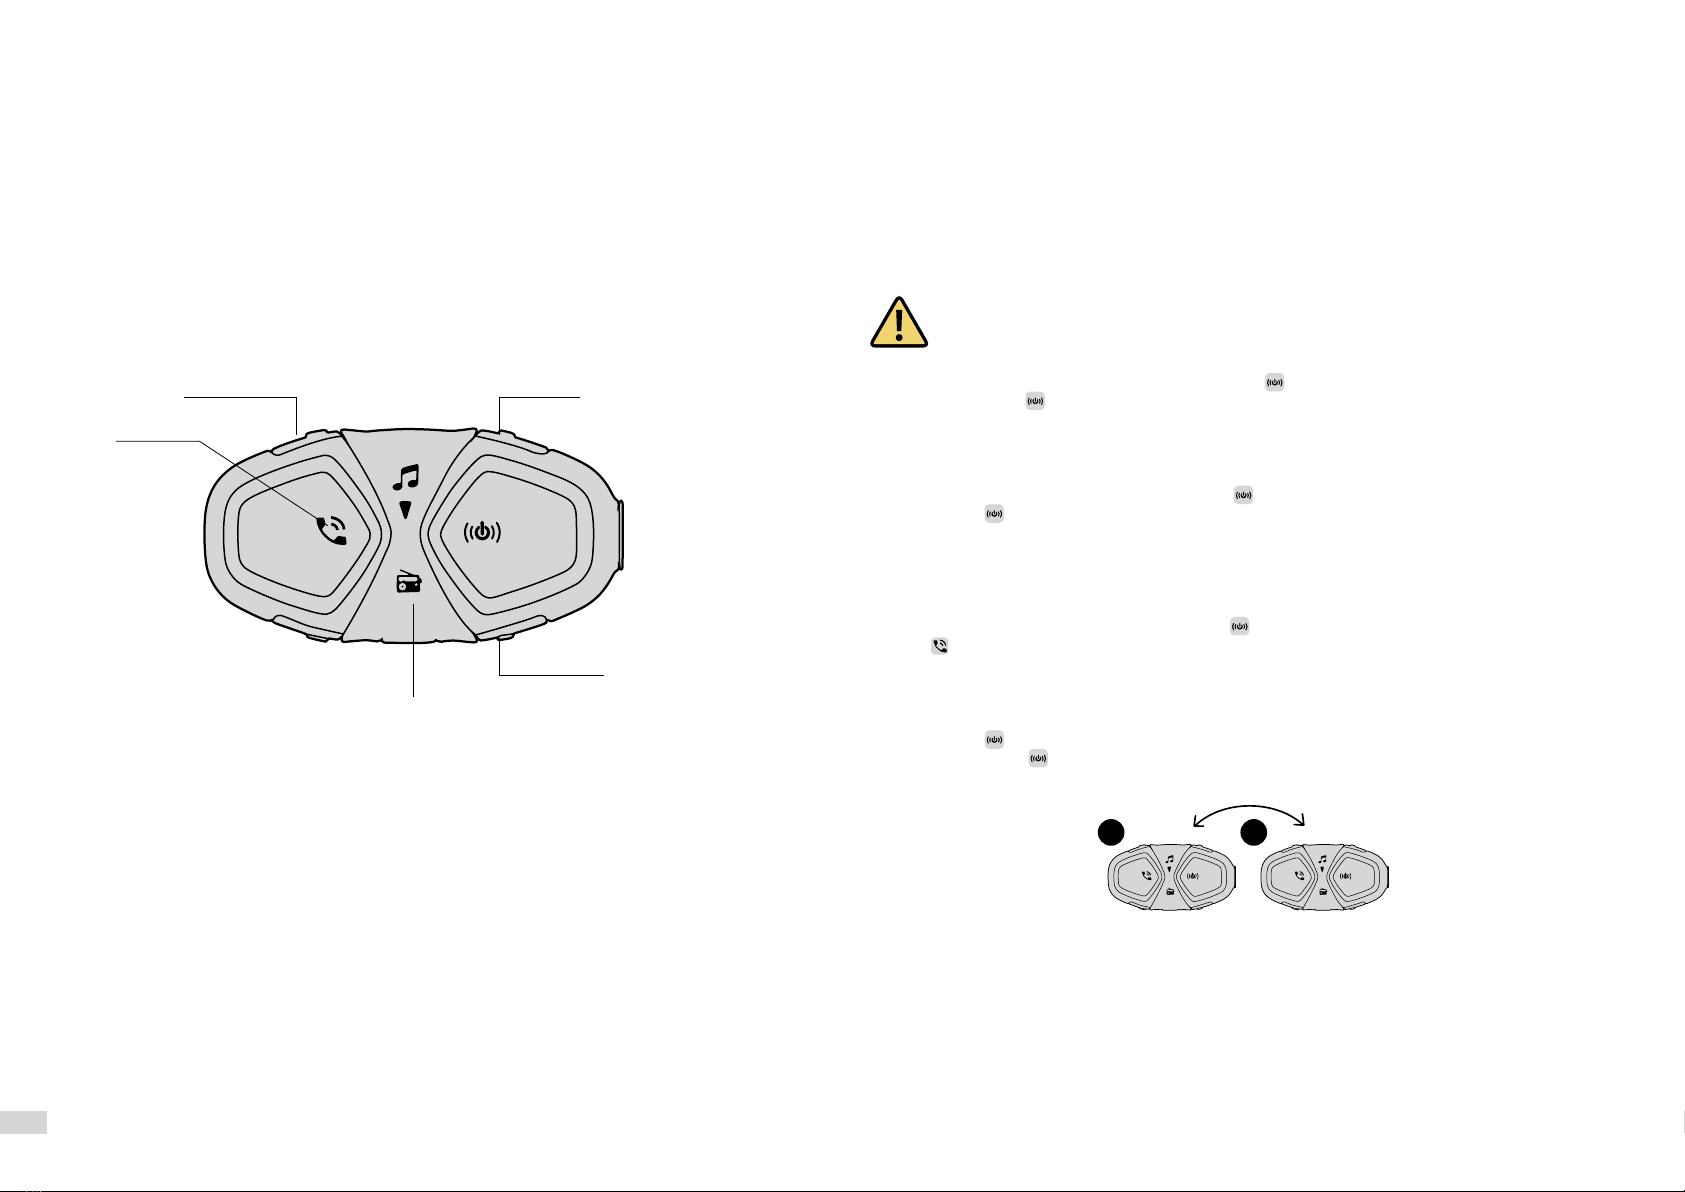
4.1 Pairing
Before starting the communication between intercoms it is necessary to perform pairing of the various
devices. This process will only need to be performed once.
Subsequently the interphone will automatically recognise the previously paired devices.
CONNECT Interphone is compatible with the entire INTERPHONE range (including the previous series)
and with the ANYCOM function. It is also compatible with the interphones of other manufacturers.
Each CONNECT Interphone can be paired to a maximum of two intercoms.
If a device already has two intercoms paired, performing a third pairing with erase the pairing
with the first device paired.
1. With the intercom off, on each unit, press and hold until the LED flashes red/blue.
2. Then briefly press only on one of the two units.
1. With the second Interphone unit (previous series) off, press and hold the central MFB button until
alternate red/blue flashing of the LEDs.
2. With CONNECT Interphone off, press and hold until the LED flashes red/blue.
3. Press briefly on CONNECT Interphone.
4.After a few seconds the units will be paired and the intercom conversation will be started.
1. In the NON-Interphone unit, start the telephone search/pairing mode; refer to the user manual of the
intercom to be paired.
2. With CONNECT Interphone off, press and hold until the LED flashes red/blue.
3. Press
on CONNECT Interphone.
4. After a few seconds the units will be paired and the intercom conversation will be started.
1. Pair unit 1 with unit 2 (Chap. 4.1.2), operation only required the first time.
2. Press briefly on unit 1 or on unit 2.
3. Press again briefly on unit 1 or on unit 2 to interrupt the communication.
4.3 Warnings and suggestions
During use in three/four user conference, to ensure the best system stability, avoid connecting other
Bluetooth®devices (telephones, GPS, etc.) to the intercom units.
Optimum operation of group conversation is ensured by only using Interphone-branded devices. The
audio quality of the “INTERCOM” function is strongly influenced by:
• the correct installation of speakers and microphone inside the helmet.
• surrounding environment (electromagnetic disturbances, natural obstacles etc.).
• the aerodynamic protection features of the motorcycle.
• type of helmet being used.
Voice telephone
response On/O
Bluetooth Unit
Selezione lingua
Guida vocale
RDS
On/O
Automatic volume
Integral/Jet/O
Erase pairings
(5” press)
1 2

7
CONNECT Interphone can be connected to Bluetooth®devices, such as mobile phones, GPS and MP3
players.
Every CONNECT Interphone can be connected simultaneously to up to two Bluetooth®devices.
5.1 Pairing
Before starting use of CONNECT Interphone with these devices, it is necessary to perform pairing of the
various devices. This process need only be performed once. Subsequently CONNECT Interphone will
automatically recognise the devices previously paired and will automatically connect.
Pairing procedure
1) Activate the Bluetooth®function on the phone/GPS/MP3 (refer to the device manual for further de-
tails).
2) With CONNECT Interphone in Standby mode (BLUE LED flashing), press together the buttons +
for 3 seconds to activate “PAIRING mode” (BLUE and RED flashing).
3) Start searching for new Bluetooth®devices on the mobile phone / GPS / MP3 reader
4) After a few seconds the device will show “Interphone CONNECT”. Select this option.
5) If prompted for a PIN or code, enter 0000 (four zeros).
6) The voice guide will confirm successful pairing with the message “SUCCESSFUL PAIRING, CONNECTED
TO THE PHONE”. The device will go into Standby mode (blue LED flashes twice every 3 seconds).
7) If the Bluetooth®device requires authorisation to access the list, provide confirmation.
To pair a second device, repeat the procedure from step 1).
As specified in section 2.8, a phone call has the highest priority than any other CONNECT INTERPHONE
function. In case of receipt of a phone call use the commands shown in the following table:
In case of an incoming call, press the button
or say a word out loud (voice activated response
Chap. 3.1)
To end a call press the button or wait for the
other person to end the call.
Press to activate the voice call
Press the button until the beep (1.5 seconds)
to redial the last number.
Press the button until the second beep (3
seconds) to call the number set.
5.3 Warnings and tips for using the phone
If two different mobiles are connected at the same time, the functions “Redial last number” and “Voice
call” may only be used by the first phone connected.
An Internet connection on the mobile phone may be needed to use the “Voice call”.
The “Voice call” function may not be supported by your mobile phone (refer to your device manual for
further details).
5.5 GPS
After pairing the CONNECT Interphone to the GPS (Chap. 5.1) it is possible to hear the voice prompts
sent by the navigator. During the intercom communication the GPS (if fitted) will interrupt the conver-
sation whenever it is necessary to transmit a voice prompt.
ensure the GPS is compatible with the Bluetooth®headsets. Consult the GPS user
manual for further information.
CONNECT Interphone uses the Bluetooth®HFP profile to manage the connection to a GPS unit.
Navigators integrated within smartphones use the A2DP profile to send route directions. This profile
does not allow interruption of the intercom conversation.
Navigators sold for use in cars are NOT usually equipped with Bluetooth®HFP. For that reason they
cannot transmit voice prompts to Bluetooth®headsets. Consult the GPS user manual for further infor-
mation.

8
CHAP. 6 – FM RADIO
CONNECT Interphone has integrated FM radio with RDS and 8 stations that can be saved
6.1 Listening to FM radio
Radio on/off Press the button.
Forward/backward station search Press the UP/DOWN button to start the forward/
backward search (from 88 MHz to 108 MHz) for
a station.
Press the UP button until the beep to select the
next saved station.
Press the DOWN button until the beep to select
the previous saved station.
Saving a station Press the button until the beep (1.5 seconds)
to save the station being listened to.
Press the UP or DOWN button to select the me-
mory (from no. 1 to no. 8) to save the station.
Press the button to confirm the memory (from
no. 1 to no. 8).
Press the button until the beep (3 seconds) to
save the 8 stations with the optimum frequen-
cy Saving is temporary and the stations will
be deleted when the CONNECT Interphone is
restarted.
6.2 “FM radio” function warnings and suggestions.
CONNECT Interphone has an FM receiver with RDS. This feature is used:
• when the tuned broadcast signal becomes too weak, CONNECT Interphone will attempt to tune in to
an alternative frequency used by the same station.
In case the signal of the current station is not weak enough to trigger the search for an alter-
native station, it is possible that listening will be characterised by disturbances due to poor
signal strength. FM reception is strongly influenced by the surrounding environment (electro-
magnetic disturbances, natural obstacles etc.).
CONNECT Interphone can play music from Bluetooth®devices (smartphones, MP3 players etc.) equip-
ped with A2DP profile. To play music it is necessary to pair the devices to CONNECT INTERPHONE (Chap.
5.1)
Press the button to start/stop playback of
music
Press the UP or DOWN button to select the next
or previous track.
7.2 Sharing music
CONNECT Interphone has a “SONG SHARING” function which allows music sharing with another Inter-
phone.
Start/Stop sharing Press the UP button until the second beep to
start/stop music sharing with last intercom
paired.
Press the DOWN button until the second beep to
start/stop music sharing with the second to last
intercom paired.
During music sharing, by pressing the button it is possible to start an intercom communication.
7.3 “MUSIC” function warnings and suggestions.
• Only Bluetooth®devices with A2DP profile can transmit stereo music to the device.
• Only Bluetooth®devices with AVRCP profile can be controlled at a distance from the device.
• The sound quality of the music also depends on the quality of the audio source (bitrate and codec of
audio files, Bluetooth®player quality etc.).
Bluetooth®v. 4.2 - Class II
HFP A2DP AVRCP
2.402 – 2.480GHz
18dBm EIRP CONNECT / 10dBm EIRP CONNECT
0 - 45°C
10 - 40°C
44x87x22
48 g
Up to 10 meters
15-12 h
1000 h
3 h
Lithium-ion rechargeable
UP
DOWN

9

10
EN - INSTRUCTIONS FOR THE DISPOSAL OF APPLIANCES FOR DOMESTIC USERS
(Applicable in countries in the European Union and those with separate waste collection systems)
This mark on the product or documentation indicates that this product must not be disposed of with other
household waste at the end of its life. To avoid any damage to health or the environment due to improper
disposal of waste, the user must separate this product from other types of waste and recycle it in a responsible
manner to promote the sustainable re-use of the material resources.
Domestic users should contact the dealer where they purchased the product or the local government office
for all the information regarding separate waste collection and recycling for this type of product. Corporate
users should contact the supplier and verify the terms and conditions in the purchase contract. This product
must not be mixed with other commercial waste.
This product has a battery than cannot be replaced by the user. Do not attempt to open the device to remove
the battery as this could cause malfunctions and seriously damage the product. When disposing of the
product, please contact the local waste disposal authority to remove the battery. The battery inside the
device was designed to be able to be used during the entire life cycle of the product
EN - Cellularline S.p.A., declares that this Bluetooth headset complies with Directive 2014/53/EU.
The full text of the EU declaration of conformity is available at the following address: www.cellularline.com/_/
declaration-of-conformity
Cellularline S.p.A., also declares that this Bluetooth headset complies with the RoHS Directive 2011/65/EU.
SAR is measured with the device at 0 mm to the body, while transmitting at the highest certified output power
level in all frequency bands of the device. The maximum SAR value is 1.75 W/kg (head/body) averaged over
10 gram of tissue.
WARNING: To prevent possible hearing damage, do not listen at high volume levels for long periods.
15.21 You are cautioned that changes or modifications not expressly approved by the part responsible for
compliance could void the user’s authority to operate the equipment.
15.105(b) This equipment has been tested and found to comply with the limits for a Class B digital device,
pursuant to part 15 of the FCC/IC rules. These limits are designed to provide reasonable protection against
harmful interference in a residential installation. This equipment generates, uses and can radiate radio fre-
quency energy and, if not installed and used in accordance with the instructions, may cause harmful interfe-
rence to radio communications. However, there is no guarantee that interference will not occur in a particular
installation. If this equipment does cause harmful interference to radio or television reception, which can be
determined by turning the equipment off and on, the user is encouraged to try to correct the interference by
one or more of the following measures :
-Reorient or relocate the receiving antenna.
-Increase the separation between the equipment and receiver.
-Connect the equipment into an outlet on a circuit different from that to which the receiver is connected.
-Consult the dealer or an experienced radio/TV technician for help.
This device complies with part 15 of the FCC rules and Industry Canada licence-exempt RSS standard(s)
Operation is subject to the following two conditions :
1)This device may not cause interference and
2)This device must accept any interference, including interference that may cause undesired operation of
the device.
FCC/IC RF Radiation Exposure Statement :
This equipment complies with FCC/IC radiation exposure limits set forth for an uncontrolled environment.
End users must follow the specific operating instructions for satisfying RF exposure compliance. This tran-
smitter must not be co-located or operating in conjunction with any other antenna or transmitter.
Table of contents
Other Cellularline Motorcycle Accessories manuals

Cellularline
Cellularline U-COM 6R User manual

Cellularline
Cellularline iCase Holder User manual

Cellularline
Cellularline U-COM 2 User manual

Cellularline
Cellularline U-COM 8R User manual

Cellularline
Cellularline INTERPHONE U-COM 4 User manual

Cellularline
Cellularline Interphone CU0047 User manual

Cellularline
Cellularline U-COM 2 User manual