2. Firmly screw the tube valve stem back into the tire tube. Then, re-inflate the tube
according to the tire tube manufacturer’s recommended PSI air pressure.
3. Fully submerge the tire tube in a tank of water, and observe air bubbles escaping
from the hole in the tube. Then remove the tube from the water tank and, with
chalk, mark the location of the hole.
4. Carefully remove the tube valve stem from the tire tube, and allow all of its air to
escape.
5. Using sandpaper, or a scraper made especially for this purpose, rough up the
area around the hole.
To Operate The Tire Patching Machine:
1. Apply an all-purpose, fast dry, rubber cement on the area around the hole. Make
sure to allow the cement to dry. Then, apply the prepared side of an
appropriate size tube patch to the tire tube (the side with the colored peel-off).
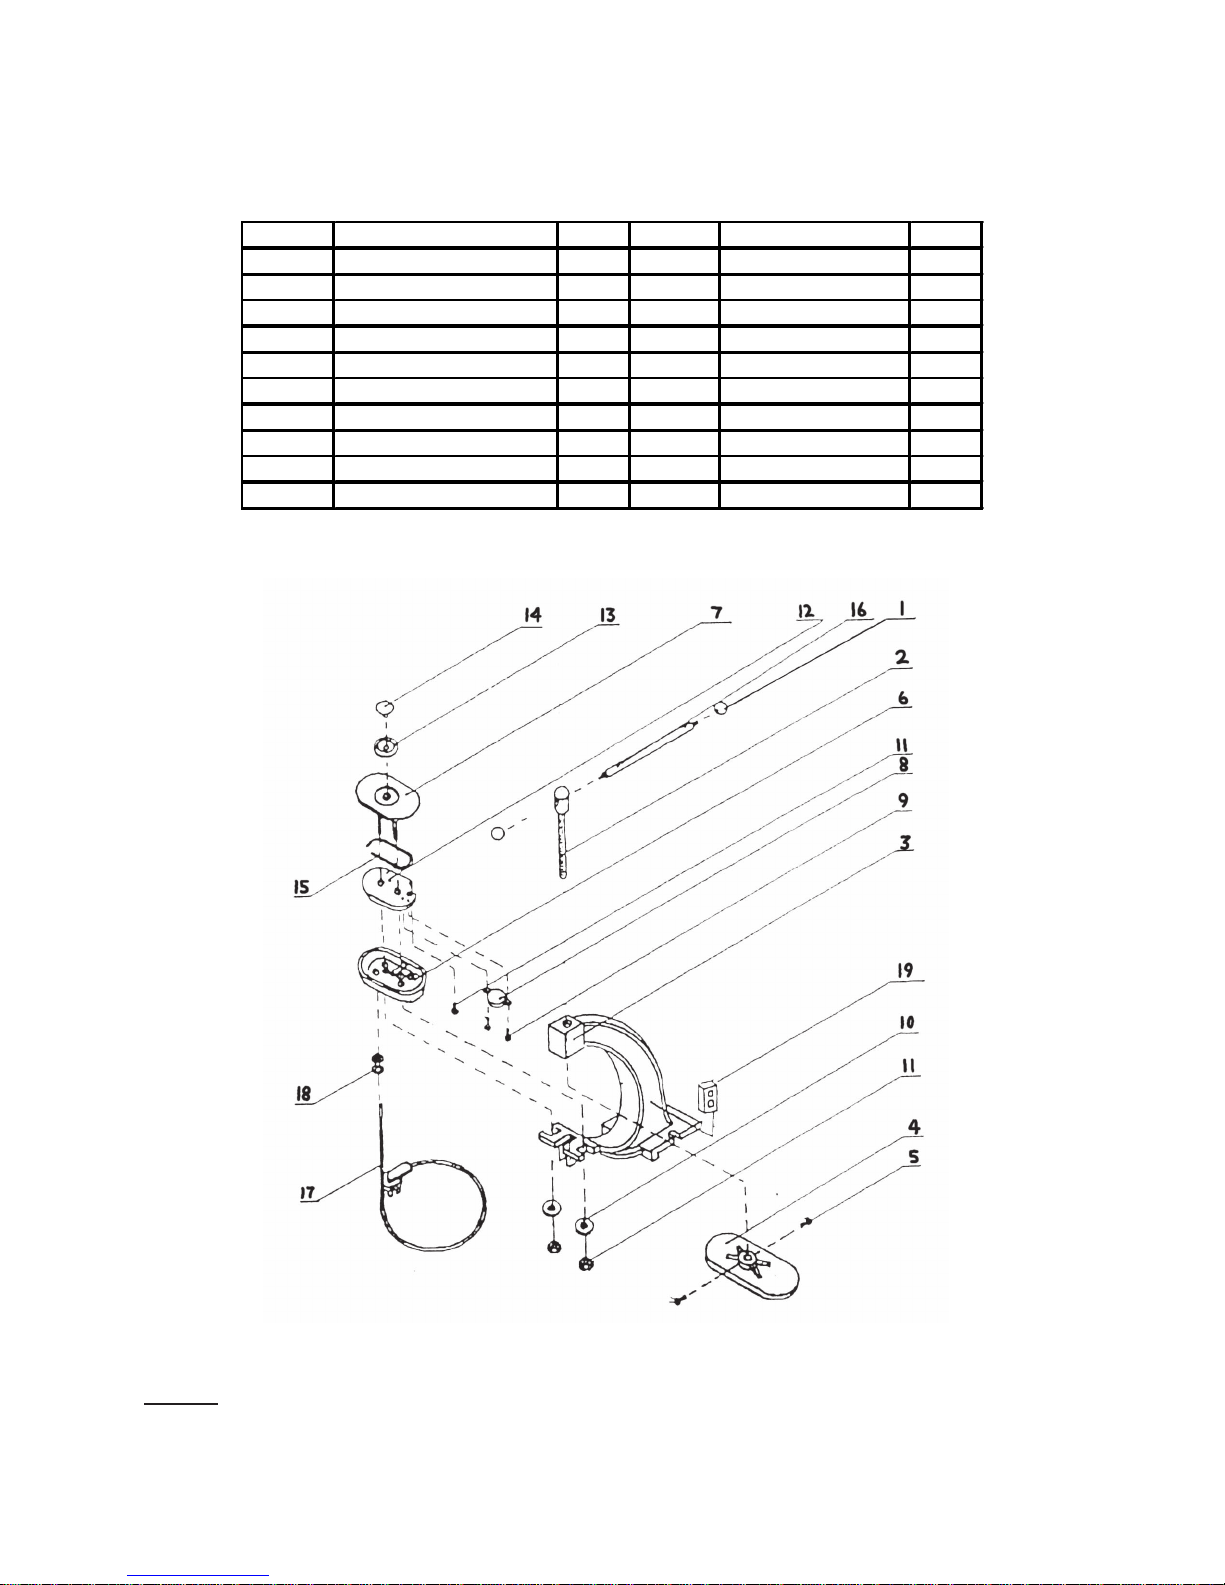
2. Place the tire tube on the Heating Box Cover (part #7) of the Tire Patching
Machine. Make sure the tube patch is resting downward, directly on the
surface of the Heating Box Cover. (See Assy. Diagram.)
3. Turn the Handle (part #16)
clockwise
to lower the Press Plate (part #4) until the
tire tube is held firmly in place between the Heating Box Cover (part #7) and the
Press Plate. (See Assy. Diagram.)
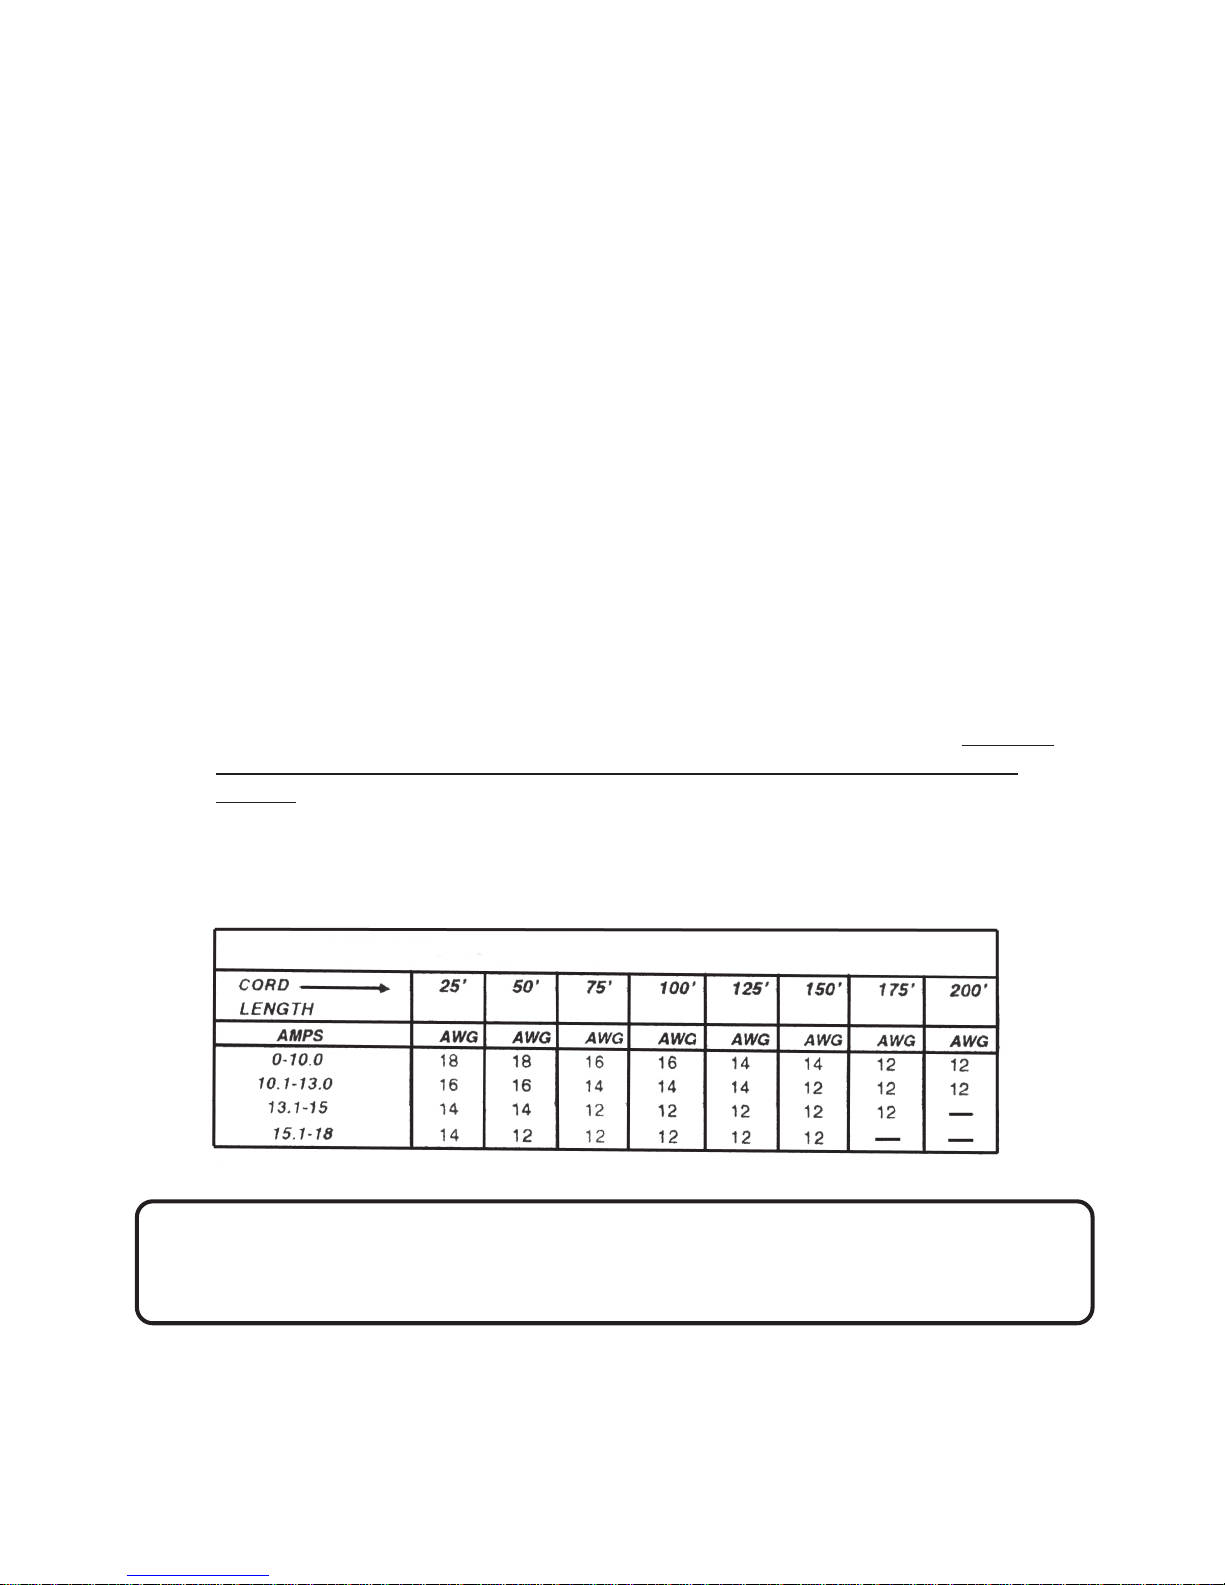
4. Connect the Power Cord/Plug (part #17) to a grounded, 3-prong, 120 volt,
electrical outlet. (See Assy. Diagram.)
5. Turn the Switch (part #19) to its “ON” position. (See Assy. Diagram.)
6. Allow 20 to 30 minutes for theTire Patching Machine to heat up and firmly
adhere the tube patch to the tire tube.
7. Then, turn the Switch (part #19) to its “OFF” position, and disconnect the Power
Cord/Plug (part #17) from its electrical outlet. (See Assy. Diagram.)
8. Turn the Handle (part #16)
counterclockwise
to fully raise the Press Plate (part
#4), and remove the tire tube from the Tire Patching Machine. (See Assy.
Diagram.)
9. Firmly screw the tire tube valve stem back into the tube. Then, re-inflate the tube
according to the tire tube manufacturer’s recommended PSI air pressure.
SKU 46616 PAGE 6