EN TRANSLATION OF ORIGINAL MANUAL
Congratulation! You have chosen a quality thermostimulator, which is careful-
ly designed and among the most ecient on taday’s market.
GENERAL WARNINGS
- To indentify the instructions for the model in your possession,
read the data on the label xed to the rear of the item.
- Before connecting up the apparatus to the mains supply, check
that the data indicated on the label (voltage and absorbed
power) correspond to the characteristics of the electric power
system
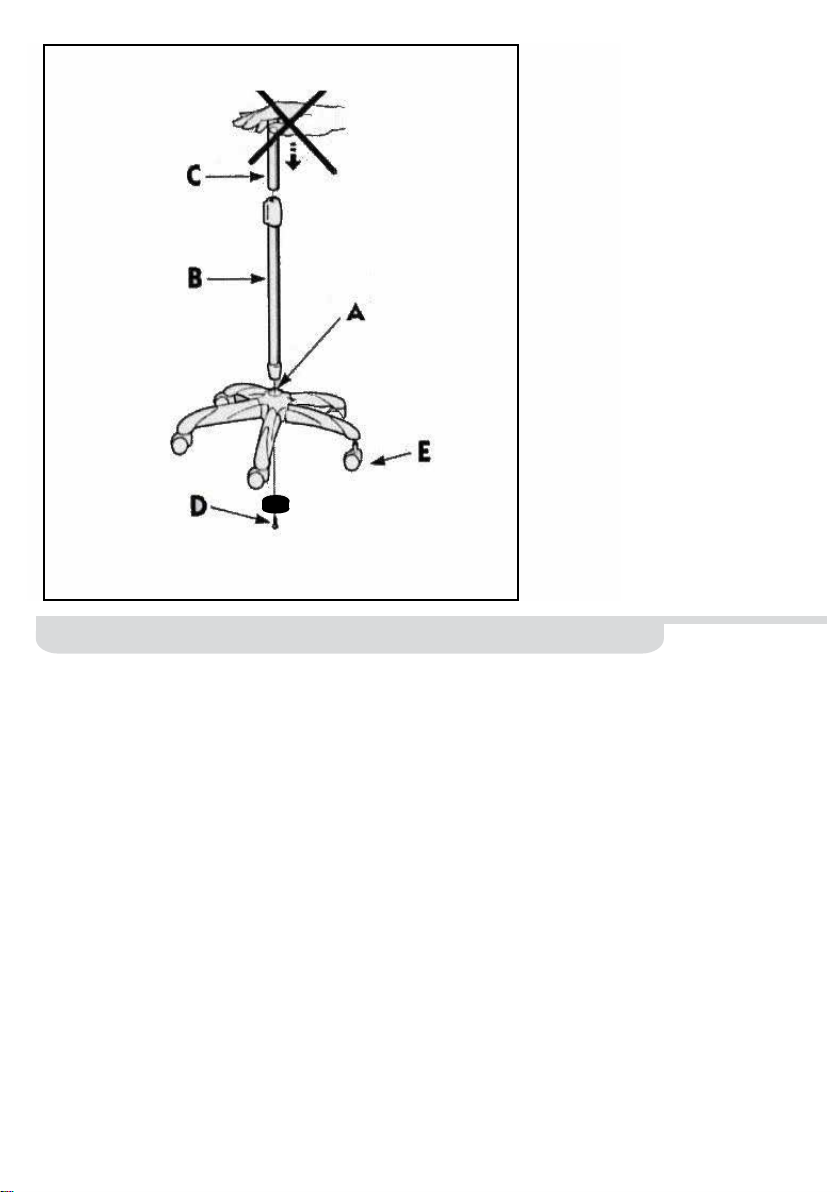
- Before mountig the apparatus on the stand be sure it is discon-
nected from the electric power supply.
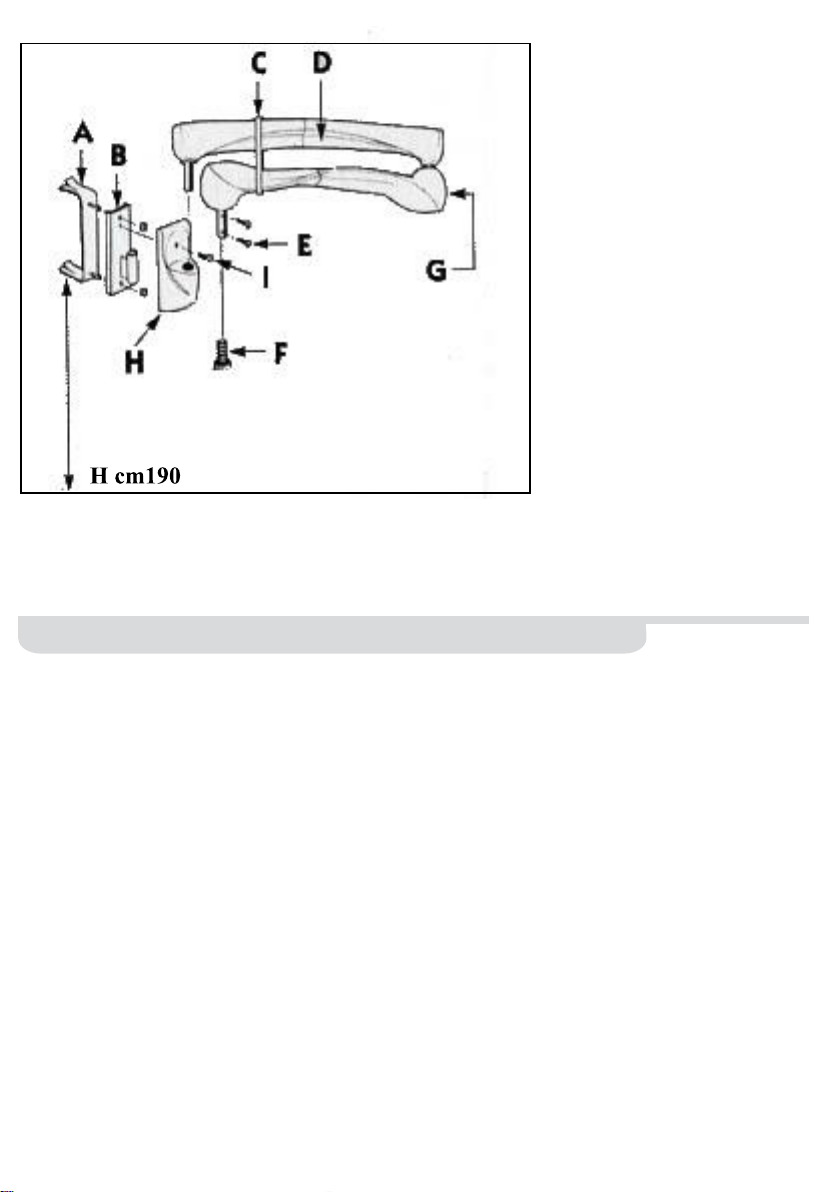
- In the case of the wall-mounted arm, the Company moreover
declines all responsability fo injury or damage resulting from the
unsuitabilityof any support made of masonry or other material.
- The apparatus can be cleaned using a cloth moistened with
water or ordinary commercially avaible detergents, provided
they do not contain alcool or acetone. However, before cleaning
make sure that the appliance is disconnected from the electric
power supply and that it has cooled down properly.
Never use this appliance near water container in bath
tubs, sinks or other container. This vaporizer must
be xed far from people using the bath tub or the
shower.
-Water poses a serious hazard even when the devices is switched
on do not leave device connected to power supply after use in the
bathroom.
- For replacement of internal parts or in case of damage to the
power cord, contact the manufacturer or service centre, or similarly
authorized personnel.
- To the aim to assure an additional protection it is advised to in-
stall, in the electrical circuit who feeds the premises from bath, a
dierential power unit, whose current dierentiates them of nomi-
nal operation is not advanced to 30mA. Ask your technical service a
council in merit.