Ceterix NovoStitch User manual

The Ceterix™ NovoStitch™ Disposable Suture Passer
Ceterix Orthopaedics
959 Hamilton Avenue
Menlo Park, CA 94025
Customer Service: (650) 241-1748
IK
Sterile
D
Do Not Reuse
i
See Instructions for Use
THE CETERIX NOVOSTITCH DISPOSABLE SUTURE PASSER
CAUTION: Federal law restricts this device to sale by or on the order of a physician.
DESCRIPTION
The Ceterix NovoStitch Disposable Suture Passer device is an arthroscopic suture passer designed to
pass USP size 2-0 or 0 braided surgical suture through soft tissue in arthroscopic surgery. The device has
a diameter less than 6.5mm. The needle is retractable.
INDICATION FOR USE
The device is indicated for passing suture through soft tissue in orthopaedic surgery.
CONTRAINDICATIONS
The device is not to be used on bone or other hard tissue.
P/N: LBL-0012 Rev: EPage 1

WARNINGS
1. Whether used arthroscopically or open surgery, the device must be used under direct
visualization.
2. Do not force the device into tight joint spaces. Excessive pushing, twisting or levering may cause
breakage.
3. Do not force the upper jaw open or closed.
4. Do not force the lower jaw into position.
PRECAUTIONS
This device should be used only by physicians with a thorough understanding of arthroscopic
procedures.
The device is provided STERILE for SINGLE USE ONLY.
This product is for single use only. It has not been designed to be re-used or re-sterilized. Reprocessing
may lead to changes in material characteristics such as corrosion and dulled edges, which may impact
the strength of the device and compromise performance. Reprocessing of single-use devices can also
cause cross contamination leading to patient infections. These risks may potentially affect patient
safety.
PREPARATIONS FOR USE
Read the Instructions for Use in its entirety prior to use of the device.
Inspect the device prior to use to ensure proper mechanical function.
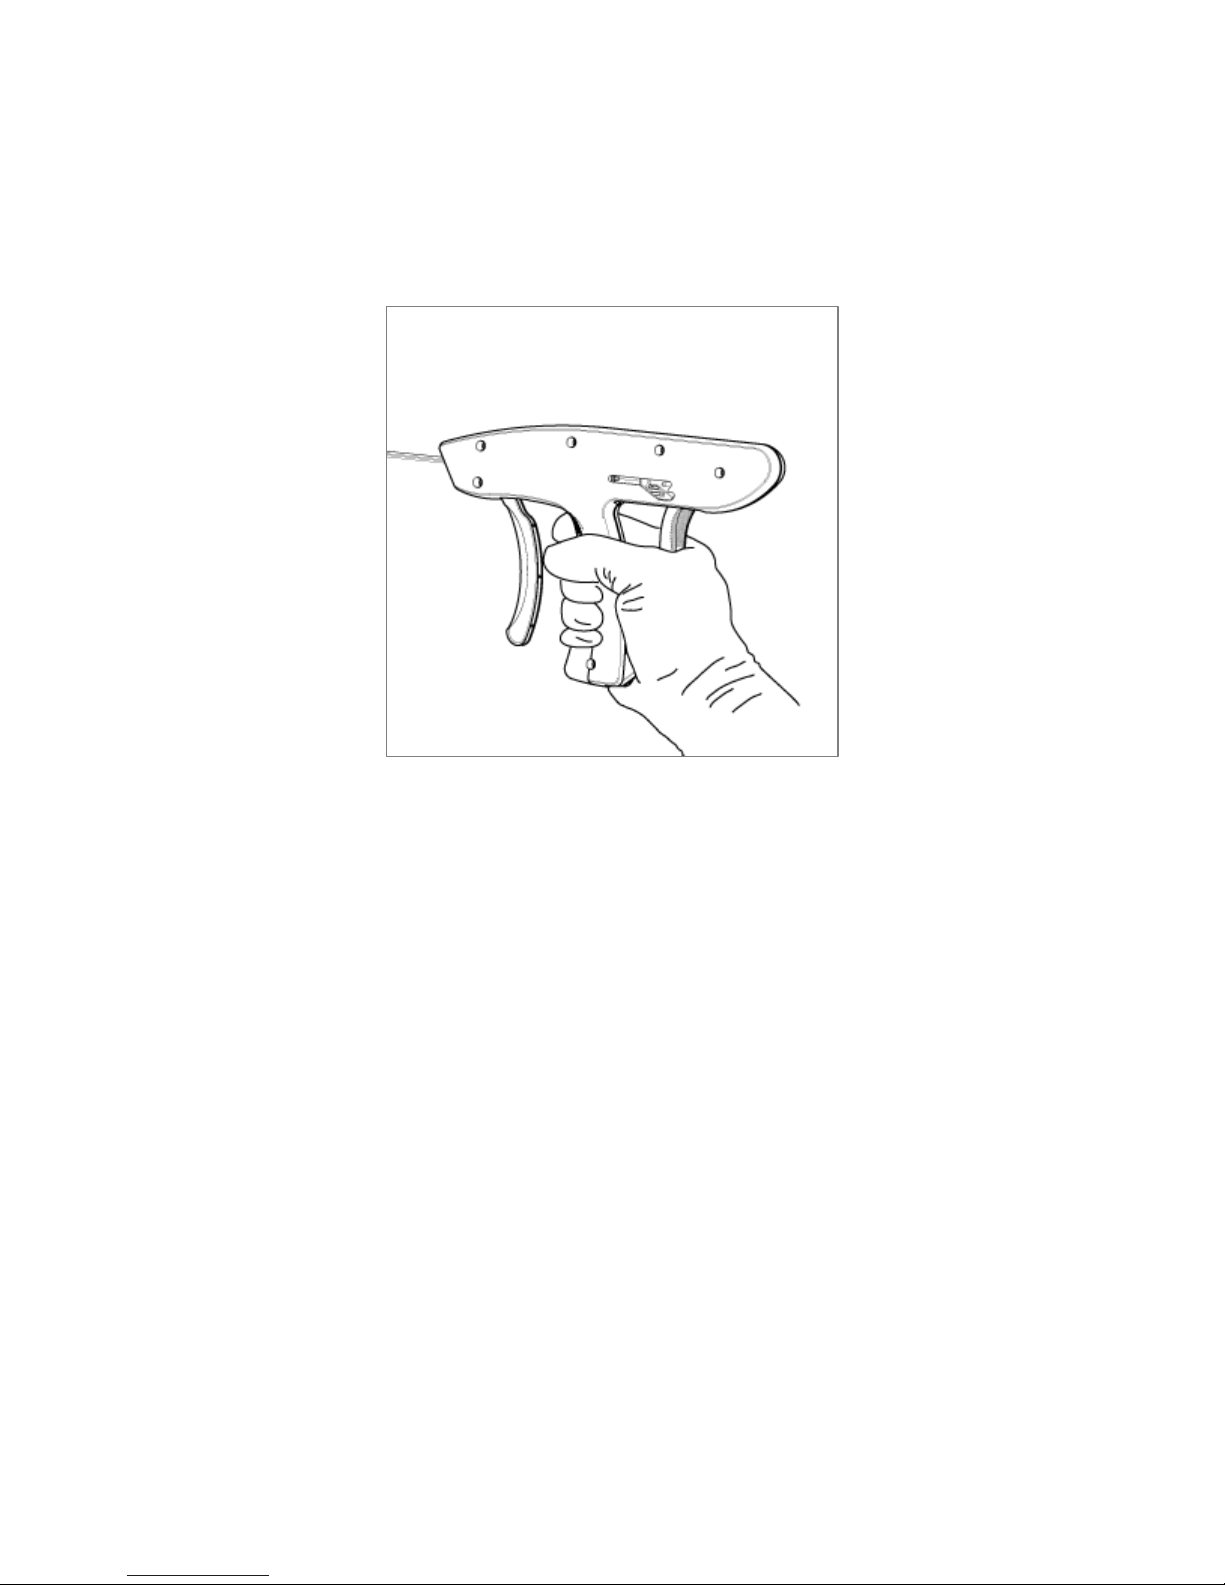
Figure 1: The Ceterix NovoStitch Disposable Suture Passer
Radiused upper jaw
Sliding lower jaw
(retracted position)
Lever A – Upper jaw lever
Lever B – Lower jaw / needle lever
1st squeeze advances lower jaw.
Squeezing with advanced lower jaw drives the needle.
Lever C – Lower jaw retractor
Shaft
P/N: LBL-0012 Rev: E Page 2

A. DIRECTIONS FOR USE LOADING SUTURE PASSER WITH SUTURE
1. Select USP size 2-0 or 0 braided suture and have available in the sterile field along with the device.
CAUTION: Do NOT use suture other than braided USP size 2-0 or 0.
2. Suture Loading: Carefully follow these steps to ensure correct suture loading.
a. Advance the lower jaw by holding the pistol grip (without Lever A) and squeezing
Lever B until the lower jaw is fully advanced (see Figure 2).
Figure 2: Fully-advanced lower jaw.
b. Load approximately 6” of one suture end into the lower jaw slot. Grab the short strand
and the remaining suture, forming a loop around the left tine of the lower jaw. Pull the
loop proximally (see Figure 3).
Figure 3: Form a loop around the left tine of the lower jaw.
P/N: LBL-0012 Rev: E Page 3
c. While maintaining light proximal tension on the loop, slightly squeeze Lever B so that
the needle moves forward about 1 mm within the lower jaw (see Figure 4), then release
Lever B. Do not fully advance Lever B at this stage. The suture strand will be locked in
the lower jaw by the needle.
Figure 4: Slightly squeeze Lever B to advance needle approximately 1mm.
d. Retract the lower jaw by pushing down on Lever C (see Figure 1), the lower jaw
retractor.
e. The suture is now loaded for passing suture through soft tissue.
3. With the suture loaded and the lower jaw in the retracted position, pass the device into the surgical
site under arthroscopic visualization. Use Lever A to position the upper jaw parallel to the shaft
during insertion of the device.
B. DIRECTIONS FOR USE PASSING SUTURE THROUGH MENISCAL TISSUE
1. Ensure portal placement and preparation is appropriate to access the region of the meniscus to be
sutured.
2. Advance the upper jaw along the superior surface of the meniscus following the radius of the
femoral condyle. Release Lever A as the upper jaw is positioned between the superior surface of the
meniscus and the femoral condyle.
3. When the upper jaw is in position, with all fingers on the white handle (not on Lever A) fully advance
the lower jaw by squeezing Lever B (see Figure 1 above). Ensure that the lower jaw slides
underneath the meniscus, then release Lever B.
4. When both upper and lower jaws are in position, simultaneously squeeze Lever A and apply slight
forward pressure to prevent the tissue from migrating distally. Arthroscopically observe upper jaw
movement. Lack of upper jaw compression during upper jaw clamping is a sign that the tissue is too
P/N: LBL-0012 Rev: E Page 4

thick to reliably deliver the suture. If the jaw does not compress and if there is an appropriate target
more centrally, reposition the device in thinner tissue so that the upper jaw does show compression
when squeezing Lever A.
5. When in position, exert additional forward force in line with the shaft prior to and during needle
deployment. Slowly deploy the needle by simultaneously squeezing Levers A and B (see Figure 1
above) until Lever B is fully advanced. Forward pressure on the device prior to and during
deployment will prevent the tissue from migrating distally. Distal tissue migration during
deployment may lead to suture misfire.
6. During deployment, the suture outside of the access port should be observed advancing in tandem
with the needle-trigger advancement. If the suture does not advance, or if the suture breaks, the
suture may be pinched between the device and the surrounding structures. If this occurs, consider
adjusting the patient position before redeploying the needle. Positioning the lower jaw beyond the
meniscus may lead to suture misfire.
7. Release both Levers A and B and then retract the lower jaw by pushing down Lever C.
Simultaneously pull the device proximally and engage Lever A to remove the upper jaw from
between the superior surface of the meniscus and femoral condyle. Keep Lever A engaged when
withdrawing the device from the joint in order to keep the upper jaw parallel with the shaft.
Remove the suture end from the upper jaw by pulling in the proximal direction, parallel to the upper
jaw.
8. If needed, repeat steps 2 through 8 using the opposing suture end. This will create a circumferential
stitch.
9. Using standard surgical techniques and the Ceterix Knot Pusher Suture Cutter or commercially-
available equivalent(s), advance a knot to the surface of the tissue until tissue approximation at the
tear is observed. Place the appropriate number of additional throws to ensure that the knot is
secure. Trim the suture limbs from the knot.
C. DIRECTIONS FOR USE PASSING SUTURE THROUGH SHOULDER LABRUM TISSUE
1. Advance the device with the upper jaw following the radius of the humeral head. Release Lever A as
the upper jaw is positioned above the labral tear.
2. When the upper jaw is in position, with all fingers on the white handle (not on Lever A) fully advance
the lower jaw by squeezing Lever B (see Figure 1 above). Ensure that the lower jaw slides into the
tear, then release Lever B.
3. When both upper and lower jaws are in position, simultaneously squeeze Lever A and apply slight
forward pressure to prevent the tissue from migrating distally. Arthroscopically observe upper jaw
movement. Lack of upper jaw compression during upper jaw clamping is a sign that the tissue is too
thick to reliably deliver the suture. If the jaw does not compress and if there is an appropriate target
more proximally, reposition the device so that the upper jaw does show compression when
squeezing Lever A.
P/N: LBL-0012 Rev: E Page 5

4. When in position, exert additional forward force in line with the shaft prior to and during needle
deployment. Slowly deploy the needle by simultaneously squeezing Levers A and B (see Figure 1
above) until Lever B is fully advanced. Forward pressure on the device prior to and during
deployment will prevent the tissue from migrating distally. Distal tissue migration during
deployment may lead to suture misfire.
5. During deployment, the suture outside of the access port should be observed advancing in tandem
with the needle-trigger advancement. If the suture does not advance, or if the suture breaks, the
suture may be pinched between the device and cannula seal. If this occurs, after reloading the device
with suture consider advancing the device beyond the tear in order to introduce slack in the suture
prior to positioning within the tear.
6. Release both Levers A and B and then retract the lower jaw by pushing down Lever C. Engage Lever
A and remove the device. Keep Lever A engaged when withdrawing the device from the joint in
order to keep the upper jaw parallel with the shaft. Remove the suture end from the upper jaw by
pulling in the proximal direction, parallel to the upper jaw.
7. If the 2-0 or 0 suture is being passed to subsequently shuttle #2 suture, create a loop in the suture
limb that exits on the glenoid side of the labral tissue and use that loop to shuttle the desired suture
through the labral tissue. If a loop is created prior to loading the suture, the free (non-looped) end
should be loaded into the device. This will ensure that the loop is positioned on the glenoid side of
the tear.
8. Complete the procedure as usual.
GENERAL USE
Bench deployment testing has demonstrated that the device can be reloaded with suture and fully
actuated 14 times. Cycling the device in excess of 14 deployments may impact needle integrity and
compromise performance.
Immediately discard the Ceterix NovoStitch Disposable Suture Passer after completion of the surgery.
The device is SINGLE USE ONLY.
STORAGE
Store in a cool, dry area.
P/N: LBL-0012 Rev: E Page 6
Table of contents
Popular Medical Equipment manuals by other brands


Getinge
Getinge Arjohuntleigh Nimbus 3 Professional Instructions for use

Mettler Electronics
Mettler Electronics Sonicator 730 Maintenance manual

Pressalit Care
Pressalit Care R1100 Mounting instruction

Denas MS
Denas MS DENAS-T operating manual

bort medical
bort medical ActiveColor quick guide

AccuVein
AccuVein AV400 user manual


