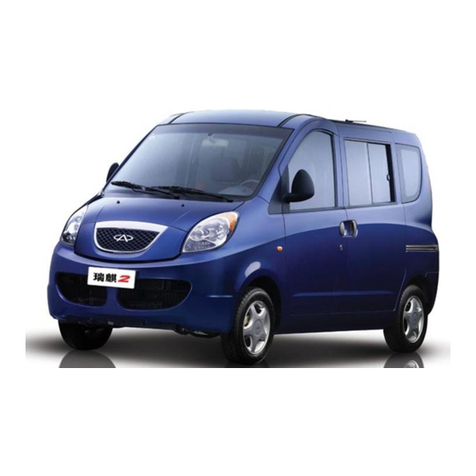
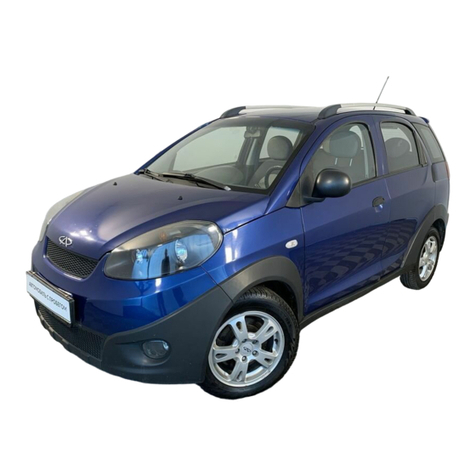
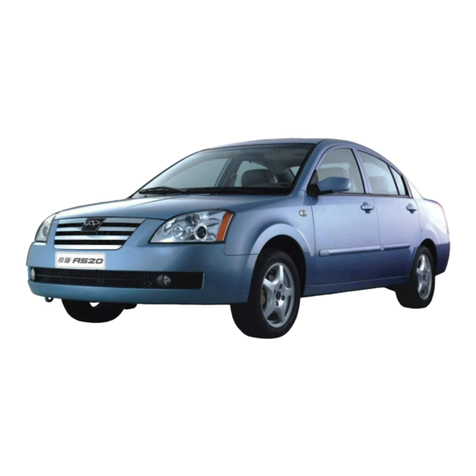
Chery QQ6 User manual

1
ServiceManualFor
CHERYQQ6
(BodyAccessories and Dimensions)
AfterSales ServiceDepartmentofChery
AutomobileSalesCo., Ltd

2
TABLE OFCONTENTS
Chapter1 EngineHoodandLuggageCompartment........................................................................8
I. RemovalofEngineHood......................................................................................................8
1. Preparation....................................................................................................................8
2. Precautions....................................................................................................................8
3. Disassembly/Reassemblyofenginehoodaccessories..................................................8
3.1. RemovalStep.....................................................................................................8
3.2. InstallationStep..................................................................................................8
Disassemblyandadjustmentoftheenginehoodassy.......................................................9
Disassemblyandassemblyofairintakegrilleassy..........................................................9
5.1. RemovalStep.....................................................................................................9
5.2. InstallationStep..................................................................................................9
Adjustmentandassemblyoftheenginehoodlock.........................................................10
6.1. RemovalStep...................................................................................................10
6.2. Installationofenginehoodlock.......................................................................10
7. Removalofhood lockcontrolcable...........................................................................10
7.1. RemovalStep...................................................................................................10
7.2. InstallationStep................................................................................................12
II. Disassembly/Reassemblyofrearbootlid..........................................................................12
1. Preparation..................................................................................................................12
2. RemovalofTrunkLidOrnamentPlate.......................................................................12
2.1. RemovalStep...................................................................................................12
2.2. InstallationStep................................................................................................12
3. Installationofluggagebootlock.................................................................................12
3.1. RemovalStep...................................................................................................12
3.2. InstallationStep................................................................................................13
4. Removaloflicenseplatelamp....................................................................................13
4.1. RemovalStep...................................................................................................13
4.2. InstallationStep................................................................................................14
Chapter2 Disassembly/ReassemblyofInteriorDecorations.......................................................15
I. Disassembly/ReassemblyofSeatBelt.................................................................................15
1. Preparation..................................................................................................................15
2. Precautions..................................................................................................................15
3. RemovalStep(Driver sseatbelt istakenasanexample)..........................................15
4. InstallationStep...........................................................................................................17
II. Disassembly/ReassemblyofSeat.......................................................................................18
1. Frontpassengerseatremovalstep..............................................................................18
2. Rearpassengerseatremovalstep................................................................................18
3. InstallationStep...........................................................................................................20
III. Disassembly/ReassemblyofConsole...............................................................................20
1. RemovalStep..............................................................................................................20
2. InstallationStep...........................................................................................................21

3
IV. Disassembly/ReassemblyofCarpet..................................................................................22
1. RemovalStep..............................................................................................................22
2. InstallationStep...........................................................................................................22
V. RemovalofCushionPad....................................................................................................23
1. RemovalStep..............................................................................................................23
2. InstallationStep...........................................................................................................24
Chapter3 RemovalandMaintenanceofDoor.............................................................................25
I. Disassembly/ReassemblyandMaitenanceofFrontDoor...................................................25
1. SystemCompositionDiagram....................................................................................25
2. Preparation..................................................................................................................26
3. Precautions..................................................................................................................26
4. Disassembly/ReassemblyStep....................................................................................26
5. InstallationandAdjustmentStep................................................................................33
II. Disassembly/ReassemblyandMaintenance ofRearDoor.................................................34
1. Preparation..................................................................................................................34
2. Precautions..................................................................................................................34
3. RemovalStep..............................................................................................................34
4. InstallationandAdjustmentStep................................................................................40
Chapter4 Disassembly/ReassemblyandMaintenance ofFront/RearBumper............................41
Disassembly/ReassemblyandMaintenance ofFrontBumper................................................41
1. SystemCompositionDiagram....................................................................................41
2. Preparation..................................................................................................................41
3. Precautions..................................................................................................................41
4. RemovalStep..............................................................................................................42
5. InstallationandMaintenance......................................................................................44
Disassembly/ReassemblyandMaintenance ofRearBumper.................................................45
1. SystemCompositionDiagram....................................................................................45
2. Preparation..................................................................................................................45
3. Precautions..................................................................................................................45
4. RemovalStep..............................................................................................................46
5. InstallationStep...........................................................................................................47
Chapter5 Disassembly/ReassemblyandMaintenance ofHeadlampandFogLamp..................48
1. SystemCompositionDiagram....................................................................................48
2. Preparation..................................................................................................................49
3. Precautions..................................................................................................................49
4. RemovalStepofHeadlamp........................................................................................49
5. RemovalofFogLamp................................................................................................52
6. InstallationandAdjustmentofHeadlamp...................................................................53
6.1. headlamp InstallationStep...............................................................................53
6.2. Introductiontoheadlamp function...................................................................53
6.2.1. Frontview.............................................................................................53
6.2.2. Backview..............................................................................................53
6.3. Adjustmentofheadlamp light..........................................................................53
7. Tail LampRemovalStep.............................................................................................55

4
Chapter6 Disassembly/ReassemblyofCeiling...........................................................................56
1. Preparation..........................................................................................................................56
2. Precautions..........................................................................................................................56
3. Disassembly/ReassemblyofSunVisor...............................................................................56
3.1. RemovalStep...........................................................................................................56
3.2. InstallationStep........................................................................................................56
4. Disassembly/ReassemblyofRoofHand-Hold....................................................................57
4.1. RemovalStep...........................................................................................................57
4.2. InstallationStep........................................................................................................57
5. Disassembly/ReassemblyofFrontCeilingLamp...............................................................57
5.1. RemovalStep...........................................................................................................57
5.2. InstallationStep........................................................................................................58
6. Disassembly/ReassemblyofAPillarTrim..........................................................................58
6.1. RemovalStep...........................................................................................................58
6.2. InstallationStep........................................................................................................58
7. Disassembly/ReassemblyofBPillarTrim.........................................................................58
7.1. RemovalStep...........................................................................................................58
7.2. InstallationStep........................................................................................................59
8. Disassembly/ReassemblyofCPillarTrim.........................................................................59
8.1. RemovalStep...........................................................................................................59
8.2. InstallationStep........................................................................................................59
9. Disassembly/ReassemblyofCeiling...................................................................................59
9.1. RemovalStep...........................................................................................................59
9.2. InstallationStep........................................................................................................60
Chapter7 Disassembly/ReassemblyofInstrumentPanel............................................................61
I. RemovalofInstrumentPanelAccessories..........................................................................61
1. Preparation..................................................................................................................61
2. Disassembly/ReassemblyofCentralConsolePanel,AudioUnit,EmergencySwitch,
A/CControlSwitch,Ashtray..........................................................................................61
2.1. RemovalStep...................................................................................................61
2.2. InstallationStep................................................................................................62
3. Disassembly/ReassemblyofFrontAshtray................................................................62
3.1. RemovalStep...................................................................................................62
3.2. InstallationStep................................................................................................63
4. Disassembly/ReassemblyofGloveCase....................................................................63
4.1. RemovalStep...................................................................................................63
4.2. InstallationStep................................................................................................63
5. combination instrumentDisassembly/Reassemblyof..............................................63
5.1. RemovalStep...................................................................................................63
5.2. InstallationStep................................................................................................64
6. Disassembly/ReassemblyofCombination Switch,WiperSwitch,IgnitionSwitch,
Heliax Cable...................................................................................................................64
II.RemovalofInstrumentPanel..........................................................................................65
1. Disassembly/ReassemblyofInstrumentPanel........................................................65

5
1.1. RemovalStep...................................................................................................65
1.2. InstallationStep................................................................................................67
2. RemovalofInstrumentPanelcross beam.............................................................68
2.1. RemovalStep...................................................................................................68
2.2. InstallationStep................................................................................................70
Chapter8 AirConditioning(A/C)System..................................................................................71
I. SystemComposition............................................................................................................71
II. RemovalofEvaporatorAssy..............................................................................................71
1. Preparation..................................................................................................................71
2. Disassembly/ReassemblyStep....................................................................................71
3. InstallationofEvaporatorAssy...................................................................................73
4. Disassembly/ReassemblyofEvaporatorInterior........................................................73
4.1. RemovalStep...................................................................................................73
4.2. InstallationStep................................................................................................78
III. Troubleshooting................................................................................................................78
Chapter9 BodyDimension..........................................................................................................80
I. ChassisControlPoint..........................................................................................................80
II. BodyAssemblyDimension................................................................................................83
1. FrontView..................................................................................................................83
2. RearView....................................................................................................................86
3. LeftView....................................................................................................................90
4. Top View...................................................................................................................104
III. DimensionofEngineCompartment...............................................................................110
WindscreenDimension.........................................................................................................111
V. DimensionofOpeningofEachPart.................................................................................112
Chapter10 WireHarness...........................................................................................................113
Section1 BatteryNegativeElectrodeHarness..................................................................113
I. SchematicDiagramofHarness.................................................................................113
II. MainConnectorsDescription...................................................................................113
III. Disassembly/ReassemblyofBatteryHarness.........................................................113
(I). Preparation......................................................................................................113
(II). Precautions.....................................................................................................113
(III). RemovalProcedure......................................................................................113
Section2 EngineCompartmentHarness.........................................................................115
I. SchematicDiagramofHarness.................................................................................115
II. MainConnectorsDescription...................................................................................116
III.Disassembly/ReassemblyofEngineCompartmentHarness................................117
(I). Preparation......................................................................................................117
(II). Precautions:...................................................................................................117
(III). RemovalProcedure......................................................................................117
Section3 ElectronicInjectorHarness................................................................................125
I. SchematicDiagramofHarness.................................................................................125
II. MainConnectorsDescription...................................................................................126
III. Disassembly/ReassemblyofEngineHarness.........................................................127

6
(I). Preparation......................................................................................................127
(II). Precautions.....................................................................................................127
(III). RemovalProcedure......................................................................................127
Section4 InteriorHarness................................................................................................133
I. SchematicDiagramofHarness.................................................................................133
II. MainConnectorsDescription...................................................................................134
III. Disassembly/ReassemblyofInteriorFloorHarness...............................................135
(I). Preparation......................................................................................................135
(II). Precautions.....................................................................................................135
(III). RemovalProcedure......................................................................................135
Section5 InstrumentHarness Assy..................................................................................142
I. SchematicDiagramofHarness.................................................................................142
II. DefinitionofMainConnectors.................................................................................143
III.Disassembly/ReassemblyofInstrumentHarness................................................150
(I). Preparation......................................................................................................150
(II). Precautions.....................................................................................................150
(III). RemovalProcedure......................................................................................150
Section6 EvaporatorHarness............................................................................................152
I. SchematicDiagramofHarness.................................................................................152
II. DefinitionofMainConnectors.................................................................................152
III. Disassembly/ReassemblyofEvaporatorHarness...................................................153
(I). Preparation......................................................................................................153
(II). Precautions.....................................................................................................153
(III). RemovalProcedure......................................................................................153
Section7 FrontLeftDoorHarness....................................................................................155
I. SchematicDiagramofHarness.................................................................................155
II. MainConnectorsDescription...................................................................................156
III. Disassembly/ReassemblyofFrontLeftDoorInnerHarness..................................157
(I). Preparation......................................................................................................157
(), Precautions..................................................................................................157
(III). RemovalProcedure......................................................................................157
Section8 FrontRightDoorHarness..................................................................................159
I. SchematicDiagramofHarness.................................................................................159
II. MainConnectorsDescription...................................................................................160
III. Disassembly/ReassemblyofFrontRightDoorInnerHarness................................160
1. RemovalStep....................................................................................................160
2. InstallationStep.................................................................................................160
Section9 RearDoorHarness.............................................................................................161
I. SchematicDiagramofHarness.................................................................................161
II. MainConnectorsDescription...................................................................................162
III. Disassembly/ReassemblyofRearLeftDoorInnerHarness...................................163
(I). Preparation......................................................................................................163
(II). Precautions.....................................................................................................163
(III). RemovalProcedure......................................................................................163

7
IV. Disassembly/ReassemblyofRearRightDoorInnerHarness.................................164
Section10 BackDoorHarness..........................................................................................165
I. SchematicDiagramofHarness.................................................................................165
II. MainConnectorsDescription...................................................................................166
III. Disassembly/ReassemblyofBackDoorInnerHarness..........................................167
(I). Preparation......................................................................................................167
(II). Precautions.....................................................................................................167
(III). RemovalProcedure......................................................................................167
Section11 DefrosterHarness.............................................................................................170
I. SchematicDiagramofDefrosterPositiveHarness....................................................170
II. SchematicDiagramofDefrosterNegativeHarness.................................................170
III. MainConnectorsDescription.................................................................................170
IV. Disassembly/ReassemblyofRearDefrosterHarness.............................................171
(I). Preparation......................................................................................................171
(II). Precautions.....................................................................................................171
(III). RemovalProcedure......................................................................................171

8
Chapter1Engine HoodandLuggage Compartment
I. RemovalofEngineHood
1. Preparation
Tool: flatheadscrewdriver,pliers, wrench
2. Precautions
2.1. Duringtheremoval,paymoreattentionto
theapplicationofappropriatestrength.
Norudeoperation.
2.2. Duringtheremoval/reassemblyoftrim,
especiallypaymoreattentiontotheprotection
ofsurface ornamentssothatanyornamentmay
notbedamaged.
3.Disassembly/Reassemblyofengine
hoodaccessories
3.1. RemovalStep
3.1.1. Removetheclipfromtheheatinsulation
washers(19 pcsintotal)withaflathead
screwdriver,and detachtheheatshieldfromthe
enginecompartment.
3.1.2. Pull off thewashingliquidhose.
3.1.3. Detachtwowaterspraynozzleclipsfrom
thebottomofenginehood,pushthenozzle
fromthebottomofenginehood,and takeout
thenozzlefromtheoutside.
3.2. InstallationStep
Theinstallingstepsarereversetothosefor
removal.

9
4.Disassemblyandadjustmentofthe
enginehoodassy.
Preparationoftool(s):13# wrench
4.1. Takeofffouradjusting boltsfromengine
hood.Andremovetheenginehood.
Atthesametime,unscrewfouradjustingbolts
toadjustthefront/rearpositionand right/left
positionoftheenginehood.
4.2. Installationofenginehoodassy.:
Theinstallingstepsarereversetothosefor
removal.
Installationtorqueis30±1Nm
5.Disassemblyand assemblyofair
intakegrilleassy.
Preparationoftool(s):cross screwdriver,socket
wrench
5.1. RemovalStep
5.1.1. Opentheenginehood byhand.
5.1.2. Useacross screwdrivertoremovethefix
screwfromtheintakegrille.
5.1.3. Utilizeasocketwrenchtoremovethe
fixing boltsfromtheintakegrille.
5.1.4. Detachtheintakegrille.
5.2.InstallationStep
Theinstallingstepsarereversetothosefor
removal.
Installationtorqueis5±1Nm

10
6.Adjustmentandassemblyofthe
enginehoodlock
Preparationoftool(s):10# wrench
6.1. RemovalStep
6.1.1. Unscrewthreecenteringboltsfromthe
enginehood,andthenremovetheenginehood
lock.
Alsounscrewthesethree boltstoadjustthe
positionofenginehoodlock.
Torque:9±1 Nm
6.1.2. Removethelockcableoffrontengine
hood fromenginehood lockassy.
6.2. Installationofenginehoodlock
Theinstallingstepsarereversetothosefor
removal.
Installationtorqueis9±1Nm
7. Removalofhoodlockcontrolcable
Preparationoftool(s):8# wrench,10# wrench,
flatheadscrewdriver
7.1. RemovalStep
7.1.1. Opentheenginehoodinsidethedriver s
cab, and removetwofixingboltsfromthe
handle.
Installationtorqueis9±1Nm
7.1.2. Removethefronthoodcablefromthe
hood.

11
7.1.3. Removethehoodlockanddetachthe
enginehoodlockcontrolcablefromthehood
lockassy..
7.1.4. Removethreeclipsusedtofix thecontrol
cablebyhandorwithaflatheadscrewdriver.
7.1.5. Drawoutthecontrolcablefromthe
enginecompartment.

12
7.2. InstallationStep
Theinstallingstepsarereversetothosefor
removal.
CAUTION:Incaseofinstallation,thegroove
oncontrolcableshall beinsertedintothepull
groove;thecontrolcablepeneratesintodriver s
cabthrough theenginecompartment,andshall
passesthroughasmall holeand thenentersinto
thecab, asshowninthefigure.
II. Disassembly/Reassemblyof
rearbootlid
1. Preparation
Tools:Flatheadandcross screwdriver,socket
wrench, open-endwrench
Materials:clip
2.RemovalofTrunkLidOrnament
Plate
2.1. RemovalStep
2.1.1. Removethescrewsfromthefixed
luggagebootinternalguardplatewithacross
screwdriver.
2.1.2. Removethedisposableclipsfromthe
fixedluggagebootinternalguardplatewitha
flatheadscrewdriver,andthenremovethe
luggagebootinternalguardplate.
2.2. InstallationStep
Theinstallingstepsarereversetothosefor
removal.
3. Installationofluggagebootlock
3.1. RemovalStep
Preparationoftool(s):10# wrench
3.1.1. Detachtheconnectorsoftheluggage
bootlockbody motor.
Small hole

13
3.1.2. Detachtwolocatingboltsfromthe
luggagebootlock (theinstallationtorqueis9±1
Nm)
3.1.3. Removetheluggagebootlockcore.
3.1.4. Removetwofixingboltsfromthetrunk
(i.e.luggageboot)lockbodywithasocket
wrench.
3.1.5. Takeoffthetrunklockbody.
3.2. InstallationStep
Theinstallingstepsarereversetothosefor
removal.
Precautionsoninstallationofluggageboot
lock:checkwhetherthelockcolumnis
deformed,whethertherivetedconnectionsare
initsproperpositions,andwhetherthelock
tonguecanopenorcloseflexibly, smoothly.
4. Removaloflicenseplatelamp
Preparationoftool(s):cross screwdriver,
open-endwrench.
4.1. RemovalStep
4.1.1. Removethetrunk internalornamentplate
(see Removaloftrunklid ornamentplate)
4.1.2. Removetwofixingboltsfromthelicense
platelampwithanopen-endwrench.

14
4.1.3. Disconnettheconnectingplugsfromthe
rightand leftlicenseplatelampsand thentake
offthelicenseplatelampassy.
4.1.4. Removetwofixscrewsfromthelicense
platelampwithacross screwdriver.
4.1.5. Takeoffthelicenseplatelamp
4.1.6. Takeoffthebulbfromthelicenseplate
lamp.
4.2. InstallationStep
Theinstallingstepsarereversetothosefor
removal.

15
Chapter2Disassembly/ReassemblyofInteriorDecorations
I. Disassembly/Reassemblyof
SeatBelt
1. Preparation
Tools: flatheadscrewdriver, wrench, sleeve.
Parts: disposableclips.
2. Precautions
Keeptheseatbelt clean,avoidtheoil stain,and
checkwhethertheseatbelt isdamaged.
3.RemovalStep(Driver sseatbeltis
takenasanexample)
Prizethefrontthresholdpressingplate
carefullywithaflatheadscrewdriver.
3.2. Removetheweatherproofrubberstripof
thefrontdooropening.
3.3. Removetherearscuffplate.

16
3.4. Removetheweatherproofrubberstripof
thereardooropening.
3.5. Removetheseatbelt lowerornament
cover.
3.6. Unscrewthefixingnutswitha17#sleeve,
and detachtheBpillarlowertrim.
Installationtorqueis50±5Nm
3.7. Unclenchtheornamentcoverontheseat
belt regulatorwithaflatheadscrewdriver.
CAUTION:Payattentiontothebreakageof
clipinsidetheregulator.
3.8. Loosenthefixingnutswitha17# sleeve,
and thentakeofftheseatbelt.
Installationtorqueis50±5Nm

17
3.9. UnclenchtheBpillartrimwitha
right-angledscrewdriver.
3.10. TakeofftheBpillartrim.
3.11. Removethefixscrewsfromtheseatbelt
withacross screwdriver.
3.12. Loosenthefixingnutswitha17# sleeve,
and thentakeofftheseatbelt.
4. InstallationStep
Theinstallingstepsarereversetothosefor
removal.
Note:
4.1. Keeptheseatbelt clean,avoidtheoil stain,
and checkwhethertheseatbelt isdamaged.
4.2. Thepillartrimshall securelyfit withthe
body,withoutanyloosesymptoms;andthe
trimshall fit well withtheceilingandrubber
strip.
4.3. Theseatbelt adjustingslidebaffleontheB
pillaruppertrimshall movefreely,withoutany
influenceontheadjustmentofseatbelt,and the
fit clearance oflowertrimshall beevenand
below1mm;
4.4. Thefitclearance betweenBpillarlowtrim
andfront/rearscuff plateshall beevenandless
than1mm;

18
II. Disassembly/Reassemblyof
Seat
Tool: 16# sleeve
1. Frontpassengerseatremovalstep
1.1. Pull themoveablehandleundertheleft
seattomovetheleftseatbackwardsandreveal
thefixingboltsundertheseat.
1.2. Removetwofixingboltsbeforetheseat.
bysleeve
1.3. Turnthemoveablehandleandpull
forwardstheseat,and exposetwofixing bolts
ontherearofseat.
1.4 Disassembletwofixing boltsattheback
ofseatwithsleeve.
1.5 Pull offtheinserterunderseatandtake
awaytheseat.
2. Rearpassengerseatremovalstep
2.1 Liftuptherearpassengerseatcushionby
hand,andthentakeoutthecushionfromthe
clipsofchassisandbody.
2.2. Directlytakeouttheseatcushionbyboth
hands.

19
2.3. Loosenthefrontfixingboltsattheright
sideofrearrightseatwithanopen-endwrench.
2.4. Loosenthefrontfixing boltsattheleft
sideofrearrightseatwithanopen-endwrench.
2.5. Pull upthering-pull ofrearrightseat,
and laydowntheseatforwards.
2.6. Loosentherearfixingboltsattherightside
ofrearrightseatwithanopen-end wrench.
2.7. Loosentherearfixingboltsattheleftside
ofrearrightseatwithanopen-endwrench,and
thenremovetherearrightseat.

20
2.8. Loosenthefrontfixingboltsofrearright
seatwithaopen-endwrench.
2.9. Pull upthering-pull ofrearleftseat,and
laydowntheseatforwards.
3.0. Loosentherearfixingbolt ofrearleftseat
withasleeve,andthenremovetherearleft
seat.
3. InstallationStep
Theinstallingstepsarereversetothosefor
removal.
Installationtorqueis25±3Nm
III.Disassembly/Reassemblyof
Console
Tool: cross headscrewdriver
1. RemovalStep
1.1. Removeeachtwoboltsatleftand right
sideswithacross screwdriver,theseboltsof
whichareusedtojointtheconsoleandfront
lowerguardplate.
(Thetighteningtorqueis2±0.5N.m)
Other manuals for QQ6
3
Table of contents
Other Chery Automobile manuals

