manuals.online logo
Brands
  1. Home
  2. •
  3. Brands
  4. •
  5. Chiayo
  6. •
  7. Portable Speakers
  8. •
  9. Chiayo Focus500 Series User manual

Chiayo Focus500 Series User manual

This manual suits for next models

1

Popular Portable Speakers manuals by other brands

Monster Rockin Roller 2 user manual

Monster

Monster Rockin Roller 2 user manual

Blueant BLUESONIC user manual

Blueant

Blueant BLUESONIC user manual

Altec 730C Specifications

Altec

Altec 730C Specifications

Aiwa BST-330 user manual

Aiwa

Aiwa BST-330 user manual

Prestigio PIS1 instruction manual

Prestigio

Prestigio PIS1 instruction manual

Akai AWS08BK manual

Akai

Akai AWS08BK manual

Philips BT6700 user manual

Philips

Philips BT6700 user manual

Wren V5BT Setup guide

Wren

Wren V5BT Setup guide

Sven PS-320 user manual

Sven

Sven PS-320 user manual

Urban revolt Streetbox Quick installation guide

Urban revolt

Urban revolt Streetbox Quick installation guide

Philips BT4000 Short user manual

Philips

Philips BT4000 Short user manual

Philips sbm130 user manual

Philips

Philips sbm130 user manual

Gembird TD-SPKBT-04 Series user manual

Gembird

Gembird TD-SPKBT-04 Series user manual

Panacom monsoon user manual

Panacom

Panacom monsoon user manual

Lenovo speaker M0520 user guide

Lenovo

Lenovo speaker M0520 user guide

Mackie THUMP GO quick start guide

Mackie

Mackie THUMP GO quick start guide

Trevi XR 400 APP user guide

Trevi

Trevi XR 400 APP user guide

Trevi XF 4200 DJ user guide

Trevi

Trevi XF 4200 DJ user guide

manuals.online logo
manuals.online logoBrands
  • About & Mission
  • Contact us
  • Privacy Policy
  • Terms and Conditions

Copyright 2025 Manuals.Online. All Rights Reserved.

GREEN PRODUCT
It has been RoHS Compliant
OPERATION MANUAL
Portable Sound System
CHIAYO ELECTRONICS CO., LTD.
http://www.chiayo.com.tw E-mail: [email protected]
OFFICE: 30, LANE 27, SEC.4. JEN-AL ROAD, TAIPEI, TAIWAN / TEL: 886-2-2741-5741 FAX: 886-2-2752-5242
FACTORY: 88, CHUNG HSIAO STREET 2, CHIAYI, TAIWAN. / TEL: 886-5-271-1000 FAX: 886-5-276-7611
Printed in Taiwan, April 2008
12I1152
130
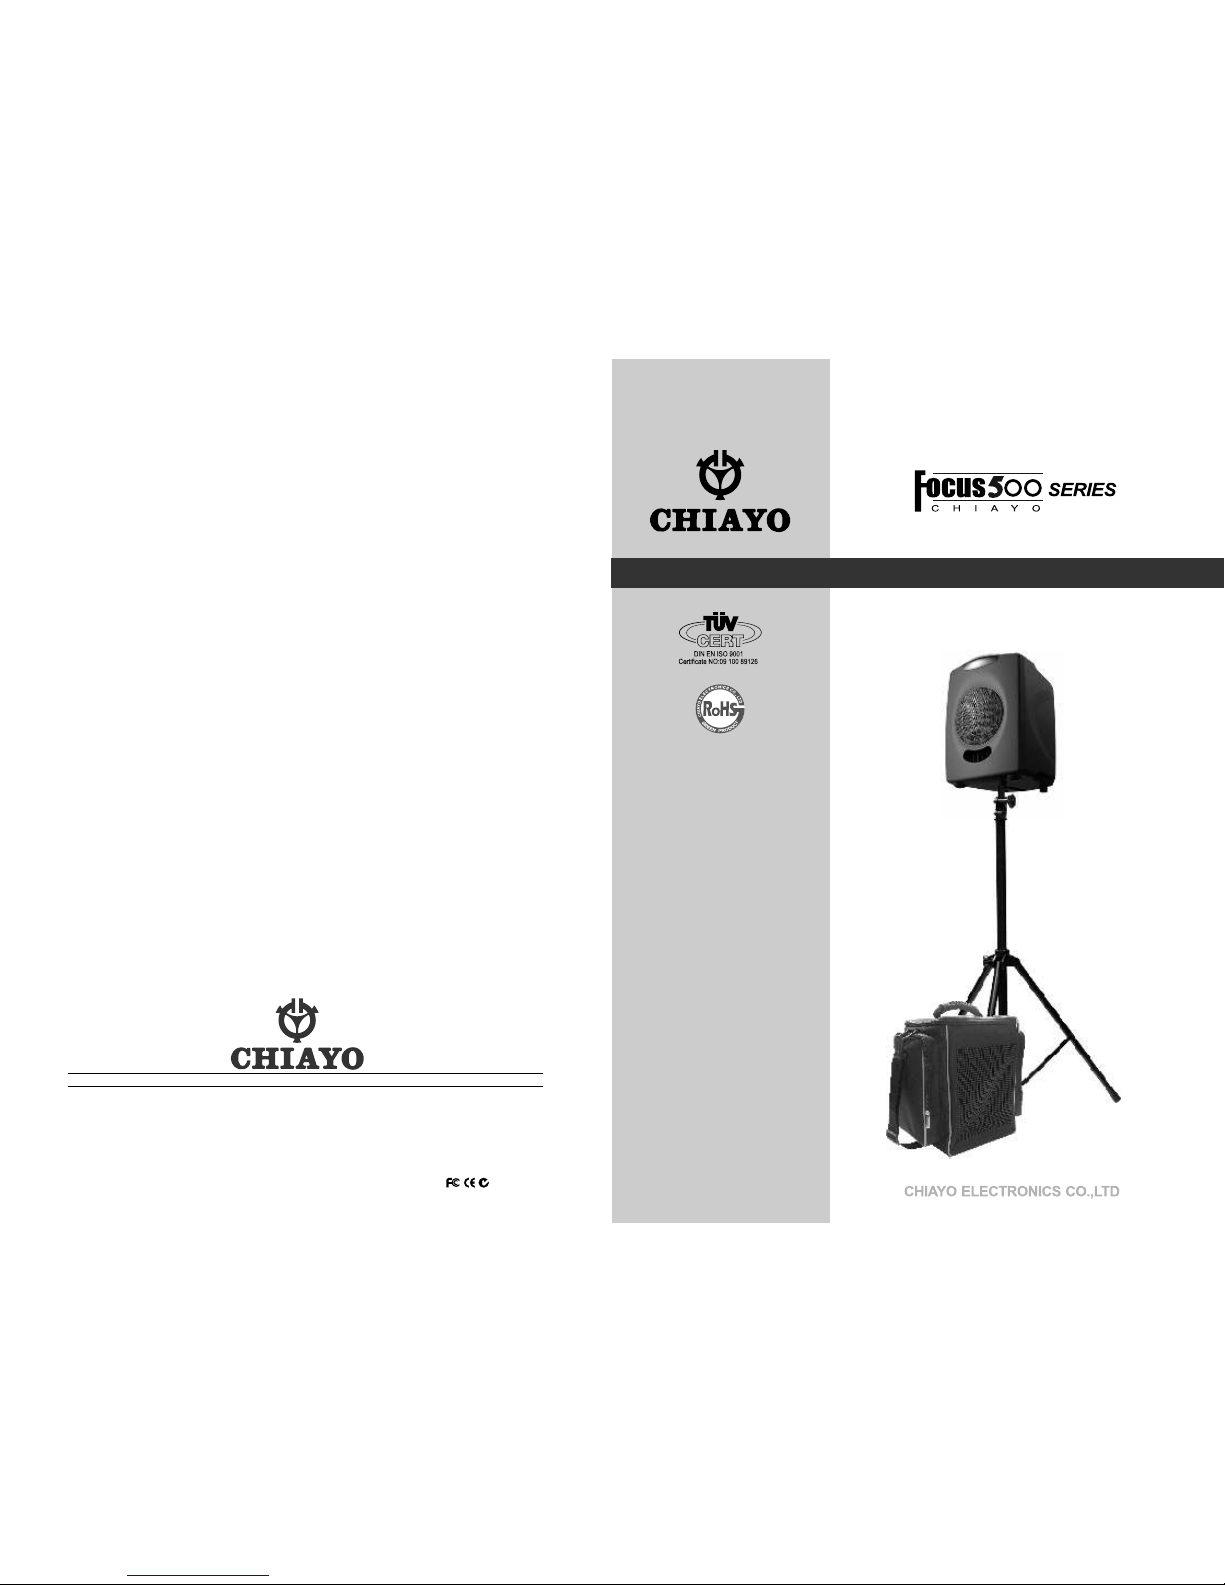
Focus 500 Operation Manual
Congratulation and thank you for the purchase of this all-in-one ultra compact
portable sound system. To ensure a trouble-free operation, please read this manual
thoroughly and fully understand its controls and functions.
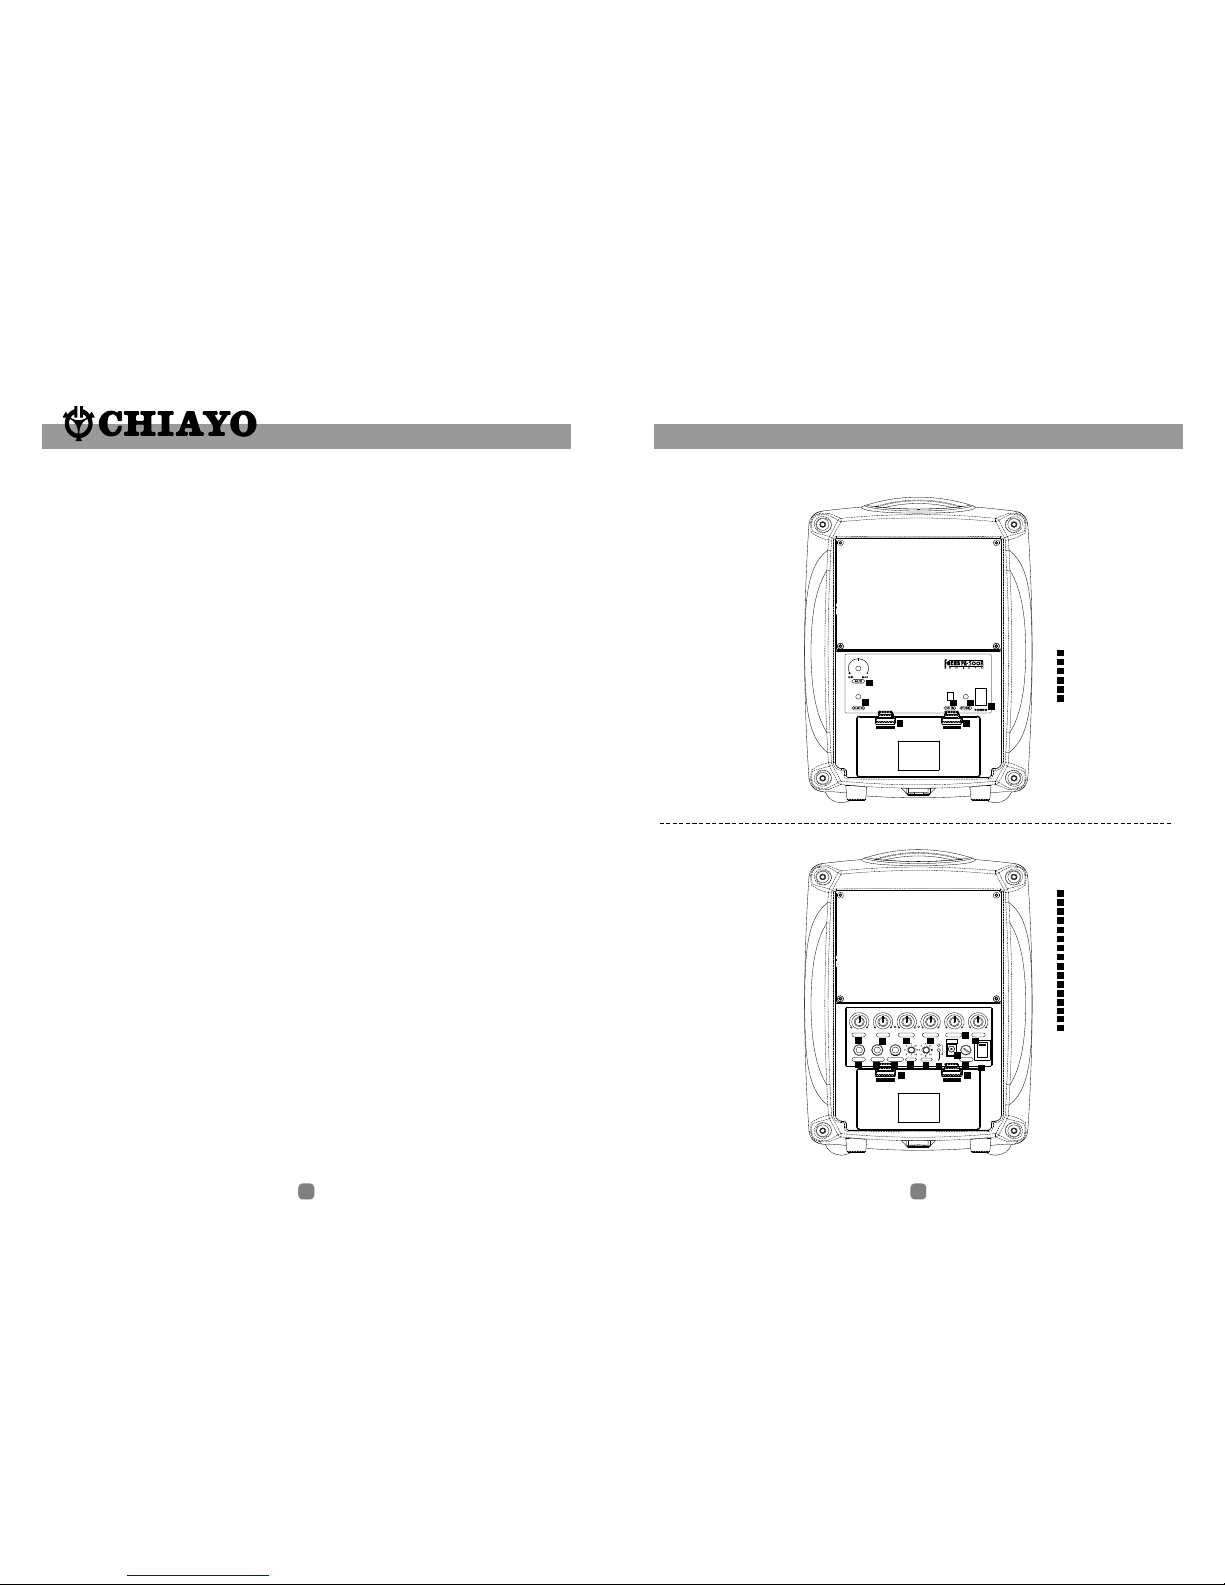
There are various versions of the Focus 500 as follow :
1. Focus 500 Active Speaker. ( Fig.1)
2. Focus 500 with Amplifier. (Fig.2 )
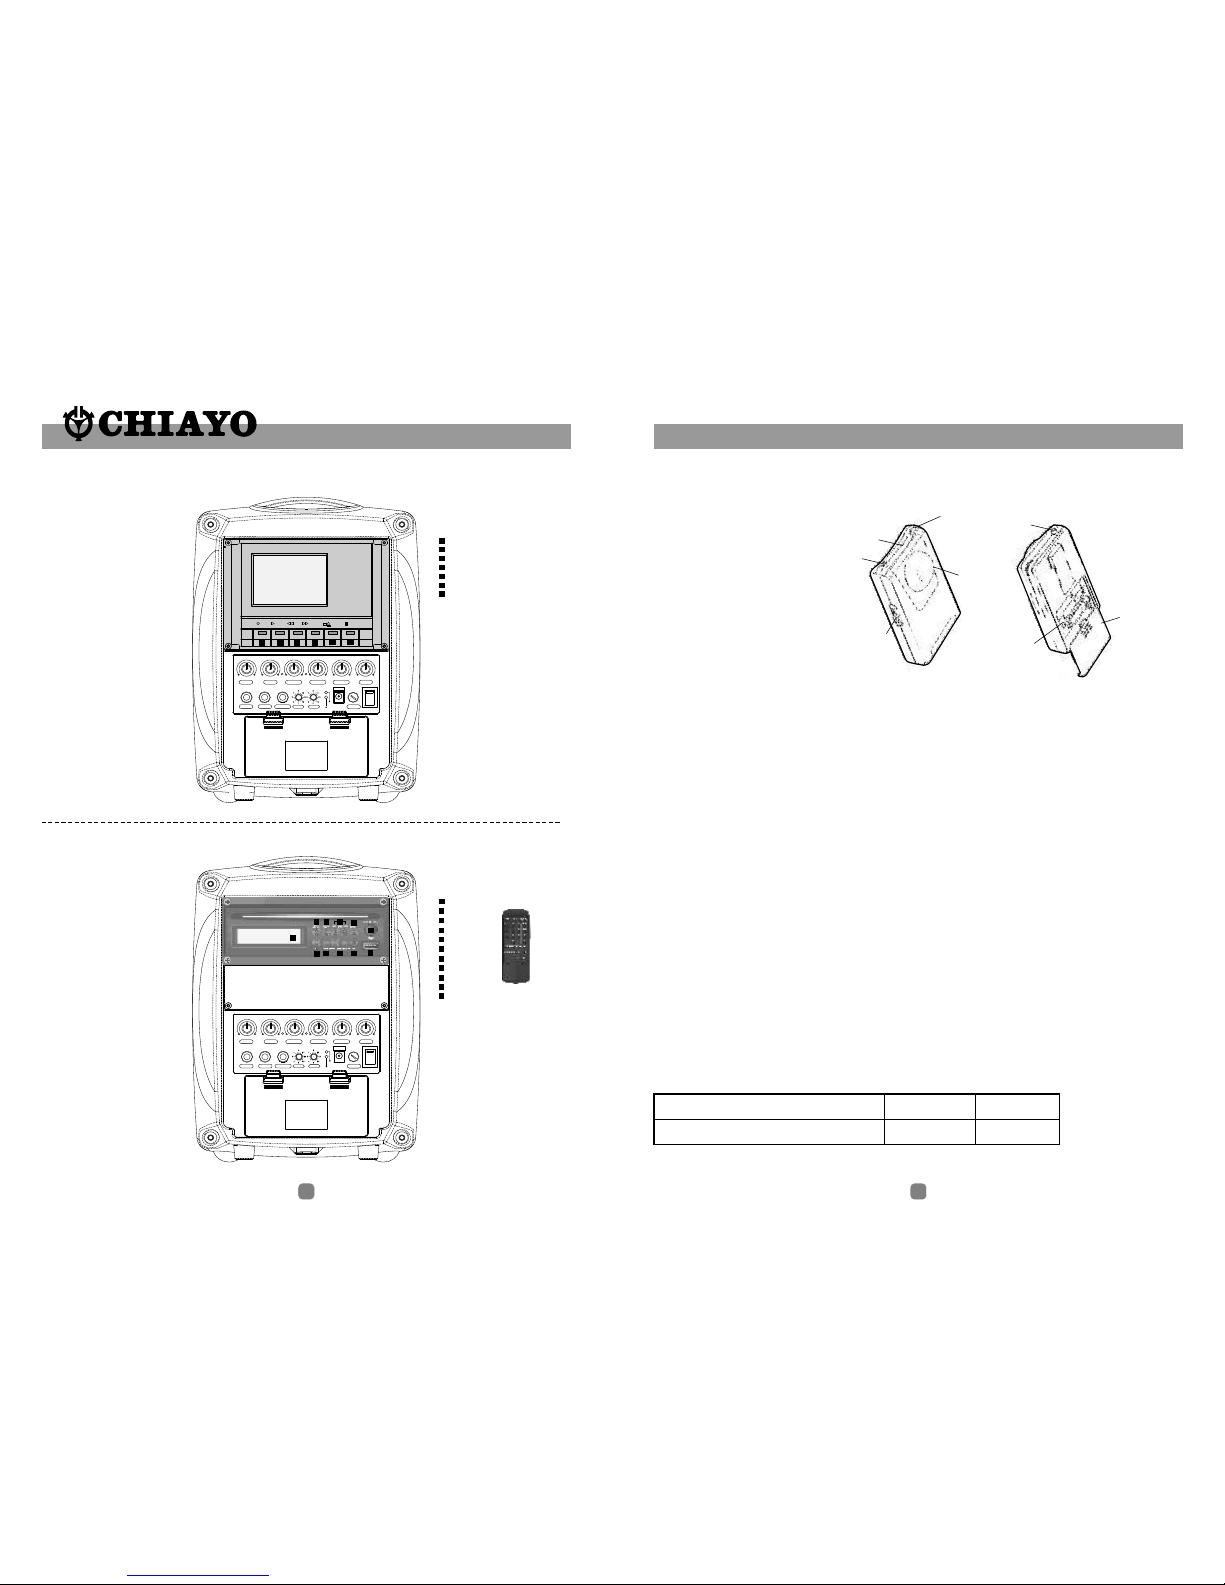
3. Focus 500 with Tape Deck. ( Fig.3 )
4. Focus 500 with ( Fig.4 )
5. Focus 500 with ( Fig.5 )
6. Focus 500 with ( Fig.6 )
All the versions can be equipped with 1 or 2 Wireless ( WR ) receiver module(s). The
wireless (WR) receiver module can be VHF, UHF or Infrared(IR). The VHF module is
a fixed crystal single frequency type whereas the UHF module is a PLL synthesized
type with 16 preset frequencies ( identified by external 16 channel rotary switch(s) ).
The IR system could be either 2.08 or 2.54MHz-fixed frequency type.
Remark: It is also possible to have all the above versions without any wireless (WR)
fitted.
Configuration :
All versions of Focus 500 series comes equipped with the following :
1.A switch mode power supply.
2.One or two wireless microphones, either handheld or bodypack transmitter.
( except version with no built-in wireless receiver module ).
Matching Transmitters
Optional accessories :
1.Carrying bag.
2.Tripod stand.
3.Charger for UHF/IR transmitter.
4.Focus 500 active speaker / passive speaker
5.Wired microphone.
Remark: Manufacturer reserves the rights to change the above combinations
without prior notice.
CD / USB Player.
Digital Recorder.
CD / USB Player & Digital Recorder.
No. of channel
Transmitter types Handheld
UHF
SQ-5016 SM-5016
SQ-816
SQ-916
SQ-816
SM-916
SQ-216
SQ-316 Q-1002
AAx3
9Vx1 9Vx1 AAx2
AAx3
9Vx1
AAx3
9Vx1
AAx3
9Vx1 9Vx1 AAx2
SM-216
SM-316
IWH-201
IWH-301
IWM-202
IWM-302
M-1002
VHF IR
Beltpack Beltpack Beltpack Beltpack
Handheld Handheld Handheld
Frequency band
Transmitters
Battery used AAx2 AAx2
16 1 1
Maintenance-free Lead Acid battery
Guidelines for maintenance-free Batteries:
1. Battery should operate at temperatures between 15°C ~ 50°C. To ensure a longer life span, it
should be kept between 5°C ~ 35°C. For optimum result, 20°C ~ 25°C will be ideal. When
temperature falls 15 degrees below zero, battery will undergo some changes in its chemical
contents and therefore cannot be recharged. Operating the battery at higher temperature will
result in higher capacity but shorter lifespan, whereas lower temperatures operation has a
longer lifespan but less capacity.
2. If the battery is not recharged 72 hrs after it is completely used, it will be permanently damaged.
3. When the battery is being charged, the internal gases will be electrolyzed into water at the
negative charge, maintaining the battery’s storage abilities with no water added. However,
erosion at the charged ends of the battery will cause poor performance.
4. The battery’s cycle lifespan ( no. of charge and discharge cycle ) is determined by the degree at
which power is dissipated., especially the degree of discharged each time it is used and the
recovery charging method. For normal use, the battery can be used for longer hours when less
power is dissipated each time and vice versa. At 25°C, maintenance-free batteries could be
charged 150 ~ 200 times at 100% discharge each time.
5. Decrease in capacity, internal short circuit, deformation in appearance, erosion of charged ends
and decrease in open circuit voltage are symbols indicating battery is approaching the end of its
life cycle.
6. When two batteries are used in parallel connection, the resistance of the cables should be kept
equal.
Properties of the Lead Acid Battery:
1. Has no memory effect. Can be charged at anytime, even when the recharge indication light is
not on.
2 .Performance and efficiency are affected by changes in the environment, especially temperature
and humidity. (Best operated between 20°C ~ 25°C)
3. Battery discharge naturally according to a certain pattern even not in use. For best performance
and a prolonged lifespan, it should be recharged every month even when not in use.
4. Under normal circumstances, battery could last for about a year.
5. When the battery’s life expires, possible indicators include internal short-circuit, decrease in
capacity, deformation in appearance, erosion of charged ends and decrease in operating
voltage.
User’s Precautions:
1. For first-time use, charge the battery for 10 hrs until it is fully charged.
2. To maintain performance and lifespan, if product has not been used for 3 months after the
initial shipment, please fully charge the battery.
3. Before each use, it’s advisable to charge the battery to its full capacity.
4. The average lifespan of the battery is one year. The user is advised to change the battery after
one year of use.
5. The current consumption is in direct ratio with load current. The more current consumption, the
less the operation time.
6. SMART and FOCUS operate on one 12V/2.7AH battery. ADVENTURE, CHALLENGER, and
VICTORY operate on two 12V/4.5AH batteries.
29 2
Caution and tips on how to obtain the best results.
1. Before inserting the batteries, please make sure that they are inserted according
to the correct polarity.
2. The audio cable of VHF transmitters also serves as antenna. The length of the
cable is cut according to the specific frequency range. Do not alter the length or
mix around the cable of different transmitters. The use of wrong audio cable will
affect the antenna efficiency of the transmitter!
3. Use only brand new Alkaline batteries. Do not use " general purpose " batteries,
When batteries are weak, replace all the batteries at the same time. Do not mix
and use new and old batteries together.
4. Position the receiver such that it has the least possible obstructions between it and
the transmitter. Line of sight is best !
5. The transmitter and the receiver should be as close as possible but not less than
1m.     
6. A receiver cannot receive signals from two or more transmitters simultaneously.
7. Turn the transmitter off when it is not in use. Remove the batteries if it is not to
be used for a period of time.
8. Antennas form an integral part of the receiver and must be installed when in
operation.      
Simple DIY Trouble-shooting :
No sound when one speaks to the wireless microphone
Please verify the followings:
1.Main power switch of the system should be ON. When power on LED not lighting up, it
means that the battery is either weak or not charged. Please plug in the AC cable to
charge the battery. The rechargeable battery has a life span of about 2 years. If the
batteries have reached their life expectancy, please change to a fresh pair.
2.The power switch of the corresponding receiver module should be put to ON. This is
indicated by the lighted power LED. When two wireless microphones are used, both
power switches of the receiver modules must be ON.
3.Wireless microphone should be switched to ON and verify that the battery is okay. (
please refer to wireless microphone operating manual ).
4.Please verify that the frequency on the wireless microphone and the corresponding
built-in wireless receiver module are exactly the same frequency group and channel.
5.Master volume control of the system should be turned on.
No sound when " CD / USB Player " is used
1. Main power switch should be ON. When no light appears, it means that the battery is
weak. Please plug in the AC cable to charge the battery.
2. CD volume control is turned on but Master volume control is not turned on.
OPENOPEN
MIC AUX TONETAPEIR2/WR2IR1/WR1
MIC IN AUX IN AUX OUT
DC IN
FUSE
POWER
MIN MAX MIN MAX ON/MIN MAX ON/MIN MAX MAXON/MIN LO HI
WR1 WR2 CHARGING
BATTERY STATUS
BATTERY LOW
ABCDEF
GHIJKL
M
NO
PP
Focus 500 Active Speaker
Fig. 1
Fig. 2
Focus 500
( Amplifier version )
A
B
C
D
E
F
AUX volume
AUX IN
DC IN
FUSE
POWER
Battery Compartment
cover release button
A
BCDE
FF
OPENOPEN
A
B
C
D
E
F
G
H
I
J
K
L
M
MIC
AUX
IR1/ WR1
IR2/ WR2
TAPE PWR/VOL control
TONE
MIC IN
AUX IN
AUX OUT
CHARGING INDICATOR
DC IN
FUSE
POWER
Battery Compartment
cover release button
N
O
P
WR1 channel selector (16-ch version only)
WR2 channel selector (16-ch version only)
328
LCD Display
PLAY/PAUSE
STOP
SKIP
EJECT
IR LED
FOLDER SKIP
USB SELECTOR
CD SELECTOR
1
1
2
3
4
5
9
8
7
6
10
USB INPUT
11
POWER/VOL.
OPENOPEN
MIC AUX TONETAPEIR2/WR2IR1/WR1
MIC IN AUX IN AUX OUT
DC IN
FUSE
POWER
MIN MAX MIN MAX ON/MIN MAX ON/MIN MAX MAXON/MIN LO HI
WR1 WR2 CHARGING
BATTERY STATUS
BATTERY LOW
1
2345
67 8 9
10
11
Focus 500
( Tape Deck version )
Fig. 3
Fig. 4
Focus 500
(CD / USB Player version)
RECORD KEY
PLAY KEY
FAST REW ING KEY
FAST FORWARD KEY
STOP/EJECT KEY
PAUSE KEY
CASSE TTE COVER
1
2
3
4
5
6
7
Battery operating time
Continuous operating time of fully charged Ni-MH battery(2100mA/2.4V) is as below.
operating time 6 hours
position of power selector switch Low High
4 hours
Beltpack IR Transmitter IWM-202
1
2
3
4
3
5
6
7
Parts and functions
1.battery cover
2.power high/low switch
3.lavalier or headset
microphone input
4.power
5.power indicator
6.infrared emission source
7.volume control
Operating procedures
1.Open battery cover and put 2*AA alkaline batteries.
2.Connect with lavalier or headset microphone input.
3.Power the transmitter to make the power indicator turn green. If red or remaining
off, it means power shortage or no power. Please replace with new batteries.
Generally two alkaline batteries can last 5~6 hours.
4.Adjust amplifier volume control.
5.Never cover with infrared emission source.
Custom made rechargeable Ni-MH battery
1.This battery is exclusively designed for the infrared wireless microphone.
2.Be sure to charge the attached battery before use.
3.For surely you do not recharge the battery before full discharge.
4.Keep clean the terminal of charge, otherwise you may not charge the battery.
5.Do not repeatedly recharge the battery before full discharge, if you repeat
above, battery life will be shortened.
6.Battery life about 1 year or 500 recharge cycles under normal operation, when
you feel operating time becomes shorter even full charging, the battery is
exhausted.
7.Replace with new battery.(Be sure to use exactly same type as attached.)
OPENOPEN
REC PLAYF.FREW ST/EJ PAUSE
2
1
3 4 5 6 7
MIC AUX TONETAPEIR2/WR2IR1/WR1
MIC IN AUX IN AUX OUT
DC IN
FUSE
POWER
MIN MAX MIN MAX ON/MIN MAX ON/MIN MAX MAXON/MIN LO HI
WR1 WR2 CHARGING
BATTERY STATUS
BATTERY LOW
27 4
Fig. 6
Focus-500
( CD / USB Player & Digital Recorder version )
j
n
m
p
q
a
b
c
d
e
f
g
h
i
k
l
o
POWER
MODE
STOP
REC.
VOL
LCD Display
SD Card Slot
EAR
USB
LINE
EQ
REPEAT
PLAY ll
MIC VOL
MIC IN
Fig. 5
Focus 500
( Digital Recorder version )
POWER
EAR
SD card
REC
LINE EQ VO/M3 DEL.
MODE
A-B
STOP PLAY
VOL
VOL
MIC MI C IN RL/L+R
FC
OPEN OPEN
MIC AUX TONETAPEIR2/WR2IR1/WR1
MIC IN AUX IN AUX OUT
DC IN
FUSE
POWER
MIN MAX MIN MAX ON/MIN MAX ON/MIN MAX MAXON/MIN LO HI
WR1 WR2 CHARGING
BATTERY STATUS
BATTERY LOW
Various settings in IWM-302
Making changes to channel:
First open the cover of IWM-302's battery compartment by pressing its release
buttons on both sides. There are 2 channels for selection, namely "A" and "B".
Either can be chosen by switching this selector(11).
Making changes to MT:
Low-impedance "MT" gain control is situated inside the battery compartment. It can
be adjusted by using a small screw driver to rotate till a desired audio output level
has been selected.
Installing batteries to IWM-302
To install the batteries, first open the battery compartment by pressing the release
buttons on both sides of the IWM-302. Batteries used are 2 pcs of NiMH 1.2V/2100
mAH type(rechargeable) or Alkaline type(not rechargeable). When inserting batteries,
please place them according to the correct polarity.
Beltpack IR Transmitter IWM-302
3 421
6
8
9
7
10
11
12
1. Volume control
2. Power on / Battery-status indicator
3. Power switch
4. 5-pin mini XLR connector
5. Lavalier microphone
6. Mic clip
7. Infrared emitter
8. Cover-release button
9. Charging contacts
10. Transmission strength selector
11. Channel selector
12. MT gain control
Parts and functions
55
MIC AUX TONETAPEIR2/WR2IR1/WR1
MIC IN AUX IN AUX OUT
DC IN
FUSE
POWER
MIN MAX MIN MAX ON/MIN MAX ON/MIN MAX MAXON/MIN LO HI
WR1 WR2 CHARGING
BATTERY STATUS
BATTERY LOW
POWER
EAR
SD card
REC
LINE EQ VO/M3 DEL.
MODE
A-B
STOP PLAY
VOL
VOL
MIC MI C IN RL/L+R
FC
a
b
cde
fghi
m
j
kln
opq
526
The above operation is only valid with Focus 500 version with built-in wireless
receiver module(s). Otherwise, the IR/WR controls are redundant.
Operating procedures
After unpacking the unit for the first time, please charge the unit for about 4~5 hours
before any operation. This is absolutely necessary as the built-in rechargeable
battery might have been discharged naturally due to long shipment and storage time,
even though it has been fully charged in the factory prior to shipment.
To charge the battery, just plug in the DC end of the switch mode power supply into
the DC IN of the unit and charging will start automatically. During the charging
process, the charging indicator LED will flash RED. When GREEN LED stays glowing
permanently, battery is then fully charged and normal operation could now be started.
To operate this portable sound unit, switch on the main POWER, which will glow
GREEN. However, the main POWER switch does NOT switch on the WR module, CD
/ USB player and Digital Recorder as each of them has a dedicated Power / Volume
control switch indicated by WR1, WR2. CD/USB Player and Digital Recorder have
separate power switch on its panel.
When the Charging / Battery Status Indicator glows RED, it means the built-in
rechargeable battery is weak and a recharge is necessary. While charging, the
unit could also be operated simultaneously.
Operating the built-in Wireless ( WR ) / Infrared ( IR ) receiver
modules
On the Focus 500 control panel, there are two designated power switch / volume
control knob for the built-in Wireless Receiver (WR) / Infrared (IR) receiver modules.
They are indicated by IR1 / WR1 and IR2 / WR2 .
st
To use the 1 wireless or IR microphone, switch on the IR1 / WR1 power cum volume
control switch, Red LED next to it will glow. Switch on the corresponding transmitter
( RF or IR type ). Rotate the volume control knob clockwise and amplified sound
could be heard if voice is spoken into the transmitter.
nd
To use the 2 wireless or IR microphone, switch on IR2 / WR2 power cum volume
control switch and repeat the same operation as above.
By default, when the system is equipped with one WR / IR receiver module only, it is
always control via IR1 / WR1 switch, IR2 / WR2 is then redundant.
For Focus 500 which comes with wireless receiver (WR) module, there are two
possibilities, namely the VHF or UHF version. The VHF receiver module is a fixed
frequency type. To operate the VHF version, just switch on the corresponding
wireless microphone(s) after switching on the IR1/WR1 or IR2/WR2 switch.
To operate the UHF version, which comes with 16 preset frequencies, please ensure
that the channel setting on the wireless microphone and Focus 500 receiver module
are the same before operation. Then perform the same procedure as above.
Parts & Function s
This uniquely designed belt clip allows 360
rotation. Select the best position to achieve
optimum wearing comfort.
M-1002 uses 1 piece of 9V battery. To install
new or replace the old battery, first open the
battery compartment cover, then insert the
new battery according to its correct polarity as
indicated. For longer operation hour, Alkaline
battery is recommended!
Battery Installation
Belt Clip
360 rotateable
belt clip.
VHF Beltpack Transmitter M-1002
MIC clip
MIC capsule
Battery
compartment
Battery compartment
cover
Power Switch Battery status
indicator.
MIC cable
MIC IN socket
MT
Input level Gain control adjustment
Low-impedance "MT" gain control is situated inside the beltpack transmitter. Gain
control port is an adjustable design that enables user to use microphones of different
output levels. To adjust the audio input levels, simply use a small screw driver to
switch the "MT" control till a desired level is chosen.
25 6
Operating the dynamic wired microphone.
To use a cable microphone, simply plug it into any MIC IN socket. The unique Neutrik
combo socket accepts both phone and Cannon jack. Rotate the dedicated volume control
knob and master volume control, amplified sound could be heard from the speaker when
voice is spoken into the cable microphone.
Operation of system with CD / USB Player.
This operation is valid for version of Focus 500 with built-in " CD / USB Player ".
To operate, first turn on the Master power switch and then turn on the CD power cum
volume control switch a little until LED next to it glow. The LCD panel on the player will be
lighted up and normal operation is ready. To insert a CD, just push it into the CD slot and
the mechanism will suck it in automatically.
Rotate the Power cum Volume control knob to adjust the volume of the player. For Bass
and Treble setting, adjust the designated controls respectively. Clockwise direction to
either control is to boost and counterclockwise is to back off its level.
For more details, please refer to the explanation on " CD / USB Player " controls and
functions.
Operation of system with Digital Recorder.
This operation is valid for version of Focus 500 with built-in " Digital Recorder " .
To operate, first turn on the Master power switch and then press the designated power
button of this module. The LCD display will be lighted up and Volume setting can be done
by rotating the knob. For Bass and Treble setting, adjust the designated controls
respectively. Clockwise direction to either control is to boost and counterclockwise is to
back off its level.
For more details, please refer to the explanation of " Digital Recorder " controls and
functions.
Operation of system with Tape Deck.
This operation is valid for version of Focus 500 with built-in " Tape Deck ".
Rotate the volume control knob of the TAPE control to adjust the volume of the TAPE player.
For Bass and Treble setting, adjust TONE control. Clockwise from center line of TONE
control is to boost Treble and counterclockwise direction from center line is to boost Bass.
For more details, please refer to the explanation of " Tape Deck " controls and functions.
Channel selection and gain adjust
Channel selector and gain adjust are hidden
in the designated cover of the front as
illustrated.
To make channel selection and gain adjust,
please press the designated cover and flip it
open as illustrated. Channel selection can be
made by rotating the selector with a small
screw driver.
Gain adjust for Lavalier and Headset
microphones can be done by adjusting the
MT switch, whereas GT switch is for the gain
adjust of electric Guitar and other high-
impedance line level inputs.
MT
Channel
Selector
GT
Battery installation
This transmitter uses 3 pieces of " AA " size
batteries (Alkaline battery is recommended ). To
install or remove the batteries, press the release
buttons at the edges of the transmitter to open or
close the cover as illustrated ( Fig.1 ).
Fig.1
Beltclip installation
This specially designed detachable beltclip
allows the user to wear the transmitter with
antenna pointing upward or downward as
illustrated. To wear the transmitter with the
transmitter pointing upward, install the belt-clip
as in Fig.2. To wear the transmitter with the
antenna pointing downward, please install the
belt-clip as in Fig.3. Chargi ng point s
Chargi ng point s
Fig.2 Fig.3
Beltpack Transmitter SM-816(UHF) / SM-216(VHF)
724
Functions
PLAY/
PAUSE
STOP
CD
USB
SKIP+
UP/CUE
SKIP-
DONW/REV
FOLDER-UP
When this key is pushed during CD stop, play will start after track search.
When this key is pushed during CD is playing, then it is changed to pause.
When this key is pushed during CD is pausing, then it is changed to play.
When CD is not stop, if this key is pushed then CD will stop.
When press this key will change to cd-mp3 mode.
When press this key will changed to USB mode.
In stop mode:
Change the starting play track(file) during stop mode, cyclic to the first track,
if it is in the last track.
In program entry mode:
Change to the next track(file) for program select .
In play mode, pause mode, program play mode, random play mode:
Single pressed, skip the playing track(file) to next track(file) for normal
play/pause mode, to next program index track(file) for program play/pause
mode, to next random track(file) for random play /pause mode.
Continue pressed , fast forward during play/pause when pressed more
than 0.7sec.
In stop mode:
Change the starting play track (file) during stop mode, cyclic to the last track,
if it is in the first track.
In program Entry mode:
Change to the previous track (file) for program select.
In play mode, pause mode, program play mode:
Single pressed, skip the playing track (file) to precious track(file) for normal
play/pause mode, to previous program index track(file) for program
play/pause mode.
Continue pressed, fast reverse during play/pause when pressed more
than 0.7sec.
In stop mode:
Skip the starting play folder to next folder during stop mode, cyclic to the
first folder if it is in the last folder.
In program entry mode:
Change the file for program select to next folder's first file, cyclic to the
first folder if it is in the last folder.
In normal play mode:
Skip the playing file to the next folder's first file.
Panel Remote
Keys
Operating the CD / USB Player
Front remotable is an unique feature of Focus 500. User can easily control this CD player by
clicking its remote from both front and rear Focus 500.
To begin operation switch on the CD Power after the main power of Focus 500 has been
turned on.
Installation of Lavalier /
Headset microphones or instrument inputs
Depending on customer requirements, Lavalier / Headset microphone or instrument
inputs could be connected to the transmitter via the audio input connector. User is free to
choose the various input sources but is advised to take note that connector used must be
compatible to each other. The pin configurations of mini XLR connector are as follow figure.
ANTENNA
GT IN
LED INDICATOR
MT IN GND
PHANTOM POWER
POWER
SWITCH
POWER
OFF ON 1
2
34
mini XLR connector
Installation of cable restraint
To prevent contact noise caused by constant tension
applied to the connector,,a cable restraint is designed
such that tension is totally reduced when it is
properly used. When the audio cable go through the
cable restraint, it could prevent sweat from going
directly into the electronic board via the connector.
This is another advantage of the cable restraint.
23 8
In mp3 mode and in USB mode .
If this key is pushed, PLAY mode is changed cyclically shown below.
PLAY MODE
EJECT
PROG
MUTE
POWER
ESP
FIND
PLAY ALL RANDOM REPEAT TRACK REPEAT FOLDER
REPEAT ALL RANDOM REPEAT PLAY ALL
IN CD mo de If this key is pushed,
PLAY mode is changed cyclically shown below
PLAY ALL RANDOM REPEAT TRACK
REPEAT ALL RANDOM REPEAT PLAY ALL.
When this key is pushed, door is moved out.
Set to programming mode.
When programming mode, [stop] key is pushed then program is all cleared.
When this key is pushed during CD is playing, the set will mute the output.
Push again, will recovery the output .
Power SW of the set .
In CDDA mode, Press"ESP" key , The ESP display lighted and the set is
in electronic anti-shock state. The electronic anti-shock time is about 40
seconds. Press "ESP" key again, cancel the ESP function.
In MP3 mode : Press this key once FILE search mode changed .
Press this key twice ALBUM search mode changed .If press this key long
time once track is displayed .press twice ID3 TAG is displayed.
You can use these keys to select the track you want directly.
When this key is pushed , the volume will decrease by 1dB per step ,
the min. volume is 0dB.
When this key is pushed, the volume will increase by 1dB per step ,
the max. volume is 30dB.
0~10;
VOL.-
VOL.+
In stop mode:
Skip the starting play folder to previous folder during stop mode, cyclic
to the last folder if it is in the first folder.
In program entry mode:
Change the file for program select to previous folder's first file, cyclic to
the last folder if it is in the first folder.
In normal play mode:
Skip the playing file to the previous folder's first file.
FOLDER-
DOWN
ENCODE
ENCODE
option
Caution: This player does not accept 8-cm diameter CD.
To avoid
damage to the USB, remember to detach it only after switching off the
player.
User is advised to have the USB 2.0 formatted in " FAT " or " FAT 32 ".
The built-in USB 2.0 player can not be able to read the MP3 files stored
in your USB if it is not formatted by either " FAT " or " FAT-32 ".
MT
Channel
GT
Selector
Beltpack Transmitter SM-916(UHF) / SM-316(VHF)
Battery installation
SM-916/SM-316 use a 9V battery. To
insert the battery, first open the battery
compartment cover by pressing the
cover downward till the door flips open
by itself (see below picture). When
installing the battery, please beware of
correct polarity. To put back the cover of
the battery compartment, one has to
press the cover in upward direction until
it is locked.
Battery status
Indicator
Power switch
Audio input
Connector
Battery
Compartment
Cable
restraint
Mike clip
Capsuale
Antenna(SM-916)
Channel selection and gain adjust
Channel selector and gain adjust are hidden in the designated cover of the front as
illustrated. To make channel selection and gain adjust, please press the designated
cover and flip it open as illustrated.
Channel selection can be made by
rotating the selector with a small
screw driver.
Gain adjust for Lavalier and Headset
microphones can be done by adjusting
the MT switch, whereas GT switch is
for the gain adjust of electric Guitar
and other high- impedance line level
inputs.
Fig.1
9 22
Product Features :
1.Digital record to MP3 compression format
2.Highest sample rate at 44.1KHz, 128Kbps (as CD quality).
3.1 - 99 recording tracks.
4.Equiped with 128MB flash memory for 60 min. recording time.
5.Available expanded memory socket of SD card. Up to 512MB
( When using 512 MB SD card, the recording time is available for over 8 hours.)
( If using 1G MB SD card, it will be divided into 99 recording tracks, each track with recording
time less than 9:59:59 will be able to display time function on LCD.)
6.USB port to PC for easy download or duplication.
7.EQ mode selection (5 modes: Normal, Classic, Pop, Rock, Jazz)
8.REPEAT function (A-B Repeat, Repeat, Repeat All)..
9.Time counting
10.Two MIC-IN (L/L+R, R) jacks.
11.Line-in control key.
12.Stereo earphone jack.
13.Tack select, Play, Stop, Pause, Forward & Rewind control keys.
14.Mode control keys.
15.Rotary Volume Control for MIC REC. and Volume Level.
Operating the Digital Recorder
1.Key---Power ,REC ,PLAY(ll) ,■ ,MODE ,▼,▲(/LINE IN) , A-B(/EQ) , ( ), <<(/VOC,/
MP3) , >>(/DEL.)
2. Tracks----1~99 tracks. May store 99 tracks both in VOC mode and MP3 Mode, flash
memory or SD card. Built-in 128MB NAND flash memory has a capacity of approx. 60 min.
recording time.
3.LCD:
Usual manual of Digital Recorder & Player
3-1 MODE key
3-2 EQ select(CLASSIC, POP, ROCK, JAZZ)
3-3 VOC mode
3-4 MP3 mode