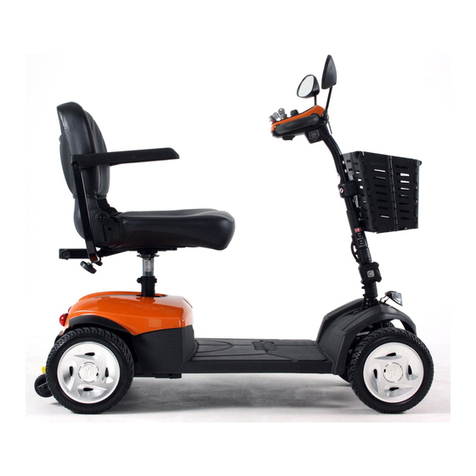
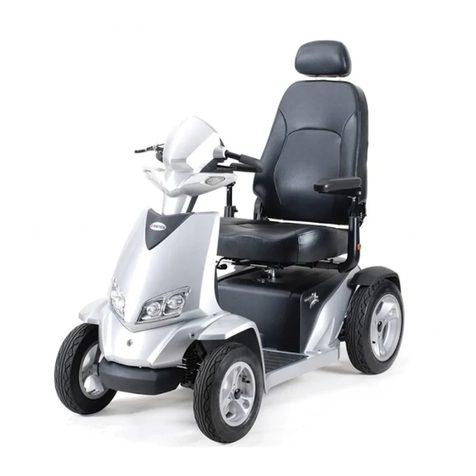
ChiefRider Revolution Steer User manual

I.I1NT
RODUCTION
USERSMANUAL
RevolutionSteer
weride
Contact+86400-660-4005
support@chiefrider.com
ChiefRiderScooterCorporation

Welcome toChiefRider.Theproductyouhavepurchasedcombinesstate-of-the-artcomponentswithsafety,
comfort,andstylinginmind.Weareconfidentthedesignfeatureswillprovideyouwiththeconveniencesyou
expectduringyourdailyactivities.
Readandfollow allinstructions,warnings,notesinthismanualandallotheraccompanyingliteraturebefore
attemptingtooperatethisproductforthefirsttime.
Pleasefilloutthefollowinginformationforquickreference:
ChiefRiderProvider:_____________________________________________________
Address:______________________________________________________________
PhoneNumber:__________________________
PurchaseDate:__________________________
SerialNumber:____________________________
Thismanualiscompiledfromthelatestspecificationsandproductinformationavailableatthetimeofpublication.
Wereservetherighttomakechangesastheybecomenecessary.Anychangestoourproductsmaycauseslight
variationsbetweentheillustrationsandexplanationsinthismanualandtheproductyouhavepurchased.The
latest/currentversionofthismanualisavailableonourwebsite.
Ifyoueverloseormisplaceyourproductregistrationcardoryourcopyofthismanual,contactusandwewillbe
gladtosendyouanewoneimmediately.
Copyright 2015
ChiefRiderScooterCorporation
INFMANU4813B/RevoSteer/Jan2015

CONTENTS
I.UNPACKING........................................................................................................-1-
II.SEATASSEMBLY..............................................................................................-2-
III.MAJORASSEMBLY.........................................................................................-3-
IV.COMFORTADJUSTMENT.............................................................................-8-
V.SAFTYOPERATION.......................................................................................-10-
VI.BATTERIESANDCHARGING.....................................................................-12-
VII.CAREANDMAINTENANCE......................................................................-17-
APPENDIX. SPECIFICATIONS.....................................................................-19-
NOTES...................................................................................................................-20-
ASSEMBLYDRAWING...................................................................-INSIDEBACK-

—— weride ——
RevolutionSteer
ChiefRiderScooterCorporation
-1-
I.UNPACKING
Before usingyourbuggy,makesureyourdeliveryiscompleteassomecomponentsmay
beindividuallypackaged.Ifyoudonotreceiveacompletedelivery,pleasecontactyour
authorizedChiefRiderProviderimmediately.Wheredamagehasoccurredduringtransport,
eithertothepackagingorcontent,pleasecontactthedeliverycompanyresponsible.
Yourpowerbuggyisshippedpartiallydisassembledforprotectionduringshipping.After
unpacking,pleasecheckwhetheryouhavereceivedthefollowingmaincomponentsasour
standardspecification(Figure1).
1. Basket
2. SteeringWheelASM
3. FrontHalf
4. RearHalf
5. PowerCharger
6. CaptainSeatASM
7. Batterygroups (2pcs)
1
2
3
7
6
5
4
Figure1

—— weride ——
RevolutionSteer
ChiefRiderScooterCorporation
-2-
II.SEATASSEMBLY
Check ifyourcaptainseatispackagedwiththefollowingmaincomponents(Figure2).
►pressthelockbuttonandpushdownthe Head-rest(s1)toyourdesiredposition
►letthebuttonlockintothecorrespondingnotch.
►Putthe LeftArm-rest(s3)intothe Seat(s2)frameandfittingyoursize.
►Lockthe LeftArm-rest into Seat(s2)withone Handscrew(s4).
►Putthe RightArm-rest(s5)intothe Seat(s2)frameandfittingyoursize.
►Lockthe LeftArm-rest into Seat(s2)withanother Handscrew(s4).
Locktherestone Handscrew(s4)into Seat(s2)frameasspareforaccessories.
s1. Head-rest
s2. Seat
s3. LeftArm-rest
s4. Handscrew(3pcs)
s5. RightArm-rest
s1
s2
s3
s4
s5
Figure2 Hand-screwM10x20
LockButton

—— weride ——
RevolutionSteer
ChiefRiderScooterCorporation
-3-
III.MAJORASSEMBLY
First youcanassemblythepowerbuggyfronthalfwithrear(Figure3).
►Pushthe FrontHalf shaftintothe RearHalf tube(Figure3.a).
►Makesurethespringlatchlocksintotheslot.
►Connectthechassiswireharnesstothecontrollerwiththerightposition(Figure3.b).
►Turnthethreadclock-wisetolocktheharnessconnector.
Figure3
Figure3.a Figure3.b
Thelargest
ribinthe
rearmiddle
Pullto
release
thelock

—— weride ——
RevolutionSteer
ChiefRiderScooterCorporation
-4-
Second assemblyyoursteeringwheel(Figure4).
►Pushthecolumnintothesteeringstempost(Figure4.a).
►Tightenthehand-screwtothecolumn(Figure4.b).
►Connectthesteeringwireandthechassiswiretogether(Figure4.c).
Figure4
Figure4.a Figure4.b Figure4.c
Hand-screwM10x35

—— weride ——
RevolutionSteer
ChiefRiderScooterCorporation
-5-
Third assemblyyourbasket(Figure5).
►Pressyourbasketdownmostalongtheclamprailoncolumnbase(Figure5.a,5.b).
Figure5
Figure5.a Figure5.b
Pressto
Release
the
lock

—— weride ——
RevolutionSteer
ChiefRiderScooterCorporation
-6-
Then assemblyyourpowerbatterygroups(Figure6).
►Checkandturnoffthekeyswitch(Figure6.a).
►Liftyourbatterygroupsandputthemintothebuggyonebyonecarefully.
►Connectthebatteryterminalhousestothecontrollerpostandmakesureallthe
terminalsarecodingwell(Figure6.b).
Figure6
Figure6.a Figure6.b
OFFON

—— weride ——
RevolutionSteer
ChiefRiderScooterCorporation
-7-
Finally assemblyyourseat(Figure7).
►Liftyourseatandputtheshaftintotheseatpost(Figure7.a).
►Pushandturnyourseatlightlyontheseatposttolocktheseatautomatically(Figure7.b).
Figure7
Figure7.a Figure7.b
Pulllever
torelease
thelock

—— weride ——
RevolutionSteer
ChiefRiderScooterCorporation
-8-
IV.COMFORTADJUSTMENT
You canfindseatadjustmentleversunderyourrighthand(Figure8).
A.Seatpositionadjustment.
►Pullthepositionleverupward(Figure8).
►Slideyourseatbackwardorforwardtoyourdesiredposition.
►Adjustyourback-resttofityourcomfortableposition.
►Releasetheleverandlockyourpreferredposition.
Note:Availabledistancefrombackwardtoforwardis180mm.
B.Back-restangleadjustment.
►Pulltheback-restangleleverupward(Figure8).
►Adjustyourback-resttofityourcomfortableposition.
►Releasetheleverandlockyourpreferredposition.
Figure8 Rotation
lever
Position
lever
Back-rest
anglelever

—— weride ——
RevolutionSteer
ChiefRiderScooterCorporation
-9-
C.Seatrotationadjustment(Figure8.a,8.b).
►Pulltherotationleverforward.
►Rotateyourseattoyourleftorrightside.
►Releasetherotationleverandlettheleverlockintothecorrespondingnotch.
Note:Theseatwilllockinevery45#positionautomatically.
D.Head-restheightadjustment.
►Pressthelockbutton(Figure8.c).
►Liftupordownyourhead-resttoyourdesiredposition.
►Releasethebuttonandlockintothecorrespondingnotch.
E.Seatheightadjustment.
►Removetheseat,andscrewouttheadjustmentbolt(Figure8.d).
►Raiseorlowertheupperseatposttothedesiredheightandmatchthelocatingholes.
►Reinstallthenutontotheadjustmentboltandtighten.
Figure8.a Figure8.b
Figure8.c
LockButton
Figure8.d
Locatinghole
Adjustment
bolt
Upperseatpost

—— weride ——
RevolutionSteer
ChiefRiderScooterCorporation
-10-
V.SAFTYOPERATION
■MakesureyourbatteriesareFullycharged. SeeIV. “BatteriesandCharging”
■Alwayscheckthemanualfreewheelleverinthedrive(backward)position(Figure9.a).
■Alwaysensurethekeyswitchisoffwhengettingonandoffyourbuggy(Figure6.a).
■Checkyouhaveselectedthecorrect"forwardorreverse"buttonposition(Figure9.b).
Figure9.a
Freewheel
position
Driving
position
Figure9.b
Forward
position
Reverse
position
Battery
condition
indicator
Horn
button

—— weride ——
RevolutionSteer
ChiefRiderScooterCorporation
-11-
■Alwaysholdingyoursteeringwheelwhendriving.
■Alwaysstartthebuggygenteellywithyourfootaccelerator(Figure9.c).
■Alwaysreduceyourspeedwhenyouturningsharp.
■Alwaysgettingoffyourbuggyafteritcompletestop.
■Poweroff yourbuggyandremovethekeyswitchwhenyouleave.
Yourbuggyisequippedwithanenergysavingautomaticpowerdowntimerfeature
designedtopreserveyourbuggy’sbatterylife.Ifyoumistakenlyleavethekeyinthekey
switchandinthe “on”positionbutdonotuseyourbuggyforapproximately30minutes,the
controllershutsdownautomatically.
Ifthepowerdowntimerfeaturetakeseffect,turnoffandthenonthekeyswitchtoresume
normaloperation.
Environmentalconditionsmayaffectthesafetyandperformanceofyourpowerbuggy.
Waterandextremetemperaturesarethemainelementsthatcancausedamageandaffect
performance.
A)Rain,SleetandSnow
Ifexposedtowater,yourpowerbuggyissusceptibletodamagetoelectronicormechanical
components.Watercancauseelectronicmalfunctionorpromoteprematurecorrosionof
electricalcomponentsandframe.
B)Temperature
Somepartsofthepowerbuggyaresusceptibletochangeintemperature.Thecontroller
canonlyoperateintemperaturethatrangesbetween-13 (-25℃)and122 (50℃).
Atextremelowtemperatures,thebatteriesmayfreeze,andyourpowerbuggymaynotbe
abletooperate.Inextremehightemperatures,itmayoperateatslowerspeedsduetoa
safetyfeatureofthecontrollerthatpreventsdamagetothemotorsandotherelectrical
components.
Figure9.c

—— weride ——
RevolutionSteer
ChiefRiderScooterCorporation
-12-
VI.BATTERIESANDCHARGING
BATTERIESANDCHARGING
Yourbuggyrequires4long-lasting,12-volt,deep-cyclebatteriesthataresealedand
maintenancefree(Figure10.a).
Theyarerechargedbyanoff-boardchargingsystem(Figure10.b).
■Chargeyourbatteriespriortousingitforthefirsttime.
■Chargethebatterieseverythreemonthskeepyourbuggyrunningsmoothly.
READINGYOURBATTERYVOLTAGE
ThebatteryconditionLEDindicatoronthesteeringwheelindicatestheapproximate
strengthofyourbatteriesusingacolorcode(Figure9.b).
Fromrighttoleft,threegreenindicatesfullychargedbatteries,twooronegreenindicatesa
drainingcharge,andredindicatesthatanimmediaterechargeisnecessary.Toensurethe
highestaccuracy,thebatteryconditionmetershouldbecheckedwhileoperatingyour
buggyatfullspeedonadry,levelsurface.
CHARGINGYOURBATTERIES
Removalofgroundingprongcancreateelectricalhazard.Ifnecessary,properlyinstallan
approved3-prongedadaptertoanelectricaloutlethaving2-prongedplugaccess.
Neveruseanextensioncordtopluginyourbatterycharger.Plugthechargerdirectlyintoa
properlywiredstandardelectricaloutlet.
Donotallowunsupervisedchildrentoplaynearthebuggywhilethebatteriesarecharging.
Werecommendsthatyoudonotchargethebatterieswhilethebuggyisoccupied.
Readthebatterycharginginstructionsinthismanualandinthemanualsuppliedwiththe
batterychargerbeforechargingthebatteries.
Explosivegasesmaybegeneratedwhilechargingthebatteries.Keepthebuggyand
batterychargerawayfromsourcesofignitionsuchasflamesorsparksandprovide
Figure10.a Figure10.b
Pluginto
off-board
port
Pluginto
electrical
outlet

—— weride ——
RevolutionSteer
ChiefRiderScooterCorporation
-13-
adequateventilationwhenchargingthebatteries.
Youmustrechargeyourbatterieswiththesuppliedoff-boardcharger.Donotusean
automotive-typebatterycharger.
Inspectthebatterycharger,wiring,andconnectorsfordamagebeforeeachuse.Contact
yourauthorizedChiefRiderProviderifdamageisfound.
Donotattempttoopenthebatterychargercase.Ifthebatterychargerdoesnotappearto
beworkingcorrectly,contactyourauthorizedChiefRiderProvider.
Ifthebatterychargerisequippedwithcoolingslots,thendonotattempttoinsertobjects
throughtheseslots.
Ifyourbatterychargerhasnotbeentestedandapprovedforoutdooruse,thendonot
exposeittoadverseorextremeweatherconditions.Ifthebatterychargerisexposedto
adverseorextremeweatherconditions,thenitmustbeallowedtoadjusttothedifferencein
environmentalconditionsbeforeuseindoors.Refertothemanualsuppliedwiththebattery
chargerformoreinformation.
Followtheseeasystepstochargethebatteries:
►Positiontherearofyourbuggyclosetoastandardelectricaloutlet.
►Removethekeyfromthekeyswitch.
►Makesurethatthemanualfreewheelleverisinthedriveposition.
►Plugthe3-pinchargerpowercordintotheoff-boardchargerport(Figure10.c).
►Extendthechargerandplugitintotheelectricaloutlet.
►Werecommendthatyouchargethebatteriesfor8to12hours.
►Whenthebatteriesarefullycharged,unplugthechargerfromtheelectricaloutletand
thenfromtheoff-boardchargerport.
■TheLEDlightsonthechargerindicatedifferentchargerconditionsatvarioustimes:
chargerpoweron,charginginprogress,andchargingcomplete.Refertothemanual
suppliedwiththechargerforacompleteexplanationoftheseindicators.
■Thereisachargerinhibitfunctiononyourbuggy.Thebuggywillnotrunwhilethe
batteriesarecharging.
Figure10.c
Off-board
chargeport

—— weride ——
RevolutionSteer
ChiefRiderScooterCorporation
-14-
FREQUENTLYASKEDQUESTIONS
Howdoesthechargerwork?
Whenyourbatteryvoltageislow,thechargerworksharder,sendingmoreelectricalcurrent
tothebatteriestobringuptheircharge.Asthebatteriesapproachafullcharge,thecharger
sendslessandlesselectricalcurrent.Whenthebatteriesarefullycharged,thecurrentsent
fromthechargerisatnearlyzeroamperage.Therefore,whenthechargerispluggedin,it
maintainsthechargeonyourbatteries,butdoesnotoverchargethem.Refertothemanual
suppliedwiththebatterychargerforcharginginstructions.
Whatifmybatterieswon’tcharge?
■Ensurethered(+)andblack(-)batterygroupcablesareconnectedproperlytothe
controllerbatteryterminals.
■Ensurebothendsofthechargerpowercordarefullyinserted.
HowoftenmustIchargethebatteries?
Twomajorfactorsmustbeconsideredwhendecidinghowoftentochargeyourbatteries:
Alldayuseonadailybasis.
Infrequentorsporadicuse.
Withtheseconsiderationsinmind,youcandeterminehowoftenandforhowlongyou
shouldchargeyourbatteries.Wedesignedtheoff-boardchargersothatitwillnot
overchargeyourbatteries.
However,youmayencountersomeproblemsifyoudonotchargeyourbatteriesoften
enoughandifyoudonotchargethemonaregularbasis.
Followingtheguidelinesbelowwillprovidesafeandreliablebatteryoperationand
charging:
Ifyouuseyourbuggydaily,chargeitsbatteriesassoonasyoufinishusingitfortheday.
Yourbuggywillbereadyeachmorning.Werecommendthatyouchargeyourbatteriesfor
8to12hoursafterdailyuse.
Ifyouuseyourbuggyonceaweekorless,chargeitsbatteriesatleastonceaweekfor12
to14hoursatatime.
■Keepyourbatteriesfullycharged.
■Avoiddeeplydischargingyourbatteries.
HowcanIensuremaximumbatterylife?
Fullychargeddeep-cyclebatteriesprovidereliableperformanceandextendedbatterylife.
Keepyourbatteriesfullychargedwheneverpossible.Protectyourbuggyandbatteriesfrom
extremeheatorcold.Batteriesthatareregularlyanddeeplydischarged,infrequently
charged,storedinextremetemperatures,orstoredwithoutafullchargemaybe
permanentlydamaged,causingunreliableperformanceandlimitedservicelife.

—— weride ——
RevolutionSteer
ChiefRiderScooterCorporation
-15-
HowcanIgetmaximumrangeordistancepercharge?
Rarelywillyouhaveidealdrivingconditions—smooth,flat,harddrivingsurfaceswithno
windorcurves.Often,youwillfacehills,pavementcracks,unevenandlooselypacked
surfaces,curves,andwind,allofwhichaffectthedistanceorrunningtimeperbattery
charge.Belowareafewsuggestionsforobtainingthemaximumrangeperbatterycharge.
■Alwaysfullychargeyourbatteriespriortodailyuse.
■Maintainbutdonotexceedthepsi/bar/kPaairpressureratingindicatedoneachtire.
■Planyourrouteaheadtoavoidasmanyhills,cracked,softsurfacesaspossible.
■Limityourbaggageweighttoessentialitems.
■Trytomaintainanevenspeedavoidstop-and-godriving.
WhattypeandsizeofbatteryshouldIuse?
Werecommenddeep-cyclebatteriesthataresealedandmaintenancefree.BothAGMand
Gel-Cellaredeepcyclebatteriesthataresimilarinperformance.Donotusewet-cell
batteries,whichhaveremovablecaps.
HowdoIchangeabatteryinmybuggy?
Batteryposts,terminals,andrelatedaccessoriescontainleadandleadcompounds.Wear
gogglesandgloveswhenhandlingbatteriesandwashhandsafterhandling.
■Alwaysusetwobatteriesoftheexactsametype,chemistry,andamphour(Ah)capacity.
■Donotmixoldandnewbatteries.Alwaysreplacebothbatteriesatthesametime.
■Keeptoolsandothermetalobjectsawayfrombatteryterminals.
ContactyourauthorizedChiefRiderProviderifyouhaveanyquestionsregardingthe
batteriesinyourbuggy.
Tochangethebatteriesinyourbuggy,youmayneedthe Phillipsscrewdriver.
►Openbatterygrouppackagesandscrewouttheboltsonbatteryterminals(Figure10.d).
►Changetheoldbatterieswithnewbatteriesaccordingdiagram(Figure10.e).
►Reinstalltheterminalscrewsandbootscoverthebatteryterminals.
►Repositionthebatterygrouppackages.
NOTE:Ifyouencounteradamagedorcrackedbattery,immediatelyencloseitinaplastic
Figure10.d
Terminal
screws
Figure10.e

—— weride ——
RevolutionSteer
ChiefRiderScooterCorporation
-16-
bag.ContactyourlocalwastedisposalagencyoryourauthorizedChiefRiderProviderfor
instructionsondisposalandbatteryrecycling,whichisourrecommendedcourseofaction.
Whydomynewbatteriesseemweak?
Deep-cyclebatteriesemployadifferentchemicaltechnologythanthatusedincarbatteries,
nickel-cadmiumbatteries(nicads),andothercommonbatterytypes.Deep-cyclebatteries
arespecificallydesignedtoprovidepower,draindowntheircharge,andthenaccepta
relativelyquickrecharge.
Weworkcloselywithourbatterymanufacturertoprovidebatteriesthatbestsuityour
specificelectricaldemands.Freshbatteriesareshippedfullychargedtoourcustomers.
Duringshipping,thebatteriesmayencountertemperatureextremesthatcaninfluencetheir
initialperformance.Heatdiminishesthechargeonthebattery;coldslowstheavailable
powerandextendsthetimeneededtorechargethebattery.
Itmaytakeafewdaysforthetemperatureofyourbatteriestostabilizeandadjusttotheir
newroomorambienttemperature.Moreimportantly,ittakesafewchargingcycles(partial
drainingfollowedbyfullrecharging)toestablishthecriticalchemicalbalancethatis
essentialtoadeep-cyclebattery’speakperformanceandlonglife.
Followthesestepstoproperlybreakinyournewbatteriesformaximumefficiency
andservicelife:
►Fullyrechargeanynewbatterypriortoitsinitialuse.Thischargingcyclebringsthe
batteryuptoabout88%ofitspeakperformancelevel.
►Operateyournewbuggyinfamiliarandsafeareas.Driveslowlyatfirst,anddonottravel
toofarfromyourhomeorfamiliarsurroundingsuntilyouhavebecomeaccustomedtoyour
controlsandhaveproperlybrokeninyourbatteries.
►Fullyrechargethebatteries.Theywillbeatover90%oftheirpeakperformancelevel.
►Operateyourbuggyagain.
►Fullyrechargethebatteriesagain.
►Afterfourorfivechargingcycles,thebatteriesareabletoreceiveachargeof100%of
theirpeakperformancelevelandareabletolastforanextendedperiodoftime.
Whatifallthesystemsonmybuggyseemtobedead?
■Makecertainthatthekeyisinthe “on”position(Figure6.a).
■Checkthatthebatteriesarefullycharged.
■Ensurebothbatterycablesandfront-to-rearharnessarefirmlyconnected(Figure6.b)
■Besurethemanualfreewheelleverinthedrive(backward)position(Figure9.a).
■Turnoffandthenonthekeyswitchtoerasethesystemfault.
Whataboutpublictransportation?
Ifyouintendtousepublictransportationwithyourbuggy,youmustcontactthe
transportationproviderinadvancetodeterminetheirspecificrequirements.

—— weride ——
RevolutionSteer
ChiefRiderScooterCorporation
-17-
VII.CAREANDMAINTENANCE
Yourbuggyrequiresaminimalamountofcareandmaintenance.Ifyoudonotfeel
confidentinyourabilitytoperformthemaintenancelistedbelow,youmayschedule
inspectionandmaintenanceatyourauthorizedChiefRiderProvider.Thefollowingareas
requireperiodicinspectionand/orcareandmaintenance.
TIREPRESSURE
■Ifequippedwithpneumatictires,alwaysmaintainthepsi/bar/kPaairpressurerating
indicatedoneachtire.
■Regularlyinspectyourbuggy’stiresforsignsofwear.
CLEANINGANDDISINFECTION
■Useadampclothandmild,non-abrasivecleansertocleantheplasticandmetalpartsof
yourbuggy.
Avoidusingproductsthatmayscratchthesurfaceofyourbuggy.
■Ifnecessary,cleanyourproductwithanapproveddisinfectant.Makesurethedisinfectant
issafeforuseonyourproductbeforeapplication.
BATTERYTERMINALCONNECTIONS
■Makecertainthattheterminalconnectionsremaintightandun-corroded.
■Thebatteriesmustsitflatinthebatterywells.
WIRINGHARNESSES
■Regularlycheckallwiringconnections.
■Regularlycheckallwiringinsulation,includingthechargerpowercord,forwearor
damage.
■HaveyourauthorizedChiefRiderProviderrepairorreplaceanydamagedconnector,
connection,orinsulationthatyoufindbeforeusingyourbuggyagain.
ABSPLASTICSHROUDS
Thefrontfrontshroud,andtherearshroudareformedfromdurableABSplasticandare
coatedwithanadvancedformulaurethanepaint.Alightapplicationofcarwaxwillhelpthe
shroudsretaintheirhighgloss.
AXLEBEARINGSANDTHEMOTOR/TRANSAXLEASSEMBLY
Theseitemsareallpre-lubricated,sealed,andrequirenosubsequentlubrication.
MOTORBRUSHES
Themotorbrushesarehousedinsideofthemotortransaxle/assembly.Theyshouldbe
inspectedperiodicallyforwearbyyourauthorizedChiefRiderProvider.
Accelerator,CHARGER,ANDREARELECTRONICS
■Keeptheseareasfreeofmoisture.
Table of contents
Other ChiefRider Scooter manuals
Popular Scooter manuals by other brands
APRILIA
APRILIA AREA 51 - 1998 manual

Longway E-Mobility
Longway E-Mobility CARVY Owner's manual & safety instructions
iSinwheel
iSinwheel X3 user manual

Malaguti
Malaguti MISSION 125 instruction manual
Beeper
Beeper FX8-G2-6 Installation & use manual
SHARKS
SHARKS RS01-1 Instruction for operation and maintenance

