4
© Copyright Chillout Systems LLC 2022 chilloutsystems.com/pages/gettingstarted
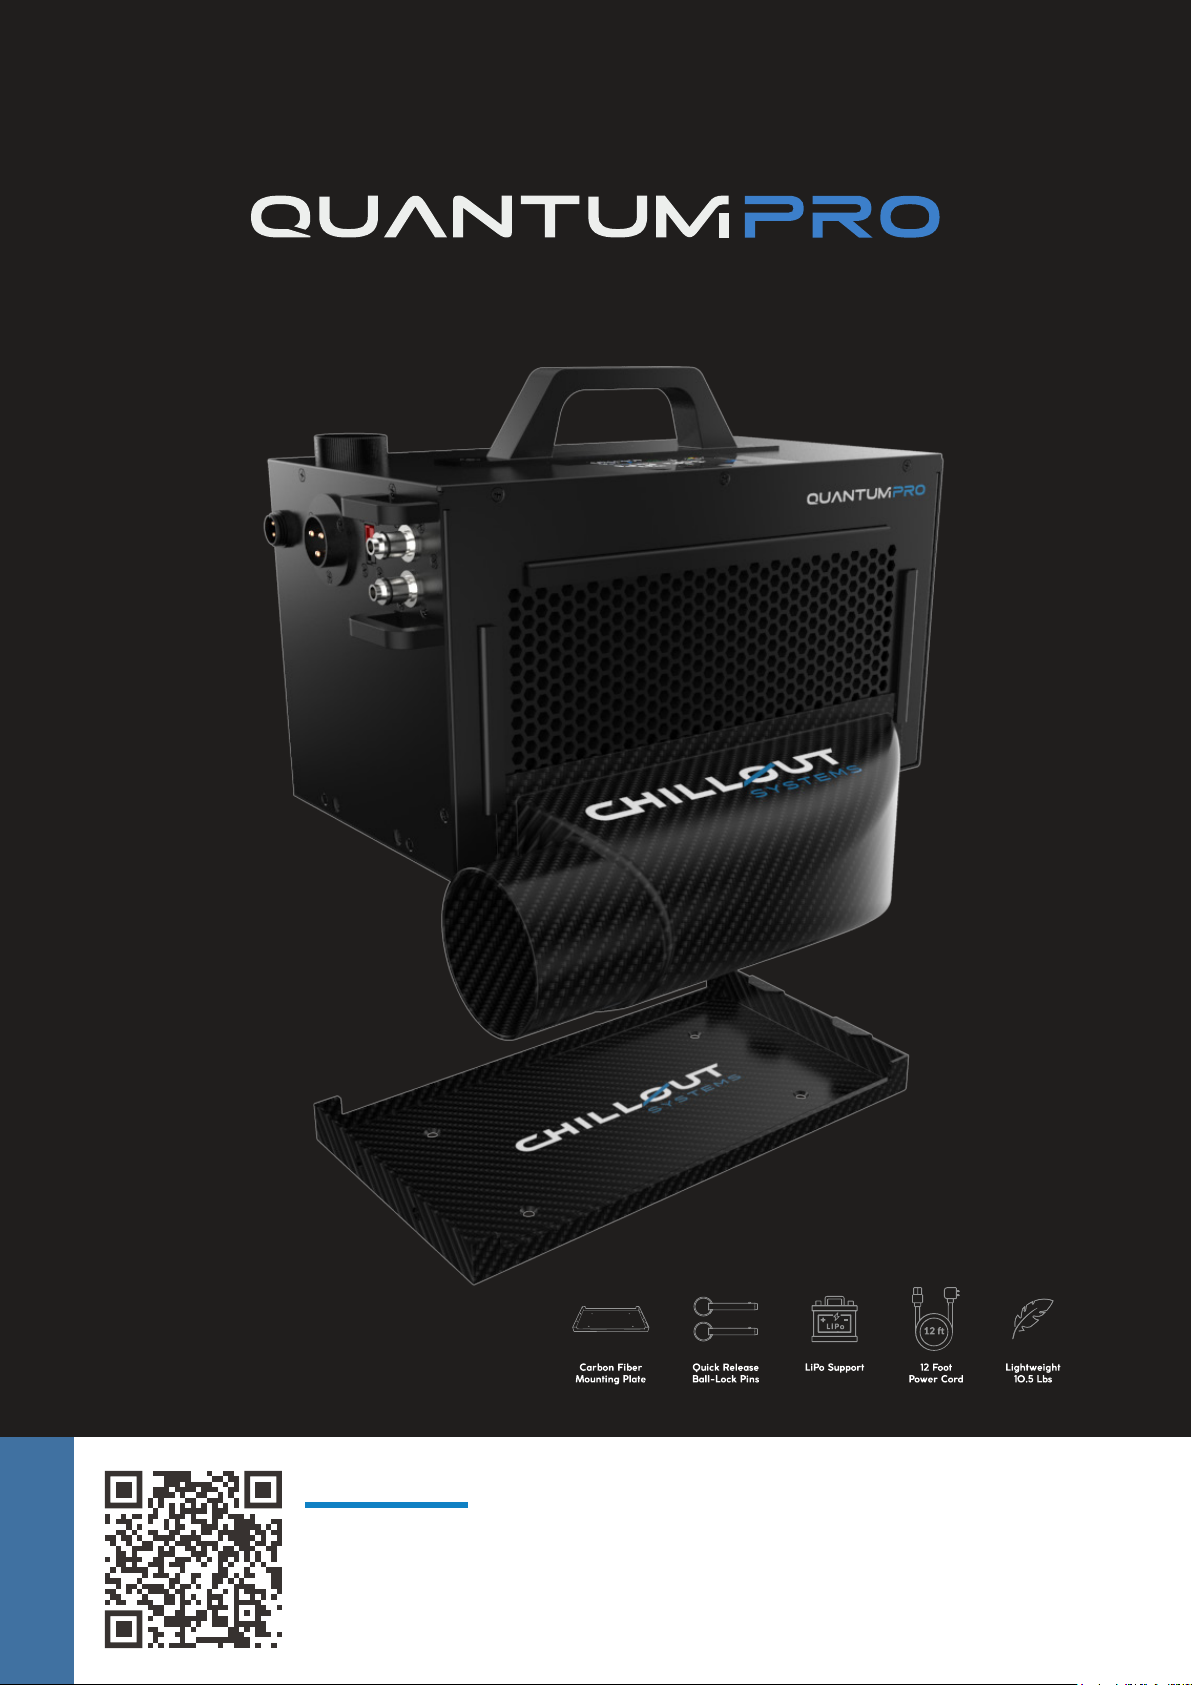
Quantum Pro Cooler
Installation Guide v1.0
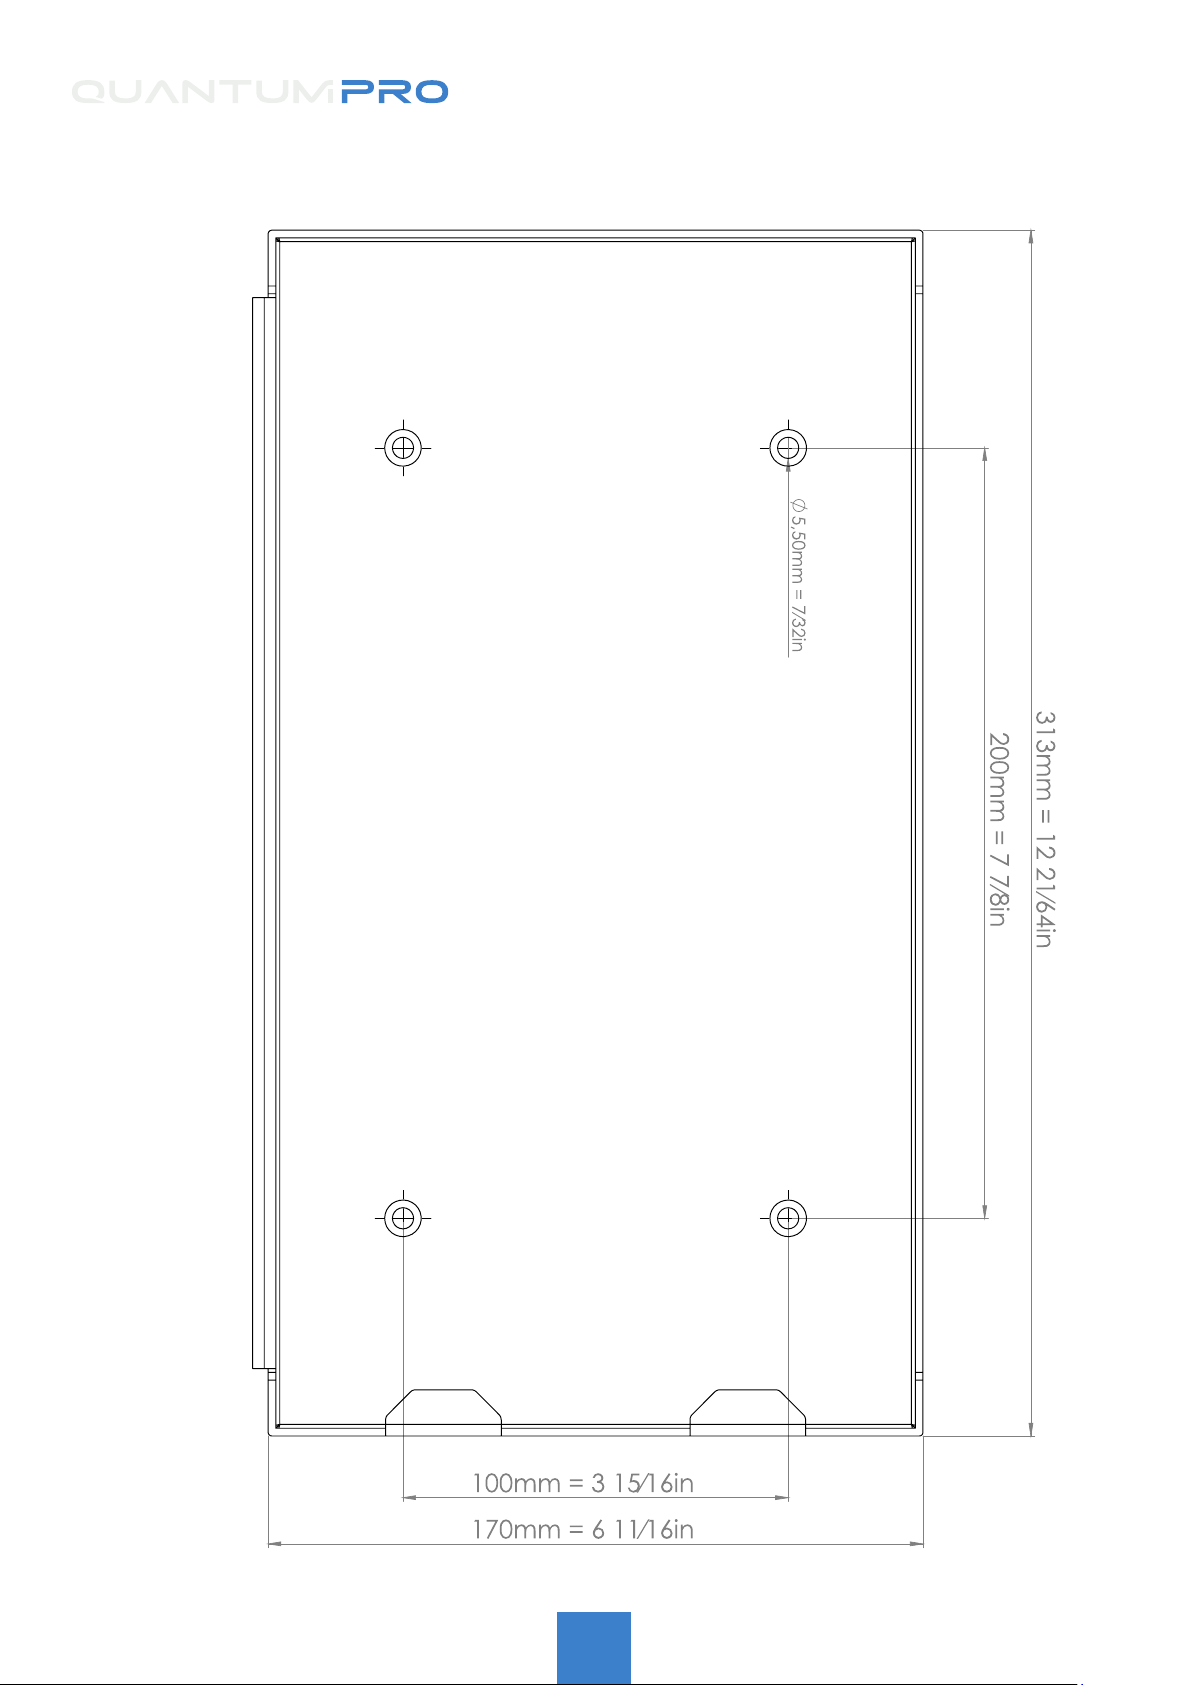
MOUNTING THE BASEPLATE
DUCTING AND PLENUMS
• Determine the best location to mount your system inside the car. If possible, keep your system away
from any heat sources to ensure maxium cooling eciency. Ensure there is a sucient gap between the
back of the unit so that the air can circulate freely.
• Place the systems base platewhere you have decided to install it and use a sharpie to mark the holes
for installation into the vehicle.
• Drill out the holes so that you can install the rivnuts to the vehicle. Once the rivnuts are installed, you
can attach the base plate to the vehicle. Be sure to install the provided rubber isolators between the base
plate and the installed rivnuts to keep airow underneath the unit.
• With the base plate now installed, insert the system into the plate and secure with the 2 ball pin
connectors.
When installing a NACA duct and plenum, consider using ChillOut Systems 4 inch ducting and plenums. With
nearly twice the airow as 3 inch ducting, this is the most ecient way to keep your system cool. In some cases 3
inch ducting may be the only option. In this case, the system must be paired with a in-line 3 inch blower that is
rated to 275 cfm..
• Place the NACA Duct where you have decided to install it and use a sharpie to trace an outline to the
vehicle. Once the outline has been traced onto your window, a rotary cutting tool can be used to cut out
the outline. We recommend using M4 nuts and bolts to secure the naca duct to a lexan window.
INSTALLING THE WIRING
• Connect the wiring harness to the system and run it to your electrical source. This can be directly to
the battery with an inline fuse or to a 40amp relay if you are using a switch for the install.
• Once you gure out the length of wire required you can trim the excess and connect it accordingly.
(Our wiring harness uses 8 AWG wire)
• Connect the remote wire to the system if you have purchased a remote. We recommend putting the
remote somewhere that sun won’t directly glare onto it (This can make it hard to read while driving).
CONNECTING THE SHIRT
• If you are using a dual prong connector, run the insulated hose from the system to where the driver
seat is, making sure there is enough slack to reach the drivers shirt comfortably.
• If you are using Chillout Systems Rapid Release Kit, you can either cut and install it to a regular
insulated hose or use our Insultated Y-Split Hose.
• When using a Y-Split hose, we recommend keeping a dual prong connector on one side of the seat
and installing the rapid release on the opposite side giving you both options in the car for connecting the
shirts to the system.
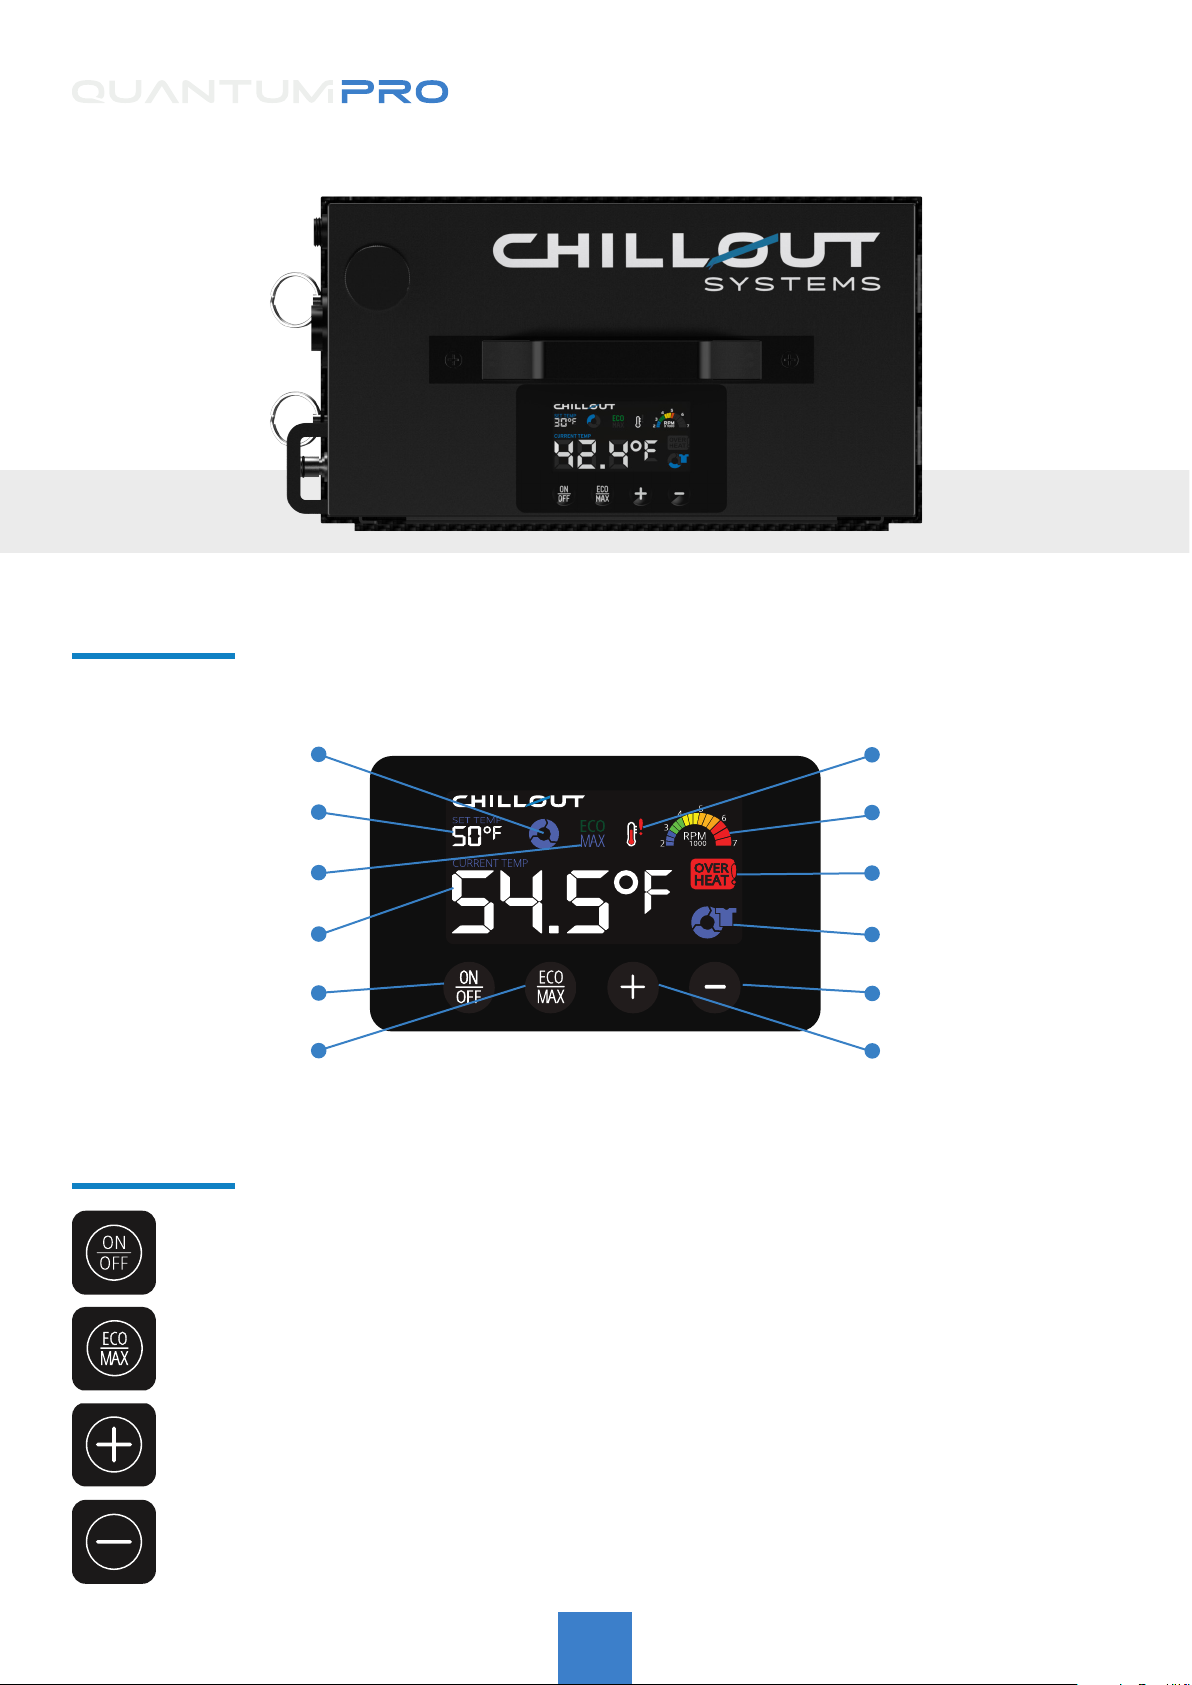
Note: The system display will light up the icon when connected to the shirt correctly. If there is a connection issue
or the system stops unexpectedly, the icon will begin ashing.