Chiltern Invadex WISPA 100 Plus User manual

User Guide
All 100 Plus models
WISPA 100 Plus
This user guide contains essential information in relation to safe use and troubleshooting and should
be retained with the hoist for reference
Unit 6C Thorpe Drive
Banbury OX16 4UZ UK

Issue 2.0
Contents
These products have been designed to the highest standards with safety, strength and quality in mind.
Follow the recommendations in this guide to ensure maximum benet from your Overhead Hoist. Should
you experience any diculties please consult the trouble shooting guide, prior to contacting your Overhead
Hoist supplier.
Your Chiltern Invadex hoist has been designed and tested to meet the highest standards of safety. Read the
safety section of this guide prior to use, this is contained on pages 1-2.
Intended use................................................ 1
Safety considerations .................................. 1-2
Using the controls........................................ 3-4
Emergency stop & reset procedure............. 5
Emergency lowering.................................... 5
Charging Wispa battery hoists..................... 6
Servicing and maintenance ......................... 7
Parts ............................................................ 7
Troubleshooting........................................... 8
Hoist specication........................................ 9
Installation notes.......................................... 10
Carry/Spreader bar installation.................... 11
Warranty ...................................................... 12
Wispa hoist service record .......................... 13-16
Declaration of Conformity............................ 17
WISPA 100 Plus

Page 1
HOIST 100 Series
Issue 2.0 Issue 2.0 June 2018
Prior to Use
• Ensure that all users read this guide before operating the hoist.
• Do not operate the hoist without training in the safe operation of the hoist and slings.
• Only use slings which have been assessed as suitable by a trained person.
• Read the relevant Sling User Guide, which is provided with each sling. It explains in detail how to
use slings correctly.
• Do not use the hoist if there is any doubt about wear to the carry bar or there is fraying or stitch
damage to the lifting tape or slings, or if the hoist itself is damaged in any way.
• Before using the hoist for the rst time ensure the batteries are fully charged (Battery models only).
• Do not exceed the maximum labelled load of the hoist*.
W, WB, WL, WLB models 130kgs (20 stone)
WT, WLT, WTB, WLTB models 200kgs (31 stone)
*Note: you must check the maximum load of the sling or any other lifting accessory,
where this diers from the hoist the lowest weight must not be exceeded.
When using the Hoist
• Ensure when the hoist is in use that the surrounding area is clear and the person being lifted is
clear of all objects.
• Hoists should only be used to lift vertically. Lifting at an angle will wear the lifting tape prematurely.
• Do not leave a user unattended in the sling.
Safety Considerations
Intended Use of the Product
The Wispa 100+ hoist has been designed to lift and transfer a disabled or sick person with the help of a carer. It
should be used with a Wispa sling or other lifting accessories, as assessed by a trained person.
Note: Not all slings and accessories are compatible with this hoist. A copy of our compatibility state-
ment can be viewed at www.chilterninvadex.co.uk/pdfs/sling-compatibility-statement.pdf
The correct and appropriate use of this product will reduce the risks associated with manual patient handling.
The lifting/transferring task should be assessed and planned by a trained person.

HOIST 100 Series
Page 2
Issue 2.0June 2018
Chiltern Invadex (UK) Limited do not encourage or recommend end users to self hoist due to the increased
risks associated with lack of help should assistance be required. That said, we are sensitive to the fact that
there are a large number of equipment users who choose to self hoist in order to maintain their independence.
Where it is known that an end user is self hoisting, ISO 10535 (Hoists for the transfer of disabled persons.
Requirements and test methods) states that an assessment of risk should be undertaken. This assessment
should be undertaken by a competent person and take into consideration factors such as; does the user
have the necessary training, skills and body strength to self hoist safely, are they able to use the emer-
gency lower/stop devices, would they be able to raise the alarm if necessary, and would they be placed
in unnecessary danger should a breakdown or other incident occur. Chiltern Invadex would recommend
that this risk assessment is reviewed at least annually, or where there is a change in user circumstance,
property or equipment.
ISO 10535 recommends that a ‘conveniently placed telephone’ or alarm system should be provided as
a safety control measure. As it is unlikely that the end user would be able to reach even a conveniently
placed telephone in an emergency situation, and a mobile phone may not be on the users person at all
times, we would recommend consideration be given to the provision of a remote pendant alarm system in
the form of a necklace or bracelet which may be a more suitable solution.
It is ultimately the responsibility of the user and healthcare professionals to make the necessary assessment
of risk where independent use of the system is required.
After use
• Return the hoist to the charging position when not in use (Battery models only).
• The outer case, mechanical parts and track should only be removed by a qualied service engi-
neer.
• Do not touch any of the moving parts in the hoist unit or in the track. Contact Chiltern Invadex for
assistance.
• Take care when attaching or removing a sling as the carry bar could cause injury if the user is hit in
the face.
• Do not try and lift using the emergency lowering device as this can damage the hoist.
Independent Hoisting

User Guide Page 3
HOIST 100 Series
Issue 2.0 Issue 2.0 June 2018
wisp
a
100 Plus
Using the controls
Overload Reset Button
In event of overload press button
to re-set
Product Identication Label
(serial number, model, SWL)
Carry/Spreader Bar
Lifting Tape
Handset Cable
Retaining Socket
Emergency Stop
Emergency Lower
Soft Touch Handset
(colour coded direction indication)
Colour coded directional arrows
match handset buttons

HOIST 100 Series
Page 4
Issue 2.0June 2018
Four Button Hand Control used on ‘Wispalong’ (WL) Hoist Models
The four button handset is used to control the raising and lowering of the carry bar and the powered
traversing along the ceiling track on
Wispalong models.
The traversing function is controlled by the or buttons, on the handset. The buttons are colour
coded with blue and yellow. These colours correspond to the blue and yellow direction travel arrows
on the underside of the hoist case.
To control the direction of the hoist, view the coloured direction arrows mounted on the hoist and press
the button on the hand control which corresponds in colour to the arrow on the hoist.
Six Button Hand Control used on X-Y Models
The 6 button hand control has the same function buttons as the four button hand control, with the
addition of the tracking for the X-Y system.
The tracking X-Y function is controlled by the bottom buttons on the handset. The buttons are colour
coded with red and green. These colours correspond to the red and green direction travel arrows on
the underside of the track ends.
To control the direction of the hoist, view the coloured direction arrows mounted on the hoist and track
ends and press the button on the hand control which corresponds in colour and direction to the arrows.
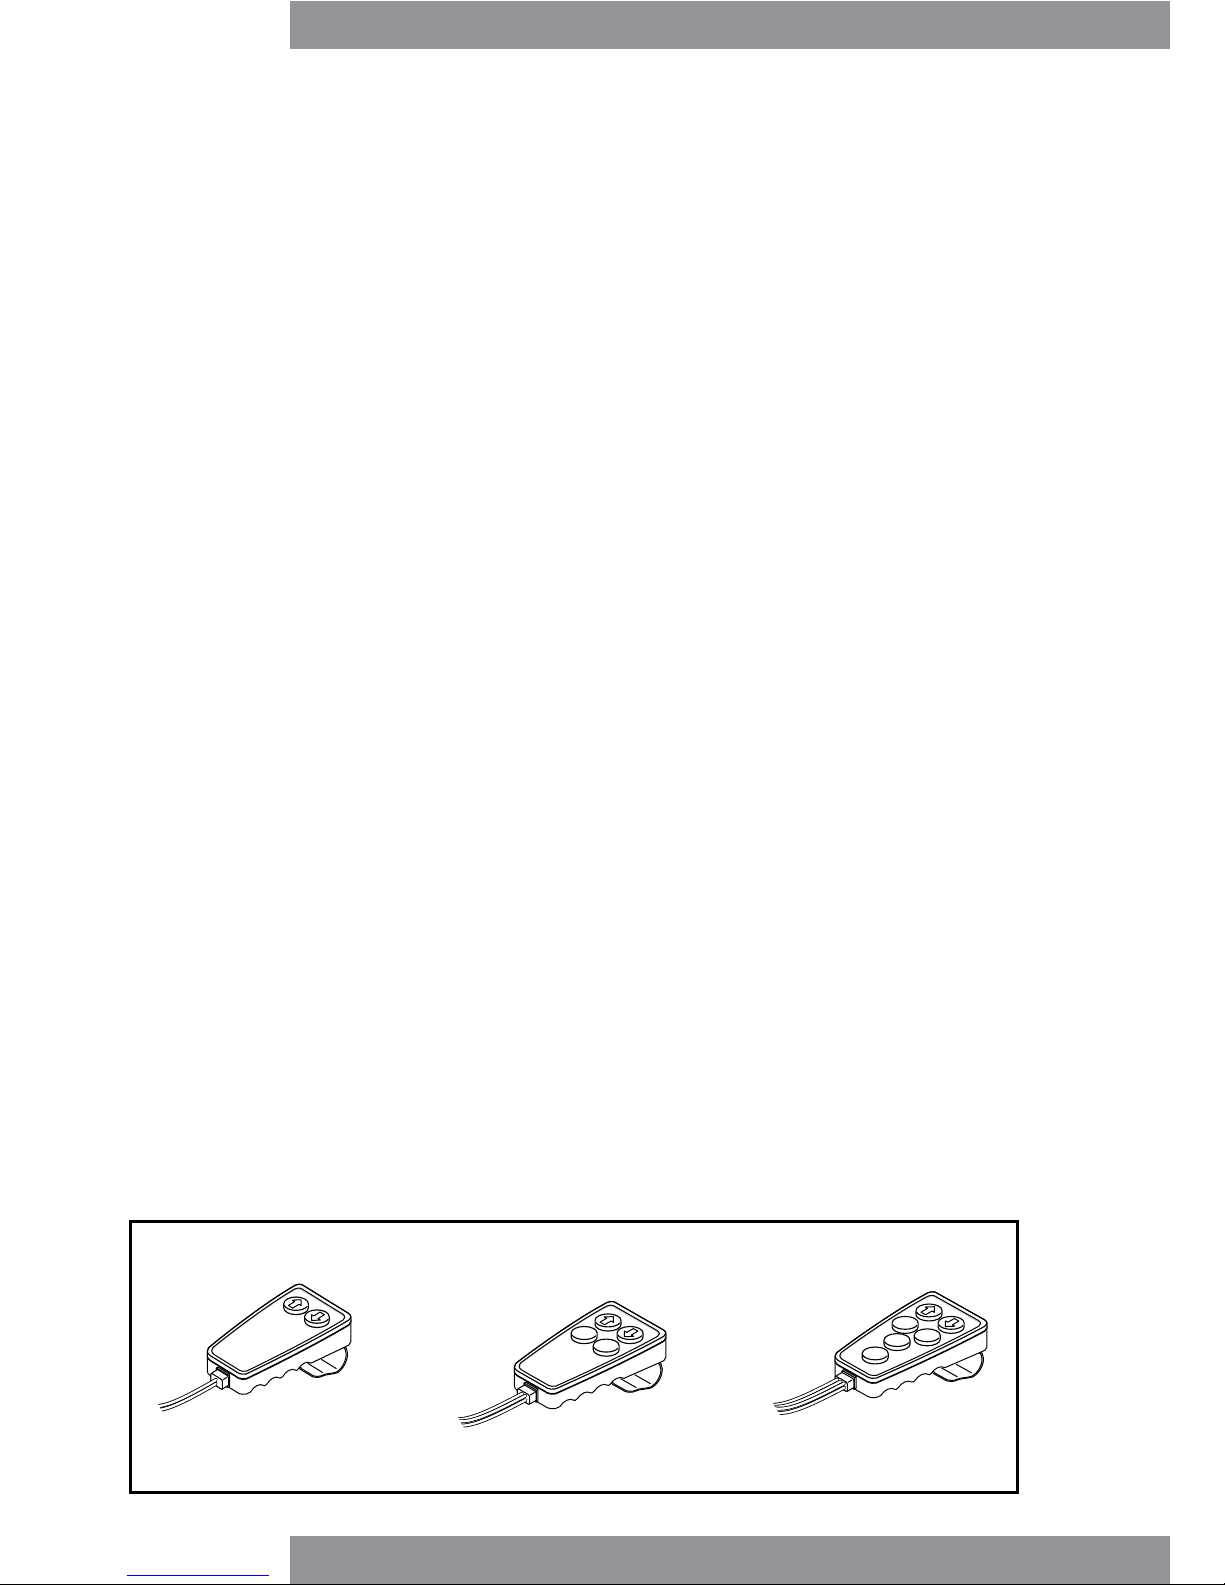
Two Button
Hand Control
Four Button
Hand Control
Six Button
Hand Control
Two Button Hand control used on Wispa (W) Hoist Models
The two button hand control is used to control the lifting and lowering of the carry bar on Wispa hoist
models. The lifting and lowering are controlled by the or buttons.
PLEASE NOTE: For all battery powered models, the hoist must be moved away from
the charging point at the end of the track before the lifting and lowering functions will
operate. Lifting and lowering functions are inoperable whilst the green charging LED
is lit.
Hand controls
The controls use air to operate the hoist and are therefore completely safe to use with wet hands.
Page 5
HOIST 100 Series
Issue 2.0 Issue 2.0 June 2018
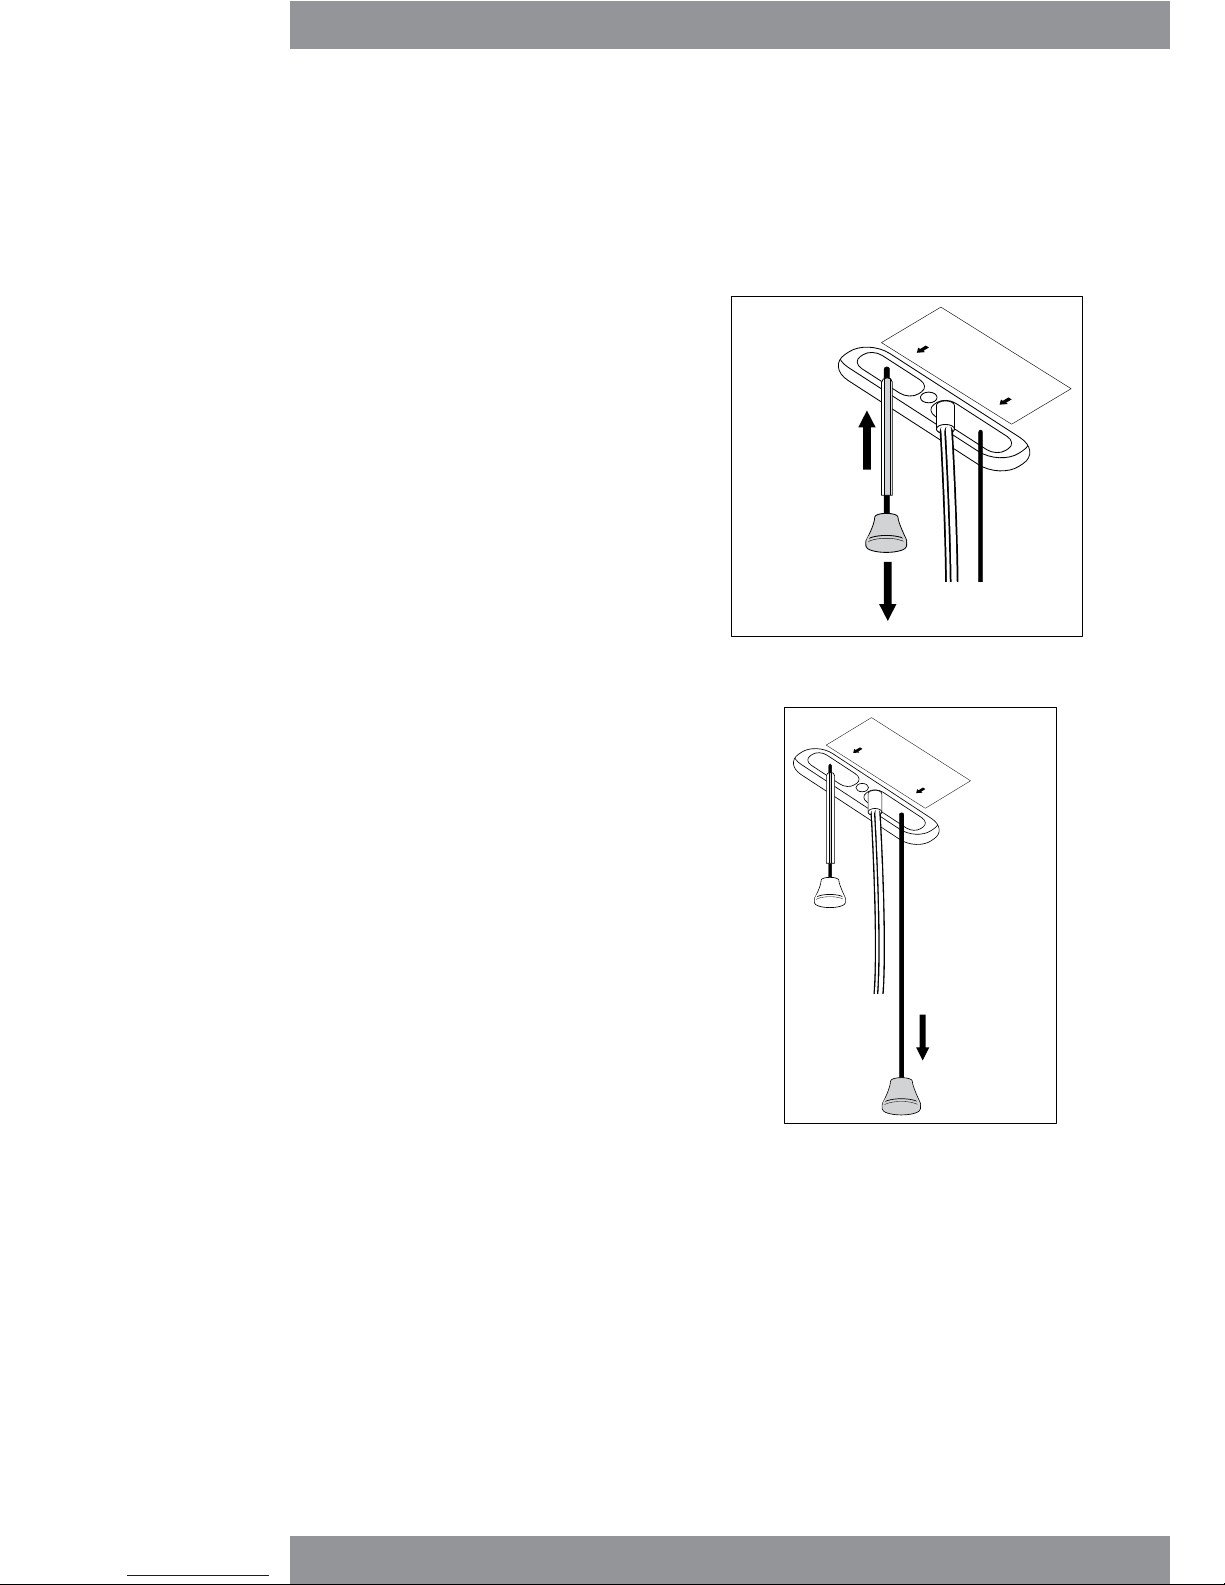
Emergency Lowering
In the unlikely event of a power failure or hoist malfunction the
hoist occupant may be lowered using the emergency lowering
cord.
To operate, pull the white cord gently until 2 clicks are heard/
felt. The occupant will then be slowly lowered.
In certain circumstances the cord may need to be pulled more
gently for just one click, to lower the occupant. If this occurs
refer to the troubleshooting guide on page 8.
Do not try and lift using the emergency lowering device as this
can damage the hoist.
EMERGENCY
STOP LOWER
Emergency lowering
pull cord
Emergency Stop
To operate in case of an emergency, pull the red cord to switch o the hoist completely.
EMERGENCY
STOP LOWER
Emergency stop
pull cord
RESET
Reset Procedure
Once the emergency stop or overload device have been
activated, the hoist will need to be reset.
To reset slide the plastic tube on the red cord upwards through
the hole in the case and push to reset the switch. A click will
be hear when the switch resets.
The hoist should now operate normally.
Please Note: The emergency lowering device uses a PP3 battery to allow the occupant
of the hoist to be lowered in the event of an emergency. Frequent testing of this device
in non-emergency situations will quickly discharge the battery. The battery should be
renewed at each service and after use.

HOIST 100 Series
Page 6
Issue 2.0June 2018
Charging Wispa Battery Hoists
When not in use it is VERY important to return Wispa Battery hoists to the end of the track where the
charging unit for the batteries is housed. To engage the hoist with the charger, simply push or traverse
the hoist to the end of the track. Correct engagement is signalled when the charging light glows green.
Once the hoist is engaged, charging is automatic. No further actions are required to charge the batteries.
The batteries cannot be overcharged. When the Hoist is on charge the lifting and lowering functions will
not operate, unless pre-set software is enabled - contact the sales oce for further information.
Battery Low Indicator Light (Wispa Battery Hoists Only)
The battery low indicator light will glow red when the hoists batteries are in need of charging. This is unlikely
to happen unless the hoist is used for long periods of time (approximately 60 lifts) without charging, or the
hoist has not been properly ‘parked’ in its charger, to recharge the batteries. Should the light ash red,
batteries are critically low and the hoist should be returned to the charging dock immediately.
Warning Buzzer (Wispa Battery Hoists Only)
If the battery low warning buzzer sounds, then the batteries need recharging before use.
Overload Reset
This device safeguards the hoist against overload, the connection between the power supply and the
control unit is deliberately broken to prevent the safe working load of the unit being exceeded. Should
the hoist not respond to the handset controls and the the buzzer sounds three times, the hoist has been
overloaded. The reset procedure on page 5 will need to be performed to resume normal hoist function.
If the hoist fails to respond contact Chiltern Invadex or your supplier.
Page 7
HOIST 100 Series
Issue 2.0 Issue 2.0 June 2018
Servicing and maintenance
ISO10535 requires that all equipment used to lift people must be fully serviced, including a load test, at
least every 12 months. The frequency of servicing should be increased in areas where the environment
or heavy usage may cause deterioration of the equipment. Chiltern Invadex recommend that in these
circumstances hoists are serviced every 6 months. An orange indicator light will show on the hoist when
a service is due.
In addition to servicing, the Lifting Operations and Lifting Equipment Regulations (LOLER) require 6 six
monthly inspections of any device and accessories (including slings) which are used as work equipment.
This includes in a private home where a carer is employed.
Additional services and LOLER inspections should be carried out where the scheme has been unused
for long periods, subject to modication or at point re-installation.
Information regarding LOLER requirements can be seen at http://www.hse.gov.uk/pubns/hsis4.pdf.
Maintenance of this equipment should only be conducted by engineers trained and certied by Chiltern
Invadex.
Keep the service record (at the back of this booklet) up to date.
DO NOT USE IF:
1. There is any damage to the hoist.
2. There is fraying or stitch damage to the lifting tape or slings.
To ensure maximum cleanliness
Wipe with a dry cloth (track and hoist). For stubborn marks use a damp cloth and a mild cleanser. Always
read the manufacturers instructions prior to applying the cleanser. To prevent damage the hoist and
handset must never be submerged in water.
Slings should be washed in accordance with the instructions on the label, sewn into the sling.
Parts
2 Button 4 Button 6 Button
Please note: hand controls are the only spare part which can be safely replaced by untrained persons
all other works should be carried out by a competent engineer.
A full list of replacement parts can be obtained on request from Chiltern Invadex or your local dealer.
OHHS350 OHHS351 OHHS352

HOIST 100 Series
Page 8
Issue 2.0June 2018
Troubleshooting
Further assistance
Please telephone Chiltern Invadex on 01869 365500 further assistance. Remember that service calls made
after the warranty period will be chargeable. If the maintenance of the equipment is the responsibility of a
third party, for example the Social Services, please contact them in the rst instance.
Battery models only
Hoist lacking power Battery is low Charge batteries
Hoist make beeping sound Battery is low
Hoist is left o charge
Charge batteries
Return to charge point
Red light is on Battery is low Charge batteries
Red light is ashing Batteries are critically low Charge immediately
Green light is on Batteries charging Will turn o when charged
Red & Green lights are
ashing
Hoist idle Return to charge
Hoist will not function Hoist is charging Remove hoist from charging dock and
wait for green LED to turn o
Powered models only
No hoist function No power Ensure mains power is connected,
check fuse box
All models
Hoist will not function Hoist has been overloaded
Emergency stop has been
activated
Thermal fuse requires reset see page
3
Reset hoist, see page 5
Hoist stops when lifting Tape is twisted Ensure tape is vertical
Orange light is on Service is due Arrange service call
Orange light is ashing Service is overdue Arrange service call
Hoist lifts when down button
is pressed
Airline incorrectly installed
Lifting tape may be reversed
on the spool
Black line on handset must align with
the raised edges on the hoist connec-
tion when inserted into the grommet on
the hoist box
To correct press up button to lower
carry bar whilst pulling lift tape down
gently to the end of its travel. Tape will
then rewind itself correctly, or the lower
cutout will operate. If lower cutout
operates the tape is wound correctly.
Symptom Suggested cause Solution
Page 9
HOIST 100 Series
Issue 2.0 Issue 2.0 June 2018
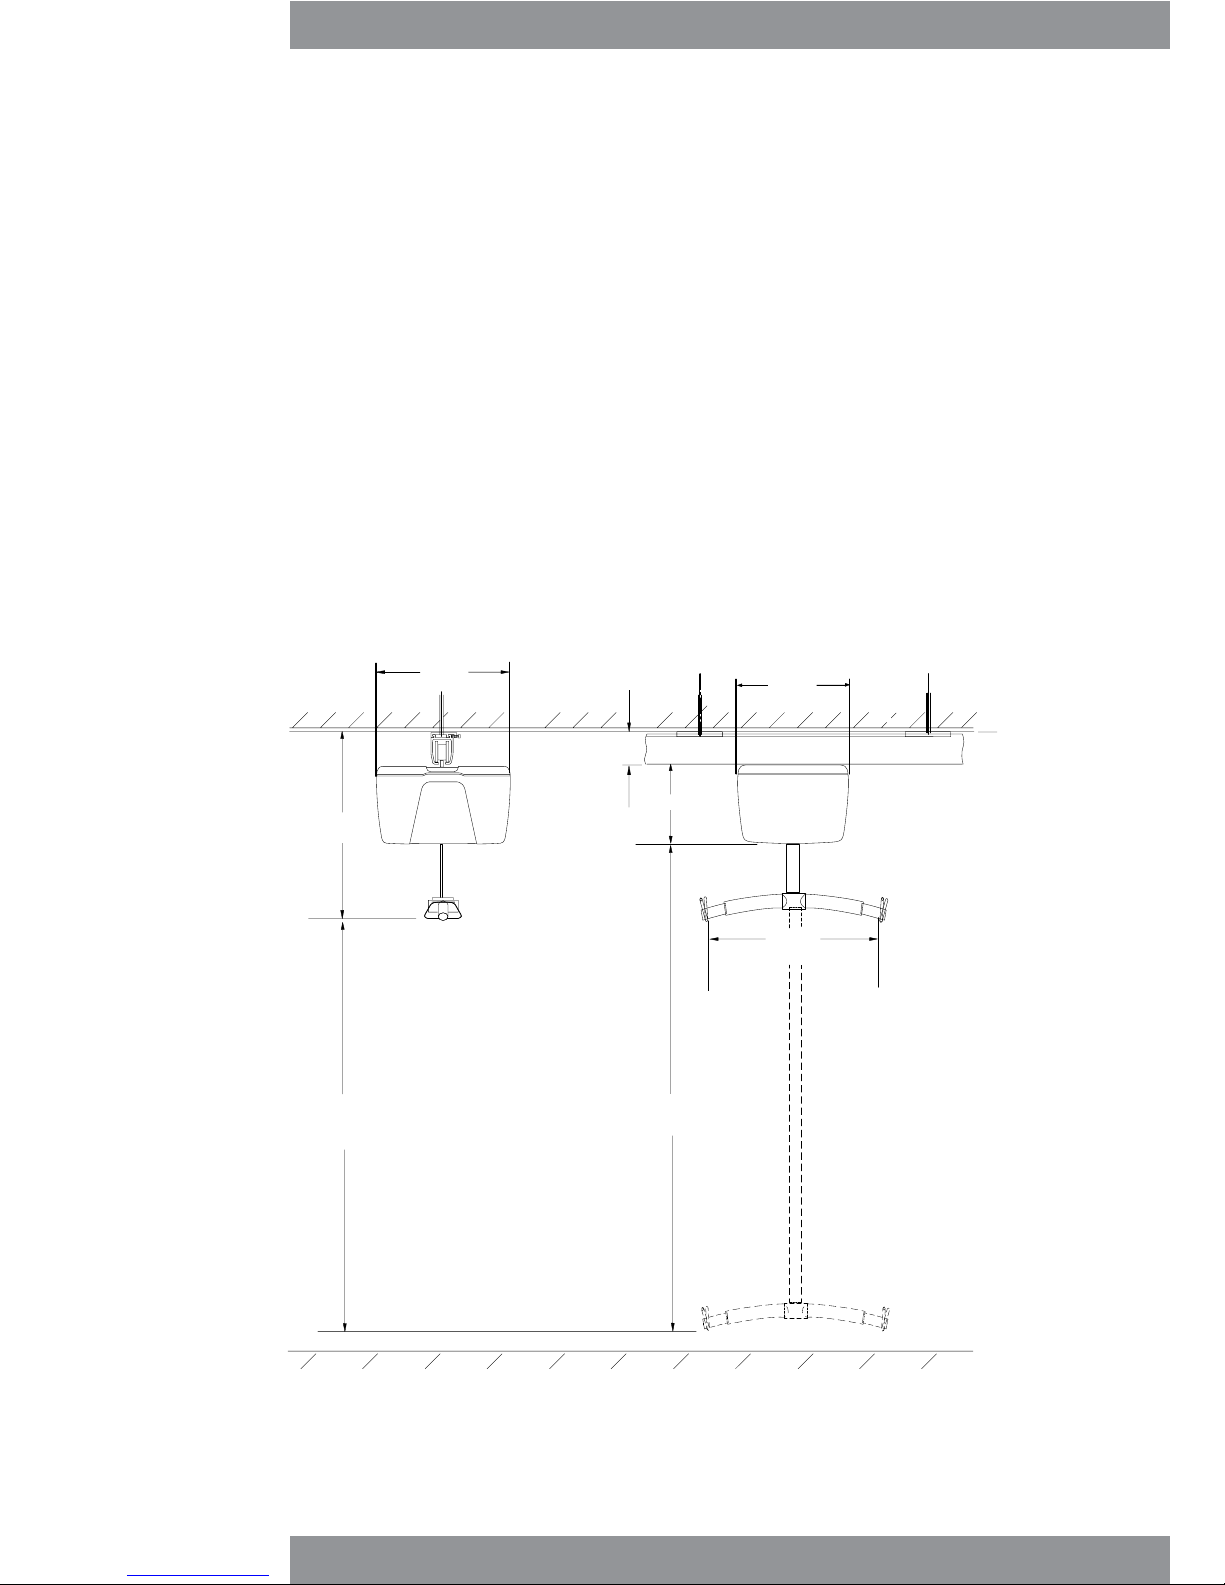
Hoist Specication
Lifting capacity WP, WBP, WLP, WLBP models - 130 Kg (20 stone)
WTP, WLTP, WTBP, WLTBP models - 200 Kg (31 stone)
Case construction Injection moulded Flame Retardant ABS
Lifting Range Approximately 1800mm*
No of Lifts per Charge 60** (Battery models)
Battery voltage 24 vdc
Overload cut out <150% maximum load (All models)
Hand control Pneumatic hand control
Track Aluminium extruded track
Low battery indication Audible and visual warning device on hoist (On battery models only)
Clearance dimension Top of track to bottom of carry bar hook at max height is 442mm
*This is adjustable and should be set by the installer to meet the requirements of the user. Typically the carry bar would stop about 300mm from
the oor. Extended tapes are available to accommodate high ceilings
**600mm up and down cycle with average 70kg (11 stone) patient weight.
CE Mark
The Chiltern Invadex Wispa 100Plus Hoist carries the CE mark and complies with the Medical Devices Directive (93/42/EEC) as amended
2007/47/EC
1782mm
maximum lifting range
with standard tape
1922mm
with standard tape
480mm
between pick up points
442mm
minimum
370mm
82mm
220mm
270mm
Standard single track conguration, for details of other congurations please contact us at [email protected]

HOIST 100 Series
Page 10
Issue 2.0June 2018
Important Information - Transformer Powered Models
Please note that the brown and blue wires on the hoist curly cable
can be connected to either of the two blue wires in the transformer.
Installation Notes
Important Information - Battery Powered Models
Where this hoist is to be a replacement unit on an existing track
installation, the charging unit included in the box MUST be used.
This hoist is NOT compatible with the old RED charging unit.
Use of this hoist with the old RED charger may result in damage
to the PCB and WILL invalidate the product warranty.
For further information please contact our Technical team on
01869 365500.

Page 11
HOIST 100 Series
Issue 2.0 Issue 2.0 June 2018
Carry/Spreader Bar Installation
9
8
4
5
6
7
3
11
2
d
c
b
a
Carry Bar/Lift Tape Replacement
Using a 2.5mm allen key remove the security screw (1) and set
aside for re-use
Push down firmly through the carry bar to remove the component
parts (2). Parts should include;
PTFE bearings x2 (a)
Lift tape retainer housing (b)
Lift tape retainer dowel (c)
Cap (d)
Should any of these parts be missing the installation should be postponed
until the necessary replacement parts have been obtained.
Note: where an existing lift tape is being removed it may be necessary
to cut along the base of the lift tape (as shown) to facilitate removal of
the retainer dowel.
Push the new lift tape through the slot in the top of the carry bar (3).
Slide the two PTFE bearings over the lift tape and position them
at the top of the carry bar (4).
Note: to ensure that the carry bar can swivel smoothly care
should be taken to ensure that the PTFE bearings are flat against
the top of the carry bar.
Place the retainer housing over the lift tape (5) and insert the dowel through the hole provided into
the lift tape loop (6). Pull the tape tight through the slot in the top of the carry bar (7).
Note: be aware of finger trap hazard.
If the tape is fitted correctly the carry bar should rotate freely, if this is not the case ensure that PTFE
bearings are installed correctly and that the dowel sits flush within the retainer housing.
Insert the cap (8) and re-insert the security screw (9).
For safety reasons a lift tape should be renewed if any sign of wear is visible
or every two years regardless of condition.
This procedure should only be carried out by qualified service personnel.
Please ensure that this guide is read thoroughly prior to commencement
Chiltern Invadex (UK) Limited, 126 Churchill Road, Bicester, Oxfordshire OX26 4XD Tel: 01869 365500 Fax: 01869 365588 Email: [email protected] Registered in England No: 04704248
CINV 576.02 October 2012

HOIST 100 Series
Page 12
Issue 2.0June 2018
Warranty
Your Chiltern Invadex (UK) Limited Overhead Hoist carries a 12 month warranty from the date of purchase,
subject to the following :-
1. Should you experience any problems with your product within the rst 12 months period please
contact your point of purchase.
2. Repairs made during the warranty period will be carried out free of charge, provided the product
has been used strictly in accordance with the guidelines set out in this user guide.
3. Our warranty does not cover replacements, adjustments or repairs which may be required as a
result of normal wear and tear, wilful or accidental damage, misuse, neglect or any other cause
which is beyond the control of Chiltern Invadex (UK) Limited.
4. Modications and repairs made to this product by unauthorised persons will render the warranty void.
5. Only parts manufactured or approved by Chiltern Invadex (UK) Limited shall be used to repair this
product. Use of unauthorised parts will invalidate all warranties and remove all liability from Chiltern
Invadex (UK) Limited for the safety of this product.
6. Chiltern Invadex (UK) Limited shall in no event be liable for any damages, costs or expenses arising
from any claim made under this warranty (save for any legal liability of Chiltern Invadex (UK) Limited
for death or personal injury resulting from the company’s negligence in respect of its products).
7. This warranty does not aect your statutory consumer rights.
Life Expectancy Statement
Based upon 25 years experience in the manufacture, installation and service of overhead hoists, Chiltern
Invadex (UK) Ltd conrm a life expectancy of at least 8 - 10 years in relation to ceiling mounted hoists.
The life expectancy of any hoist can be vastly increased or decreased dependant upon the frequency of
use, the loads applied, correct operation and of course regular servicing and maintenance as detailed
within this guide.
A full statement of life expectancy can be obtained from Chiltern Invadex.
Page 13
HOIST 100 Series
Issue 2.0 Issue 2.0 June 2018
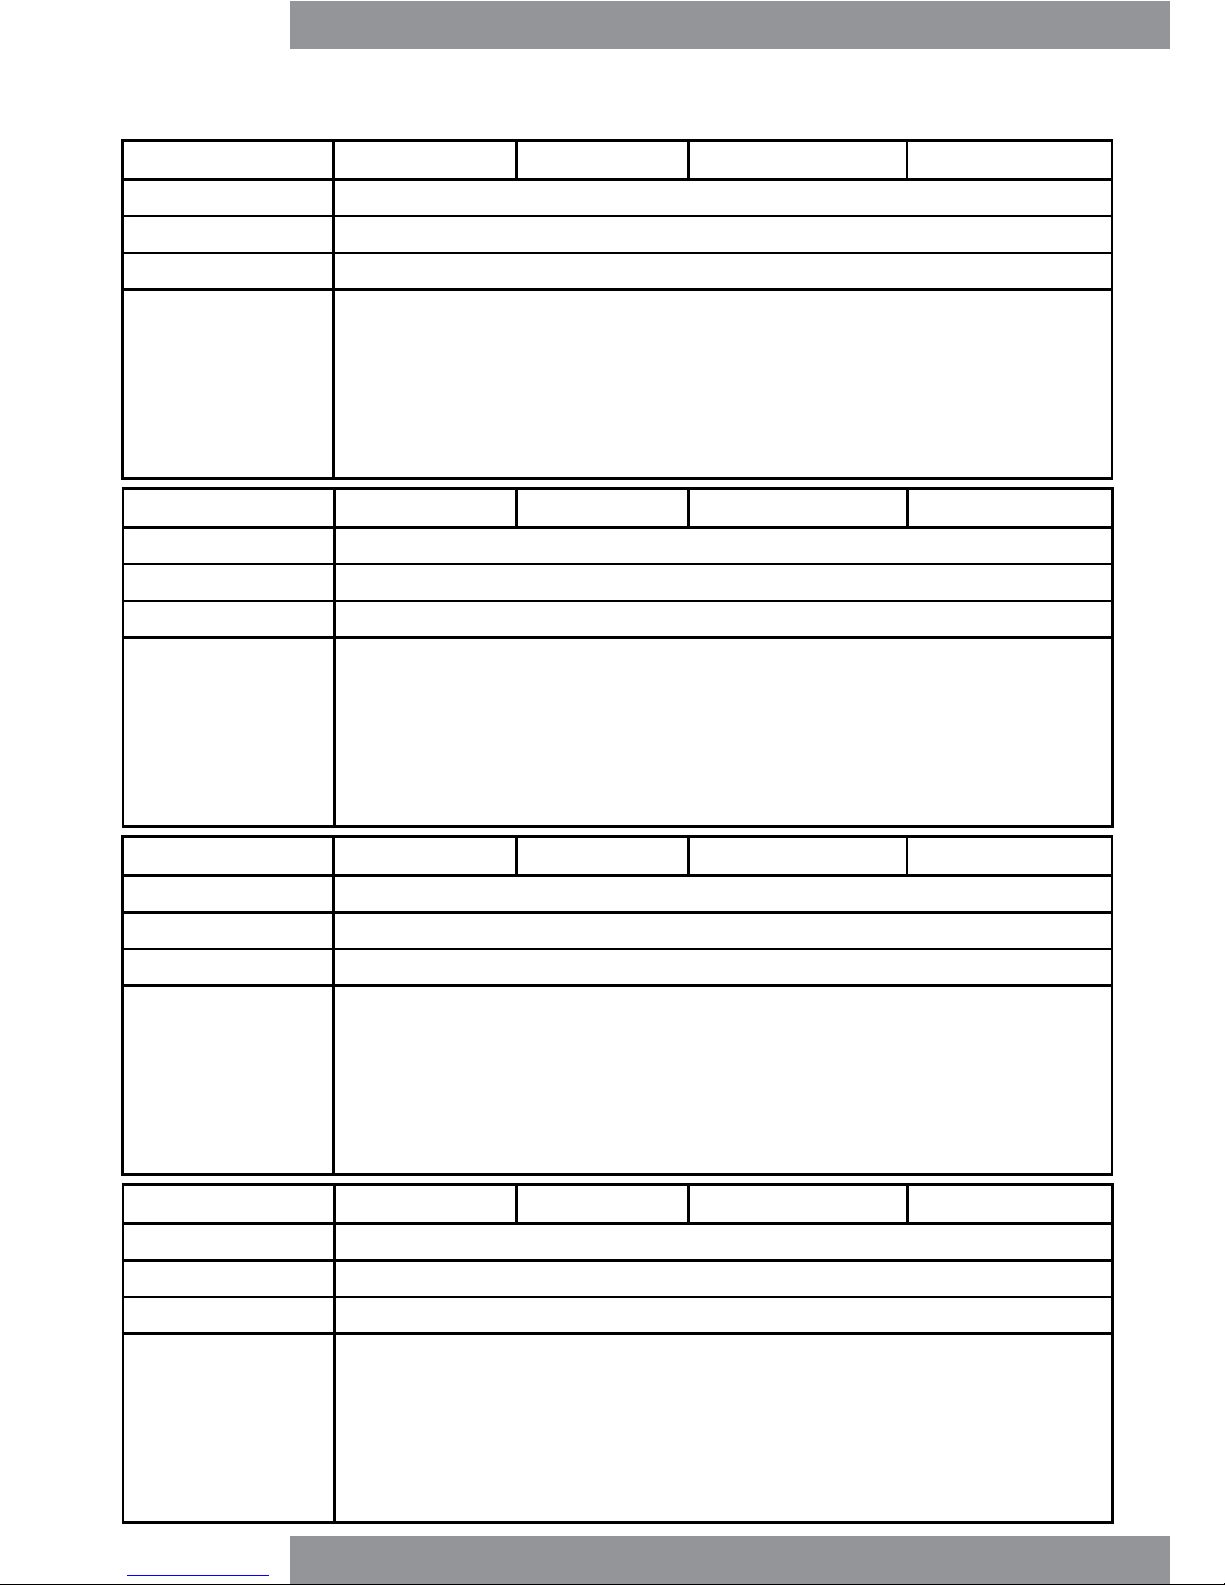
Year 1 Date of Service Load tested to kg
Serviced by
Address
Engineer name
Comments
Year 2 Date of Service Load tested to kg
Serviced by
Address
Engineer name
Comments
Year 3 Date of Service Load tested to kg
Serviced by
Address
Engineer name
Comments
Wispa Hoist Service Record
Year 4 Date of Service Load tested to kg
Serviced by
Address
Engineer name
Comments
HOIST 100 Series
Page 14
Issue 2.0June 2018
Year 5 Date of Service Load tested to kg
Serviced by
Address
Engineer name
Comments
Year 6 Date of Service Load tested to kg
Serviced by
Address
Engineer name
Comments
Year 7 Date of Service Load tested to kg
Serviced by
Address
Engineer name
Comments
Year 8 Date of Service Load tested to kg
Serviced by
Address
Engineer name
Comments
Page 15
HOIST 100 Series
Issue 2.0 Issue 2.0 June 2018
Year 9 Date of Service Load tested to kg
Serviced by
Address
Engineer name
Comments
Year 10 Date of Service Load tested to kg
Serviced by
Address
Engineer name
Comments
In addition to regular service and maintenance a requirement to provide 6 monthly LOLER inspections
may apply. Refer to page 7.

HOIST 100 Series
Page 16
Issue 2.0June 2018
Contractor name:
Contact number:
Address:
Contract/warranty/account number:
Notes:
The below space can be used to store details of your service contractor, if the equipment
has been provided by a third party for example the Local Authority, this information will be
available from them.
Refer to page 17 for details unique to your hoist. This information may be required when contacting your
service provider.
Page 17
HOIST 100 Series
Issue 2.0 Issue 2.0 June 2018
Chiltern Invadex (UK) Ltd
Issue a Issue Date Sept 2017
CI 2.10 Declaration of Conformity –Patient hoists Page 1 of 1
Author Authorisation
M Adamou
V Cartwright
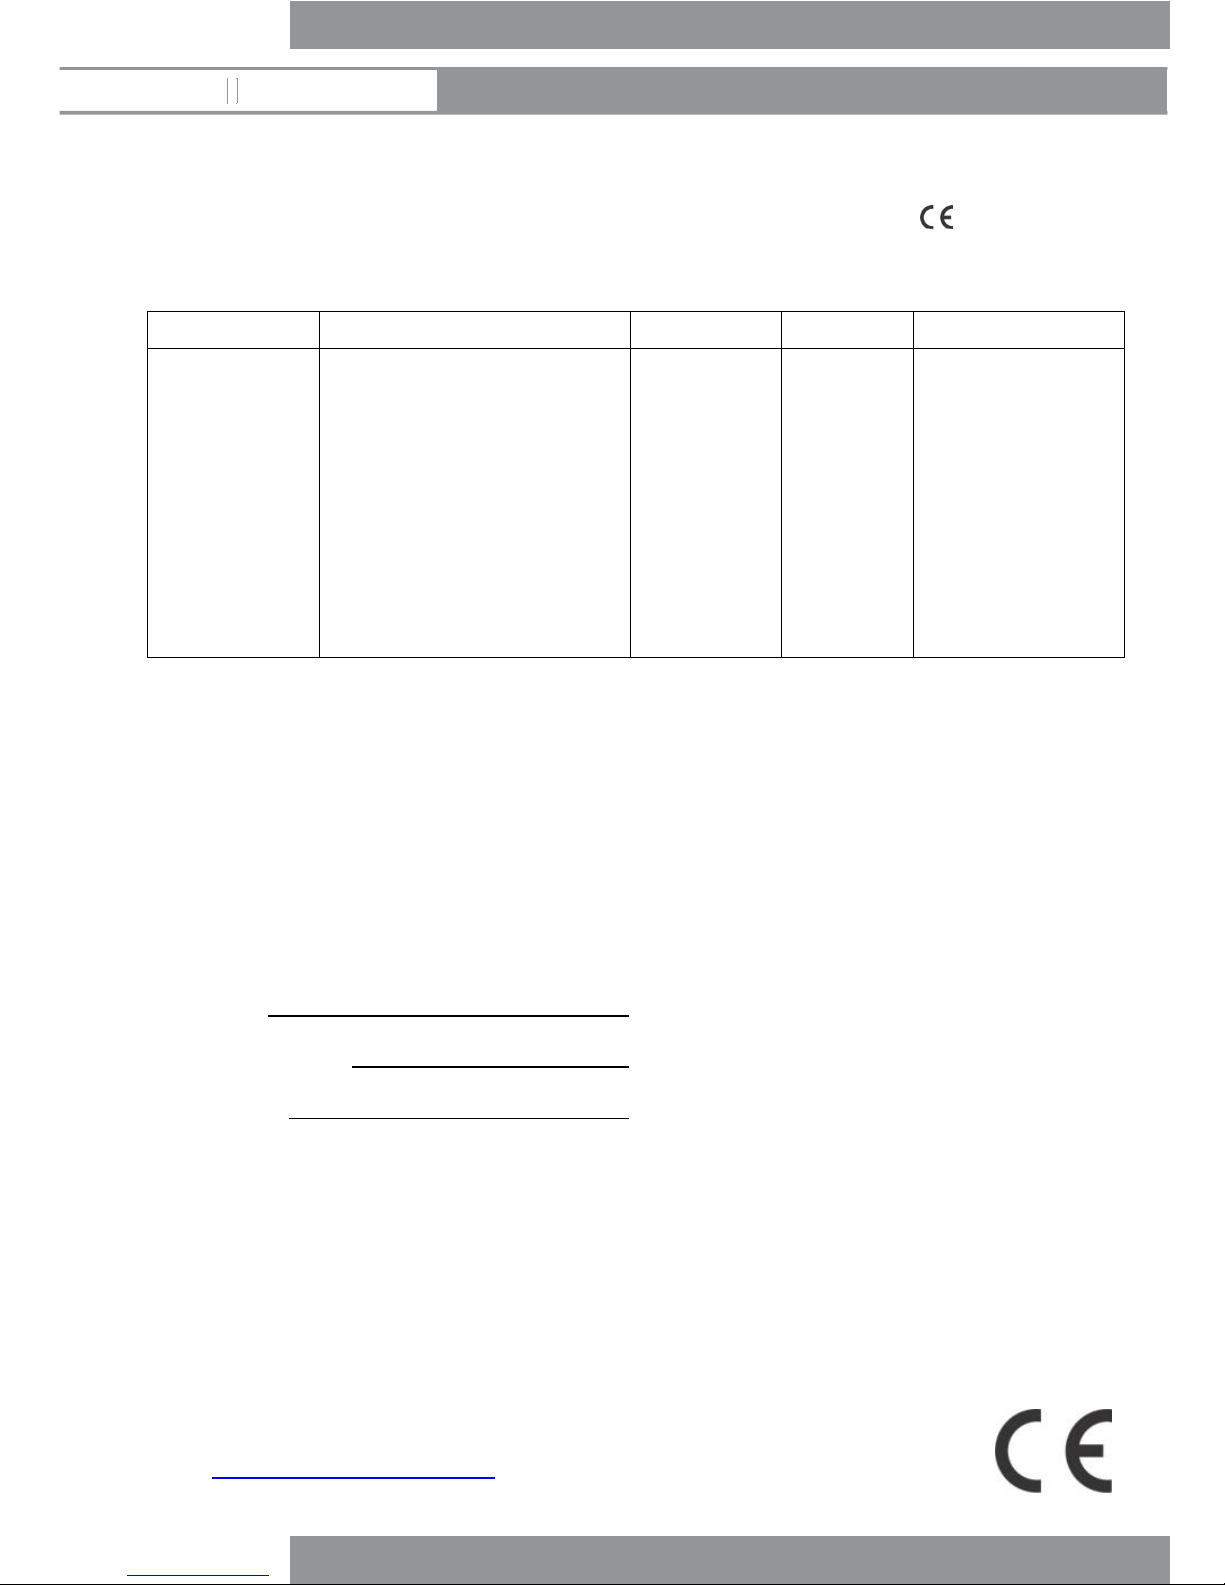
Chiltern Invadex (UK) Limited hereby declare the products identified below are Class 1 Medical
Devices as defined by the Medical Devices Directive 93/42/EEC and carry the mark.
Wispa branded patient hoist models;
Portable hoist 100Plus 200 Series 300 Series Mobile Hoist
WP
Transformer powered models
W
WT
WL
WLT
Battery powered models
WB
WTB
WLB
WLTB
200L
200LT
200LTR
200LTX
200LTXR
300L
300PT
300PTR
300P
300PR
MHWMEHUKEL
We hereby certify that the products listed have been designed, assessed, manufactured,
labelled and packaged to conform with the specifications which apply to them under
International Standard ISO10535:2006 and confirm compliance with the provisions applied
under the Medical Devices Directive 93/42/EEC (as amended by 2007/47/EC)
The necessary technical files are available for inspection by the relevant enforcement
authorities.
Registered Manufacturer Number: CA005328
E4: Patient/Hoist/Transfer Aids and Accessories
Hoist model:
Date of manufacture:
Serial number:
Unit 6C
Thorpe Drive
Banbury
OX16 4UZ
UK
Email: [email protected]

Manufactured by;
Chiltern Invadex (UK) Limited
Unit 6C
Thorpe Drive
Banbury
OX16 4UZ
UK
01869 365500
Overseas Enquiries
+44(0)1869 365500
www.chilterninvadex.co.uk
FM553189
.
The crossed wheelie bin symbol shown on this product indicates that
the item must not be disposed of with general household waste. Proper
recovery of your waste electronic and electrical equipment will ensure
safety of human health and the environment.
For more information where the product can be safely disposed of
please contact your Local Authority, the dealer from where the product
was purchased or Chiltern Invadex (UK) Limited.
WEEE producer number
WEE/JD1274RU
To request a copy of this guide in large print
please contact
customer services on 01869 365500 opt 1 or
email: [email protected]
Co p yr i ght © C hil t er n In v ad e x (UK) Ltd The design of the product shown in this guide is vested in Chiltern Invadex (UK) Ltd and should not be copied or reproduced in anyway
whatsoever without the express permission in writing of Chiltern Invadex (UK) Ltd.
Pu b li s hed by : Ch i lt e rn I nv a dex (UK) Ltd Unit 6C, Thorpe Drive, Banbury OX16 4UZ Registered in England No: 04704248 OH0014 Issue 2.0
June 2018
WISPA 100 Plus
Table of contents
Other Chiltern Invadex Medical Equipment manuals


