ChiQ FSS559NEI32D User manual

Refrigerator Service Manual
Applicable to
Model: FSS559NEI32D(BCD-570WPDR)(C1873)

Contents
I. Product features............................................................................................................................ 3
II. Outer appearance and structure ................................................................................................. 4
III. Main technical parameters ....................................................................... 错误!未定义书签。
IV. Operation instructions.................................................................................................................. 4
V. Display rules................................................................................................................................... 7
VI. Cooling system .............................................................................................................................. 8
VII. Control system............................................................................................................................... 8
VIII. Maintenance guide ..................................................................................................................... 11
IX. Explosive view and spare parts list .......................................................... 错误!未定义书签。

I. Product features
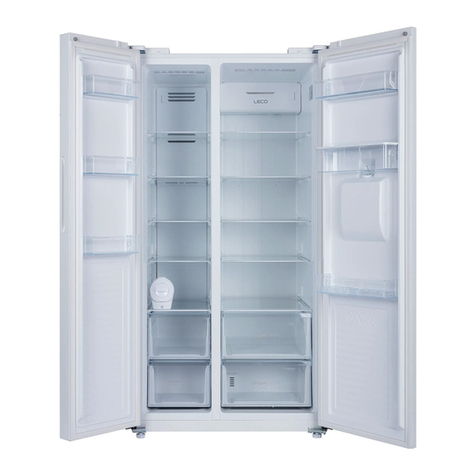
This is a frost-free side-by-side fridgefreezer. Its right side is the fridge compartment for fresh
food storage, such as fruits, vegetables, eggs, milk, cooked foods, etc.; and its leftside is the
freezer compartment where fish, meat, etc. can be frozen for the long-term storage.
★Real-time monitoring; The states of the fridge compartment, freezer compartment and variable
temperature chamber are monitored in the real-time manner to ensure they are operating
under the optimal conditions with the best humidity maintained, so that the food
preservation time can be extended.
★Stylish appearance; Adopting the optimized man-machine engineering design, this hidden
handle refrigerator has an elegant and novel appearance.
★Multi-airflow; The stereo multiple air outlets are adopted by the refrigerator, which guarantees
uniformity of the storage temperature.
★Smart defrosting; Featuring the smart defrosting design, the refrigerator performs the defrost
operation according to the actual use frequency and frost formation speed, thus more
energy-saving. Before the defrost operation, the refrigerator internal temperatures are
automatically judged and pre-refrigeration is made, so that the internal temperatures before
and after defrosting do not change significantly, which is conducive to the food preservation.
★More user-friendly designs; Such functions as wide working voltage range, automatic
temperature control, power-off memory, power-on delay, automatic alarm, fast freezing, and
fridge power-off, etc. are available.
★LED display and induction keys; The parameters and control states of the fridge and freezer
compartments can be displayed by the LED screen; the fridge temperature adjustment range
is between 2 °C and 8 °C, and the temperature range of the freezer compartment is between
-16 °C and -24 °C. The fan of each compartment is synchronized with the cooling request of
the corresponding compartment, and the lamp of each compartment is controlled by the
door lamp switch of the corresponding compartment.

II. Outer appearance and structure
Note: Due to technological innovation, the product descriptions in this manual may not be completely consistent
with your refrigerator. Details are in accordance with the real product.
III. Operation instructions
1. Keys
Temp.Zone
1) This is the key to select the temperature zone, and the temperature zone changes once

with each response of the key. When the fridge zone is selected (with icon of the fridge
door flickering), temperature digits starts flickering. After temperature setting, press
the OK key to validate it. When the freezer zone is selected (with the icon the freezer
door flickering), set the temperature by reference to the fridge temperature setup.
2) The temperature zone selection changes through the following cycle:
Fridge → Freezer →Fridge;
Note: When the function program is enabled, temperature setting becomes invalid.
3) Every time when settings are finished (with no flickering any more), if the Temp. Zone
key is pressed again, the Fridge icon starts flickering first.
4) Fridge OFF: When the fridge temperature is set, the temperature setting progresses
through the following cycle.
2℃→3℃→4℃→5℃→6℃→7℃→8℃→OF→2℃
(‘OF’ represents the OFF state, and when the OF setting takes effect, the fridge will be
shut off, with no refrigeration request.)
Temp. (temperature setting)
1)Under the temperature setting state, the temperature rises by 1℃with each key
response.
2)Adjustable temperature range for each compartment:
Fridge compartment : 2℃~ 8℃;
Freezer compartment: -16℃~ -24℃;
OK
1)Under the state of function selection or temperature setting, the selected function or
the set temperature value takes effect when this key is pressed, with the corresponding
flickering stopped immediately.
2)Under the function selection or the temperature setting state, if this key is not pressed,
flickering will stop in 5 seconds, with the selected function or the set temperature value
invalid.
Function
1)This is the key to select functions, and the function selected changes with each key
response.
2)Function selection changes through the following cycle:
“Smart”→“Fast freeze”→“Smart”

3)The selected function takes effect after the ‘OK’ key is pressed. When a function has not
been set, press this key to select the function, and then press the OK key, the selected
function can be enabled; and if a function has been set, press this key to select the
function, and then press the OK key, the function will exit.
Child lock
1)Under the state of “Child lock”, hold down this key for 3s, then the child lock function
can be disabled.
2. Function program rules
Press the key to perform the corresponding function of Smart, Fast Freeze, Fridge OFF, or
Child Lock.
‘Fast freeze’ function
1) To enter ‘Fast Freeze’
Refer to the key operation;
2) To exit ‘Fast Freeze’
a) The ‘Fast Freeze’ function will exit automatically when the refrigerator total run
time reaches 26 hours, counting from the moment the fast freeze function is
enabled, with the character ‘Fast Freeze’ and its icon extinguished.
b) When the ‘Smart’ function is enabled, the ‘Fast Freeze’ function exits, with its
icon extinguished.
c) Refer to the key operation.
3) When the ‘Fast Freeze’ function is enabled, the freezer temperature can’t be
modified.
4) When the ‘Fast Freeze’ function gets exited, the freezer temperature restores to its
original temperature that is set before the ‘Fast Freeze’ function is enabled
’Smart’ function
1) To enter ‘Smart’.
Refer to the Key operation;
2) To exit ‘Smart’ (the following refers to the OR relationship):
a) Refer to the key operation.
b) When the ‘Fast Freeze’ or ‘Vacation’ function is enabled, the ‘Smart’ function
exits.
3) When the ‘Smart’ function is enabled, the fridge temperature is set at 05℃and the
freezer temperature at -18℃, which are subject to no change.
4) When the ‘Smart’ function gets exited, the temperature of each compartment
restores to its original temperature that is set before the ‘Smart’ function is enabled
‘Child Lock’ function
1) To enter Child Lock.

When the display is unlocked, the Child Lock function will be enabled automatically if
no key operation within 3 minutes.
2) To exit Child Lock.
Refer to the Key operation.
3) When the Child Lock function is enabled, the refrigerator temperature and function
are subject to no change.
IV. Display rules
Under normal operation, the temperature of the compartment whose icon lights up is
displayed at the digit zone.
The display fullylights up when the refrigerator is energized for the first time, which will
restore to the normal display in 2 seconds.
When the display lights up, it will be off if no key operation within 3 minutes.
When the display screen is off, a key can be awakened when it is pressed for the first time,
and the function of the key can be enabled if it is pressed again.
In the case of failure or any door open action, the display lights up.
In the case of temperature setting, temperature of the current corresponding compartment
is displayed, with the ‘2-digit’ and ‘-’ icons flickering.
Over-temperature alarm
When energized, if the freezer sensor temperature is higher than -10℃, its corresponding
icon and temperature gets flickering. The temperature of the freezer when it is energized

can be displayed by pressing any key. And the normal display is restored 10s later or by
pressing any key again.
Special function program display contents
When the ‘Smart’ function is enabled, the character ‘Smart’ and its icon light up, with the
fridge temperature and the freezer temperature displayed as 5℃and -18℃; when the ‘Fast
Freeze’ function is enabled, the character ‘Fast Freeze’ and its icon light up, with the freezer
temperature displayed to be ‘-32’.
V. Cooling system
Schematic diagram of the cooling system
VI. Control system
(Including the control system diagram, main control board circuit layout diagram, each
component control)
1. Schematic diagram of the control system

Components output:
Compressor(~220V / 50Hz,200W)
Buzzer
LED display
Fridge lamp(12V,3W)
Fridge lamp (12V,3.5W)
Freezer fan(12VDC,4W)
Freezer defrosting heater(~240V / 50Hz,240W)
2. Diagram of the control board-the board integrating the inverter control with the main
control

3. Components control rules
1) Compressor
Make sure to wait for at least 5 minutes before you start it again after it is shut down.
控
制
板
简
图

2) Lamp
a) If any refrigerator door switch is detected to be on, the corresponding
compartment lamp gets switched on.
b) If any refrigerator door switch is detected to be off, the corresponding
compartment lamp gets switched off.
c) The lamp gets switched off after keeping illuminated for more than 10
minutes
3) Fridge air damper
When the fridge is cooling, the fridge air damper is opened; and when the fridge is
not cooling, the fridge air damper is closed.
4) Freezer fan motor
a) When the fridge and the freezer are cooling, the fan motor gets started.
b) When the fridge and the freezer are not cooling, the fan motor gets stopped.
c) When defrosting gets started, the fan motor runs according to the defrosting
rules.
d) When the fridge door or the freezer door is opened, running of the fan motor
gets suspended for 10 minutes.
5) Power cut memory
a) The temperature setting of each compartment can be memorized.
b) Such functional state as Smart, Fast Freeze can be memorized.
c) Parameter settings (the original value or the modified value) can be
memorized
VII. Maintenance guide
1. Fault alarms
a) Over-temperature alarm: When the refrigerator system is first powered on, if the
freezer sensor temperature is detected to be higher than -10℃, the freezer zone
icon and the freezer temperature get flickering. When any key is touched, the
flickering gets stopped, with the said freezer temperature (above -10℃)displayed.
The normal display can be restored after 5s.
b) Door open alarm: When any door is open for more than 3 minutes, the buzzer will
issue alarms continuously until the said door is closed. The alarm can be stopped
when any key is pressed, but it will be restored after 3 minutes if the door keeps
open.
2. Fault indicators
The general information and item information displayed under different failure
categories are as follows:
S/N
Failure Type
Item Information
1
Fridge sensor fault
The graphic of the fridge zone lights up, with E0
displayed.

2
Freezer sensor fault
The graphic of the freezer zone lights up, with
E0 displayed.
3
Freezer evaporator
sensor fault
he graphic of the freezer zone lights up, with E1
displayed.
4
Communication fault
EC is displayed.
5
Ambient temperature
sensor fault
EH is displayed.
6
7
8
1) If the fault messages E0 and E1 need to be displayed at the same time, E2 will
be displayed instead.
2) In case the number of sensor faults or compartment sensor faults is more
than two, the number will be displayed.
3. Fault troubleshooting
(How to detect the fault is presented here only, and for details about disassembly and
assembly, see the next chapter.)
Note:Make sure to cut off power supply before servicing.
(1) Fridge sensor fault (The fridge zone icon is flickering, with E0 displayed)
a. Cut off power supply, remove the electrical box cover, check whether the
temperature sensor terminal on the control board is well connected, insert it
again, and then power on the system to observe whether there is alarm or
not.
b. If the alarm continues, cut oft power supply, change the control board, and
power on the system to observe there is alarm or not on the display panel.
(2) Freezer sensor fault (the freezer zone icon gets flickering, with EO displayed.)
a. Cut off power supply, remove the electrical box cover, check whether the
temperature sensor terminal on the control board is connected in sound
condition, insert it again, and then power on the system to observe whether
there is alarm or not.
b. If the alarm continues, cut off power supply, change the control board, and
then power on the system to observe whether there is alarm displayed on
the panel.
(3) Freezer evaporator fault (the freezer zone icon gets flickering, with E1 displayed.)
a. Cut off power supply, remove the electrical box cover, check whether the
temperature sensor terminal on the control board is connected in sound
condition, insert it again, and then power on the system to observe whether
there is alarm or not.
b. If the alarm continues, cut off power supply, remove the freezer air duct
assembly, check whether the temperature sensor terminal is connected well,

insert it again, and then power on the system to observe whether there is
alarm or not;
c. If the alarm continues, cut off power supply, insert a new temperature sensor
into the cabinet terminal, power on the system to observe whether the
display panel will continue to alarm; If there is no alarm, replace the
temperature sensor, and restore the assembly after connecting the
temperature sensor terminal well.
d. If the alarm continues, cut off power supply, change the control board, and
then power on the system to observe whether there is alarm displayed on
the panel.
(4) Communication fault
a. Cut off power supply, remove the electrical box cover, check whether the
temperature sensor terminal on the control board is connected in sound
condition, insert it again, and then power on the system to observe whether
there is alarm or not.
b. If the alarm continues, cut off power supply, dismantle the display panel to
observe whether its terminal is connected in sound condition, insert the
terminal again, and then power on the system to check whether there is
alarm or not.
c. If the alarm continues, cut off power supply, replace the display panel, power
on the system after inserting its terminal well, and observe whether there is
alarm or not.
d. If the alarm continues, cut off power supply, change the main board, power
on the system after insert the terminal well, and check whether there is
alarm or not.
(5) Ambient temperature sensor failure
a. Cut off power supply, change the display panel, and power on the system
after inserting the terminal well, checking whether there is alarm or not.
(6) Door open alarm
When the door is open for more than 3 minutes, the display panel lights up, and
the buzzer issues the alarm sound at the frequency of 1Hz, indicating the door is
not closed tightly.
a. Open all the doors and close them again, checking whether the refrigerator
alarm is lifted or not.
b. If the alarm continues, cut off power supply, remove the electrical box cover,
check whether all terminals (door lamp switch and LED lamp terminal) are
connected well, insert the terminals again, close the doors, power on the
system, and then wait for 3 minutes, observing whether the display panel
lights off and there is the buzzer alarm.

c. If the alarm continues, for the compartment equipped with the proximity
switch, open the compartment door and then close it, leaving some gaps, and
observe whether the corresponding compartment LED lamp (if any) turns
off;If the LED lamp turns on/off as the door is opened/closed, the proximity
switch and magnet under test are qualified; otherwise, the proximity or
magnet is unqualified. Replace the unqualified proximity switch or magnet,
close the door, and then observe whether the door open alarm is eliminated
or not. For the compartment with no LED lamp, replace the proximity switch
or magnet directly, and then close the door, observing whether the door
open alarm is eliminated.
d. If the alarm continues, cut off power supply, change the display panel, and
wait for 3 minutes after power-on, observing whether the alarm is eliminated
or not.
4. Other fault phenomena and maintenance methods
(1) The refrigerator does not work. (The whole machineis not working, with the
compressor not started, the display panel not illuminated and the LED lamp OFF
when the door is opened.)
a. Check whether the refrigerator plug is properly plugged in; whether the
socket is electrified; and whether the socket voltage is normal.
b. Cut off power supply, remove the electrical box cover, observing whether the
terminals are properly connected, reinsert the terminals, and then power on
the system to observe whether the refrigerator can work normally.
c. Cut off power supply, change the main board, insert the terminal well, and
power on the system to observe whether the refrigerator can work normally.
(2) The compressor cannot start. (Other devices are working normally)
The compressor shutdown duringthe normal operation of the refrigerator does
not belong to this type of failure. Be sure to wait for at least 5 minutes before
starting the compressor again in the case of compressor shutdown. During the
following maintenance operations, if a power failure occurs, please wait for 5
minutes, and then power on the system to observe the compressor working, or
wait for 5 minutes after the system is powered on to observe whether the
compressor can work normally or not.
a. Cut off power supply, remove the electrical box cover, check whether the
terminals are properly connected, insert them again, and then power on the
system to observe whether the compressor can start normally.
b. If it still cannot start, cut off power supply, remove the compressor cover, check
whether the compressor protector is properly plugged in, reconnect it, and then
power on the system, observing whether the compressor can start normally or

not.
c. If it still cannot start, cut off power supply, replace the control board, and power
on the system after inserting well the terminal, observing whether the
compressor can start normally or not.
d. If it still cannot start, it is judged as the compressor fault, then replace the
compressor.
(3) LED lamp does not light up when the door is opened.
a. If the door open alarm occurs, check whether the door is closed and the door
lamp switch gets broken. (The LED lamp goes off when the door is open for
10 minutes.)
b. In the case of no door open alarm, cut off power supply, remove the electrical
box cover, check whether the terminals are properly connected, insert them
again, and then power on the system to observe whether the LED lamp lights
up.
c. If the LED lamp is still off when the door is opened, cut off power supply,
change the LED lamp, and then power on the system, observing whether the
LED lamp goes on.
(4) The freezer is cooling while the fridge is not cooling.
a. Hold down the combination keys of ‘Child Lock’ and ‘OK’ for 5 seconds to
enter the maintenance program, turn on the compressor, fan and air damper
manually, turn off the defrosting heater, and then open the door, put your
hand at the air duct outlet, checking whether there is cooling air blown out
from it.
b. If there is no obvious cooling air blown out from it, cut off power supply,
dismantle the fridge air duct assembly and the freezer air duct assembly, with
the terminals not removed, and then check
Whether there is frost jamming, whether there are heavy frosts formed
on the evaporator and air duct outlet. If yes, refer to the following Item
(8).
Power on the system, and check whether the fan is normal by reference
to Item (6).
Power on the system, enter the maintenance program, wait 2 minutes
before opening the air damper, and check whether the air damper can
be opened normally; if it cannot be opened normally, replace the air
damper; (It takes some time for the air damper to reset every time when
the system is powered on.)
c. Cut off power supply, replace the display panel, power on the system when
the door is opened, close the door for cooling 10 minutes, and then open the

fridge door, hold down the door lamp switch, checking whether there is cool
air blown out of the fridge air outlet.
d. Cut off power supply, replace the main board, power on the system when the
door is opened, close the door for cooling 10 minutes, and then open the
fridge door, hold down the door lamp switch, checking whether there is cool
air blown out of the fridge air outlet.
After completing the maintenance, assemble all the components, and power
on the system to perform the operation of ‘Item a’, ensuring there is cool air
blown out of the fridge air duct outlet. After that, cut off power supply, and
power on again.
(5) The refrigerator is not cooling.
Cut off power supply, remove the electrical box cover, check whether the
terminals on the main board are properly connected, insert them well again, and
then power on the system when the door is opened, wait for 10 minutes to
observe whether the refrigerator compressor can be started. If not, refer to Item
(2); and if yes, touch the left and right-side plates by hand to check whether they
are hot or not. If not hot, it is judged to be the refrigerant leakage fault, then
conduct vacuum pumping and charge the refrigerant again.
(6) The refrigerator air fan is not running.
a. Cut off power supply, remove the electrical box cover, check whether the
terminals on the main board are properly connected, insert them well again,
power on the system, hold down the combination keys of ‘Function’ and ‘OK’
for 5 minutes to enter the maintenance program; turn the fan on, open the
freezer door, and place your hand on the air duct to check if there is cool air
blown out.
b. Cut off power supply, remove the freezer air duct assembly, check whether
the terminals are properly connected, and whether there is such interference
as ice, wire harness or other foreign matter. If the terminals are loose or
detached, reconnect them well; if there is ice, perform the maintenance
program first to confirm whether the fan is in good condition or not. Ifyes,
refer to the operation of Item (8); and if there is the wire harness or foreign
object interference, reshape the wire harness or remove the foreign object.
Then, power on the system, hold down the combination keys of ‘Child Lock’
and ‘OK’ for 5 minutes to enter the maintenance program, turn on the fan,
checking whether the fan can be started normally. If the fan cannot start,
replace the freezing air duct assembly, and enter the maintenance program
again to check whether the fan can be started normally.
c. Replace the main board, power on the system to enter the maintenance

program, and turn on the fan, checking whether the fan can be turned on
normally.
(7) The refrigerator does not defrost.
a. Cut off power supply, remove the electrical box cover, and check whether the
terminals on the main board are properly connected.
b. After the power is cut off, remove the freezer air duct assembly, checking
whether the defrosting heater terminal is properly connected, whether the
terminal is sealed properly, and whether the terminal is in good condition.
c. After the power is cut off, remove the temperature fuse, and test the
temperature fuse with a multimeter to determine whether it is damaged or
not.
d. After the power is cut off, remove the defrosting heater, and measure the
resistance of the defrosting heater with a multimeter to determine whether
the defrosting heater is damaged.
e. After the power is cut off, replace the main board.
f. After the power is cut off, replace the display panel.
How to check the heater.
1) Dismantle the freezer air duct assembly by referring to the disassembly
method of "freezer air duct assembly", unplug the heater terminal, and set
the multimeter as illustrated below to test the heater resistance:
Test results should be between 228 ~ 252 Ω, beyond which the heater should be replaced.

How to check the fuse.
1) Dismantle the freezer air duct assembly by referring to the disassembly method
of "freezer air duct assembly", unplug the fuse terminal, set the multimeter as
illustrated below, and apply the electroprobe to the position as the picture
illustrates, so as to test whether the fuse is blown out:
If the multimeter buzzes and displays as below, it is judged as normal andneeds not to be
replaced; and if the multimeter maintains unchanged, the fuse is judged to be blown out and
needs to be replaced.

5. Special programs
Maintenance program (by holding down the combination keys of ‘Child Lock’
and ‘OK’)
(1) When you press the "Temp. Zone" key, the parameter items and adjustable
operating parameter values as listed in the following table will be displayed
from left to right and from top to bottom.
(2) The operating state can be adjusted by pressing the ‘Temp.’ key.
Parameter Items
Operating parameter values (0 indicates OFF,
and 1 indicates ON) and temperatures
Original value
Parameter set value
C1
Fridge temperature
d1
Freezer temperature
d2
Freezer evaporator temperature
CH
Ambient sensor temperature
C(Compressor)
0(OFF), 1(ON)
Cp(fridge air damper)
0(OFF), 1(ON)
FD(freezer fan motor)
0(OFF), 1(ON)
HD(freezer defrosting
heater)
0(OFF), 1(ON)
HF(air damper heater)
0(OFF), 1(ON)

FL(condenser fan)
Standby (this
feature not
actually available)
0(OFF), 1(ON)
(3) During the running of the maintenance program, the compressor keeps
rotating at 3000rpm.
(4) After the operating state is set, the refrigerator will run according to the
maintenance program.
(5) During the running of the maintenance program, you can press the ‘Temp.’
key to change the load running state at any time, or to view the real-time
value of each sensor.
(6) Exit conditions
The maintenance program keeps running for at most 3 hours, beyond
which it will automatically exit, with the normal operation program
restored.
When the refrigerator is powered off and then on again, the
maintenance program gets exited immediately.
6. Disassembly instructions for key components
How to disassemble the fridge air duct assembly.
(a)Pry off the two clamping jaws at the bottom of the fridge air hood (illustrated as the photo)
using an electric pen or a flat head screwdriver, screw off the two screws attached to the fridge
liner with the cross-head screwdriver, and remove the fridge air hood with both hands.
Table of contents
Other ChiQ Refrigerator manuals
ChiQ
ChiQ P45514ML1W/2 User manual

ChiQ
ChiQ CQRT10Y1GD1W User manual

ChiQ
ChiQ FCD418NE4D User manual
ChiQ
ChiQ FBM317NEI32 User manual

ChiQ
ChiQ MRF-262 User manual

ChiQ
ChiQ MRF-252WE User manual

ChiQ
ChiQ CSH431W User manual
ChiQ
ChiQ BCD-262 User manual
ChiQ
ChiQ CTT107BC User manual
ChiQ
ChiQ CSS618NWD User manual

ChiQ
ChiQ CBM117L42 User manual
ChiQ
ChiQ CSR129W User manual
ChiQ
ChiQ CQRT16Y3G2S User manual

ChiQ
ChiQ CBM251W User manual
ChiQ
ChiQ CQRD03Z1GD1MR User manual

ChiQ
ChiQ CQRT12Y3G2RS User manual
ChiQ
ChiQ CQRT09Y1GD1W User manual
ChiQ
ChiQ CQRM15Y1GD1RS User manual
ChiQ
ChiQ CQRT15Y3G2W User manual
ChiQ
ChiQ MRF-467W User manual
