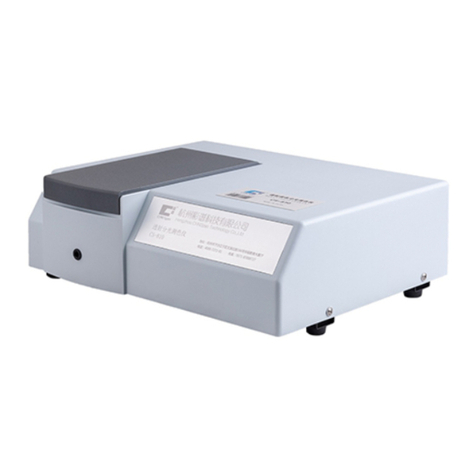
CHN Spec TH-100 User manual

TH-100
R
V. 2022.1
China’s leading expert of colorand gloss analysis
地址:杭州市江干区文渊北路166号华银教育大厦7楼
全国免费电话:4007-7272-81
传真:0571-85888727
杭州彩谱科技有限公司
HANGZHOU CHNSPEC TECHNOLOGY CO.,LTD
www.hzcaipu.com
雾度计

[一]雾度计使用须知----------------------------------------------01
[二]雾度计注意事项----------------------------------------------01
[三]雾度计功能描述----------------------------------------------02
[四]雾度计技术参数----------------------------------------------02
[五]外观结构介绍 -----------------------------------------------03
[六]测量流程图--------------------------------------------------04
[七]程序界面介绍------------------------------------------------04
[八]测量--------------------------------------------------------05
8.1 标样测量----------------------------------------------05
8.2 试样测量----------------------------------------------06
[九]数据查看----------------------------------------------------06
[十]设置--------------------------------------------------------08
10.1 测量设置----------------------------------------------08
10.2 系统设置----------------------------------------------12
10.3 校准--------------------------------------------------15
[十一]USB通信---------------------------------------------------15
[十二]参数介绍--------------------------------------------------16
[十三]异常处理分析----------------------------------------------17
[十四]附件------------------------------------------------------17
[十五]公司声明 -------------------------------------------------18
CATALOGUE

雾度计使用须知
雾度计注意事项
雾度计是一台设计用于测定塑料、薄膜、玻璃制品、LCD面板等透明、半透明平
行平面材料的雾度、总透光率的仪器。
雾度计广泛应用于实验室、工厂、或现场操作,足以在几乎所有应用领域的质量
控制中实现准确的雾度测量。
限制性保修的时间段是自购买本仪器开始起(时间:如一年)的时间。如果您的
仪器需要服务,请将仪器带到当地的销售部或通过网址:www.hzcaipu.com 联系
我们来进行维修。
为了避免仪器精度受影响,请不要将仪器私自拆开。如果由于私自拆卸机器或不
正确的使用而导致仪器损坏,请用户自行负责。
雾度计功能描述
技术参数
1、
2、
3、
4、
雾度计符合以下测试标准:ASTM D1003/D1044,ISO 13468/ISO 14782,JIS K
7105,JIS K 7361,JIS K 7136,GB/T 2410-2008。
雾度计满足CIE-A、CIE-C、CIE-D65三种标准照明光源下的雾度与全透过率测
量。
雾度计满足补偿法测试,可提供更准确的测试结果。
雾度计拥有开放式的测量区域,可以满足任意大小的样品测量。
雾度计采用5.0寸TFT显示屏,拥有良好的人机交互界面。
雾度计提供专业的雾度以及透过率的测量分析软件,可以满足用户对测试数据的
分析以及管理。
1、
2、
3、
4、
5、
6、
1、
2、
3、
4、
5、
6、
7、
8、
9、
10、
11、
12、
本机属精密仪器,不能承受跌落导致的碰撞,使用时请放置于相对平整的地方。
本机不能防潮或抗潮,受潮或液体溅入易损坏本机。
本机的屏幕是由玻璃制成,受到异常外力或锐器的作用易损坏。
本公司建议使用原配电源适配器。
为保障本机正常工作,请不要在过冷或过热的地方存贮和使用,也勿将本机放置
在潮湿或阳光长期直射的地方,更不要在强震等恶劣的环境中使用本机,以免发
生意外。
本机是精密仪器,使用时请避开强电磁干扰。
为保证测量准确,测试时请保持仪器平稳,不要摇晃。
本机属精密仪器,使用完毕请将仪器关机保管。
请将仪器存放在干燥的地方。
禁止对积分球内部进行清洁。
如果仪器发生故障,请不要尝试自行修理,我们的客户服务部门会快速的为客户
提供帮助。
本机及说明书如有进一步改进或补充,恕不另行通知。如有疑问,敬请垂询本公
司。
遵循标准 ASTM D1003/D1044,ISO 13468/ISO14782,JIS K 7105,JIS K 7361,JIS K 7136,
GB/T 2410-08
光路结构 0/d
光源 CIE-A,CIE-C,CIE-D65
光谱响应 CIE光谱函数Y/V(λ)
量程 0-100%
测量参数 ASTM和ISO双标准下的雾度,透过率
分辨率 0.01%
重复性 0.08
显示 5英寸TFT液晶屏
测量口径 21mm
样品大小 厚度≤145mm
存储数据 20000个数值
接口 USB接口
电源 DC12V/3A
工作温度
储藏温度
体积 长X宽X高:310mmX215mmX540mm
重量 6kg
标配 PC管理软件(Haze QC)
选配 测量夹具、雾度标准片、定制口径板
5 ̄40℃,相对湿度80%或更低(在35℃下),无水气凝结
-20℃ ̄45℃,相对湿度80%或更低(在35℃下),无水气凝结
01
www.hzcaipu.com 02 www.hzcaipu.com

显示屏
向上选择键
返回键
测试键
USB接口
电源接口
铭牌
1
1
6
向下选择键
出光口
测试口
电源开关
6
7
8
9
7
10
10
2
2
3
3
4
4
11
5
5
9
8
外观结构介绍 测量流程图
程序界面介绍
USB通信
数据查看测量
设置
A-1
打开电源开关
校准
设置(测量设置、系统设置)
标样测量 试样测量
保存/不保存测量结果
完成
11
03
www.hzcaipu.com 04 www.hzcaipu.com

数据查看
数据查看
T001 2017/11/05 09:00:350
T002 2017/11/05 11:09:300
T003 2017/11/05 11:10:451
标样名称 试样数 测试时间
[Enter]-标样操作 [Cancel]-返回
C-1
B-2
查看标样
删除
编辑名称
试样测量
SXXX ASTM标准/C光源 HAZE+TRAN
切换到试样测量 保存标样数据
[Enter]-测量 [Cancel]-返回
测量值 差值 结果
H:
B-2
T:
在上面的标样测量完成并保存后,按“测试样”按钮,即可进入该标样下的“试样测量”
界面,按“Enter”键进行测量,“滴”声后完成试样测量,查看测量结果。再次按下“
测试”键可进行新的试样测量。与标样测量相同,试样测量在未保存时,在测量结果的
标题栏中,第一列名称中的试样名称显示为“Sxxx”,保存后则显示为保存后的名称。
在“数据查看”界面下,同样可以进行试样测量。通过“Up”、“Down”键选择已有
的标样,按“Enter”键进入查看所选的标样。然后在“查看标样”页面下,按
“Enter”键,进入该标样下的试样查看界面,按“Enter”键,调入该试样进入试样测
量界面,按“Enter”键进行测量。“滴”声后完成试样测量,查看测试结果。再次按
下“Enter”键进行新的试样测量。
注:试样测量前请先设置容差。(参看容差设置)
试样测量
05
www.hzcaipu.com 06 www.hzcaipu.com
测量
标样测量
A-1
TXXX ASTM标准/C光源
雾度(H):
透过率(T):
HAZE+TRAN
切换到试样测量 保存标样数据
[Enter]-测量 [Cancel]-返回
B-1
B-1
①标题栏:显示当前页面主要的功能信息,包括当前时间等信息。
②工作区:显示页面下属子菜单的主要功能。
程序基本操作方法:
通过“Up”、“Down”选择键,选择“相应的功能按钮”,“Test”键进入“选择的
功能界面”进行相应操作,“Cancel”键返回上一步骤。
测量:用户可以测量样品的全透过率和雾度参数,测量试样与标样之间的差异以及查看
所保存的测试记录等。
数据查看:在该页面中用户可以查看已保存的标样下的各项参数,并可对选择的样品进
行查看试样、删除和编辑名称操作。
设置:用户可以对仪器测量条件的各项参数进行选择和设置。
USB通信:用户可以通过USB接口与PC机连接进行数据传输,以及进行上位机操作。
标样放置完成后,按机器的“Enter”键,“嘀”声后完成测量,查看测量结果。测试
结果的标题栏中,分别显示了标样名称和测试结果的测试标准和参数。当标样未保存时,
标样名称一律显示为“Txxx”,当按“保存”按钮保存标样后,名称显示为保存之后的
标样名。测试标准和参数可在测量前在“测量设置”中进行设置(参考设置章节说明)。
标样测量

设置
测量设置
C-1
C-2
D-1
查看试样
设置
测量设置
测量参数
容差设置测量模式 平均设置
光源选择 参照标准
S000 2017/11/05 11:10:45
试样名称 测试时间
[Enter]-试样操作 [Cancel]-返回
C-2
D-1
E-1
调入标样
删除
编辑名称
测量设置 系统设置
校准
通过“Up”、“Down”选择键选择所需查看的试样,按“Enter”键,即可弹出菜单窗
口,通过“Up”、“Down”选择键,进行调入试样、删除、编辑名称等操作。
调入试样:查看该试样的测试数据。
删除:将删除该试样下的所有试样测试记录。
编辑名称:编辑更改所选样品的名称。
07
www.hzcaipu.com 08 www.hzcaipu.com
通过“Up”、“Down”选择键选择所需查看的标样,按“Test”键,即可弹出菜单窗口
,通过“Up”、“Down”选择键,进行查看标样、删除、编辑名称等操作。
查看标样:查看该标样的测试数据。
删除:将删除该标样下的所有试样测试记录。
编辑名称:编辑更改所选标样的名称。
测量设置:在该页面下,用户可以对仪器测量中的光源、容差、测量平均数、测试标准
、测试参数等选项进行设置。
系统设置:在该页面下,用户可以对语言、时间、电源管理进行设置,以及对仪器进行
恢复出厂设置,查看本仪器的版本号信息。
校准:在该页面下,用户可以对仪器进行校准操作。

E-1
E-2
[Enter]-确认并退出 [Cancel]-返回
E-2
参数设置
雾度
透过率
雾度+透过率
通过“Up”、“Down”选择键选择,按“Test”键进入“测量设置”页面。
参数设置:通过“Up”、“Down”选择键选择“显示设置”,按“Enter”键进入显示
设置页面。按“Up”、“Down”键,选择您所需要显示的测量参数,按“Enter”键确
认。当您选择某一项后,测量页面将显示您所选的内容。
E-3
光源选择:通过“Up”、“Down”选择键选择“光源选择”,按“Enter”键进入光源
设置页面。本页面下可以选择在测量页面显示任一种光源下的测量数据,通过“Up”、
“Down”选择键进行选择,按“Enter”键确认。
E-4
标准选择:通过“Up”、“Down”选择键选择“标准选择”,按“Enter”键进入标准
选择页面。按“Up”、“Down”键,选择您所需要测试标准,按“Enter”键确认。当
您选择某一项后,在进行测试时会按照您选择的标准进行。标准进行切换之后需要重新
进行校准。
E-5
测量模式:通过“Up”、“Down”键选择“测量模式”,按“Enter”键进入测量模式
页面。在本页面下通过“Up”、“Down”键选择“快速模式”或“高精度模式”。快速
模式下,透过率显示精度为0.1,雾度<10时,雾度显示精度0.01,雾度≥10时,雾度显
示精度0.1;高精度模式下,透过率和雾度显示精度均为0.01。
[
Enter
]-确认并退出
[
Enter
]-确认并退出
[Cancel]-返回
[Cancel]-返回
E-4
标准选择
ISO(国际)
ASTM(美国)
高精度模式
快速模式
[Enter]-确认并退出 [Cancel]-返回
E-3
光源选择
A光源
C光源
D65光源
E-5
测量模式
09
www.hzcaipu.com 10 www.hzcaipu.com

系统设置
E-7
E-6
平均设置:通过“Up”、“Down”键选择“平均设置”,按“Enter”键进入平
均设置页面。在本页面下通过“Up”、“Down”键修改数值,按“Enter”键确认。
F-2
语言选择:通过“Up”、“Down”选择键选择“语言选择”,按“Enter”键进入语
言设置页面。本仪器提供中文、英文两种界面语言,通过“Up”、“Down”键选择,
按“Enter”键确认。
F-1
通过“Up”、“Down”选择键选择,按“Enter”键进入该“系统设置”页面。“系
统设置”页面中可进行:语言设置、时间设置、电源管理、恢复出厂、查看版本等操作。
E-6
容差设置 [Up],[Down]-修改
2.0
E-7
F-1
平均设置
系统设置
语言选择
恢复出厂 版本
时间设置 电源管理
[Up],[Down]-修改
1语言选择
English
中文
F-2
容差设置:通过“Up”、“Down”键选择“容差设置”,按“Enter”键进入容
差设置页面。在本页面下通过“Up”、“Down”键修改数值,按“Enter”键确认。
11
www.hzcaipu.com 12 www.hzcaipu.com

F-4
电源管理:通过“Up”、“Down”选择键选择“电源管理”,按“Enter”键进入电
源管理页面。可对仪器的背光时间进行修改设置。“Up”、“Down”键选择修改项,
“Enter”键确认,再按“Up”、“Down”键修改数值,按“Cancel”键选择保存、
退出。
F-3
时间设置:通过“Up”、“Down”选择键选择“时间设置”,按“Enter”键进入
时间设置页面。设置修改本仪器的测量显示时间,可对年、月、日、时、分进行设
置,“Up”、“Down”键选择修改项,“Test”键确认,再按“Up”、“Down”
键修改数值,按“Cancel”键选择保存、退出。
F-4
F-5
恢复出厂:通过“Up”、“Down”选择键选择“恢复出厂”,按“Enter”键进入恢
复出厂页面。恢复出厂后,所有的数据将会被删除,并且设置系统将会恢复到默认设
置。
F-5
F-3
电源管理
背光时间: 秒
F-6
仪器型号:xxx
产品序列号:xxxxxx
软件版本号:xxx
杭州彩谱科技有限公司
扫微信二维码保修提升3年
F-6
版本:通过Up、Down选择键选择“版本”,按“Enter”键进入“版本查看”页面。
显示本仪器的版本号信息,包括仪器型号、产品序列号、软件版本号。
警告:所有数据将会被删除
是否恢复出厂设置?
是 否
13
www.hzcaipu.com 14 www.hzcaipu.com

校准
G-1
根据仪器界面提示,保持测试口对准空气,按下仪器右边侧面的按钮进行校准操作。
H-2
当USB线插入USB接口,正常连接时如上图显示。
校准
请保持测试口(haze-port)对准空气,
并点击[Enter]键进行校准
[Enter]-校准 [Cancel]-退出
G-1
上次校准的时间为:2019/11/08 12:45:12
[Cancel]-返回
H-2
USB 已连接
当前为ASTM模式
参数介绍
雾度
漫散射会降低物体的成像质量。材料内部细小的颗粒或样品表面会引起散射,散射光会
散射到不同的角度且每个角度的光密度都很小,这会导致对比度的降低,样品会形成如
牛奶或云雾状的外观,这一现象称为雾度。根据ASTM D1003标准,雾度是超出2.5°散
射的透射光所在全部透射光的百分比。
透明度评估条件
透明产品外观具有光泽、颜色和透明度等特性。透明度尤为重要,其评估条件为:透光
率,雾度等。透过率是全部透射的光与入射光的比率。它会随材料表面对光的反射和吸
收而降低。
15
www.hzcaipu.com 16 www.hzcaipu.com
USB通信
H-1
在主页面,通过“Up”、“Down”选择键,选择“USB通信”图标,按“Enter”键,
进入“USB通信”页面。当USB线未插入USB接口或USB线与USB接口接触不良时,将
如图显示。插入USB接口或重新插入即可正常连接,进行上位机操作。
[Cancel]-返回
H-1
USB未连接
请插入USB,或重新插入

异常处理
1、仪器无法开机
2、开机后不能进
入主程序
3、测量结果报错
4、测试数值异常
电源连接可能异常
开机校准过程可能异常
容差设置可能异常
1、样品与测量口贴合紧密与否
2、样品表面损伤是否较大
检查电源接口处是否接触良好,并
插好电源
重新按照要求进行校准保证校准顺
利通过
检查容差设置并调整
1、检查样品与测量口的贴合情况,
保证紧密贴合
2、检查样品表面情况,保证样品是
完好的对测量没有影响的
异常情况 分析 处理方法
异常处理分析
本公司向用户承诺,我们生产的雾度计,保修期限为购买之日起的三年时间内有
效,正常使用情况下非人为造成的故障问题,本公司将负责给予免费维修,超过
保修期或人为因素导致的故障,本公司将提供维护,将收取维修材料及相关费用。
本公司对于第三者因使用本产品引起的任何损失或索赔不负任何责任。
本公司对由于因故障、维修或断电造成的数据丢失而导致的任何损害或损失均不
负任何责任。为防止重要数据的丢失,请务必对所有重要数据进行备份。
本产品中预置的所有作品之版权归本公司所有,受《中华人民共和国著作权法》
保护。
我公司出售本产品的行为不代表向用户转让或授予与作品版权相关的任何权利。
本说明书所提到的产品规格及信息仅供参考,内容会随时更新,恕不另行通知。
●
●
●
●
●
●
公司声明
17
www.hzcaipu.com
USB数据线 数据管理软件U盘
比色皿夹具 薄膜夹具 标准片 5mm口径板
附件
标配件
选配件
外部电源适配器
5mm
7mm口径板
7mm
10mm口径板
10mm
18 www.hzcaipu.com
防尘盖

TH-100
Haze Meter
OPERATION MANUAL
www.hzcaipu.com/en
www.chnspec.com
Service hotline:+86 571 85888707
WARNING
Please do not disassemble the product without the assistance of
customer support center, If you have any questions, please contact the
local agency.
China’s leading expert of color
and gloss analysis
R
V. 2022.1
Address:No.166,Wenyuan North Road,Jianggan District,Hangzhou City,China

CATALOGUE
01
01
02
02
03
04
05
05
06
06
07
08
08
12
15
15
[ I ]Haze Meter Term of Use
[ II ]Haze Meter Note
[ III ]Haze Meter Function
[ IV ]Haze Meter Technical Data
[ V ]Appearance and Structure
[ VI ]Measurement Flow Chart
[ VII ]Interface Introduction
[ VIII ]Measurement
8.1 Target Measurement
8.2 Sample Measurement
[ IX ]Data view
[ X ]Settings
10.1 Measurement Setup
10.2 System Setup
10.3 Calibration
[ XI ]USB
16
17
17
18
[ XII ]Parameter introduction
[ XIII ]Trouble Shooting
[ XIV]Accessories
[ XV ]Company’s Statement

1.Haze meter is designed for plastic, films, glass, LCD panel, touch
screen and other transparent and semi-transparent materials haze and
transmittance measurement.
2. Haze meter can be widely used in labs, factories or worksites, it can
meet haze measurement requirement for all industries.
3. Warranty time is one year from the purchasing date. If your instrument
need after-sales service, please bring it to local distributor or contact us
on website: www.chnspec.com
4.To avoid damage on instrument accuracy or precision, please do not
disassemble the instrument. Damage to the instrument caused by
disassembly or improper use is not included in the warranty.
1.Dropping or collision is dangerous for this precision instrument . please
put it on the relatively flat place to start your measurement.
2.Moisture or liquid splashing will damage the instrument. It is not
damp proof.
3.Large force, or sharp objects may easily damage the glass screen .
4.Please use our original adapter if possible.
5.Do not use or store it in too hot or cold environment, neither wet nor
sunlight shining places. Dangerous to use it under strong vibration.
Please take care and avoid accidents.
6. Keep it away from strong magnetisms. It interfere the precision
instrument.
7.Please keep the instrument steady; do not shake the instrument in
usage
8.Please shut down the instrument after using
9.Please store the instrument in a dry place
10.You are not permitted to clean the interior of integrating sphere.
11.Please contact us if the instrument get a problem, don`t try to fix it
yourself.
12.This instrument and its instructions are subject to further improvement
or supplement without prior notice.
Haze Meter Terms of use
Haze Meter Notes
1. Haze meter conforms to standards: GB/T 2410, ASTM D 1003, ISO
13468 , ISO 14782 and GB/T 2410-2008.
2. Haze meter can provide haze and transmittance value under CIE-A,
CIE-C and CIE-D65 light sources.
3. Haze meter contains compensation method which provides higher
accuracy on test result.
4. Open sample measurement area to make it can measure samples at
any sizes.
5. Haze meter adopts 5.0 inch TFT display screen for friendly interface.
6. Haze and transmittance analysis software to meet customer's different.
requirementrequirement on data analysis and management.
Haze Meter functions
Haze Meter Technical Data
01 02
www.chnspec.com www.chnspec.com
USBInterface
20000 valuesMemory
Thickness≤145mmSample Size
5 inch TFT LCD screenScreen
0.08Repeatability
0.01%Resolution
0-100%Measurement Range
21mmMeasuring caliber
0/dGeometry
CIE Luminosity function Y/V (λ)Spectral Response
Measurement parameter ASTM and ISO (HAZE),Transmittance (T)
Standard ASTM D1003/D1044,ISO 13468/ISO14782,JIS K
7105,JIS K 7361,JIS K 7136,GB/T 2410-08
Working
Temperature
Light Source CIE-A、CIE-C、CIE-D65
Power DC12V/3A
5~40℃,Relative humidity 80% or lower (35℃)
no condensation

Measurement flow chart
Appearance and structure
03 04
www.chnspec.com www.chnspec.com
Switch on the instrument
Calibration
Setting (meas setup, system setup)
Target Measure
Save/not save the test result
Finish
Sample Measure
UP
DOWN
1
2
3
4
CANCEL
5
Test Aperture
Display Screen
TEST
Light Exit Aperture
6
7
8
USB
Nameplate
9
Power Interface
11
10
Switch on-off
12
3
4
6
5
10
7
11
9
8
Optional Measurement Fixture, Haze Standard,
Customize caliber board
PC management software(Haze QC)
Standard
Accessory
LxWxH:310mmX215mmX540mm
Size
Storage
Temperature
6kg
Weight
-20℃~45℃,Relative humidity 80% or lower (35℃)
no condensation

A-1
Main interface
①Title: Show the page function
including time and standard.
②Working Area: Show the main
function of submenu.
③Condition area: display current
conditions of the current page
Operation:
Press “up” or “down” to choose the function, press “Test” to confirm your
choice. Press “cancel” will go back to previous step.
Measure:
We can measure haze and transmittance. Compare the difference between
target and sample. Save the test value.
Data View:
We can view the saved target value, sample value under the target, edit the
sample name and delete the sample.
Setting :
We can set measurement parameters.
USB:
We can connect instrument with PC for data transfer and measure on PC.
Interface Introduction
Measurement
USB
Data ViewMeasure
Settings
A-1
05 06
Target measure
Switch to sample Save target data
TXXX ASTM/C HAZE+TRAN
[Enter]-Measure [Cancel]-Quit
H:
T:
B-1
Sample measure
SXXX
Measured Difference Result
ASTM/C HAZE+TRAN
[Enter]-Measure [Cancel]-Quit
H:
T:
B-2
B-1
After the standard sample is placed, press the “Enter” button of the
machine, After measurement,the test result can been in on instrument screen.
Separately displaying the standard sample name and the standard and
parameters of the test result in the title bar of the measurement
results.When the standard sample is not saved, the name of the standard
sample always displayed as “Txxx”. When the standard sample is saved by
pressing the “Save” button, the name appears the saved standard
sample name. Test standard and parameters can be set in setting
interface before. .measurementmeasurement.(Refer to the setup chapter
description)
Standard Sample Measurement
B-2
After the standard sample measurement is completed and saved, press the
“Enter” button to enter the “Sample Measurement” interface under the
standard sample, press the “Enter” button to measure, after the measurement
is finished, we can see the test result on screen. Press the "Enter" button
again to make a new sample test result. As with the standard measurement,
when the sample measurement is not saved, the name of the sample always
displayed as “Sxxx”. When the sample test result is saved by pressing the
“Save” button, the name appears the saved sample name.
Sample Measurement
www.chnspec.com www.chnspec.com
Switch to sample Save target data

Data View
T Name S Num Testing time
[Enter]-Select [Cancel]-Quit C-1
T000 1 2018/01/06 11:00:00
Sample View
Delete
Editing name
Sample View
S Name Testing time
[Enter]-Select [Cancel]-Quit C-2
S000 2018/01/06 11:00:00
Sample View
Delete
Editing name
Press the “Up” or “Down” buttons to select the standard sample you want to
view. Press “Enter” button, the menu window will pop up. Press the “Up” or
“Down” button to check the standard sample. Delete, Edit Name, etc.
View the standard sample: View test data for this standard.
Delete: All sample test records under this standard sample will be deleted.
Edit Name: Edit the name of the selected standard sample.
Data View Settings
Measure Setup
07 08
C-1
Press the “Up” or “Down” buttons to select the sample you want to view. Press
“Enter” button, the menu window will pop up. Press the “Up” or “Down” button
to transfer into the sample. Delete, Edit Name, etc.
Transfer into the sample: View test data for this standard.
Delete: All sample test records under this sample will be deleted.
Edit Name: Edit the name of the selected sample.
C-2
D-1
Settings
D-1
Measure Setup System Setup
Cal
Measurement Settings: User can set parameter,light source,reference,
tolerance and average.
System Settings: User can set language, time,power,reset all and version.
Cal:User can do calibration for haze meter.
Mode
Measure Setup
Parameter
Tolerance Average
Light choice Reference
E-1
www.chnspec.com www.chnspec.com

09 10
www.chnspec.com www.chnspec.com
E-1
Press the “Up” and “Down” button to select and press “Enter” button to enter the
“Measurement Settings” interface.
E-2
[Enter]-Select [Cancel]-Quit
E-2
Parameter
Haze
Tran
Haze+Tran
Press "up" or "down" to select parameter, and press “Enter” to enter the setting
page. Press "up" or "down" to select parameter you need, press “Enter” to confirm
the choice.
E-3
Light Choice: Choose Light choice by pressing "up" or "down". User can select the
measurement data under any light source on the measurement page by pressing
“Enter”. User can select the light source by pressing "up" or "down",press "Enter"
to confirm your choice.
[Enter]-Select [Cancel]-Quit
E-3
Light choice
Light A
Light C
Light D65
E-4
Reference:Choose reference by pressing "up" or "down", press "Enter" to
confirm. User can select the measurement standards ASTM or ISO. When
you select the standard, the test is performed according to the standard.
Calibration is required after the standard is changed.
[Enter]-Select [Cancel]-Quit
E-4
Reference ISO
ASTM
E-5
Mode:Choose reference by pressing "up" or "down", press "Enter" to
confirm. User can select “Fast mode” or “High precision mode”.
Fast mode means when haze <10%,Resolution is 0.01,when haze≥10%,
Resolution is 0.1,but the resolution of Transmittance is 0.1.
High precision mode means the Resolution of Haze and Transmittance is 0.1.
[Enter]-Select [Cancel]-Quit
E-5
Mode High precision mode
Fast mode

System Setup
F-2
Language:Instrument support two languages English and Chinese.
User can choose language by pressing "up" or "down", press "Enter"
to confirm.
F-1
Press "up' or "down" to select the system setup,press "Enter"
to enter into the system setup page.User can set language,
time,power,reset all and view instrument version.
F-1
System Setup
Language
Reset All Version
Set time Power
E-7
Average:Choose average by pressing "up" or "down", press "Enter"
to confirm. User can modify the average value by press "up" or
"down",press "Test" to confirm it.
E-7
Average [Up],[Down]-Modify
1
Language
English
中文
F-2
E-6
Tolerance: Choose Tolerance by “Up” and “Down” , press "Enter" to confirm.
User can modify the value by pressing “Up” and “Down” and press “Enter” to
comfirm.
E-6
Tolerance [Up],[Down]-Modify
0.5
11 12
www.chnspec.com www.chnspec.com

F-3
Time setting: User can set the instrument time such as year,month,
date,hour and minute. Press "up" or "down" we can change the
value,press "cancel",we can choose save or exit.
F-3
Y M D H m
F-4
Power:User can set the instrument lighting time. Press "up" or "down",
we can setting the lighting time. Press"cancel" to save or exit.
F-4
F-5
Reset all: If user do reset all, all saved data will be deleted and
setting will revert to default settings.
F-5
Power
Lighting Time: s
F-6
Instrument Model:
Serial Number:
Version:
F-6
Version:User can see instrument mode,serial number and
instrument version.
Warning:All data will be
deleted!
Initial?
Yes No
13 14
www.chnspec.com www.chnspec.com
Table of contents
Other CHN Spec Measuring Instrument manuals
