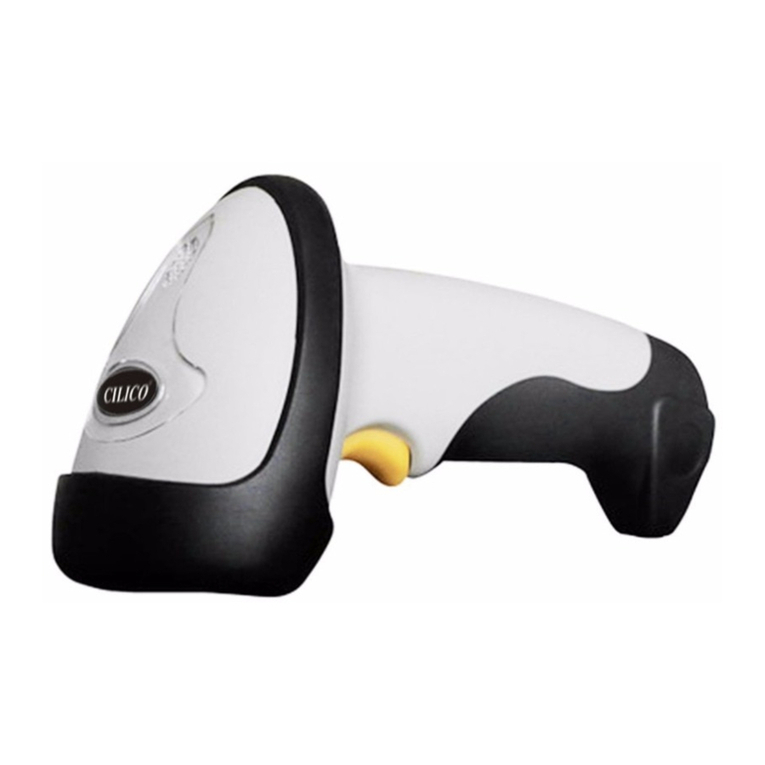
CILICO IOT800 User manual

IOT800 Wireless Barcode Scanner
User Manual
CILICO MICROELECTRONICS LIMITED
Version:V1.1
Date :2018/3/16

CILICO MICROELECTRONICS LIMITED
Add: 4th floor, Huixin IBC Tower A, No. 1 Zhangbayi Road, Xi'an High-tech Zone, China
2
Catalogue
Product Introduction........................................................................................................... 3
Introduction of General User Mode....................................................................................5
Introduction of Secondary Development User Mode......................................................... 5
1Function Introduction........................................................................................................6
1.1 Eight Modes for Transmission.............................................................................. 6
2 Quick Guide..................................................................................................................... 6
2.1Power on.................................................................................................................6
2.2Indicative Definition.............................................................................................. 6
2.2.1 LED Description................................................................................................ 6
2.2.2Beeper Description..............................................................................................6
2.3 Power off............................................................................................................... 7
3 Operation Instructions......................................................................................................7
3.1 USB Mode.............................................................................................................7
3.1.1 USB Keyboard Mode......................................................................................... 7
3.1.2 USB Serial Port Mode........................................................................................8
3.2 Bluetooth Mode.....................................................................................................8
3.2.1 Bluetooth HID Mode..........................................................................................8
3.2.2 Bluetooth SPP Mode.......................................................................................... 9
3.3 Network Mode.................................................................................................... 10
3.3.1 WiFiDirect Transmission Mode.......................................................................11
3.3.2 TCP Mode........................................................................................................ 13
3.3.3 UDP Mode....................................................................................................... 13
3.4 Iot Mode..............................................................................................................14
3.4.1 MQTT Standard Iot Mode;.............................................................................. 15
3.4.2 Amazon AWS-IOT Mode................................................................................ 16
3.5 Scanning Information..........................................................................................18
3.6 Inventory............................................................................................................. 18
3.6.1 Inventory Mode................................................................................................19
3.6.2 Inventory Statistics...........................................................................................19

CILICO MICROELECTRONICS LIMITED
Add: 4th floor, Huixin IBC Tower A, No. 1 Zhangbayi Road, Xi'an High-tech Zone, China
3
3.6.3 Inventory Upload............................................................................................. 19
3.6.4 Inventory Clearing........................................................................................... 20
3.7 System Setting.....................................................................................................20
3.7.1 Light Settings................................................................................................... 20
3.7.2 Chinese Settings...............................................................................................21
3.7.3Storage Setting.................................................................................................. 22
3.7.4 Target Encoding...............................................................................................22
3.7.5 End Settings..................................................................................................... 22
3.7.6 Keyboard Settings............................................................................................ 23
3.7.7 Time Settings................................................................................................... 23
3.7.8 Factory settings................................................................................................ 24
3.8 System Information.............................................................................................25
3.9 Power off and Reboot......................................................................................... 26
4. Barcode system configuration..................................................................27
Product Introduction........................................................................................................... 4
Introduction of General User Mode .............................................................................. 5
Introduction of Secondary Development User Mode......................................................... 5
1 Function Introduction.......................................................................................................6
1.1 Eight Modes for Transmission.............................................................................. 6
2 Quick Guide..................................................................................................................... 6
2.1Power on.................................................................................................................6
2.2Indicative Definition...............................................................................................6
2.2.1 LED Description.................................................................................................6
2.2.2Beeper Description.............................................................................................. 6
2.3 Power off............................................................................................................... 7
3 Operation Instructions......................................................................................................7
3.1 USB Mode............................................................................................................. 7
3.1.1 USB Keyboard Mode......................................................................................... 7
3.1.2 USB Serial Port Mode........................................................................................8
3.2 Bluetooth Mode.....................................................................................................8

CILICO MICROELECTRONICS LIMITED
Add: 4th floor, Huixin IBC Tower A, No. 1 Zhangbayi Road, Xi'an High-tech Zone, China
4
3.2.1 Bluetooth HID Mode..........................................................................................8
3.2.2 Bluetooth SPP Mode.......................................................................................... 9
3.3 Network Mode.....................................................................................................10
3.3.1 WiFiDirect Transmission Mode.......................................................................11
3.3.2 TCP Mode........................................................................................................ 13
3.3.3 UDP Mode........................................................................................................14
3.4 Iot Mode.............................................................................................................. 15
3.4.1 MQTT Standard Iot Mode;.............................................................................. 16
3.4.2 Amazon AWS-IOT Mode................................................................................ 17
3.5 Scanning Information..........................................................................................18
3.6 Inventory............................................................................................................. 19
3.6.1 Inventory Mode................................................................................................ 19
3.6.2 Real-time Date..................................................................................................20
3.6.3 Inventory List................................................................................................... 20
3.6.4 Data Upload......................................................................................................20
3.6.5 Inventory Clearing............................................................................................21
3.7 System Setting.....................................................................................................21
3.7.1 Light Settings................................................................................................... 21
3.7.2 Chinese Settings............................................................................................... 22
3.7.3Storage Setting.................................................................................................. 23
3.7.4 Target Encoding............................................................................................... 23
3.7.5 End Settings......................................................................................................24
3.7.6 Keyboard Settings............................................................................................ 24
3.7.7 Time Settings....................................................................................................24
3.7.8 Factory settings................................................................................................ 26
3.8 System Information............................................................................................. 26
3.9 Power off and Reboot..........................................................................................27
4. Barcode system configuration.......................................................................... 28

CILICO MICROELECTRONICS LIMITED
Add: 4th floor, Huixin IBC Tower A, No. 1 Zhangbayi Road, Xi'an High-tech Zone, China
5
Product Introduction
IOT 800 fashion barcode scanner
Touch Wi-Fi & Bluetooth dual-wireless stylish 2D barcode scanner
Fast, accurate and easy to operate - the best choose to meet your staff and business operations
As the first wifi, bluetooth dual-wireless scanner. IOT800 product enjoys 1.54" LCD and
capacitive touch screen, using full lamination process, with smooth operation and stylish
appearance. The core control chip has a dominant frequency up to 1 GHz, running extremely fast.
Product software design is featured with a powerful direct use, as well as a wealth of secondary
development capabilities.
Cradle
LCD
Key

CILICO MICROELECTRONICS LIMITED
Add: 4th floor, Huixin IBC Tower A, No. 1 Zhangbayi Road, Xi'an High-tech Zone, China
6
Introduction of General User Mode
Bluetooth HID Mode: IOT800 switches to Bluetooth HID Mode, and users use the bluetooth device
for searching, matching and connection, then it can be used directly
Wi-Fi Direct Transmission Function: IOT800 switches to WiFi TCP Mode, and IOT800 direct
transmission plug-in is opened on the target computer to scan the generated WiFi user name password
QR barcode, and IP of the target-end and the port QR code, then the scanned barcode can be directly
sent to the target computer
USB Keyboard Mode: IOT800 switches to USB Keyboard Mode, insert the USB cable then the
barcode can be directly scanned to PC using wired mode.
Introduction of Secondary Development User Mode
Bluetooth SPP Mode: Bluetooth SPP Mode is a Bluetooth serial port mode. After the secondary
development, the user can directly search and connect IOT800 through his/her own software for
operation.
USB Serial Port Mode: The secondary development is conducted for USB serial port mode, and the
user can control IOT800 through software.
Wifi TCP/UDP Mode: IOT800's TCP/UDP Mode combines with its own business software through
secondary development, which can directly send the scanned barcode to the server and also support
multiple IOT800s to send data to the server.
MQTT Mode: MQTT is an IoT protocol Mode. Through secondary development, data can be directly
uploaded by IOT800 to the cloud server.
AWS-IoT Mode: Through secondary development of IOT800, barcode scanner can upload data to
Amazon Cloud Server.

CILICO MICROELECTRONICS LIMITED
Add: 4th floor, Huixin IBC Tower A, No. 1 Zhangbayi Road, Xi'an High-tech Zone, China
7
1 Function Introduction
1.1 Eight Modes for Transmission
Network TCP (client);
Network UDP;
Bluetooth Serial Port (client)
Bluetooth Keyboard;
USB Virtual Serial Port;
USB Keyboard;
MQTT Standard Iot Mode;
Amazon AWS-Iot Mode;
2 Quick Guide
2.1Power on
Long press IOT800 scan button for 1s and wait about 3s, the scanner sends a start completion
sound. Note: When the scanner is not fully started, the scan button will not respond to any scanning
operation.
2.2Indicative Definition
2.2.1 LED Description
LED Indicator
Green indicator flashes
Successfully read the barcode while sending a short sound (high frequency)
Blue indicator flashes
Successful setting
Red indicator
The red indicator is always on in the charged state and goes out after the full
charge.
Red indicator flashes (1Hz)
Battery failure
Red indicator flashes (4Hz)
External supply voltage is too high
2.2.2Beeper Description
Beeper Description
Four high-frequency short
sounds (tone rises)
Indicates power on
A high-frequency short sound
(tone rises)
Indicates successful reading of the barcode
Two high-frequency short
Indicates that the cache failure

CILICO MICROELECTRONICS LIMITED
Add: 4th floor, Huixin IBC Tower A, No. 1 Zhangbayi Road, Xi'an High-tech Zone, China
8
sounds (tone rises)
Four high-frequency short
sounds (tone falls)
Indicates power off
Three high-frequency short
sounds (tone rises)
Indicates correct setting
2.3 Power off
Under normal working conditions, long pressing the scan button for 5s or using the Shutdown
Button on the operation interface can shut it down properly, and the shutdown sound will be given
while shutting down IOT800. Under special circumstances, long pressing the scan button for more than
10s can force to restart the barcode scanner.
3 Operation Instructions
3.1 USB Mode
Iot800 supports USB Keyboard Mode and USB Serial Port Mode. Please click on the main
interface "USB Mode" to enter the USB Mode selection interface if it needs to be switched to USB
Keyboard Mode or USB Serial Port Mode. After selecting the desired mode, the corresponding switch
indication will be on, and other modes will automatically shut down. After completing the mode
selection, it needs to be restarted to complete the setting. For details on how to restart the device, see
[3.9 Shutdown and Restart].
3.1.1 USB Keyboard Mode
After the USB Keyboard Mode switching and device restart are completed, MicroUSB data cable
is used to connect the barcode scanner and PC. There will be one more device in the keyboard
catalogue in the device manager of PC , as shown in the following figure:
After the device is recognized by PC, it can be scanned using a barcode scanner. The scanned data will
be uploaded to PC via USB. When testing, a word or txt file is opened and scanned by the barcode
scanner. The barcode information can be displayed in the opened document.

CILICO MICROELECTRONICS LIMITED
Add: 4th floor, Huixin IBC Tower A, No. 1 Zhangbayi Road, Xi'an High-tech Zone, China
9
3.1.2 USB Serial Port Mode
After the USB Serial Port Mode switching and device restart are completed, MicroUSB data cable
is used to connect the barcode scanner and PC. There will be one more device in the port catalogue in
the device manager, as shown in the following figure:
After the device is recognized by PC, it can be scanned using a barcode scanner. The scanned data will
be uploaded to PC via USB. When testing, a serial port assistant on PC is opened, and then opening the
corresponding serial port of the device can receive the barcode information scanned by the barcode
scanner in the serial port assistant.
3.2 Bluetooth Mode
IOT800 supports SPP (client) Mode and Bluetooth HID Mode. Please click on the main interface
""Bluetooth Mode" to enter the Bluetooth Mode selection interface if it needs to be switched to SPP
Mode and Bluetooth HID Mode. The current available options include "SPP Mode" and "HID Mode".
After selecting the desired mode, the corresponding switch indication will be on, and other modes will
automatically shut down. After completing the mode selection, it needs to be restarted to complete the
setting. For details on how to restart the device, see [3.9 Shutdown and Restart].
3.2.1 Bluetooth HID Mode
After the Bluetooth HID Mode switching and device restart are completed, Bluetooth devices such
as a mobile phone or computer can be used to pair with the barcode scanner. Click the Bluetooth
re-pairing as shown below:
Taking an Android mobile phone as an example, turn on the Bluetooth to search
"CT_AABBCCDDEEFF" for pairing. In the pairing process, it only needs to click Pairing, without

CILICO MICROELECTRONICS LIMITED
Add: 4th floor, Huixin IBC Tower A, No. 1 Zhangbayi Road, Xi'an High-tech Zone, China
10
entering any pairing codes. After the pairing is completed, the connection of HID will be completed
automatically. At this time, a note or editor is opened at the mobile phone, and the barcode scanner is
used to scan the barcode. The barcode information can be directly displayed in the note or text.
The above pairing process only needs to be done once. In the later use, only the Bluetooth SPP
Mode can be turned on, and the barcode scanner will automatically search for and connect the last
successfully paired device. Please refer to steps in 3.4.1 for resetting if the device needs to be replaced.
3.2.2 Bluetooth SPP Mode
After the Bluetooth SPP Mode switching and device restart are completed, Bluetooth devices such
as a mobile phone or computer can be used to pair with the barcode scanner. Click the Bluetooth
re-pairing as shown below:
Taking an Android mobile phone as an example, turn on the Bluetooth to search
"CT_AABBCCDDEEFF" for pairing. In the pairing process, it only needs to click Pairing, without
entering any pairing codes. After the pairing is completed, the Bluetooth serial port .app is installed on
the mobile phone and configured as follows after it is opened:
Then return to the main interface of the app, you will find that the barcode scanner is connected
(the name of the barcode scanner in the figure below is only for reference) as shown in the figure below.
The barcode is scanned, and the barcode information will be automatically uploaded to the chat page of
the current app.

CILICO MICROELECTRONICS LIMITED
Add: 4th floor, Huixin IBC Tower A, No. 1 Zhangbayi Road, Xi'an High-tech Zone, China
11
Paring process only needs to be done in the first time, the scanner will search and connect with the
last paired device automatically when Bluetooth SPP mode is enabled). Please refer to steps in 3.4.1 for
resetting if the device needs to be replaced.
3.3 Network Mode
First, you should download the application from this link:
https://1drv.ms/u/s!Atdn2SjsDyWtgfASAas9JWHPkMXTkg
Iot800 supports Network TCP (client) Mode and Network UDP Mode. Please connect the wireless
network first if it needs to be switched to network mode. IOT800.exe of the supporting software is
opened as follows:

CILICO MICROELECTRONICS LIMITED
Add: 4th floor, Huixin IBC Tower A, No. 1 Zhangbayi Road, Xi'an High-tech Zone, China
12
Wifi Name and Password Setting of Barcode Scanner
As shown in the above figure, it shall be operated according to the sequence of 1-2-3-4-5, then the
Wifi name and password to be connected are set into the barcode scanner. After the barcode scanner is
restarted, and the red fork of theWiFiicon disappears, it indicates thatWiFiis connected (This
setting is only done once. IfWiFineeds to be changed, resetting is required).
3.3.1 WiFi Direct Transmission Mode
TheWiFidirect transmission function enables the user to coordinate IOT800HID plug-in of
supporting software in the network environment, then the scanning information of the barcode
scanner can be directly transmitted to PC, with the specific usage as follows:
Open IOT800HID.exe of the supporting software
As shown in the above figure, it shall be operated according to the sequence of 1-2-3-4, with
the correct input and selection of the corresponding options. After the saving setting is completed,
the server IP and port number shall be recorded.

CILICO MICROELECTRONICS LIMITED
Add: 4th floor, Huixin IBC Tower A, No. 1 Zhangbayi Road, Xi'an High-tech Zone, China
13
Open IOT800.exe of the supporting software, as shown below:
As shown in the above figure, it shall be operated according to the sequence of 1-2-3-4-5-6-7
(Note: The server IP and port number entered in IOT800HID plug-in are filled in 4 and 5, and then
the barcode scanner is used to scan the generated QR code to save the setting into the barcode
scanner. After the barcode scanner restart is completed, and theWiFiicon turns green,WiFiDirect
Transmission can be used normally. Taking the PC as an example to create a new txt file and open
it. At this time, the barcode scanner is used to scan the barcode, and the barcode information can
be directly uploaded to the txt file.

CILICO MICROELECTRONICS LIMITED
Add: 4th floor, Huixin IBC Tower A, No. 1 Zhangbayi Road, Xi'an High-tech Zone, China
14
3.3.2 TCP Mode
IP Port Setting of Barcode Scanner TCP Mode
As shown in the above figure, it shall be operated according to the sequence of 1-2-3-4-5-6-7, then
the relevant configuration parameters of TCP Mode are set into the barcode scanner. After the setting is
completed, the barcode scanner is restarted, and the WiFi icon turns green, which indicates that TCP
has been connected successfully. (This step requires the creation of TCP server. Taking PC as an
example, the Network Debugging Assistant shall be used to create TCP server. Then, IP and port
number of the server shall be recorded and entered into the place indicated in the figure above. If the
TCP server is not created, the WiFi icon will be white, which indicates that only WiFi is connected but
not connected to the TCP server). After confirming that the TCP connection is successful (the WiFi
icon turns green), the barcode scanner can be used to scan the barcode. At this time, the barcode
information can be displayed in the receiving area of the Network Debugging Assistant.
TCP Mode will be saved in the barcode scanner after the first setting. In the later use, it only needs
to click "Network Mode" on the main interface as shown in the following figure. Then, the TCP Mode
is clicked. It will be used after restart, without reconfiguration.
3.3.3 UDP Mode

CILICO MICROELECTRONICS LIMITED
Add: 4th floor, Huixin IBC Tower A, No. 1 Zhangbayi Road, Xi'an High-tech Zone, China
15
IP Port Setting of Barcode Scanner UDP Mode
As shown in the above figure, it shall be operated according to the sequence of 1-2-3-4-5-6-7, then
the relevant configuration parameters of UDP Mode are set into the barcode scanner. After the setting is
completed, the barcode scanner is restarted, and theWiFiicon turns green, which indicates that it has
entered UDP Mode. At this time, the barcode scanner can be used to scan the barcode, and the barcode
information can be displayed in the receiving area of the Network Debugging Assistant.
(Taking PC as an example, the Network Debugging Assistant is used to create a UDP connection,
and then IP and port number are recorded and entered to the place indicated in the figure above), UDP
Mode can be set once, then it will be saved in the barcode scanner. In the later use, it only needs to
click "Network Mode" on the main interface as shown in the following figure. Then, the UDP Mode is
clicked. It can be used after restart, without reconfiguration.
3.4 Iot Mode
Iot800 supports MQTT standard IOT Mode and Amazon AWS-IOT Mode. Please connect the
WiFi first if it needs to be switched to IOT Mode. IOT800.exe of the supporting software is opened as
follows:

CILICO MICROELECTRONICS LIMITED
Add: 4th floor, Huixin IBC Tower A, No. 1 Zhangbayi Road, Xi'an High-tech Zone, China
16
Wifi Name and Password Setting of Barcode Scanner
As shown in the above figure, it shall be operated according to the sequence of 1-2-3-4-5, then the
WiFi name and password to be connected are set into the barcode scanner. After the barcode scanner is
restarted, and the red fork of the WiFi icon disappears, it indicates that WiFi is connected (This
setting is only done once. If WiFi needs to be changed, resetting is required).
3.4.1 MQTT Standard Iot Mode;
MQTT Standard Iot Mode Setting of Barcode Scanner
As shown in the above figure, it shall be operated according to the sequence of
1-2-3-4-5-6-7-8-9-10-11, then the relevant configuration parameters of MQTT Standard Iot Mode are
set into the barcode scanner. After the setting is completed, the barcode scanner is restarted, and
theWiFiicon turns green, which indicates that MQTT server has been connected successfully, and the
barcode scanner enters MQTT Standard IOT Mode. At this point, the barcode scanner can be used to
scan the barcode and release a message. Meanwhile, the message can be subscribed at the user's
personal subscription section. If the release and subscription are opened in the barcode scanner at the
same time, the barcode scanner itself can subscribe the message after the barcode is scanned, as shown

CILICO MICROELECTRONICS LIMITED
Add: 4th floor, Huixin IBC Tower A, No. 1 Zhangbayi Road, Xi'an High-tech Zone, China
17
in the following figure:
Above MQTT Standard IOT Setting only needs to be done once. If the setting is not changed later,
"IOT Mode" can just be clicked in the main interface to select "MQTT Mode", and then opening the
publisher or subscriber is selected. After the barcode scanner is restarted, it can be used directly without
reconfiguration.
3.4.2 Amazon AWS-IOT Mode
Server IP Port Setting of Barcode Scanner UDP Mode
As shown in the above figure, it shall be operated according to the sequence of 1-2-3-4-5-6-7-8-9,
then the relevant configuration parameters of AWS-IOT Mode are set into the barcode scanner. In this
case, the barcode scanner shall be set as the Serial Port Mode with reference to Section 3.1. After the
restart is completed, the Amazon server certificate shall be uploaded as shown in the following figure:

CILICO MICROELECTRONICS LIMITED
Add: 4th floor, Huixin IBC Tower A, No. 1 Zhangbayi Road, Xi'an High-tech Zone, China
18
As shown in the above figure, after the certificate is uploaded according to the sequence of
1-2-3-4-5-6, the barcode scanner will restart automatically. After the setting is completed, the barcode
scanner shall be restarted, then theWiFiicon turns green, which indicates that the barcode scanner has
successfully connected the server of Amazon. After the barcode is scanned at this time, the message
can be received in the user's subscription section time.
Above AWS-IOT Setting only needs to be done once. If the setting is not changed later, "IOT
Mode" can just be clicked in the main interface to select "AWS-IOT Mode", and then opening the
publisher or subscriber is selected. After the barcode scanner is restarted, it can be used directly without
reconfiguration.

CILICO MICROELECTRONICS LIMITED
Add: 4th floor, Huixin IBC Tower A, No. 1 Zhangbayi Road, Xi'an High-tech Zone, China
19
3.5 Scanning Information
Iot800 can display the detailed information of the current barcode in real time. If the scanning
information needs to be checked, To view scan information, "Scanning Information" on the main
interface shall be clicked to enter the scanning information interface. In this interface, the detailed
information of the barcode will be displayed on this interface when the barcode scanner completes a
barcode scanning. If the barcode content is too long, the overlong part will be ignored. It should be
noted that the scanned barcode information will no longer be displayed if the current mode is Inventory
Mode.
3.6 Inventory
Iot800 supports Inventory, thus it can save and count the scanned barcodes so as to upload them
when needed and clear the saved barcodes. Please click the main interface "Inventory Mode" to enter
Inventory Mode interface if necessary.. On this interface, the Inventory Mode can be enabled or
disabled, and the the total number of barcode can be counted, uploaded and cleared.

CILICO MICROELECTRONICS LIMITED
Add: 4th floor, Huixin IBC Tower A, No. 1 Zhangbayi Road, Xi'an High-tech Zone, China
20
3.6.1 Inventory Mode
Clicking "Inventory Mode" on the interface will prompt "Enter the Inventory Mode?" Clicking
"Confirm" will enter the Inventory Mode, and clicking "Return" will not take any operation. If the
Inventory Mode is enabled, it will be disabled after clicking, and then the switch is off. Note: After the
inventory mode is enabled, the scanning information interface will not display the specific information
of the barcode. The saved data will be cleared after the Inventory Mode restarted.
Swipe the screen to “Inventory”and click to open “Inventory Mode”. There are several ways you
can view the page: Received, Ship, Whse.1, Whse.2, Whse.3.
You can use it according to your situation. If you are receiving stock, you will choose “Received”. If
you are calculating the goods to be shipped, choose “Ship”. If you want to store the goods, you can
choose“Whse1-3”accordingly. Normally, when you turn on Inventory Mode, the system will directly
select the status of Received. If you need to change to another location, click on the selection manually.
3.6.2 Real-time Date
Click “Real-time Date ”. When you scan an object, the bar code information will be
displayed in time.
Please click "Inventory Statistics" to check the current statistical information This interface
displays the number of barcodes counted currently.
Table of contents
Other CILICO Barcode Reader manuals
