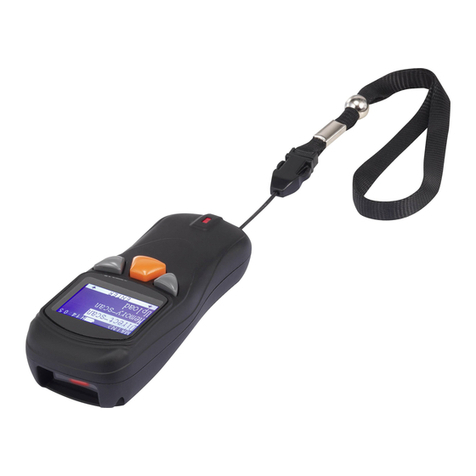
CILICO CT10X User manual

CT10X
Barcode Scanner
Instruction Manual

2
IMPORTANT NOTICE
Safety Precaution
* DO NOT disassemble the scanner, or place foreign
matter into the scanner cause a short circuit or circuit
damage.
* DO NOT expose the scanner or battery to any
flammable sources.
Maintenances Precaution
* Use a clean cloth to wipe dust off the body of the
scanner.
* If you find the scanner abnormal, write down the
specific scenario and consult the maintenanceperson.

3
Contents
IMPORTANT NOTICE...................................................................... 2
Safety Precaution. .....................................................................2
Maintenances Precaution. ......................................................... 2
Contents...........................................................................................3
Overview of CT10X Barcode Scanner..............................................5
Features of the Scanner............................................................ 5
Appearance...............................................................................5
Introduction of Key Function. .....................................................6
Specifications. ............................................................................ 6
Correct Aiming. ..........................................................................7
IncorrectAiming. ........................................................................7
QUICK START ........................................................................................7
Enter the Setting Mode. .............................................................9
Exit the Setting Mode with Save.................................................9
Exit the Setting Mode without Save............................................ 9
Restore Factory Defaults. ........................................................10
Check Software Version..........................................................10
Save Custom Settings..............................................................11
Chapter 1 Features and Basic Setups............................................12
1.1 Battery ............................................................................ 13
1.1.1 Mounting the battery(charging)..............................13
1.1.2 How to operate CT10XBarcode Scanner..................13
1.1.3 Auto Power Off.......................................................13
1.2 Transmit Buffer ............................................................... 14
1.2.1 Inventory Mode...................................................... 16
1.3 LED Indicator.................................................................. 17
1.4 Beeper ........................................................................... 17
1.4.1 Beeper Volume......................................................18
1.5 Scan Modes....................................................................19
1.5.1 Manual Mode......................................................... 19
1.5.2 Auto Power Off Mode.............................................20
1.5.3 Auto-induction Mode.............................................. 21
1.6 Symbologies Supported......................................................22
1.7 USB Wired Data Transmission........................................22
Chapter 2 How to Connect with BT................................................23
2.1.Select Output Interface................................................... 24
2.1.1 BT SPP Mode........................................................ 24

4
2.1.2 BT HID Mode.............................................................24
2.2 Setting up a BT connection. ............................................25
2.3 Connect to PC via BT......................................................26
2.4 Connect to PDA via BT....................................................31
2.4.1 One-click Android Connection....................................36
2.4.2 One-click iOS Connection..........................................39
2.4.3 Connect via BT Input Method..................................42
Chapter 3 SYMBOLOGY SETTINGS.............................................45
3.1 Codabar...........................................................................46
3.2 Code25: Industrial 25.......................................................47
3.3 Code25: Interleaved 25....................................................48
3.4 Code25: Matrix 25............................................................49
3.5 Code25: Standard 25.......................................................50
3.6 Code 39. ..............................................................................51
3.6.1 Enable/Disable Code 39. .........................................51
3.6.2 START/STOP Transmission.....................................51
3.6.3 Checksum Verification..............................................52
3.6.4 Standard/Full ASCII Code 39. ..................................53
3.7 Code 93. ..............................................................................54
3.8 Code 128. ............................................................................55
3.9 EAN-8. .................................................................................54
3.9.1 Enable/Disable EAN-8.............................................55
3.9.2 Convert to EAN-13...................................................56
3.9.3 Checksum Transmission..........................................57
3.10 EAN-13. .............................................................................58
3.10.1 Enable/Disable EAN-13.........................................58
3.10.2 Convert to ISBN. ....................................................58
3.10.3 Checksum Transmission........................................59
3.11 UPC-A. ...............................................................................60
3.11.1 UPC-A Output “0”. ..................................................60
3.11.2 UPC-A Checksum Transmission. ...........................60
3.12 UPC-E. ...............................................................................61
3.12.1 Enable/Disable UPC-E. .........................................61
3.12.2 UPC-E Checksum Transmission. ..........................61
3.13 MSI. ....................................................................................62

5
Overview of CT10X Barcode Scanner
Features of the Scanner
* Small size, portable.
* User feedback via LED indicator andbeeper
* The voice volume of scan barcode successfully could change via
setting barcode.
* Built-in 256 KB Flash memory can store up to thousand scan
barcodes.
* Provides 2 KB memory for reserve buffer while Bluetooth
connection interrupt, can store up to 110 scan barcodes.
* Supports BT SPP.
* Supports BT HID.
★ Supports a wide range of barcode types. FedEx and USPS
barcodes are all supported.
★ Whole body shockproof and drop resistance design
★ Proprietary intellectual property rights
★ Comfortable operating feel
★ Button life up to 3 million times
★ Support BT standard protocol, no need adaptor
★ 1500mAh large capacity lithium battery
★ Long working hours
★ The maximum readable digit extend to 64-bit. CT10X both wired
and wireless mode support 64bit readable
★ Prefix and suffix are allowed to be added. Reset to factory default
settings by scanning the “Factory Reset” barcode.
Appearance
Scan Wi
Bluetooth Wireless mode USB Wired mode

6
Introduction of Key Function
* Long press Scan button 3 seconds will turn on the CT10X
scanner.
* Long press Scan button 3 seconds will turn off the CT10X
scanner.
* Flip the Scan button can read the barcodes.
Specifications
PHYSICAL CHARACTERISTICS
Material
Size
Color
Power supply
Weight
ABS+TPU
Length 160mm*Width 70mm* Height 90mm
White, Black
Built-in rechargeable lithium battery
150g(With battery)
PERFORMANCE CHARACTRISTICS
Bluetooth
Interfaces Supported
Light Source (Laser)
Sensor
Decode Capability
Resolution
Nominal WorkingDistance
Decode Rate
Scan width
Decode mode
Scan mode
Print Contrast Minimum
Scan angles
Cylinder Horizontal Scan
Indication
Radio Range
POWER
Voltage
Laser Safety
EMC
standby Current
Operating current
Bluetooth class 2.0, Version+EDR
USB, RS232, PS2 Keyboard
Laser LED650+/-20nm
2500 pixels
Codabar, USPS, FedEx, UPC-E, Code 93,
MSI, Code 128, UCC/EAN-128, Code 39,
EAN-8, EAN-13, UPC-A, ISBN, Industrial 25,
Interleaved 25, Standard 25, 2/5 Matrix
5mil
6~30cm
100 decodes per second
30mm=Scanner Window
Single-Line Aiming
Auto off mode / Manual mode
30%
Roll30° Pitch75° Yaw65°
Diameter 35mm
Beeper, LED
10m Visual range
DC 5V
Accord with national level two laser safety
standards
CE & FCC DOC Compliance
35mA
60mA

7
USER ENVIRONMENT
Operating Temp.
Storage Temp.
Operating Humidity
Storage Humidity
Drop Specifications
Accessories
0 to 50. °C / 32 to 122°F
0 to 50. °C / 32 to 122°F
20-85% ( non-condensing )
20-85% ( non-condensing )
Free fall of 1.5m air drop
Lithium battery, Charger., Data lines
Correct Aiming
Incorrect Aiming
QUICK START
The setting of the CT10X Barcode Scanner can be changed by
reading the setup barcodes contained in this manual. This section
describes the procedure of setting the CT10X Barcode Scanner by
reading the setup barcodes and provides some example for
demonstration.
Step 1: Turn on CT10X Barcode Scanner. It will response with a
long beep(high tone), it's LED shows red and with Intmt
twinkle.
Note: How the CT10X Barcode Scanner establishes a
connection with computer or other compatible device,
please refer to Chapter 2.
Step 2: Enter the Setting Mode. The CT10X Barcode Scanner
will response three beeps (tone descending from high to
low), and its LED indicator will flashing purple.

8
Enter Setup
Step 3: Read a Setup barcode. The CT10X Barcode Scanner will
response three beeps (tone ascending from low to high),
and its LED indicator will flashing purple.
For Example:
Enable Codabar
Step 4: Exit the Setting Mode. The CT10X Barcode Scanner will
response three beeps (tone descending from high to low),
and its LED indicator will not flashing purple and power off.
Note: When any setup error occurs, the CT10X Barcode
Scanner will respond with a long beep (low tone), and its
LED indicator will flashing purple.
Exit with Save
Steps of Setup
Enter Setup
Details (eg: Enable/Disable a Barcode)
Exit Setup

9
Enter the Setting Mode
For the scanner to enter the setting mode, you must have it read the
"Enter Setup" barcode, which will be located at the bottom of almost
every page of this manual.
The CT10X Barcode Scanner will respond with three beeps (tone
descending from high to low), and its LED indicator becomes purple
and go off quickly after reading the barcode.
Enter Setup
For setting scanner parameters, see "Read a Setup Barcode" below.
Exit the Setting Mode with Save
For the scanner to exit the setting mode, you must have it read the
"Exit with Save" barcode, which will be located at the bottom of
almost every page of this manual.
Just like reading the "Enter Setup" barcode, the scanner will respond
with three beeps (tone ascending from low to high) after reading the
barcode.
Exit with Save
Exit the Setting Mode without Save
If you want to exit the setting mode without saving any changes, you
must have the scanner read the "Exit without Save" barcode.
Just like reading the "Enter Setup" barcode, the scanner will respond
with three beeps (tone ascending from low to high) after reading the
barcode.
Exit without Save

10
Restore Factory Defaults
"Restore Factory Defaults" is a special barcode. The CT10X
Barcode Scanner will respond with a short beep (high tone) after
reading this barcode. At this time, the scanner system could restore
factory defaults, and no need to read "Exit with Save" barcode
again. The Scanner defaults enable HID, PIN defaults 10010.
Restore Factory
Note: Most of setting mode have restore factory defaults selection.
The factory default value for each setting is indicated by an asterisk
"*".
You could use this barcode at the following status:
1. The scanner can not work. For example, it can not readbarcodes.
2. You forget the settings you did to the scanner before, and you
don't want to be affected by the settings when you use the
scanner.
3.After using a function which is not be used usually in the scanner.
Check Software Version
If you want to know the software version of CT10X, should read the
‘Enter Setup’ and ‘Output Software Version’ barcode:
Enter Setup
Output Software Version
Checking the software version is done at the enter setup mode, so
after output the software version, need to read ‘Exit without Save’
barcode.
Exit without Save

11
Save Custom Settings
1. You may change factory defaults, and customize some functions
suitable for your own applications when you use CT10X, you
must read the ‘Enter Setup’ Function barcode you want to
customize ‘Save Custom Settings’ ‘Exit with Save’ barcodes.
Enter Setup
Save Custom Settings
Restore Customs Settings
Exit with Save
2. If you want to restore to custom settings after resetting the
barcode scanner, just need to read ‘Enter Setup’ ‘Restore Custom
Settings’ ‘Exit with Save’ barcodes as above.

12
Chapter 1 Features and Basic Setups
This chapter will introduce the features and usage of the barcode
scanner.
Contents
1.1 Battery...................................................................................... 13
1.1.1 Mounting the battery(charging)........................................13
1.1.2 How to operate CT10XBarcode Scanner........................13
1.1.3 Auto Power Off............................................................. 13
1.2 Transmit Buffer......................................................................... 14
1.2.1 Inventory Mode. .............................................................. 16
1.3 LED Indicator........................................................................... 17
1.4 Beeper..................................................................................... 17
1.4.1 Beeper Volume. .............................................................. 18
1.5 Scan Modes............................................................................. 19
1.5.1 Manual Mode. ................................................................. 19
1.5.2 Auto Power Off Mode................................................... 20
1.5.3 Auto-induction Mode. ......................................................21
1.6 Symbologies Supported. ..........................................................22
1.7 USB Wired Data Transmission. ...............................................22

13
1.1 Battery
The scanner is powered by 1500mAh chargeable Lithium batteries.
The batteries can support the scanner work continuous for 60 hours,
or read 56000 barcodes (read an EAN-13 barcode per 5s).
1.1.1 Mounting the battery (charging)
1. Hold the scanner face down in onehand.
2. Insert USB cable for charging.
1.1.2 How to operate CT10X BarcodeScanner
Turn on the scanner
Press the Power key for about 2 seconds. The scanner will respond
with a long beep (high tone), and its LED indicator is flashing.
Turn off the scanner
Press the Power key for about 3 seconds. The scanner will respond
with two short beeps (high tone) and the LED indicator is turn off.
1.1.3 Auto Power Off
In order to conserve battery power, the user can specify the time
interval for the scanner to automatically turn off. By default, it is set
to 10 minutes.
Enter Auto Power Off
5min (*)10min
20min 30min

14
Exit Auto Power Off
For example: Set 20 minutes for the scanner to automatically turn off.
1. Read the "Enter Setup" barcode;
2. Read the "Enter Auto Power Off"barcode;
3. Read the "20min" barcode;
4. Read the "Exit with Save" barcode.
Note: If you want to keep the scanner power on all the time, read
"Exit Auto Power Off" in stead of step 3 and 4.
Enter Setup
Exit with Save
Exit without Save
1.2 TransmitBuffer
During the Bluetooth connection, the CT10X Scanner uses a 16KB
memory as a data buffer, and sends the collected data to the host
computer one by one via the Bluetooth. Upon reading a barcode
successfully, the scanner responds with one short beep and its LED
indicator becomes green and goes off quickly. However, the host
computer may not receive the data immediately if getting out of
range. With the 256KB transmit buffer, the scanner can ignore the
transmission status and keep on reading barcodes until the buffer is
full. When the buffer is full, the scanner will respond with a long beep
(low tone), this reminds the user that the space of buffer is not
enough and can not read barcode any more. Once the Buffer is

15
full, the user should return to the range of BT connectionquickly,
the data in the buffer can be sent back to the host computer and
release the space ofbuffer.
Note: The 256KB transmit buffer on the scanner can hold as many
as 2600 barcodes bases on Code128. You can choose to clear the
data in the buffer every time when you turn on the scanner.
Enable Clear Data in Buffer When
Turn On the Scanner *Disable Clear Data in Buffer When
Turn On the Scanner
Note: You can clear the data in the buffer via enable barcode, you
can also clear the data in the buffer via press the Power key long
time.
After the Bluetooth connect successfully, the barcodes in the buffer
will upload to appointed position automatically. You also can setup
upload the barcodes in the buffer or not via reading the following
barcodes. By default, it is enabled.
If you don‘t want to upload the barcodes automatically, you can
setup as disabled, when the Bluetooth connect, the barcodes won’t
upload. You can double click Power key to start uploading the
barcodes.
(*)EnableAuto Uploading DisableAutoUploading
Enter Setup
Exit with Save
Exit without Save

16
1.2.1 Inventory Mode
If you want to keep the barcodes in the buffer of CT10X for multiple
uploading, you can choose inventory mode. In inventory mode,
CT10X will count the number of the barcodes automati- cally, and
control the time, position etc. for uploading. Also, you can clear the
barcodes in the buffer after uploading. Following is the setup
method:
1. Read ‘Enter Inventory Mode’ barcode to enter into the inventory
mode
Enter Inventory Mode
2. If you want to recover to normal mode, read the ‘Enter Normal
Mode’ barcode
Enter Normal Mode
3. Read the ‘Clear the barcodes in the buffer’ barcode to clear the
barcodes (only suitable for inventorymode)
Clear the barcodes in the buffer
4. Read ‘Data Uploading’ barcode to upload the barcodes in the
buffer (only suitable for inventorymode)
Data Uploading
5. Read ‘Upload Counting’ barcode to count the number of the
barcodes (only suitable for inventorymode)
Upload Counting
Note: Inventory function can be used under any scan mode
mentioned in 1.5.

17
1.3 LED Indicator
The LED indicators on CT10X can help the user know about the
current operation status.
COLOR OF LED INDICATOR
MEANING
Green LED on and off quickly
Good Read, with one short beep (high
tone)
Green LED on Every 5s
Indicates the CT10X Scanner in Memory
Mode
Purple, Flashing(On/Off ratio 1:1)
Indicates the CT10X Scanner in Setting
mode
Blue, Flashing (On/Off ratio 1:1)
Indicates the BT is waiting for connection,
the CT10X stores the address of BT
which connects with the last time.
Indicates the CT10X Scanner is out of
range or can not establish connection with
BT, with two short beeps(high-low tone)
Blue, Flashing (On/Off ratio 20ms:3s)
Indicates the CT10X Scanner establish a
BT connection successfully, with two short
beeps (low-high tone).
Indicates the CT10X Scanner reconnect
with BT, with two short beeps (low-high
tone).
Red, Flashing (On/Off ratio 1:1)
Indicates the CT10X Scanner has no
address of BT which connects with before.
The default BT connect interface is HID,
the PIN code is 10010.
1.4 Beeper
The beeper built in CT10X can help the user know about the
current operation status.
BEEPING
MEANING
One long beep, high tone
Power on. If the scanner has no BT
address which could connect with, flashing
red. If the scanner has BT address which
could connect with, flashing blue.
One short beep, high tone
Read barcode, with green LED on and off
quickly
One long beep, low tone
Configuration error, with purple flashing;
Or transmit buffer full, with green LED on
and off quickly
Two short beeps, high tone
Power off.
Two short beeps, low-high tone
Two short beeps, high-low tone
BT connection established, with blue LED
flashing (On/Off ratio 20ms:3s).
BT connection out of range or suspended,
with blue LED flashing (On/Off ratio 1:1).

18
Three short beeps, tone descending
from high to low
Enter or Exit Setting mode, with purple
LED flashing.
Three short beeps, tone ascending
from low to high
Configuration correct, with purple LED
flashing;
1.4.1 BeeperVolume
Mute MinimumVolume
(*)Medium Volume MaximumVolume
For example: Set Minimum Volume for beeper.
1. Read the "Enter Setup" barcode;
2. Read the "MinimumVolume" barcode;
3. Read the "Exit with Save" barcode.
Enter Setup
Exit with Save
Exit without Save

Exit with Save
Exit without Save
20
1.5 Scan Modes
Three kinds of scan modes are supported by the CT10X Barcode
Scanner:
1.5.1 Manual Mode
By default, the scan mode is set to Manual Mode. If the user keeps
press the Scan Key, the CT10X Scanner will emit a red light line.
This indicates the scanner could scan, the scanning will not stop
until the scanner under the following situation.
* Read a barcode successfully;
* Release the Scan Key.
Manual Mode
Enter Setup

Exit with Save
Exit without Save
20
1.5.2 Auto Power Off Mode
(*)Auto Power Off Mode
Setup Auto Power Off Time
Enter Setup
Table of contents
Other CILICO Barcode Reader manuals
