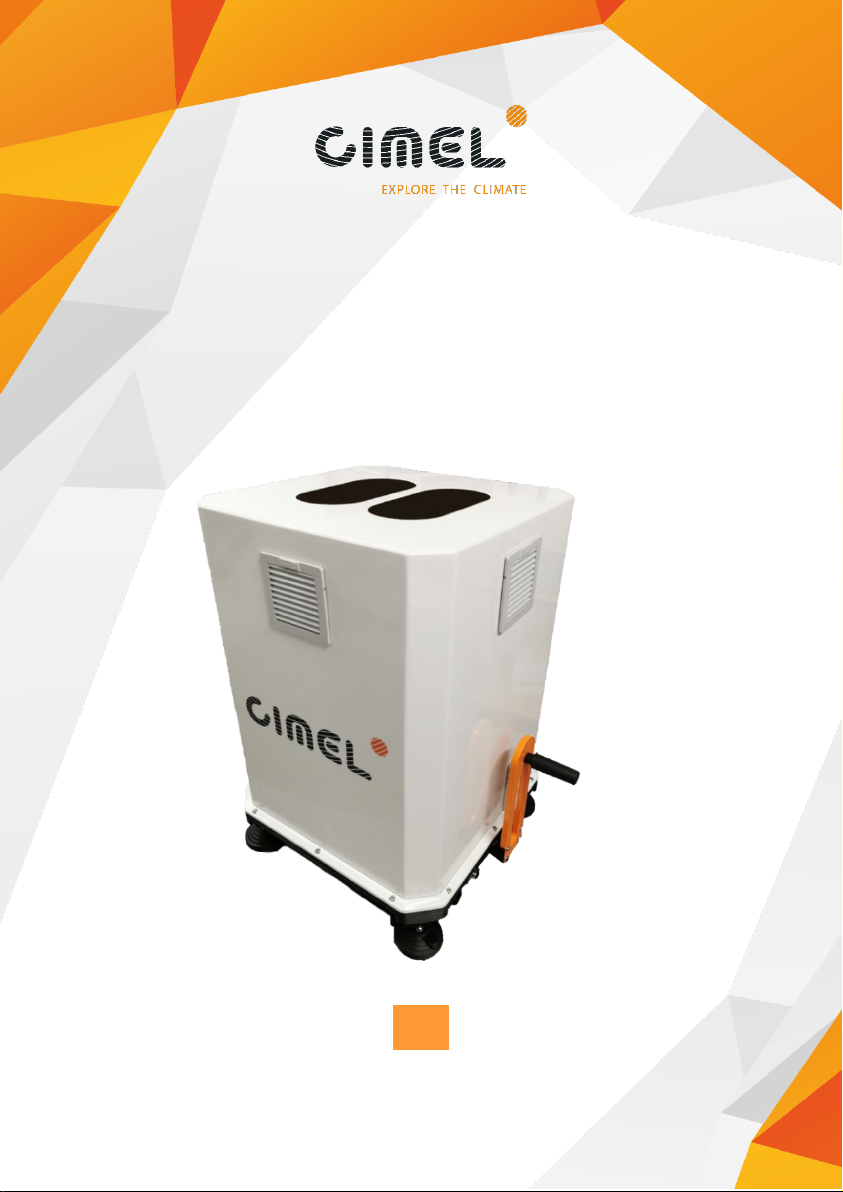
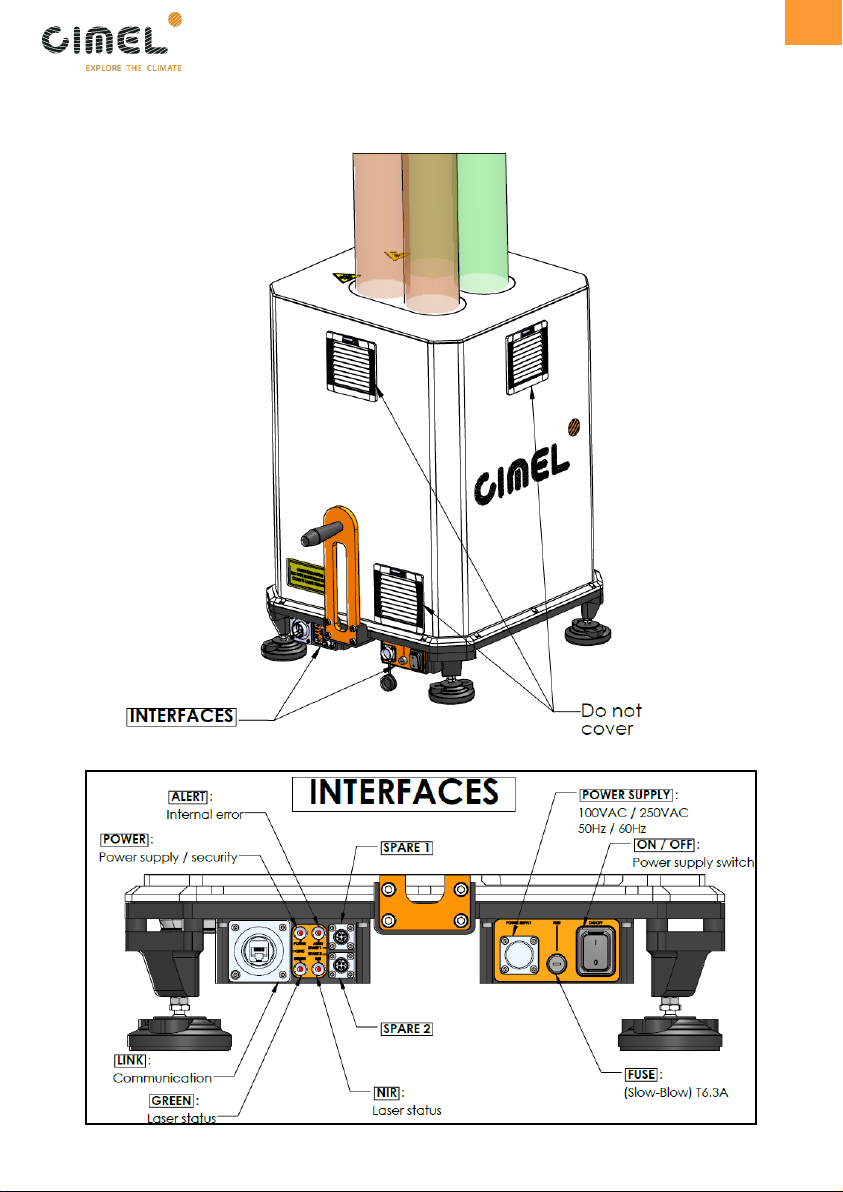
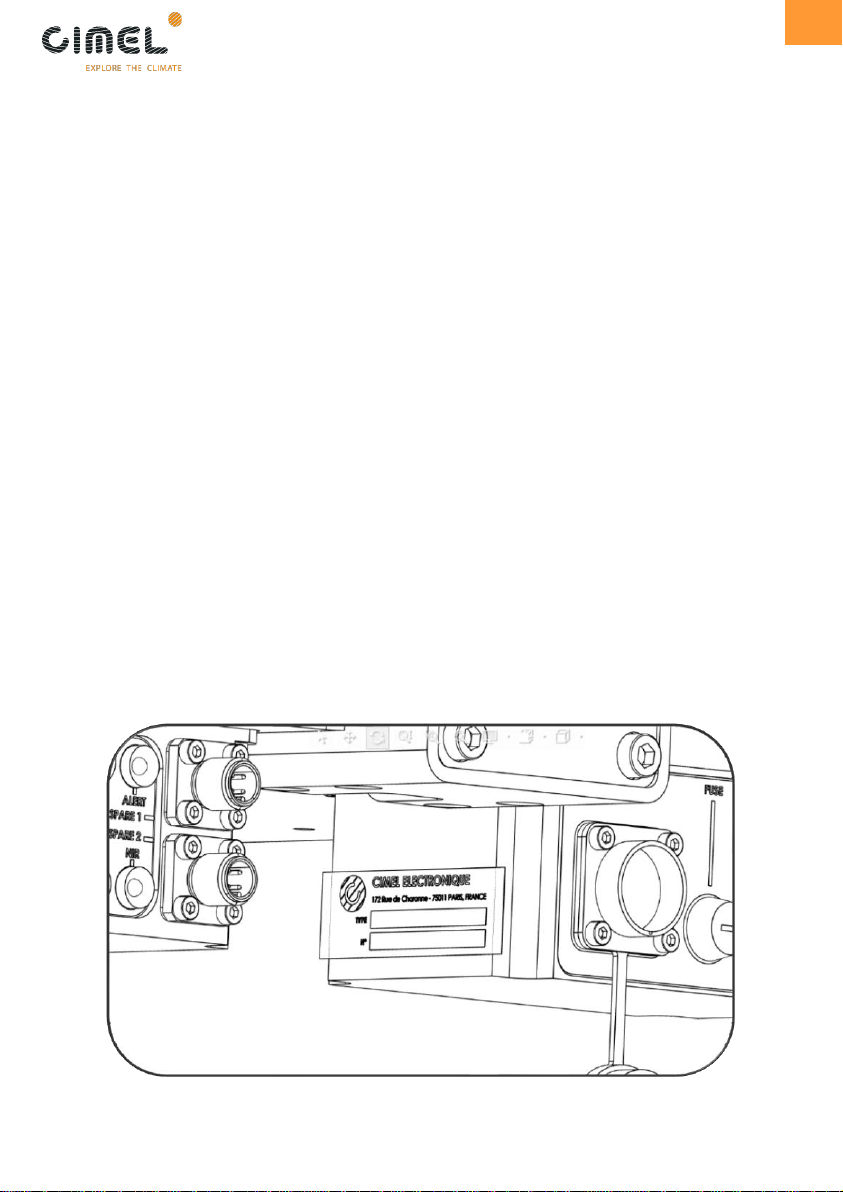
Cimel CE376 EYE-SAFE LIDAR User manual

USER MANUAL
CE376 EYE-SAFE LIDAR
Models: I376-KIT-LGPN/LGP/LGN/LG/LN C
EN

2
EN
EN –ENGLISH
Table of Contents
Package Contents
Specifications
Safety Information
Getting to Know Your CE376 LiDAR
Getting Started
Options
Care & Maintenance
Troubleshooting
Warranty Information
Customer Support
2
3
4
5
6
8
9
10
11
11
Package Contents
1 x CE376 LiDAR
1 x Flight-case
1 x Power supply cable (10 m)
1 x Ethernet Communication cable (20 m)
1 x Ethernet-USB converter
1 x USB-B to USB-A cable
1 x User Manual
1 x USB key with software and calibration files

3
EN
Specifications
Power Supply
100 -250 VAC 50/60Hz
Fuse Characteristics
slow blow T6.3A
Typical Power Consumption
40 W
Maximum Power Consumption
200 W
Operating Conditions
Temperature:
+18°C –+28°C / 65°F –82°F
Humidity:
5% to 75%
Dimensions
713 x 463 x 691 mm /
28 x 18.2 x 26.8 in
Weight
35 kg / 77 lbs
Computer interface
USB 2.0
Acquisition Mode
Photon counting
Acquisition time
1 s to 1200 s
Maximum range measurement
30720 m
Minimum range measurement
50 m
Range resolution
15 m
NIR CHANNELS
GREEN CHANNELS
Available in CE376
models
GPN, GN, N
Available in CE376
models
GPN,
GP
GN, G
Wavelength
808 nm
Wavelength
532 nm
EYE-SAFE
IEC 60825-1
compliant
EYE-SAFE
IEC 60825-1
compliant
Depolarization
Channel
NO
Depolarization
Channel
YES
NO
Laser Divergence
460 µrad
Laser Divergence
<50 µrad
FOV Reception
520 µrad
FOV Reception
230 µrad
Dimensions are in mm.

4
EN
READ AND SAVE THESE
INSTRUCTIONS
SAFETY INFORMATION
To reduce the risk of electric shock, eye-damage or other injury, please follow all
instructions and safety guidelines.
General Safety
•Only use your CE376 LiDAR as
described in this manual.
•Do not use your CE376 LiDAR
outdoors. It is not waterproof.
•Do not use in excessively humid
area.
•Do not use your CE376 in a closed
room without a roof window or a
hatch above it.
•It requires at least 2 persons to lift a
CE376 LiDAR. Take care to use your
leg muscles instead of your back.
Keep the CE376 LiDAR steady when
moving.
•Do not drop, hit, flip or lay your
CE376 LiDAR on its sides. Any of
these actions might demand the
technical intervention of a CIMEL
qualified operator.
•Do not remove the cover of your
CE376 LiDAR.
•Do not cover the vents.
•Do not place any heavy objects on
the CE376 LiDAR.
•Do not try to put any object or hands
inside your CE376 LiDAR through
vents or traps.
•Do not use your CE376 LiDAR if it is
damaged or not working correctly, or
if the power supply cable or plug is
damaged. Do not try to repair or re-
align it yourself. Contact Customer
Support (see p.11).
Laser Safety
•Do not stare inside your CE376
LiDAR through the windows when it
is switched ON. The laser beam is
considered safe with blink reflex
(0.25 s) but can damage retina for
longer exposure.
•Do not look inside your CE376
LiDAR through a magnifying glass
or any optical instruments when it is
switched ON.
•Do not try to open your CE376
LiDAR, or make it work without its
cover. CIMEL cannot be held
responsible for any injury occurring
when the cover is removed.

5
EN
GETTING TO KNOW YOUR CE376 LIDAR

6
EN
GETTING STARTED
1. In order to use your CE376 LiDAR you need either a thermal enclosure I376-
ENC-X or a regulated and temperate environment with a non-tempered glass
window on the roof or a hatch (to be used only in non-raining conditions).
2. Place your CE376 LiDAR in as follows:
-It is preferable to place the CE376 LiDAR in a shady place.
-If the site is close to Equator, protect the LiDAR from direct sunlight at midday.
-If the site is in the North Hemisphere: place your CE376 LiDAR with its lower
side pointing North.
-If the site is in the South Hemisphere: place your CE376 LiDAR with its lower
side pointing South.
3. Remove the blue plastic tape from all glasses or windows.
4. Remove the covers over LINK connector and POWER SUPPLY connector and
connect the communication cable and the power supply cable, respectively.
➔All CE376 LiDAR connectors have a key-connection.
Pointing direction

7
EN
5. Connect the other side of the communication cable to the Link port of the
Ethernet-USB converter box, and the USB cable connector USB B to the other
port.
6. Install the software Lidar2.exe and drivers on your computer following the
Software Manual instructions (provided on the USB key).
7. Connect the USB cable to your computer and Power ON your CE376 LiDAR.
8. On the Interface of your CE376 LiDAR all external LEDs should blink green for
1.8s then go OFF except for the POWER LED that should stay green [A].
9. After clicking on the POWER ON button from the Lidar2.exe software, both
the GREEN and NIR LEDs should turn green to indicate that both lasers are
switched ON. If any of the laser LEDs is blinking green, this means the laser
source needs time to reach nominal temperature (few seconds to 3 minutes)
before firing [B].
10. After a few seconds, the POWER, GREEN and NIR LEDs should all be green.
All lasers are ON [C].
➔Note that if the model of your CE376 LiDAR doesn’t include one specific wavelength
(GP, G or N), the corresponding laser source LED will be disabled.
A
B
C

8
EN
OPTIONS
Thermal Enclosure
Model
I376-ENC-1
I376-ENC-2
Power Supply
115 VAC (50Hz/60Hz)
Typical Power
Consumption
1300 W
Cooling Capacity
3940/4104 BTU/Hr.
5585/6180 BTU/Hr.
Operating
Conditions
Temperature: -30°C –+55°C / -22°F –130°F
Humidity: 0% –100%
An additional internal dehumidifier is needed if temperature and
humidity are highs (Due point temperature > 19°C)
Dimensions
90 x 95 x 130 cm / 35.4 x 37.4 x 51.2 in
Weight
93 kg / 205 lbs
Model
I376-ENC-3
I376-ENC-4
Power Supply
230 VAC (50Hz/60Hz)
Typical Power
Consumption
1300 W
Cooling Capacity
4269/4703 BTU/Hr.
5469/5965 BTU/Hr.
Operating
Conditions
Temperature: -30°C –+55°C / -22°F –130°F
Humidity: 0% –100%
An additional internal dehumidifier is needed if temperature and
humidity are highs (Due point temperature > 19°C)
Dimensions
90 x 95 x 130 cm / 35.4 x 37.4 x 51.2 in
Weight
93 kg / 205 lbs
With this option, connect your CE376 LiDAR to the cables inside the Thermal
Enclosure and connect externally the Power Supply cable and the communication
Cable delivered with your CE376 LiDAR to the Thermal Enclosure on the outside.
The Thermal Enclosure must be placed following the same instructions as per the
CE376 LiDAR (see p.6).

9
EN
CARE AND MAINTENANCE
Cleaning window
Depending on the weather conditions, it is
recommended to clean the window
through which is placed your CE376 LiDAR
at least once a week.
If your CE376 LiDAR is in a Thermal
Enclosure, clean the window of the
Thermal Enclosure with water and a
smooth cloth.
Temperature inside your
CE376 LiDAR
In Lidar2.exe software, check in
monitoring data the temperature inside
your CE376 LiDAR. If any anomaly occurs,
check that the thermal enclosure is
working properly.
After-pulse calibration
It is recommended to perform an After-
Pulse calibration every month. Put a dark
cloth over the outside window of your
CE376 LiDAR in order to block laser light
completely and perform an After-Pulse
Calibration with the software Lidar2.exe
for 600 s.
Polarization Calibration
It is recommended to perform a
polarization calibration twice a year on
your CE376 LiDAR. Contact Support for
further details (may necessitate an
intervention on the acquisition PC).
Routine Maintenance
It is recommended to do a check-up
maintenance of your CE376 LiDAR
every year after its installation by a
CIMEL qualified operator. Maintenance
is not included in the warranty of the
product.
Moving your CE376
LiDAR
If you plan to use your CE376 LiDAR on
a field campaign or on another site, the
intervention of a CIMEL qualified
operator could be necessary. Contact
Support for further details.

10
EN
TROUBLESHOOTING
Problem
Possible Solution
GREEN LED blinks green
The laser is reaching its nominal temperature. Wait
a few moments until it turns green.
GREEN LED blinks red
Green laser issue. Power OFF your CE376 LiDAR in
the Lidar2.exe software and Power ON again.
If the problem persists, Power OFF your CE376
LiDAR with the main switch, wait a few seconds
and switch Power ON.
NIR LED blinks green
The laser is reaching its nominal temperature. Wait
a few moments until it turns green.
NIR LED blinks red
NIR laser issue. Power OFF your CE376 LiDAR with
the main switch and disconnect from the power
outlet. Wait a few seconds before plugging it back
and Power ON.
ALERT LED blinks red
Internal issue, please contact Support.
All LED green but no laser
beam visible
The NIR laser source is invisible to the eye.
By day the green laser beam can be difficult to see.
To check if the green the laser is on, put a white
paper sheet above the lidar to see the laser beam.
The CE376 LiDAR doesn’t
power ON
Verify that the Instrument is plugged into an
electrical outlet.
If there is no issue with the electrical outlet, check
the condition of the fuse. In case the fuse is
damaged, replace it by a new one with the same
characteristics (slow blow T6.3A).
If the CE376 LiDAR is used with the optional CIMEL
Thermal Enclosure, check if the circuit breaker
inside is properly operating.
Droplets or dew on the
Thermal Enclosure
window
This may happen in the morning and/or after rain.
Remove the water from the glass manually, or let it
evaporate by itself after a few hours.
Condensation in the
Thermal Enclosure
window
Use a dehumidifier.
If any of these issues persist, please contact Support.

11
EN
WARRANTY INFORMATION
Terms & Policy
CIMEL warrants all products to be the highest quality in
material, craftmanship and services for one year,
effective from the date of delivery to the end of the
warranty period. Warranty lengths may vary between
product categories. To extend the duration of the
warranty, please contact our sales team to request of
quotation.
CUSTOMER SUPPORT
CIMEL
172 Rue de Charonne
75011 PARIS
FRANCE
Email: [email protected]
*Please have the Model and Serial Number of your
CE376 LiDAR ready before contacting Customer
Support.
This manual suits for next models
5
Table of contents
Other Cimel Measuring Instrument manuals