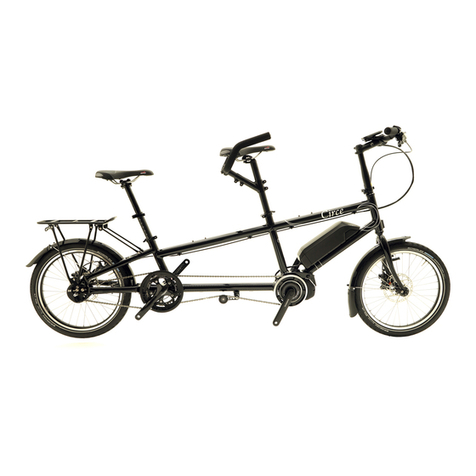
Circe Cycles Helios User manual

Owner’s Manual
Helios / Helios STEPS / Triplet
V2.00

CONTENTS
INTENDED USE .........................................................................................................................................3
SAFETY .....................................................................................................................................................3
BIKE COMPONENTS OVERVIEW ............................................................................................................4
RIDING AND ADJUSTING YOUR TANDEM.............................................................................................5
WEIGHT DISTRIBUTION AND WEIGHT LIMITS ..........................................................................................6
INSPECTION AND MAINTENANCE.........................................................................................................7
ACCESSORIES .......................................................................................................................................10
WARRANTY AND OTHER INFORMATION.............................................................................................10
APPENDIX A ..........................................................................................................................................12
APPENDIX B...........................................................................................................................................13
INTRODUCTION
Congratulations on becoming a new Circe Helios owner. The Helios is an innovative, functional, fun product that works
well at many levels. We are condent that it will give you many years of good and enjoyable service.
This manual is written to enable you to get the best from your bike. It includes sections on riding, maintenance, and
safety, and we have included some tips learnt from many years of riding and maintaining tandems. The latest version
of the manual is always available as a downloadable PDF document on our website - please make sure you read it
thoroughly.
Finally, we get great pleasure every time we ride our tandem and we hope that you will join us in getting many years of
enjoyment from this wonderful bike.

3
Circe Cycles
CYCLING WITH CARE
You can help prevent accidents by using common sense,
cycling with care, and thinking about your safety. You
need to think about what other cyclists, vehicles, and
pedestrians may do, and react accordingly. Anticipate
potential hazards, such as car doors opening or children
running in front of you. Cycle at an appropriate speed,
stay back from other cyclists and vehicles, and avoid
cycling on the inside of trafc queues. A rear view mirror is
helpful to see what is happening behind you. Help other
road users understand what you are going to do next by
staying visible, maintaining a clear position on the road
and using clear hand signals. Using a horn or bell will help
other people know that you are near.
CYCLING IN BAD WEATHER
Take extra care when the weather is wet, foggy, windy, or
icy. Ride with extra care and brake early, as your tandem
will take longer to stop. Sudden braking could lead to
skidding and loss of control.
CYCLING IN POOR VISIBILITY
Take extra care when riding in the dark, dawn and
dusk, or when visibility is poor. If you have to ride in these
conditions, make sure you can be seen. Use a headlight
(white) and tail-light (red) in addition to the reectors that
are tted. Wear light-coloured reective clothing and
reective accessories.
This section provides some guidance on ways to cycle
safely on your new tandem.
CYCLING LAWS AND REGULATIONS
Most countries have special laws and regulations for
bicycles and cyclists, and these may apply to you as a
tandem rider. Know the local cycling laws and obey them.
PINCH POINT AND MOVING PARTS
Some parts of your tandem can injure you if mishandled.
For example, the chainring teeth are sharp and brakes get
hot during use. Moving parts, including brake levers and
the fold mechanism, can pinch, cut or, crush.
CHECK LIST FOR EVERY RIDE
Before you ride your tandem, make sure it is in a safe
operating condition. If any part of your tandem does not
function correctly, do not ride it until it is xed. Refer to
the maintenance schedule on page…..to see what you
should check and when.
WEAR A HELMET
It is good practice to wear a cycling helmet that complies
with the latest safety standards. Choose a helmet that
is comfortable and ts well. Follow the manufacturer’s
instructions to ensure it ts correctly.
VISIBILITY
Make sure other road users and pedestrians can see
you. Ensure your reectors and lights are clean, correctly
positioned, and not obstructed by clothing or accessories.
Check that your lights are working correctly before you
ride, even if you don’t anticipate using them. Wear bright
coloured clothing with reective areas.
SUITABLE CLOTHING
Wear clothing that is suitable for conditions you will ride
in. Wear glasses to protect your eyes from dust, dirt, and
bugs. Wear appropriate shoes that will stay on your feet
and can grip the pedals. Use pedal straps or “clipless”
pedals to prevent your shoes slipping off the pedals while
cycling.
INTENDED USE
SAFETY
Please be aware of how your tandem should be used. No Circe tandem is suitable for jumping or tricks. Misuse of your
Circe tandem, or triplet, may lead to mechanical or structural failure, will invalidate your warranty, and could result in
serious injury or death. Our tandems are designed for riding on smooth roads and paths, and on improved trails, though
to what extent is dictated by tyre choice and rider condence, ability and experience.

4
Circe Cycles
1.
2.
3.
4.
9.
5.
6.
7.
8.
10.
11.
12.13.
14.
15.
16.
17.
18.
19.
20.
1. Stem
2. Handlebar
3. Steerer extender
4. Headset
5. Brompton block mounting (Optional extra)
6. Mudguard (Optional extra)
7. Fork
8. Disc brake
9. Steering stabiliser (Optional extra)
10. Battery (STEPS model only)
11. Drive unit (STEPS model only)
12. Timing chain
13. Tensioner
14. Chainset
15. Hub gear
16. Rack
17. Stoker saddle and seatpost
18. Stoker stem assembly
19. Captain saddle and seatpost
20. Frame
BIKE COMPONENTS OVERVIEW

5
Circe Cycles
To ensure that riding your bike is the pleasurable
experience it should be, it is essential that attention
be paid to correct t. Ideally this should be done in
conjunction with an accredited dealer, but the following
points should be observed.
WEIGHT DISTRIBUTION
A tandem generally works better with the heavier rider
on the front. This is because the front rider, or ‘Captain’, is
responsible for stabilising the tandem when starting and
stopping, for steering, and for braking which particularly
on long descents can be very demanding.
SADDLE HEIGHT
This dimension is very important for bio-mechanical
efciency and for protecting joints from injury. As a
working rule, with the pedal at the furthest position from
saddle and the rider’s heel on the pedal, the leg should
be straight to very slightly bent. This means that when
the foot is in the correct position with the ball of the
foot on the pedal axle, the knee will be slightly bent at
full extension. The degree of bend is personal, but it is
important that, at full extension during the pedalling cycle,
the knee is neither overstretched nor too bent.
‘!’ Certainly for children we advise the use of adjustable crank shorteners,
and anyone outside typical average leg lengths should consider such
shorteners or appropriate length cranks.
SADDLE ANGLE AND POSITION
Ideally the saddle should be adjusted fore/aft so that
the centre of the knee joint is vertically above the pedal
axle. The saddle top should be approximately horizontal,
but care should be taken with the angle of the s addle,
particularly so that the nose does not obstruct forward
rotation of the pelvis.
FORWARD EXTENSION AND BAR ADJUSTMENT
For comfortable riding, the amount of stretch of the
back, torso and arms are crucial. An experienced rider
should use the positions with which they are normally
comfortable, but for rst time riders, a good starting
position should not be too stretched or bent over. With
familiarisation this position can be gradually adjusted. Both
front and back positions of the Helios offer considerable
adjustment for different rider sizes and riding styles.
CONTROLS AND RIDING TECHNIQUE
Traditionally the front rider is known as the ‘Captain’ and
the rear rider, the ‘Stoker’. The Captain steers, has control
of the brakes and gears and is responsible for stabilising
the tandem when starting and stopping. The Stoker pedals
and should otherwise relax and not attempt to steer! For
some applications, the Stoker may have an auxiliary drag
brake. The Captain should also give some feedback to
the stoker as to road conditions, for example, ‘bump’ and,
often, certainly with inexperienced couples, forewarning
of gear changes and sudden turns.
STARTING AND STOPPING
At start, the Captain will mount the tandem, keeping it
stable so that the Stoker can sit on the rear saddle with
feet on pedals ready to go. The Captain will then sit, and,
keeping the tandem upright with one leg, will, with the
stoker, start pedalling. It is important to start in a low gear
and for both riders to give a good hard push to get the
tandem underway!
To stop, the Captain should warn the Stoker and then, as
on a single bike, put one leg down to stabilize the bike.
The Stoker usually remains seated with feet on the pedals
but must keep still so as not to unbalance the tandem. If
the tandem is at rest for a longer period, one or both riders
should be prepared to place both feet on the ground.
BRAKES AND BRAKING TECHNIQUE
The Circe Helios is tted with excellent brakes that are
able to stop the tandem quickly and safely. However, it
is important to remember that a tandem is heavy and,
consequently, with braking distances being greater than
on a single, it is very important to be aware of trafc
conditions and not rely on last-minute-panic-braking.
In use, both brakes should be used, but the front brake
is the much more effective brake and does the majority
of the stopping. Consequently, a lot of heat can be
generated in the front wheel braking surfaces and, if long
descents in mountainous areas are anticipated, some
form of auxiliary braking should be considered. If the
tandem is tted with disc brakes, then rim brakes can be
added and vice versa if rim brakes are tted. This enables
the different braking surfaces to be alternated and any
heat build up to be controlled better.
GEAR USAGE
Your Helios is tted with a good range of gears, each
model having an appropriate gear range for its intended
use. It is important to use the gears to nd a cadence
(leg spin speed) that is comfortable for both riders and,
by being aware of road conditions, to use the gears to
try and keep within this range. Although mutual comfort
is the most important requirement, a cadence of 80-100
is generally considered to give a good bio-mechanical
balance, though, obviously this may vary depending on a
variety of physical factors, both personal and terrain.
RIDING AND ADJUSTING YOUR TANDEM

6
Circe Cycles
dedicated ttings are correctly attached, and the seat/s
securely installed. The tandem should then be safely
supported either on its stand or against something solid
before the child is placed in the seat. In this conguration,
the Helios can take one adult and one or two small
children. With the Triplet module is is possible to take one
adult and three children (one in a childseat)
The Helios also features a remarkably low rear stand-over
height and very congurable stoker bar, so that, with the
addition of crank shorteners, a very small child can start
riding. With a child or an adult as stoker, it is still possible to
have a child seat attached to the seat post or rear rack.
As previously stated, because the steering is at the front, it
is better for the heavier rider to be the captain. If luggage
is to be carried it is advisable to try and maintain as even
a weight balance as possible, possibly using a front rack
and panniers to achieve this. The permissible maximum
combined rider weight is 170kg (same for the Triplet).
Please see the charts below for specic limits.
CARRYING CHILDREN
The Helios is particularly suited to carrying children, but
great care must be taken to ensure their safety. It is
essential that they wear approved cycling helmets and
that they are securely fastened into any child carrying
seats. If the Cargo Rack is used, it is essential that the
TANDEM
POSITION STAND-OVER
HEIGHT APPROX AGE
MIN SEAT
HEIGHT (FROM
BB CENTRE)
MAX SEAT
HEIGHT (FROM
BB CENTRE)
APPROX HEIGHT
RANGE
APPROX WEIGHT
RANGE
BACK 51cm 3.5 + 35cm 80cm 105-190cm 80kg
FRONT 66cm 55cm 85cm 150-195cm 100kg
TRIPLET
POSITION STAND-OVER
HEIGHT APPROX AGE
MIN SEAT
HEIGHT (FROM
BB CENTRE)
MAX SEAT
HEIGHT (FROM
BB CENTRE)
APPROX HEIGHT
RANGE
APPROX WEIGHT
RANGE
BACK 51cm 3.5 - 10yrs 35cm 80cm 105-190cm 80kg
MIDDLE 53cm 5 + 50cm 75cm
(telescopic post) 115-160cm 60kg
FRONT 66cm 55cm 85cm 150-195cm 100kg
WEIGHT DISTRIBUTION AND WEIGHT LIMITS
SHIMANO STEPS OPERATION
To turn on and off:
1. Switch the system on using either the power button on
the battery or the display.
2. Make sure your feet are not on the pedals while turning
the system on to allow the torque sensor to calibrate.
Left switch (Assist):
The grey buttons adjust the level of assist; down arrow for a
lower assist level or no assist, and the up arrow for a higher
assist level. The black button changes the displayed data.
Right switch (Gears):
The grey buttons adjusts the gear you are in, the black
button switches between manual and automatic shifting.
We recommend using manual mode, as this is more
suitable for tandem use.
For more detailed user instructions see Shimano’s online
resource https://si.shimano.com

7
Circe Cycles
TOURING WITH THE HELIOS
Tandems make great machines for touring. Two riders of
unequal strength can ride together and share the joys of
cycle travel. The Helios can be equipped with a full touring
complement of panniers and bags and with suitable
gearing is capable of going anywhere. Remember, it is
low gears that are essential for loaded touring; one can
always freewheel downhill or with the wind behind you,
but you have to pedal up hills and against the wind.
If you are thinking of a full camping tour, we would
advise three brakes (two discs and one rim brakes). It is
also important to ensure that the luggage weight is well
distributed, possibly using both front and rear panniers.
The Helios, tted with its dedicated rear rack, also makes
a wonderful single touring bike. The rack can take multiple
panniers and is stiff and stable whatever the weight, and
with the large prole tyres, immensely strong wheels, and
wide gear range, you are truly able to go anywhere!
INSPECTION AND MAINTENANCE
This section covers the ongoing checks and maintenace
which are essential to ensure the performace and safety
of your tandem or triplet.
Service Schedule
The service schedule, which can be found in the
appendix, gives a you a guide to which checks should be
carried out and how often. Please note that these are a
guide based on average usage (30 miles/week in good
weather). If you use your tandem more oftern, or in poor
weather, you will need to do more frequent maintenance.
Brakes
Depending on what model of bike you have, it will either
have disc brakes, rim brakes or a combination of both.
With rim brakes you should check that the brake pads
have not worn below their minimum wear line and are
correctly aligned to the rim and not touching the tyre.
If the brake ever pulls all the way to the bar before
engaging, then you should refer to the cable adjustment
section or, consult a professional mechanic. Disc brakes
should also have their pads checked regularly, and if
embarking on a long ride, it may be worth replacing
the pads even before they reach their minimum wear
line. The disc also needs regularly checking for damage,
alignment, and thickness (the minimum thickness is
normally specied by the disc brake manufacturer).
NOTE: Brakes on a tandem have to work doubly as hard as
on a solo bike, so ensuring they are functioning effectively
is critical!
Cables
Cables don’t normally need a lot of adjustment. When
they are new, they will stretch slightly, and that stretch
needs to be adjusted out of the system. Check all cables
regularly for signs of damage.
Brake cables
To adjust the brake cables,
loosen the locking nut on
the barrel adjuster at the
lever. Screw the barrel
adjuster out a little and
check the brakes. When
squeezing the lever, it
shouldn’t come too close
to the handlebar grips.
When the lever is released,
the wheel should turn
freely and not drag on the
brakes.
Gear cables
Gear cable tension
can be adjusted at the
handlebar shifter for
Shimano internal hubs
and derailleur gears.
The Rohloff hub cable
tenison is adjusted at the
clickbox. Refer to the
manufacturer’s manuals
for a more detailed
explanation of adjustment.
LOAD CARRYING
The Helios is a great load carrier, both for two people
touring or shopping, but also as a single bike with the
Cargo rack. When loading the Helios, it is important that all
bags and luggage are attached securely and that straps
are tight and not able to snag on anything. If used as a
solo freight carrier it is vital the load be secured carefully.

8
Circe Cycles
Headset
The headset is the bearing which allows the fork to rotate
in the frame. It plays a major part in the handling of the
bike and should be checked regularly (as per table);
that it’s both tight (not rocking front and back when front
brake is applied and bike rocked backward and forward),
and turning smoothly. If you are unsure about adjusting
your headset, consult a qualied mechanic.
Quick release and thru axle
Quick-releases are used in a number of places on your
bike; it is important that they are tightened correctly.
To locate a quick release properly, adjust the quick-
release by opening it, holding both ends and turning one
clockwise until, when you close the lever, you feel some
resistance. At this point, try to close the lever fully. The
adjustment is correct when you can fully close the lever,
but with some effort (the lever should leave its impression
in the palm of your hand). If you can only close the lever
part way, open it, unscrew the adjusting nut slightly and
try again. If it closes too easily, tighten it up a tiny bit and
try again.
The front wheel is held in place using a thru axle, which
can be installed/removed using a 6mm Allen key, from
the left side (disc brake side) of the fork.
Drive train
Check that the cranks are tight after the rst 50 miles
of riding. These should be fastened rmly to the bottom
brackets, with no play. Even a small amount of movement
will cause the joint between the spindle and the hole in
the crank to wear, resulting eventually in damage to the
chain set.
The rear derailleur idlers tend to collect oil and dirt.
Clean them with a dry rag. If they squeak, they can be
disassembled and greased. When you lubricate your
chain, put a drop of light oil on the moving pivots of the
derailleur; they will last much longer. The more you ride
your bike, the more used you become to the sounds it
makes. If you notice any change in the sound your bike
makes, check it carefully; it may be a sign of something
needing attention.
Handlebars/stem
Both stoker and captain handlebar arrangements, which
include the stem and quick release steerer extender,
should be checked before every ride. The careful
operation of the quick release steerer extender is critical in
ensuring that it continues to function correctly.
The steerer extender ts to the top of the fork and locates
on the 4-pointed star, the slot at the back of the extender
should align with the vertical slot on the side of the top
cap when the handlebars are pointing forward. Ensure
the steerer is fully pushed down before tightening the Q/R.
Open Closed
Top cap
Extender

9
Circe Cycles
When reinstalling the Rohloff you must orienatate the
torque arm such that it aligns with the lower disc brake
mounting bolt.
Alne mechanical
Remove the shifter cable form the cassette joint by shifting
to the highest gear (8 or11 depending on the hub). Once
the cable is removed, undo the wheel nuts with a 15mm
spanner, and the wheel should slide out. When reinstalling,
ensure the wheel is fully seated in the drop outs and the
disc brake (if tted) is aligned with the caliper. Tighten the
bolts to the recommended torque (Appendix A).
Alne Di2
Before removing the wheel, it is essential that the Di2
cable to the hub motor unit is disconnected using the
Di2 tool supplied with your bike. Then follow the same
instructions as per the mechanical Alne hub.
Tyres
Quality tyres are vital for good traction and control while
accelerating, turning, and braking. Each brand of tyre has
its own individual mix of puncture protection, rolling resist-
ance, pressure rating, and durability. Finding the one that
suits your riding style best is the challenge. Tyres should
always be inated according to the range marked on the
sidewall, never above the maximum recommended, and
they should be checked regularly. Worn tyres should be
replaced. Lower pressure results in a more comfortable
ride, but at the expense of higher rolling resistance. Bal-
loon tyres are now available that combine relatively low
rolling resistance, puncture protection, and a smooth ride;
they are well worth considering. With two adults on the
tandem we recommend having the tyres inated to the
upper limit of the marked pressure range.
NOTE: It is important that both tyres on your tandem are
inated to the correct pressure.
Wheels and removal
The wheels on your tandem are made up of three
components; the rim which holds the tyre on, and
provides a braking surface, the spokes which support the
hub in the middle of the rim, and the hub around which
the wheel rotates, providing a means to driver, with disc
brakes, a means of braking. All three parts should be
checked regularly (as per maintenance table), rims should
be checked for wear and straightness, spokes that they
are all at correct tension and none of them are broken,
hub for play in bearings and signs of damage to ange.
Rear wheel removal
Rohloff
Remove the clickbox from the left side of the hub. It is
recommended that you shift to the 14th gear before
doing this to help with reassembly.

10
Circe Cycles
There are a number of recommended accessories for your
Helios:-
General:
• Lights - even if you don’t plan on riding in the dark,
there is always the chance of getting caught out
late, and it is essential, and in many countries the
law, to have working lights.
• A good pump, spare tube, and puncture repair kit
and tool kit. With a tandem, because of the extra
weights involved it is essential to have a pump that
can reach the necessary high pressures.
• A good quality stand for parking and loading
your tandem. The Helios front stand is perfect for
stabilizing the tandem when loading children or
freight.
• Mudguards.
• Speedometer/GPS.
• Carrying bags add to the versatility of any bike.
The Helios comes with attachment points for racks
and bags at the front and back of the bike. Best to
discuss with your supplier what works best for your
needs.
ACCESSORIES
Dedicated:
• Front light bracket
• Front stand (STEPS)
• Front stand (Non STEPS)
• Freewheel crankset
• Crank shorteners
• Junior cranks 125mm
• Thule stand off (to transport the tandem on the roof
of your car using a Thule 591 or 598 rack)
• Separable kit (allows your Helios to break down into
a two suitcases, two bags or, the Traveller case)
• Triplet module
The Helios is an incredibly versatile bike and, with our
range of accessories, you can make full use of this
versatility. If you would like to purchase any of these
accessories, please contact your local dealer or call us on
+44 (0)1954 782020.
WARRANTY AND OTHER INFORMATION
Cyclecentric warrants, to the original owner of each
new Circe tandem, that the frame is free of defective
materials and workmanship for two (2) years from original
date of purchase. Component parts are limited to one
(1) year from original date of purchase. Warranty is
conditional upon the bike being operated under normal
conditions and being properly maintained. Warranty is
offered to the original owner only, and is not transferable.
This warranty does not apply to:
• Damage through normal wear and tear
• Neglect (inadequate care and maintenance)
• Damage from crashes or jumping
• Overloading through excess weight
• Incorrect assembly
• Modications to the bike (additional or changed
components)
• Theft
• Use as a power driven vehicle
• Failure to follow instructions or warnings in the
owner’s manual
• Activities for which the bike was not designed.
Bending of frames, forks, handlebars, seat posts or wheel
rims can be a sign of misuse or abuse. Cyclecentric
reserves the right to make sole determination of whether
any failure or damage claimed under warranty was
caused by material or manufacturing defect, and reserves
the sole discretion to repair or replace any parts covered
by this warranty. The owner shall be responsible for all
labour, shipping, and travel costs connected with the
repair or replacement of warranted parts. Cyclecentric
will, at our sole discretion, normally consider compensation
for reasonable labour, shipping, and travel costs
associated with warranty claims. Cyclecentric shall in
no event be liable for incidental or consequential losses,
damages, or expenses in connection with its bicycle
products.
Liability waiver
Taking part in any sporting activity can result in injury
or death. Cycling is no different in this regard. The rider
(that’s you) is expressly assuming the risk for any injury
and/or property damage that may result from using our
product, as well as for any and all injuries and/or property
damages caused by someone riding your bike. We have
no control over how the bike is used or maintained. It’s
your bike; it is up to you to be responsible for yourself. You
need to ensure that the bike is safe each time before
you ride it. You need to ensure that it is maintained to a
proper standard. Read and understand this manual; it has
warnings and suggestions that will help you to use the bike
safely. If you are in any doubt about any of the advice or
procedures in this manual, please contact your dealer or
Cyclecentric. It is up to you to know and obey trafc laws

11
Circe Cycles
of the country or state where you will be riding your bike.
Pedal cycles are regarded in most countries as vehicles
when on the road and are subject to the same rules as
motor vehicles. If you are not comfortable on the road, or
have little experience riding in trafc, try practising riding
on quieter streets, at least until you develop the necessary
skills and road awareness. Many bike shops can offer
instruction on advanced riding techniques.
Legal requirements
Legal requirements vary from country to country and you
should always comply with them. The important areas you
need to consider are lighting and helmet use. Consult your
local bike dealer for information about what is required in
your area. Please also remember that even if not required
by law, some equipment (such as helmets and lights) can
increase your personal safety and should be carefully
considered.
Frame number location
The frame number is located under the stoker bottom
bracket shell. To read it you may need to turn the bike
over.
Contact information
Cyclecentric Ltd
37 High Street
Longstanton
Cambridge
CB24 3BP
UK
tel. +44 (0) 1954 782020
email. [email protected]
web: www.circecycles.com
Online
Facebook
Find ‘CirceCycles’ on facebook and ‘Like’ our page to
keep updated on what’s new. You may also want ot join
our customer group at ‘I love my Circe’.
YouTube
There are a number of useful instructional videos on our
YouTube channel and we intend to keep adding to this
resoucrce over time.
www.youtube.com/circecycles

12
Circe Cycles
Fastener Allen key size (mm) Nm In-lbf Loctite
Extender clamp top bolt 5 8 71
Extender clamp bolt 5 8 71
Stem bolts 4 6 53
Alne hub nut 15 spanner 30-45 265-398
V brake mounting bolt 5 6-8 53-71 Y
Front derailleur clamp bolt 5 3-5 27-44
Front derailleur cable clamp bolt 5 5-7 44-62
Pedals (Allen key) 8 35 310
Pedals (spanner) 15 spanner 35 310
Thru axle M15 x 1.5 6 17 150
Brake lever clamp bolt 4-5 6-8 53-71
Adjustable drop out M8 bolt 6 15-17 130 -150
Mechanical caliper mounting
bolt
5 9-10 80-89 Y
Rohloff disc rotor bolt 5 7 62 Y
Rohloff M4x25 retaining plate T-20 3 27
Rear derailleur mounting bolt 5 10 89
Rear derailleur cable clamp bolt 5 4-5 38-44
Disc rotor bolt T-25 2-4 18-35 Y
Separable coupling bolt 6 15-19 130-168
Separable drainpipe bolt 6 15-19 130-168
Shimano hollowtech crank bolt 5 10-14 88-132
Square taper crank bolt 8 34-44 305-391
Shimano C/L disc tting HG tool 40-50 350-435
All other M4 bolts 3 5-6 44-53
Tightening Torques Table
APPENDIX A

13
Circe Cycles
APPENDIX B
Component Before every ride Monthly Annually Other
Brakes X
Cables X
Drive train X
Handlebar stem X
Headset X
Frame/fork X
Quick releases X
Tyres X
Wheels X
Service and maintenance schedule

14
Circe Cycles
EU Declaration of conformity
Cyclecentric Ltd
37 High Street
Longstanton
Cambridge
CB24 3BP
UK
As a manufacturer we hereby declare that the following product:
Product: Tandem with electric pedal assistance
Model: Circe Cycles Helios STEPS
Serial number:
Is in compliance with the essential requirements of the following Directives:
• Directive 2006/42/EC (Machinery)
• Directive 2014/30/EU (EMC)
And with the following harmonised standards:
• EN 15194:2017
EUtechnicallecontactnameandaddress:
Alastair Langdon (Director), Cyclecentric Ltd, 37 High Street, Longstanton, Cambridge, CB24 3BP UK
Authorised signatory on behalf of Cyclecentric Ltd:
Signed:
Name and role: Alastair Langdon, Director
Date: 15/12/2020

All photos, illustrations, colours, weights, and specications contained in this catalogue are based on the latest
production information at the time of publication. Circe Cycles reserves the right to make changes at any time, without
notice, in colours, materials, equipment, specications, and models. Some models may be shown with optional
equipment. Please check model availability and full specication with your dealer prior to ordering.
www.circecycles.com
Other manuals for Helios
2
This manual suits for next models
2
Table of contents
Other Circe Cycles Bicycle manuals

