Circuit-test DMR-1500 User manual

USER’S MANUAL
DIGITAL POCKET MULTIMETER
DMR-1500
CIRCUIT-TEST ELECTRONICS
www.circuittest.com


– 1 –
TABLE OF CONTENTS
SAFETY
Safety Information . . . . . . . . . . . . . . . . . . . . . . . . . . . . . . . 2-3
Safety Symbols . . . . . . . . . . . . . . . . . . . . . . . . . . . . . . . . . . . 3
INTRODUCTION
LCD Symbol Definitions . . . . . . . . . . . . . . . . . . . . . . . . . . . . . 4
Front Panel Description . . . . . . . . . . . . . . . . . . . . . . . . . . . . . 5
SPECIFICATIONS
General . . . . . . . . . . . . . . . . . . . . . . . . . . . . . . . . . . . . . . . . . 6
Ranges and Accuracy . . . . . . . . . . . . . . . . . . . . . . . . . . . . . . 7
OPERATING INSTRUCTIONS
1. DC Voltage Measurement . . . . . . . . . . . . . . . . . . . . . . . . 8
2. AC Voltage Measurement . . . . . . . . . . . . . . . . . . . . . . 8-9
3. Resistance Measurement . . . . . . . . . . . . . . . . . . . . . . . . 9
4. Continuity Test . . . . . . . . . . . . . . . . . . . . . . . . . . . . . . . . 10
5. Diode Test . . . . . . . . . . . . . . . . . . . . . . . . . . . . . . . . .10-11
6. Frequency Measurement. . . . . . . . . . . . . . . . . . . . . . . . 11
7. Capacitance Measurement . . . . . . . . . . . . . . . . . . . .11-12
8. Duty Cycle Measurement . . . . . . . . . . . . . . . . . . . . . . . 12
9. Relative Function. . . . . . . . . . . . . . . . . . . . . . . . . . . . . . 12
10. Battery Replacement. . . . . . . . . . . . . . . . . . . . . . . . . . . 13
MAINTENANCE. . . . . . . . . . . . . . . . . . . . . . . . . . . . . . . . . . . . . . 13
WARRANTY. . . . . . . . . . . . . . . . . . . . . . . . . . . . . . . . . . . . . . . . . 14

– 2 –
SAFETY INFORMATION
This meter is CUL and UL approved. This meter is designed to be safe
under the following conditions: indoor use, altitude up to 2000m, tem-
perature 5°C to 40°C, maximum relative humidity 80% for temperatures
up to 31°C decreasing linearly to 50% relative humidity at 40°C and rated
pollution degree 2. Caution and proper guidelines must be followed for
personal and product safety. Read this instruction manual carefully
and completely before using the meter. Lack of caution or poor safety
practices can result in serious injury or death.
• This meter is not recommended for high voltage industrial use;
for example, do not use for measurement on 440VAC or 600VAC
industrial power mains. The unit is intended for use with low energy
circuits up to 600VDC / 600VAC or high energy circuits up to
250VAC / 250VDC only.
• Use caution when working above 60VDC or 30VAC RMS as these
voltages pose a shock hazard.
• Always consider circuits to be energized. Never assume any equip-
ment to be de-energized.
• Always start with power off. Set the function switch to the correct
setting before making any measurements and do not change posi-
tion of the function switch during measurements.
• Never connect unit to AC or DC powered circuits when the function
switch is set to resistance, diode check or continuity ranges.
• Always disconnect the power when performing resistance, diode or
capacitance tests. Discharge capacitor before testing.
• Disconnect the live/positive test lead (red) prior to disconnecting
the common/negative test lead (black).

– 3 –
• When ʻBATʼ appears on the display, change both batteries to
achieve more accurate readings.
• Turn the meter off and disconnect any load before removing the
batteries.
• Do not operate the unit unless the case is completely closed.
• When using the test probes always keep fingers behind the finger
guards. Never touch the exposed probe tip.
• Always inspect the instrument, test leads and other accessories for
damage prior to use.
SAFETY SYMBOLS
Safety symbols and special annunciators on the meter and in this manual
indicate cautions and warnings of important operational procedures that
must be followed to ensure personal and product safety.
This symbol indicates a General Warning. When adjacent to a
terminal or operating device indicates that the operator must
refer to an explanation in the Operating Instructions.
450V
MAX
This symbol indicates that the terminal(s) so marked must not
be connected to a circuit point at which the voltage with respect
to ground exceeds 450V AC/DC.
This symbol adjacent to one or more terminals indicates them
as being associated with ranges that may in normal use, be
subjected to particularly hazardous voltages. For maximum
safety, the meter and its test leads should not be handled when
these terminals are energized.

– 4 –
INTRODUCTION
DMR-1500 is an Auto Ranging Pocket sized meter featuring a large
3-3/4 digit LCD display with a 4000 count. This meter can measure/test
the following:
– Voltage – Frequency
– Resistance – Continuity
– Diode – Duty Cycle
LCD DISPLAY SYMBOL DEFINITIONS
DISPLAY/SYMBOL DEFINITION DISPLAY/SYMBOL DEFINITION
AUTO Auto Ranging µMicro
BAT Low Battery mmilli
DC Direct Current FFarads
AC Alternating Current VVolts
Diode KKilo
Continuity MMega
nnano Ohms
%Duty Cycle Hz Hertz
Relative
AUTO
BAT
AC
DC
n%
umFV
KM Hz

– 5 –
AUTO POWER OFF
OFF
DC/
AC
Ω / /
/
DMR-1500
4000 COUNT
AUTO
BAT
AC
DC
n%
umFV
KM Hz
MAX 450V
MAX 450V
DC / AC
CIRCUIT-TEST
!
SELECT
Hz / % RELATIVE
VOLT Hz / %
5
4
3
2
1
FRONT PANEL DESCRIPTION
NO. ITEM DESCRIPTION
1LCD Display 3-3/4 digit 4000 count LCD Display
2Hz/% Button Use with the function switch to select Frequency/Duty
Cycle/Voltage
3Relative Button Indicated by on the LCD display. The displayed reading
becomes the reference for subsequent readings. The reading
will get zeroed, stored and subtracted from subsequent read-
ings. This function can be used for capacitance and voltage
measurements.
4Select Button Depending on the measurement mode selected on the
function switch:
a) Volt mode - select between AC or DC
b) / / / mode - select between resistance, capaci-
tance, diode and continuity check
5Function Switch Use to select different measurement modes or to turn the
meter OFF

– 6 –
SPECIFICATIONS
GENERAL
Display: 3 3/4 digit 4000 count LCD
Maximum Display: 3999
Ranging: Auto
Auto Shut-off: Meter will shut-off after 30 minutes from last
use
Polarity: Automatic, minus (-) sign indicates negative
polarity; no sign for positive polarity
Measuring rate: 3 times/sec
Input impedance: 10M (DCV / ACV)
Diode Test: Test current of 1.0 mA maximum
Continuity: Audible signal sounds if resistance is less
than 30
Over range indication: ʻOLʼ is displayed
Operating Temp: 5 to 35° C (41 to 95° F)
Storage Temp: -10 to 50° C (14 to 122° F)
Relative Humidity: <75% Operating/Storage
Power Source: 2 x LR44 or SR44 cells
Dimensions: 106(H) x 51(W) x 10(D) mm
(413/16 x 2 x 3/8")
Weight: 100g (3.5oz) [with case and test leads]
Accessories included: One pair of test leads (built-in), 2 x LR44
batteries (installed), Userʼs manual

– 7 –
RANGES AND ACCURACY
FUNCTION RANGE RESOLUTION ACCURACY
DC VOLTAGE
(DC V)
400mV
4V
40V
400V
450V
0.1mV
1mV
10mV
100mV
1V
±(1.0% reading + 3 digits)
±(1.2% reading + 3 digits)
AC VOLTAGE
(AC V)
(40-200HZ)
4V
40V
400V
450V
1mV
10mV
100mV
1V
±(1.2% reading + 6 digits)
RESISTANCE 400
4k
40k
400k
4M
40M
0.1
1
10
100
1k
10k
±(1.0% reading + 5 digits)
±(2.0% reading + 10 digits)
FREQUENCY 10Hz
100Hz
1000Hz
10KHz
100KHz
0.001Hz
0.01Hz
0.1Hz
1Hz
10Hz
±(0.3% reading + 6 digits)
DUTY CYCLE 0.1% - 99.9% ±(2.3% reading + 6 digits)
CAPACITANCE 40nF
400nF
4µF
40µF
100µF
0.01nF
0.1nF
1nF
10nF
100nF
±(6.0% reading + 6 digits)
NOTE: Accuracy consists of: (% reading i.e. accuracy of the measure-
ment circuit + digits i.e. accuracy of the analog to digital converter)

– 8 –
1. DC VOLTAGE MEASUREMENT
WARNING: MAXIMUM INPUT IS 450V DC. USE EXTREME CAUTION WHEN
WORKING WITH HIGH VOLTAGES. NEVER APPLY THE TEST LEAD TO THE MEASUR-
ING CIRCUIT WHEN CHANGING THE POSITION OF THE FUNCTION SWITCH.
NOTE: The meter is auto ranging and will automatically display the correct
voltage within the overall range of the meter.
➔ Set the function switch to VOLT/Hz/%.
➔ If ʻDCʼ does not show on the display, push the SELECT button until
it appears.
➔ Apply the test leads to the circuit to be measured. Ensure that the
black lead is connected to the negative side of the circuit and red
lead to the positive.
➔ Read the displayed voltage.
➔ If the minus (-) sign appears it means the voltage is negative at the
point being measured.
➔ If ʻOLʼ appears on the display, it indicates over-range. Immediately
remove test leads from the measuring circuit to avoid any damage
to the meter. The input voltage should not exceed the measure-
ment capability of this meter.
2. AC VOLTAGE MEASUREMENT
WARNING: MAXIMUM INPUT IS 450V AC. USE EXTREME CAUTION WHEN
WORKING WITH HIGH VOLTAGES. NEVER APPLY TEST LEADS TO THE MEASURING
CIRCUIT WHEN CHANGING THE POSITION OF THE FUNCTION SWITCH.
NOTE: The meter is auto ranging and will automatically display the correct
voltage within the overall range of the meter.
➔ Set the function switch to VOLT/Hz/%.

– 9 –
➔ If ʻACʼ does not show on the display, push the SELECT button until
it appears.
➔ Apply the test leads to the circuit to be measured.
➔ Read the displayed voltage.
➔ If ʻOLʼ appears on the display, it indicates over-range. Immediately
remove test leads from the measuring circuit to avoid any damage
to the meter. The input voltage should not exceed the measure-
ment capability of this meter.
3. RESISTANCE MEASUREMENT
WARNING: NEVER CONNECT THE TEST LEAD TO ANY VOLTAGE WHEN
THE FUNCTION SWITCH IS SET TO . REMOVE ALL POWER FROM THE CIRCUIT
BEING TESTED WHEN CHECKING RESISTANCE. DISCHARGE ANY CHARGED
CAPACITORS. NEVER APPLY THE TEST LEAD TO THE MEASURING CIRCUIT WHEN
CHANGING THE POSITION OF THE FUNCTION SWITCH.
NOTE: The meter is auto ranging and will automatically display the resistance
measurements within the overall range of the meter.
➔ Set the function switch to / / / .
➔ If , or ʻFʼ appear on the display, push the Select button until
, K or M appears on the display.
➔ Apply the test leads to the resistor being measured. If the resistor
is part of a circuit, it is necessary to disconnect one end of the
resistor to avoid any unwanted interference from the rest of the
circuit.
➔ Read the displayed resistance indicated with proper decimal point
and one of the symbols , K or M .
NOTE: ‘OL’ appears on the display if the test leads are not connected to
anything.

– 10 –
4. CONTINUITY TEST
WARNING: NEVER CONNECT THE TEST LEADS TO ANY VOLTAGE WHEN
THE FUNCTION SWITCH IS SET TO / //. REMOVE ALL POWER FROM
THE CIRCUIT BEING TESTED WHEN CHECKING RESISTANCE. DISCHARGE ANY
CHARGED CAPACITORS.
➔ Set the function switch to / / / .
➔ Press the Select button until appears on the display.
➔ Apply the test leads to the circuit.
➔ The buzzer will sound if the resistance is less than 30 and the
measured resistance value will be displayed in ohms with proper
decimal point.
5. DIODE TEST
WARNING: NEVER CONNECT THE TEST LEAD TO ANY VOLTAGE WHEN
THE FUNCTION SWITCH IS SET TO / //. REMOVE ALL POWER FROM THE
CIRCUIT BEING TESTED WHEN PERFORMING THE DIODE TEST. DISCHARGE ANY
CHARGED CAPACITORS.
Note: If the diode is part of a circuit, it is necessary to disconnect one end
of the diode to avoid any unwanted interference from the rest of the circuit.
The value indicated in the display during the diode check is the forward
bias voltage.
➔ Set the function switch to / / / .
➔ Press the Select button until appears on the display.
➔ Apply the test leads across the diode terminals and note the
meter reading.
➔ Reverse the diode and note this reading. Based on the readings
the result can be evaluated as follows:

– 11 –
– If one reading is around 0.5 and the other reading is ʻOLʼ,
the diode is good
– If both readings are ʻOLʼ, the diode is open (defective)
– If both readings are very small or 0 (zero), the diode is
shorted (defective)
6. FREQUENCY MEASUREMENT
WARNING: NEVER MEASURE FREQUENCY ON A CIRCUIT WITH MORE
THAN 250V.
➔ Set the function switch to VOLT/Hz/%.
➔ Press Hz/% button once and ʻHzʼ appears on the display.
➔ Apply the test leads to the point of measurement.
➔ Read the displayed frequency indicated with proper decimal point
and symbol.
7. CAPACITANCE MEASUREMENT
WARNING: FULLY DISCHARGE THE CAPACITOR BY SHORTING THE
CAPACITOR LEADS TOGETHER BEFORE TESTING.
NOTE: The meter is auto ranging and will automatically display the correct
capacitance value within the overall range of the meter.
➔ Set the function switch to / / / .
➔ Press the Select button until ʻFʼ appears on the display.
➔ Touch the probe tips to the capacitor.
➔ Read the value and unit shown on the display.

– 12 –
➔ If ʻOLʼ appears on the display, the value of the capacitor is over the
maximum range of the meter.
8. DUTY CYCLE MEASUREMENT
WARNING: NEVER MEASURE FREQUENCY ON A CIRCUIT WITH MORE
THAN 250V.
➔ Set the function switch to VOLT/Hz/%.
➔ Press the Hz/% pushbutton twice and ʻ%ʼ appears on the display.
➔ Apply the test leads to the point of measurement.
➔ The duty cycle will be shown on the display with proper decimal
point and value.
9. RELATIVE FUNCTION
NOTE: This function can only be used when making voltage and capacitance
measurements.
Relative is indicated by on the LCD display. This function sets the
displayed reading to zero and stores it as a reference value which is
subtracted from subsequent measurements. Press the button again to
release this function and will disappear from the display.
Example: When 5V DC is being measured and this button is pressed
once, the value is stored. After disconnecting the test probes from the
voltage source and then re-applying to another voltage source of 4.5V
DC, the LCD will display -0.5V DC. This means that the subsequent
reading (4.5V DC) is 0.5V DC lower than the reference (5V DC).

– 13 –
10. BATTERY REPLACEMENT
WARNING: DISCONNECT BOTH TEST LEADS FROM ANY SOURCE OF
VOLTAGE BEFORE REMOVING THE BACK COVER. DO NOT OPERATE THE METER
UNTIL THE BACK COVER IS IN PLACE AND FASTENED SECURELY.
ʻBATʼ will appear in the display when the battery drops below the
operating voltage and requires replacing.
➔ Turn off the meter and remove from the carrying case.
➔ Remove the single screw securing the battery cover and lift to
open.
➔ Replace both batteries observing the correct polarity.
➔ Replace the cover and tighten the screw.
MAINTENANCE
a) Always keep the meter dry.
b) Keep the meter clean. Wipe the case occasionally with a damp
cloth. Do not use chemicals, cleaning solvents or detergents.
c) Use and store the meter in recommended normal environmental
conditions. Extreme temperatures can shorten the life of the
electronic components.
d) Use only fresh batteries.
e) Remove the batteries when the meter is not being used for a
long period of time.

– 14 –
LIMITED WARRANTY
Circuit-Test Electronics warrants to the original purchaser that this
product be free of defect in material or workmanship for a period of
2 years from the date of purchase. Visit our website (www.circuittest.
com) for information on warranty service.
Any product which has been subjected to misuse or accidental damage
is excluded from the warranty. Except as stated above, Circuit-Test
Electronics makes no promises or warranties either expressed or
implied including warranties of merchantability or the fitness for any
particular purpose.
Register your product online at www.circuittest.com
CIRCUIT-TEST
ELECTRONICS
A division of R.P. Electronic Components Ltd.
www.circuittest.com
Table of contents
Other Circuit-test Multimeter manuals
Circuit-test
Circuit-test DMR-2400 User manual
Circuit-test
Circuit-test DMR-6600 User manual
Circuit-test
Circuit-test DMR-6700 User manual
Circuit-test
Circuit-test DMR-4200 User manual
Circuit-test
Circuit-test DCL-420 User manual
Circuit-test
Circuit-test DMR-3600 User manual
Circuit-test
Circuit-test DMR-6550 User manual
Circuit-test
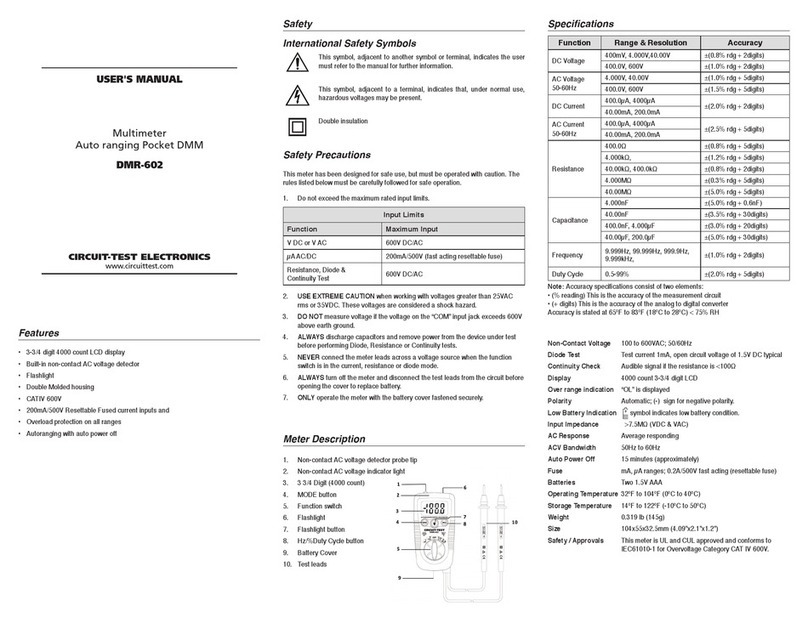
Circuit-test DMR-602 User manual
Circuit-test
Circuit-test DMR-4350 User manual
Circuit-test
Circuit-test DMR-1100A User manual
