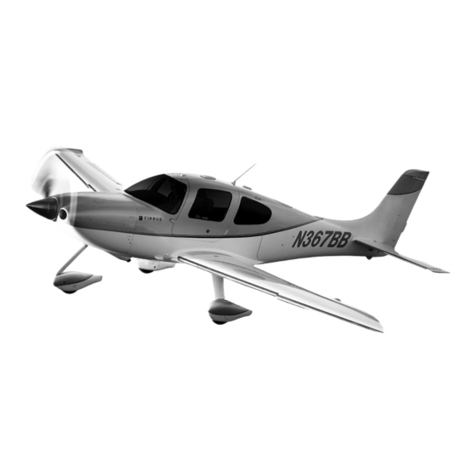
Cirrus SR22 User manual

CIRRUS AIRPLANE MAINTENANCE MANUAL MODELS SR22 AND SR22T
56-20
Page 1
All
EFFECTIVITY:
CABIN
1. DESCRIPTION AND OPERATION
The aft passenger windows are manufactured of acrylic and adhesive bonded to the fuselage. Replace-
ment is accomplished by removing the interior trim around the window, removing the sealant around the
window, and then removing the window from the fuselage. In general, the reverse process is used to install
a replacement window. This method is literally seamless, and the fuselage will show no marks or evidence
of maintenance.
15 Jun 2010

56-20
Page 2 All
EFFECTIVITY:
CIRRUS AIRPLANE MAINTENANCE MANUAL MODELS SR22 AND SR22T
15 Jun 2010
2. MAINTENANCE PRACTICES
A. Aft Passenger Window
(1) Removal - Aft Passenger Window (See Figure 56-201)
(a) Acquire necessary tools, equipment, and supplies.
(b) Remove the interior trim panels from around the window. (Refer to 25-10)
(c) Cover the interior and instrument panel with a drop cloth to prevent foreign material from
contaminating the interior and instruments.
(d) Using several pieces of duct tape, make handles on the exterior of the window.
CAUTION: Exercise care to prevent the removal of laminate from the fuselage when
cutting and removing the sealant from between the fuselage and window. If
laminate is damaged, it must be repaired prior to installing the window.
Note: If window is being replaced, it will be easier to use a die grinder and a cut-
off disk to cut out the inner portion of the window to gain access to the
bonding flange. The window should be cut as close as possible to the fuse-
lage.
(e) Cut sealant loose from between fuselage and window using a small pocket knife. While
pushing in on the window, follow the edge of the fuselage with the tip of the blade, then
back cut in towards the fuselage to clean out the sealant. (See Figure 56-201)
(f) Using a phenolic or hardwood utility knife, isopropyl alcohol and aluminum oxide sandpa-
per (80-grit), remove all remaining sealant from the fuselage bonding flange.
Description P/N or Spec. Supplier Purpose
Die Grinder (1-inch cut-off
disk)
- Any Source Cut window.
Masking Tape 2-inch Any Source Prevent damage to
the window.
Drop Cloth - Any Source Prevent contamina-
tion.
Isopropyl Alcohol TT-I-735 Grade
A or B
Any Source General cleaning.
Aluminum Oxide Sandpaper 80-grit Any Source Sealant removal.
Phenolic or Hardwood Utility
Knife
1-inch Any Source Sealant removal.

CIRRUS AIRPLANE MAINTENANCE MANUAL MODELS SR22 AND SR22T
56-20
Page 3
All
EFFECTIVITY:
Figure 56-201
Window Removal
SR22_MM56_1493
WINDOW BONDING FLANGE
SEALANT
FUSELAGE (REF)
Cut window out next to bonding
flange, do not damage laminate.
Any laminate which becomes
damaged must be repaired prior
to installing the new window.
BONDING FLANGE
Push window inward
while cutting sealant
between bonding flanges FUSELAGE BONDING FLANGE
15 Jun 2010

56-20
Page 4 All
EFFECTIVITY:
CIRRUS AIRPLANE MAINTENANCE MANUAL MODELS SR22 AND SR22T
15 Jun 2010
(2) Installation - Aft Passenger Window (See Figure 56-202), (See Figure 56-203)
Window sealant is intended to provide an acceptable seal between the window and fuselage and
to prevent the leakage of air through the airframe structure. Window sealant is used in the instal-
lation of all windows in the aircraft.
Isopropyl alcohol, kerosene, white alptha naptha, mineral spirits, and cotton are acceptable for
cleaning acrylic windows. Residue left behind by the “Spraylat” protective coating may be
removed by soaking the area with isopropyl alcohol and rubbing with an alcohol soaked soft flan-
nel cloth. Residue left behind by the adhesive backed paper covering can also be removed by
the above method. If, however, the paper covering has been stored on the window for an
extended period of time, soak paper with kerosene and keep it wet for several hours. Remove
any remaining adhesive by using a mixture of equal parts of kerosene and isopropyl alcohol.
Soak a soft flannel cloth with this mixture and rub the window with the cloth. The window should
be cleaned after this procedure with a dish washing liquid and plenty of water.
CAUTION: Never use organic solvents such as Methyl Ethylketone (MEK), acetone, or lac-
quer thinner. Do not use jewelry cleaner or paper towels to remove any contami-
nates. Never use ice scrapers on acrylic windows. Do not store any window
outdoors while the protective covering is still on the window. The covering will
become very difficult, if not impossible, to remove without damaging the window.
CAUTION: It is very important to keep the window well supported at all times. Warm tempera-
tures are not required during these operations; however, acrylic will take much
more abuse at 80 degrees than at 30 degrees.
Note: Always inspect the window before final installation. Use care to prevent staining or
scratching the window.
(a) Acquire necessary tools, equipment, and supplies.
Description P/N or Spec. Supplier Purpose
Padded Cargo Rods - Any Source Temporarily secure
window.
Masking Tape 2-inch Any Source Prevent damage to
the window.
Temperature-Resistant
Sealing Compound
MIL-S-8802
Type II, Class B
(Refer to 20-10) Seal windows.
Isopropyl Alcohol TT-I-735 Grade A
or B
Any Source General cleaning.
Cotton Gloves (clean, lint
free)
- Any Source Protect hands.
Cotton Cloth (clean, lint
free)
- Any Source Clean sealing sur-
face.
Application Spatula (non-
nylon)
1-inch Any Source Smooth adhesive.
Primer MC-145 LP Aero Plastics
Rd#1 Box 201-B
Jeannette, PA
15644
Aid in adhesion.
CIRRUS AIRPLANE MAINTENANCE MANUAL MODELS SR22 AND SR22T
56-20
Page 5
All
EFFECTIVITY:
Note: Exercise care to protect the inner and outer window surfaces from damage
during the installation process. The stepped area on the edge of the window
(which is bonded to the fuselage) is called the bonding flange.
(b) Verify that sealant is within storage-life requirements.
(c) Inspect fuselage bonding flange for any remaining sealant or contaminates, remove and
clean as necessary.
(d) Remove the protective covering from the window and inspect the window for damage or
defects, never install a defective window.
(e) Install a continuous piece of fine line tape on the edge of the fuselage window opening
(next to the bonding flange). (See Figure 56-202)
Note: The masking tape will provide a smooth and continuous parting line at the
bonding flange.
(f) Working in one direction on the fuselage window opening, place 2-inch masking tape on
top of the outer edge (the edge furthest away from the bonding flange) of the fine line tape.
(g) Make a directional mark on the masking tape to indicate the proper direction for removal.
(See Figure 56-203)
CAUTION: Do not apply protective coating on the window bonding flange.
(h) Apply three coats (in opposing directions) of protective coating (AC-940 Blue) on the outer
window surface.
(i) Using several pieces of duct tape, make handles on the exterior of the window after the
protective coating has fully cured.
Note: Five or more padded cargo rods may be necessary to hold the window into
the proper position. Padded cargo rods may be placed on each corner of
the window and in the center of the window. Additional padded cargo rods
may be required to prevent the window from sliding down.
(j) Place window into position and secure the window into the fuselage using padded cargo
rods. (See Figure 56-203)
(k) Inspect the window for proper fit. The window must have equal amounts of space around
the perimeter of the window. The exterior surface of the window should be flush with exte-
rior surface of fuselage.
Protective Coating AC-940 Blue AC Products, Inc.
172 Ela Jolla St.,
Placentia CA
92670
Prevent damage to
the window.
Fine Line Tape (pin strip-
ping)
1/4-inch 3-M Allow smooth tran-
sition between
fuselage and win-
dow.
Aluminum Oxide Paper 80-grit or finer Any Source Abrade acrylic sur-
face prior to adhe-
sion.
Description P/N or Spec. Supplier Purpose
15 Jun 2010

56-20
Page 6 All
EFFECTIVITY:
CIRRUS AIRPLANE MAINTENANCE MANUAL MODELS SR22 AND SR22T
15 Jun 2010
CAUTION: The window bonding flange must never be trimmed to a thickness less than
0.080 of an inch. The window bonding flange must never be less than ½-
inch wide.
Note: The window bonding flange should have equal amounts of space around it.
If the window doesn’t fit into the fuselage with equal amounts of space
around it, the window and/or bonding flange will need to be trimmed accord-
ingly.
The window should be flush with the exterior surface of the fuselage. If the
window cannot be made flush by adding moderate pressure on the padded
cargo rods, the thickness of the window bonding flange must be trimmed
accordingly. Aluminum oxide sandpaper (80-grit) on a sanding board may
be used to trim the window.
(l) Mark and trim the window as required to ensure a perfect fit.
Note: Five or more padded cargo rods may be necessary to hold the window into
the proper position. Padded cargo rods may be placed on each corner of
the window and in the center of the window. Additional padded cargo rods
may be required to prevent the window from sliding down.
(m) Place the prefit window into position and clamp the window into position using padded
cargo rods.

CIRRUS AIRPLANE MAINTENANCE MANUAL MODELS SR22 AND SR22T
56-20
Page 7
All
EFFECTIVITY:
Figure 56-202
Window Alignment
SR22_MM56_1494
BONDING FLANGE
Trim window thickness as required
to obtain a flush fit to fuselage.
HANDLE
NOTE
0.080" MINIMUM
WINDOW
BONDING FLANGE
0.5" MINIMUM
Placement of padded cargo rods.
Trim window as required to ensure
equal spacing on all sides
Apply protective coating on window
to prevent damaging window during
the installation process.
Trim window bonding flange as required
to obtain a 0.5 inch flange.
FUSELAGE (REF)
15 Jun 2010

56-20
Page 8 All
EFFECTIVITY:
CIRRUS AIRPLANE MAINTENANCE MANUAL MODELS SR22 AND SR22T
15 Jun 2010
(n) Remove a small amount (approximately 2-inches wide) of protective coating from around
edge of window.
(o) Install a continuous piece of fine line tape (pinstripe tape) around the edge of the window
(next to the bonding flange). The fine line tape should be adhered to the window with
equal amounts of space between the fine line tape on the fuselage and the fine line tape
on the window.
(p) Working in one direction on the window, place 2-inch masking tape on top of the inner
edge (the edge furthest away from the bonding flange) of the fine line tape.
Note: The alignment marks will be used to ensure that the window will be installed
into the exact location in which it was during prefit.
(q) Using a straight edge, make several alignment marks around the edges of the masking
tape on the fuselage to the masking tape on the window.
(r) Carefully remove window from fuselage.
(s) Using aluminum oxide 80-grit paper, abrade the bonding flange of the window in a random
pattern. Remove all surface gloss.
CAUTION: Wax or grease pencil markings on any part are not allowed. Any such mark-
ings inadvertently occurring must be removed prior to application of primer.
All surfaces shall be thoroughly cleaned and dried before application of
primer.
Immediately prior to applying any primer on the window bonding flange, sol-
vent clean the flange with isopropyl alcohol. When handling cleaned sur-
faces, wear clean cotton gloves to prevent surface contamination. Surfaces
must be re-cleaned in the event of contamination.
Note: Fold cloth in such a manner to eliminate raw edges to reduce the possibility
of lint. Always clean an area larger than the application area.
(t) Remove contaminates from the window bonding flange and the immediate work area
using a vacuum and a clean brush attachment.
CAUTION: Do not apply primer to the composite bonding surface.
(u) Ensure that all surfaces adjacent to the window bonding flange are masked to prevent
them from coming into contact with any primer or sealant.
(v) Using isopropyl alcohol, solvent clean fuselage bonding flange.
(w) Verify all required materials are present and all parts have been prepared and pre-fit.
(x) Wearing clean gloves, lightly dampen a cloth with primer. Fold the cloth in such a manner
to eliminate raw edges to reduce the possibility of lint.
(y) Apply primer to the acrylic bonding flange. Wipe the cloth over the prepared area. Apply
as little primer as possible while still wetting the entire surface.
CAUTION: Keep primed area clean and free from contaminates while primer is drying.
Seal window as soon as practical after primer drying period to minimize
contamination.
(z) Allow the primer to dry for thirty to sixty minutes.
(aa) Mix sealant per manufacturer's instructions. Mix the required quantity in the ratio specified
in the adhesive manufacturer's instructions. (Refer to 20-10)

CIRRUS AIRPLANE MAINTENANCE MANUAL MODELS SR22 AND SR22T
56-20
Page 9
All
EFFECTIVITY:
CAUTION: Do not apply sealant to window bonding flange. The sealant must be
applied to the fuselage bonding flange.
(ab) Apply a thin layer of sealant to the outer edge of the fuselage bonding flange. Spread the
sealant out using an application spatula.
CAUTION: When spreading the sealant, ensure all air pockets are removed.
Note: If more than one bead is required, apply it immediately adjacent to the prior
bead to form one large bead.
(ac) Directly on top of the sealant previously spread, apply a 1/4-inch to 3/8-inch bead of seal-
ant down the center of the bond area.
Note: Five or more padded cargo rods may be necessary to hold the window into
the proper position. Padded cargo rods may be placed on each corner of
the window and in the center of the window. Additional padded cargo rods
may be required to prevent the window from sliding down.
(ad) Using padded cargo rods, secure the window into position making sure the reference
marks made earlier are perfectly aligned and that the contour of the window matches the
contour of the fuselage.
(ae) Using a 1-inch application spatula, push sealant into the gap between the window and the
fuselage.
Note: To prevent sealant from becoming damaged, pull tape towards sealant while
the sealant is still damp.
(af) Remove masking tape and fine line tape from the perimeter of the window and the fuse-
lage.
CAUTION: Overheating windshield can cause window damage.
(ag) Allow the sealant to air dry. Following the manufacture’s instructions, the sealant can be
heat cured using a heat gun.
(ah) Remove cargo rods.
(ai) Remove the drop cloth.
(aj) Using a vacuum cleaner, remove all debris.
(ak) Install and secure interior trim panels. (Refer to 25-10)
(al) Clean window. (Refer to 56-10)
15 Jun 2010

56-20
Page 10 All
EFFECTIVITY:
CIRRUS AIRPLANE MAINTENANCE MANUAL MODELS SR22 AND SR22T
15 Jun 2010
Figure 56-203
Window Installation
SR22_MM56_1495
HANDLE
Trim window as required to ensure
equal spacing on all sides.
SEALANT
FUSELAGE (REF)
Force the sealant into the bonding flange
to ensure no air is trapped in the sealant.
FUSELAGE WINDOW
OPENING
2" MASKING TAPE
FINE LINE TAPE
SEALANT
WINDOW BONDING FLANGE
FINE LINE TAPE
2" MASKING TAPE
WINDOW
BONDING FLANGE
DIRECTIONAL
ARROW
Remove surface gloss from bonding
flange using 80-grit sandpaper.
Make alignment marks to ensure proper
alignment after fit up.
NOTE
Remove approximately 2-inches
of protective coating.
Other manuals for SR22
27
This manual suits for next models
1
Table of contents
Other Cirrus Aircraft manuals

Cirrus
Cirrus SR22 User manual

Cirrus
Cirrus SR22 User manual

Cirrus
Cirrus SR22 User manual

Cirrus
Cirrus SR22 User manual

Cirrus
Cirrus SR22 User manual

Cirrus
Cirrus SR22 User manual

Cirrus
Cirrus SR22 Technical specifications

Cirrus
Cirrus SR20 Quick setup guide

Cirrus
Cirrus SR22 User manual

Cirrus
Cirrus SR20 Owner's manual

Cirrus
Cirrus SR20 Quick setup guide

Cirrus
Cirrus SR22 User manual

Cirrus
Cirrus SR22 User manual

Cirrus
Cirrus SR20 User manual

Cirrus
Cirrus SR22 User manual

Cirrus
Cirrus SR22 Owner's manual

Cirrus
Cirrus SR20 User manual

Cirrus
Cirrus SR20 User manual

Cirrus
Cirrus SR22T Owner's manual

Cirrus
Cirrus SR22 User manual