manuals.online logo
Brands
  1. Home
  2. •
  3. Brands
  4. •
  5. Cisco
  6. •
  7. Network Hardware
  8. •
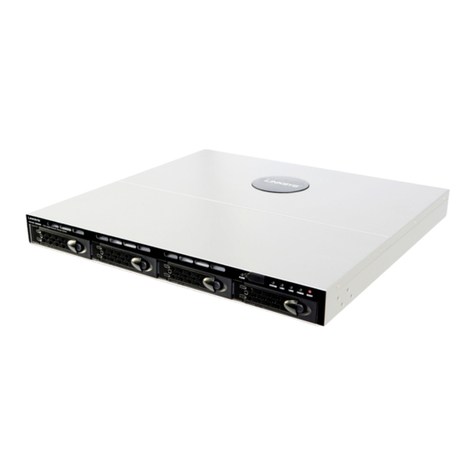
  9. Cisco SOURCEfire 3D500 User manual

Cisco SOURCEfire 3D500 User manual

3D500/1000/2000
Required items:
either a computer to use as a management console•
or a monitor and keyboard to connect directly to the
device
flathead and Phillips screwdrivers for the•
rack-mounting kit (optional)
Included items:
one of the following Sourcefire devices:•
Sourcefire 3D500•
Sourcefire 3D1000•
Sourcefire 3D2000•
These devices have identical chassis.To confirm
which model you have, see your packing list.
one power cord•
two straight-through Cat 5e Ethernet cables•
USB thumb drive•
rack-mounting kit (optional)•
2014-5.2-3
3D500/1000/2000
FRONT BACK
(A) Management Interface
(B) Sensing interfaces
(C) Serial port
(D) VGA port
(E) USB ports
(F) Reset button
(G) Power supply connector
C D E F G
B
2MGMT 1 43 BypassBypass
A
Physical and Environmental Parameters
Parameter Description
Form factor 1U
Dimensions (D x W x H) 6.7” x 11.8” x 1.25” (17 cm x 30 cm x 3.2 cm)
Power adapter - AC input 1/6 Ampere maximum at 110-240 Volts 50-60 Hz
Power adapter - DC output 5 Ampere maximum at 12 Volts
Operating temperature 0°C to 40°C (32°F to 104°F)
Non-operating temperature -20°C to 75°C (-4°F to 167°F)
Non-operating humidity 5% to 95%, non-condensing at 45°C (113°F)
Cooling requirements Designed to operate in an air-conditioned environment
Regulatory Conformance
This Sourcefire appliance conforms to multiple national and international standards. For a full list of
regulatory compliance, see the
Sourcefire 3D System Installation Guide
.
Security Considerations
Before you install your appliance, Sourcefire recommends that you
consider the following:
Locate your appliance within a secure location that•
prevents access by unauthorized personnel.
Allow only trained and qualified personnel to install,•
replace, administer, or service the appliance.
Always connect the management interface to a secure•
internal management network that is protected from
unauthorized access.
Sensing Interface LEDs
LEDs Description
Link The color of the LED indicates the speed of the connection. Refer to the
Sourcefire 3D System Installation Guide
for more information.
Activity A blinking LED indicates traffic. If the LED is off, there is no activity.
Bypass Indicates that an inline pair has failed open. If the LED is on, an inline with
bypass inline set is inspecting traffic normally. The LED is off at all other
times.
Management Interface LEDs (all)
Left
(activity)
Indicates activity on the port:
A blinking light indicates activity.•
No light indicates there is no link.•
Right (link) Indicates whether the link is up:
A light indicates the link is up.•
No light indicates there is no link.•
FOUR PORT 1000BASE-T COPPER
Link Activity
Bypass
LEDS, SPECIFICATIONS, REGULATORY, and SECURITY
Page 1 of 4Quick Start Guide - 3D500/1000/2000 Devices
Thank you for choosing Sourcefire!
Before installing this device, download and follow the
instructions in the Sourcefire Support Welcome Kit
(https://support.sourcefire.com) to get started with
Sourcefire Support, and to set up your Customer Center
account.
9770 Patuxent Woods Drive
Columbia, MD 21046 USA
800.917.4134 | +1.410.423.1901
support@sourcefire.com
©2014 Cisco and/or its affiliates.
All rights reserved.
WARNING!
This Sourcefire appliance should be installed and maintained by
qualified personnel only. Keep in mind the following safety
information to avoid system damage or personal injury:
Remove all factory packaging before using the appliance.•
Provide adequate ventilation to prevent overheating. Do not•
cover or block vents, or otherwise enclose the appliance.
The appliance must be properly grounded when connecting•
power to the power outlet.
At all times, keep the chassis area free from dust.•
Lifting the chassis for rack installation may require two people,•
as the unit is heavy.
To avoid electrical shock, do not open or remove the chassis•
covers or metal parts without proper instruction.
!
QUICK START GUIDE
Quick Start Guide - 3D500/1000/2000 Devices
3D500/1000/2000
2014-5.2-3
Your device is typically deployed inside a firewall, where it
is connected to your trusted management network and the
various network segments you want to monitor.
In a simple deployment scenario, you connect the management
interface on your device to your trusted management network
using an Ethernet cable, then connect the sensing interfaces
to the network segments you want to monitor using the
appropriate cables (copper or fiber) in either a passive or inline
cabling configuration.
The trusted management network (a restricted network
protected from unauthorized access) may have a single secure
connection to the Internet for security updates and similar
functions, but is separate from the rest of your network and is
not accessible to hosts used in daily business operations.
You can connect sensing interfaces to different network
segments dedicated to particular components of your business
that have distinct security requirements to target policies
based on the needs for specific segments. These segments
can include the DMZ (outward-facing servers, such as mail,
ftp, and web hosts), your internal network (hosts used in
daily operation and similar applications), and the core (hosts
reserved for critical business assets), and can also include
segments dedicated to remote locations, mobile access, or
other functions.
How you cable your sensing interfaces determines your
configuration options. If you use passive cabling, you can
configure passive sensing interfaces. If you use inline cabling,
you can create passive, inline, or inline with bypass interfaces
on your device. For more information on deployment options
and interface configurations and how they affect product
features, see the
Sourcefire 3D System User Guide
and the
Sourcefire 3D System Installation Guide
.
Deploying the Appliance
Page 2 of 4
DEPLOYMENT and CABLING
Cabling the Device
You can cable your device to configure passive or inline interfaces, depending on your deployment needs.
Use passive cabling if you want to:
monitor traffic•
collect information about hosts, operating systems, applications, users, files, networks, and vulnerabilities•
Use inline cabling if you want to use the same features as a passive deployment, and use policies to block traffic based
on access control features such as application control, user control, security intelligence, URL dispositions, file control,
malware detection, or intrusion prevention
Use the appropriate cables (as indicated by your interface) and cabling diagram for the interface you want to configure,
then use the web interface on the Defense Center to configure the interfaces. See Connecting the Sensing Interfaces on
page 3.
Quick Start Guide - 3D500/1000/2000 Devices
3D500/1000/2000
2014-5.2-3
Understanding the Sensing Interfaces
The 3D500/1000/2000 is a 1U device with four copper sensing interfaces, each with bypass capability.
You can use these interfaces to passively monitor up to four separate network segments.
You can also use paired interfaces in an inline configuration on one network segment for the 3D500 or up to two network
segments for the 3D1000 or 3D2000.
FOUR PORT 1000BASE-T COPPER
1234
Link
Bypass
Activity
Page 3 of 4
INSTALLATION
For each network segment you want to
monitor passively, connect the cable to one
sensing interface.
Use this cabling when you want to configure
passive interfaces.
Passive Interface Cabling Inline Interface Cabling
For each network segment you want
to monitor inline, connect the cables
sequentially to interfaces 1 and 2, and, for
3D1000/2000, interfaces 3 and 4.
Use this cabling when you want to configure
inline or inline with bypass interfaces.
PASSIVE
NETWORK
SEGMENT A
PASSIVE
NETWORK
SEGMENT B
1234
INLINE
NETWORK
SEGMENT B
INLINE
NETWORK
SEGMENT A
1234
This section describes the physical connection of the sensing interfaces. After you cable the interfaces, use the web
interface on the Defense Center that manages the device to configure the device’s sensing interfaces as passive, inline, or
inline with bypass.
See the
Sourcefire 3D System Installation Guide
for detailed information on planning your deployment. After you have
selected a deployment model, cable the sensing interfaces as needed for your configuration.
Connecting the Sensing Interfaces
To install the hardware:
Connect the power cord to the receptacle on the power supply at the rear of the device.1.
Connect the other end of the power cord to an electrical outlet carrying 110/240 VAC.2.
You can use the device as a desktop device, or mount the device in your rack using the instructions included with the
mounting kit.
The device boots up when it is provided with power. There is no power switch.
Installing the Hardware
Quick Start Guide - 3D500/1000/2000 Devices
3D500/1000/2000
This section descibes the process of using a monitor and keyboard to connect your management interface to a secure
internal network, and to set up the IP address and network settings for the management interface for the device. You can
also use a host on the management interface, the LCD Panel, or the command line to enter the network configuration and
register the device to a Defense Center. See the
Sourcefire 3D System Installation Guide
for more information.
The procedure prompts you for the following information about the management interface and your network
environment:
the IP address you want to give to the management interface•
the netmask for the management interface’s IP address•
the default gateway for the management interface•
To use a monitor and keyboard to configure the management interface:
Using the supplied Ethernet cable, connect the management interface on the rear of the device to a protected management1.
network. You can use the ID button on the front of the device to light an LED in the rear to help locate the chassis in the rack.
Connect a monitor and keyboard to the USB ports on the device.2.
Log in as3. admin.
The system requests a password.
Enter4. Sourcefire as the password.
Note that the password is case sensitive.
Type5. sudo su - and press Enter. If needed, reenter Sourcefire as the admin account password to approve the command and
display the root prompt.
Run the following script:6.
/usr/local/sf/bin/configure-network
The following prompt appears (appended with the current value):
Do you wish to configure IPv4? (y or n)
Type7. y and press Enter to configure the appliance with an IPv4 address.
The following prompt (appended with the current value) appears:
Management IP address?
Enter the IP address you want to assign to the management interface or press Enter to accept the current value. For example:8.
10.2.2.20
10.2.2.20
The following prompt (appended with the current value) appears:
Management netmask?
Management netmask?
Enter the netmask for the interface’s IP address or press Enter to accept the current value. For example:9.
255.255.0.0
255.255.0.0
The following prompt appears:
Management default gateway?
Enter the IP address of the gateway for this IP address. For example:10.
10.2.1.1
10.2.1.1
The following prompt appears:
Are these settings correct: (y or n)?
You have two options:11.
If the settings are correct, type• y and press Enter to continue.
If the settings are incorrect, type• n and press Enter. You are prompted to enter the information again.
After you enter the correct network settings for the management interface, type12. exit and press Enter to log out of root.
Type13. logout and press Enter to log out of the appliance, then disconnect the monitor and keyboard.
Continue with Performing the Initial Setup.
Configuring the Management Interface
Complete the initial setup through the web interface. To access the web interface through the management interface,
browse to the IP address you configured in the previous procedure. See the
Sourcefire 3D System Installation Guide
for
information on setting up the devices.
Performing the Initial Setup
CONFIGURATION
2014-5.2-3
Page 4 of 4

This manual suits for next models

2

Other Cisco Network Hardware manuals

Cisco Secure Network Server 3700 Series Manual

Cisco

Cisco Secure Network Server 3700 Series Manual

Cisco 5400 Series Instruction Manual

Cisco

Cisco 5400 Series Instruction Manual

Cisco TELEPRESENCE MCU ACCESSING CONFERENCES - User manual

Cisco

Cisco TELEPRESENCE MCU ACCESSING CONFERENCES - User manual

Cisco Cisco ASA Series User manual

Cisco

Cisco Cisco ASA Series User manual

Cisco CTE 1400 Series User manual

Cisco

Cisco CTE 1400 Series User manual

Cisco 2431 - IAD Router User manual

Cisco

Cisco 2431 - IAD Router User manual

Cisco OSM-12CT3/T1 - Optical Services Module... Quick guide

Cisco

Cisco OSM-12CT3/T1 - Optical Services Module... Quick guide

Cisco ONS 15454 SDH Manual

Cisco

Cisco ONS 15454 SDH Manual

Cisco N540X-6Z18G-SYS-A User manual

Cisco

Cisco N540X-6Z18G-SYS-A User manual

Cisco Meraki MX68 Manual

Cisco

Cisco Meraki MX68 Manual

Cisco IPS-4240-K9 - Intrusion Protection Sys 4240 User manual

Cisco

Cisco IPS-4240-K9 - Intrusion Protection Sys 4240 User manual

Cisco WEC600N User manual

Cisco

Cisco WEC600N User manual

Cisco GS7000 Operating instructions

Cisco

Cisco GS7000 Operating instructions

Cisco NCS 2000 series User manual

Cisco

Cisco NCS 2000 series User manual

Cisco VPN 3002 Hardware Client Manager User manual

Cisco

Cisco VPN 3002 Hardware Client Manager User manual

Cisco ONS 15454 Instruction Manual

Cisco

Cisco ONS 15454 Instruction Manual

Cisco PRISMA II XD User manual

Cisco

Cisco PRISMA II XD User manual

Cisco Catalyst 8300 Series Manual

Cisco

Cisco Catalyst 8300 Series Manual

Cisco Content Delivery Engine 100/200/300/400 Manual

Cisco

Cisco Content Delivery Engine 100/200/300/400 Manual

Cisco WS-CE500 - Catalyst Express 500-24PC Instruction Manual

Cisco

Cisco WS-CE500 - Catalyst Express 500-24PC Instruction Manual

Cisco TelePresence Service manual

Cisco

Cisco TelePresence Service manual

Cisco ISA550 Instruction Manual

Cisco

Cisco ISA550 Instruction Manual

Cisco Cisco 5400 ENCS Manual

Cisco

Cisco Cisco 5400 ENCS Manual

Cisco DS-X9530-SF1-K9 - Supervisor-1 Module - Control... User manual

Cisco

Cisco DS-X9530-SF1-K9 - Supervisor-1 Module - Control... User manual

Popular Network Hardware manuals by other brands

HP A3550A - High Availability Disk Arrays Model 20 Storage... installation guide

HP

HP A3550A - High Availability Disk Arrays Model 20 Storage... installation guide

Datacom Systems FTP-8000 Series Fast start guide

Datacom Systems

Datacom Systems FTP-8000 Series Fast start guide

ADTRAN NetVanta Series Quick configuration guide

ADTRAN

ADTRAN NetVanta Series Quick configuration guide

Extron electronics Surface Mount Boxes SMB 205 L installation guide

Extron electronics

Extron electronics Surface Mount Boxes SMB 205 L installation guide

Symantec CAS-S200 quick start guide

Symantec

Symantec CAS-S200 quick start guide

ELSA LANCOM Business 6000 manual

ELSA

ELSA LANCOM Business 6000 manual

3Com 3CNJPSE24 datasheet

3Com

3Com 3CNJPSE24 datasheet

TRENDnet TEG-S4M4S30 supplementary guide

TRENDnet

TRENDnet TEG-S4M4S30 supplementary guide

Eneo FNR-4004/500 user manual

Eneo

Eneo FNR-4004/500 user manual

Nokia Flexi BTS Series quick guide

Nokia

Nokia Flexi BTS Series quick guide

HIK VISION AX PRO M2 quick start guide

HIK VISION

HIK VISION AX PRO M2 quick start guide

ADC Campus-RS REX2 Specifications

ADC

ADC Campus-RS REX2 Specifications

Huawei CR52-10GE Specifications

Huawei

Huawei CR52-10GE Specifications

Panarex Electronics Linkbox N-1000 user guide

Panarex Electronics

Panarex Electronics Linkbox N-1000 user guide

Vega Absolute SI-13 user manual

Vega Absolute

Vega Absolute SI-13 user manual

CheckMK Rail2 Mark I quick start

CheckMK

CheckMK Rail2 Mark I quick start

evertz MAGNUM user manual

evertz

evertz MAGNUM user manual

Parker Sporlan SCS-PB Installation and operating instructions

Parker

Parker Sporlan SCS-PB Installation and operating instructions

manuals.online logo
manuals.online logoBrands
  • About & Mission
  • Contact us
  • Privacy Policy
  • Terms and Conditions

Copyright 2025 Manuals.Online. All Rights Reserved.