1/20
P991 Instruction manuals
Thank you for your purchase of this product.
Before using the watch, read this instruction manual carefully to ensure correct use.
ENGLISH
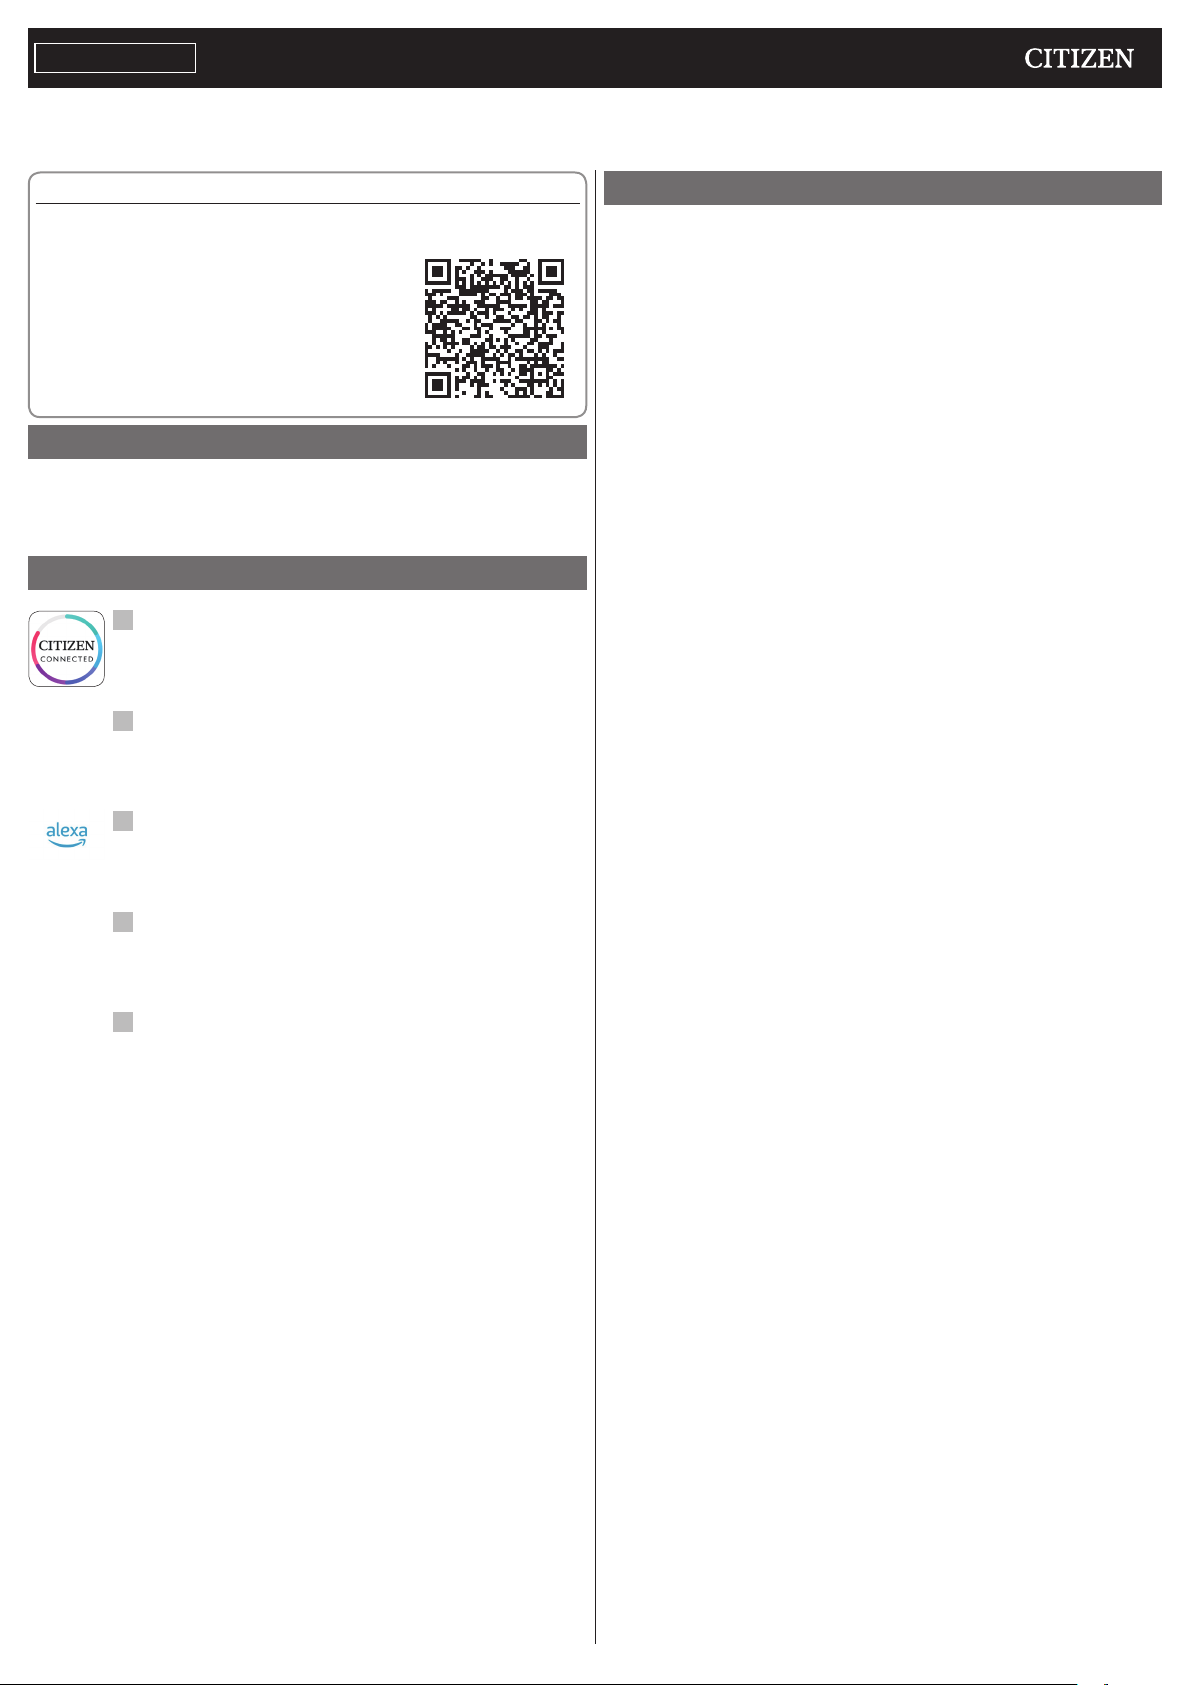
Accessing the latest information (Cal. No.: P991)
You can access the latest information of this watch using the QR code.
https://www.citizenwatch-global.com/support/html/en/p991/p991.html
• Access also here to see notices.
• You can also see how to use enhanced features and
functions such as slide rules and tachymeters on
the web site. It depends on models whether they are
equipped with enhanced features and functions or not.
Safety precautions
“Precautions” provided with the product contains instructions that should be
strictly followed at all times not only for optimal use, but to prevent any injuries to
yourself, other persons or property.
Make sure to read it through before using the product.
Features
Connection with a smartphone through the dedicated app
Time and calendar are synchronized with those on the smartphone.
To get the dedicated app, access a download site of apps for your
smartphone.
Measurement of activity, heart rate and blood oxygen
levels (SPO2)
The watch records data of measurement above and shows them on the
dedicated app and send them to health care apps.
Amazon Alexa ready
You can use Alexa through the microphone on the watch.
You need to install the Amazon Alexa app on the watch using the
Google Play store on the watch.
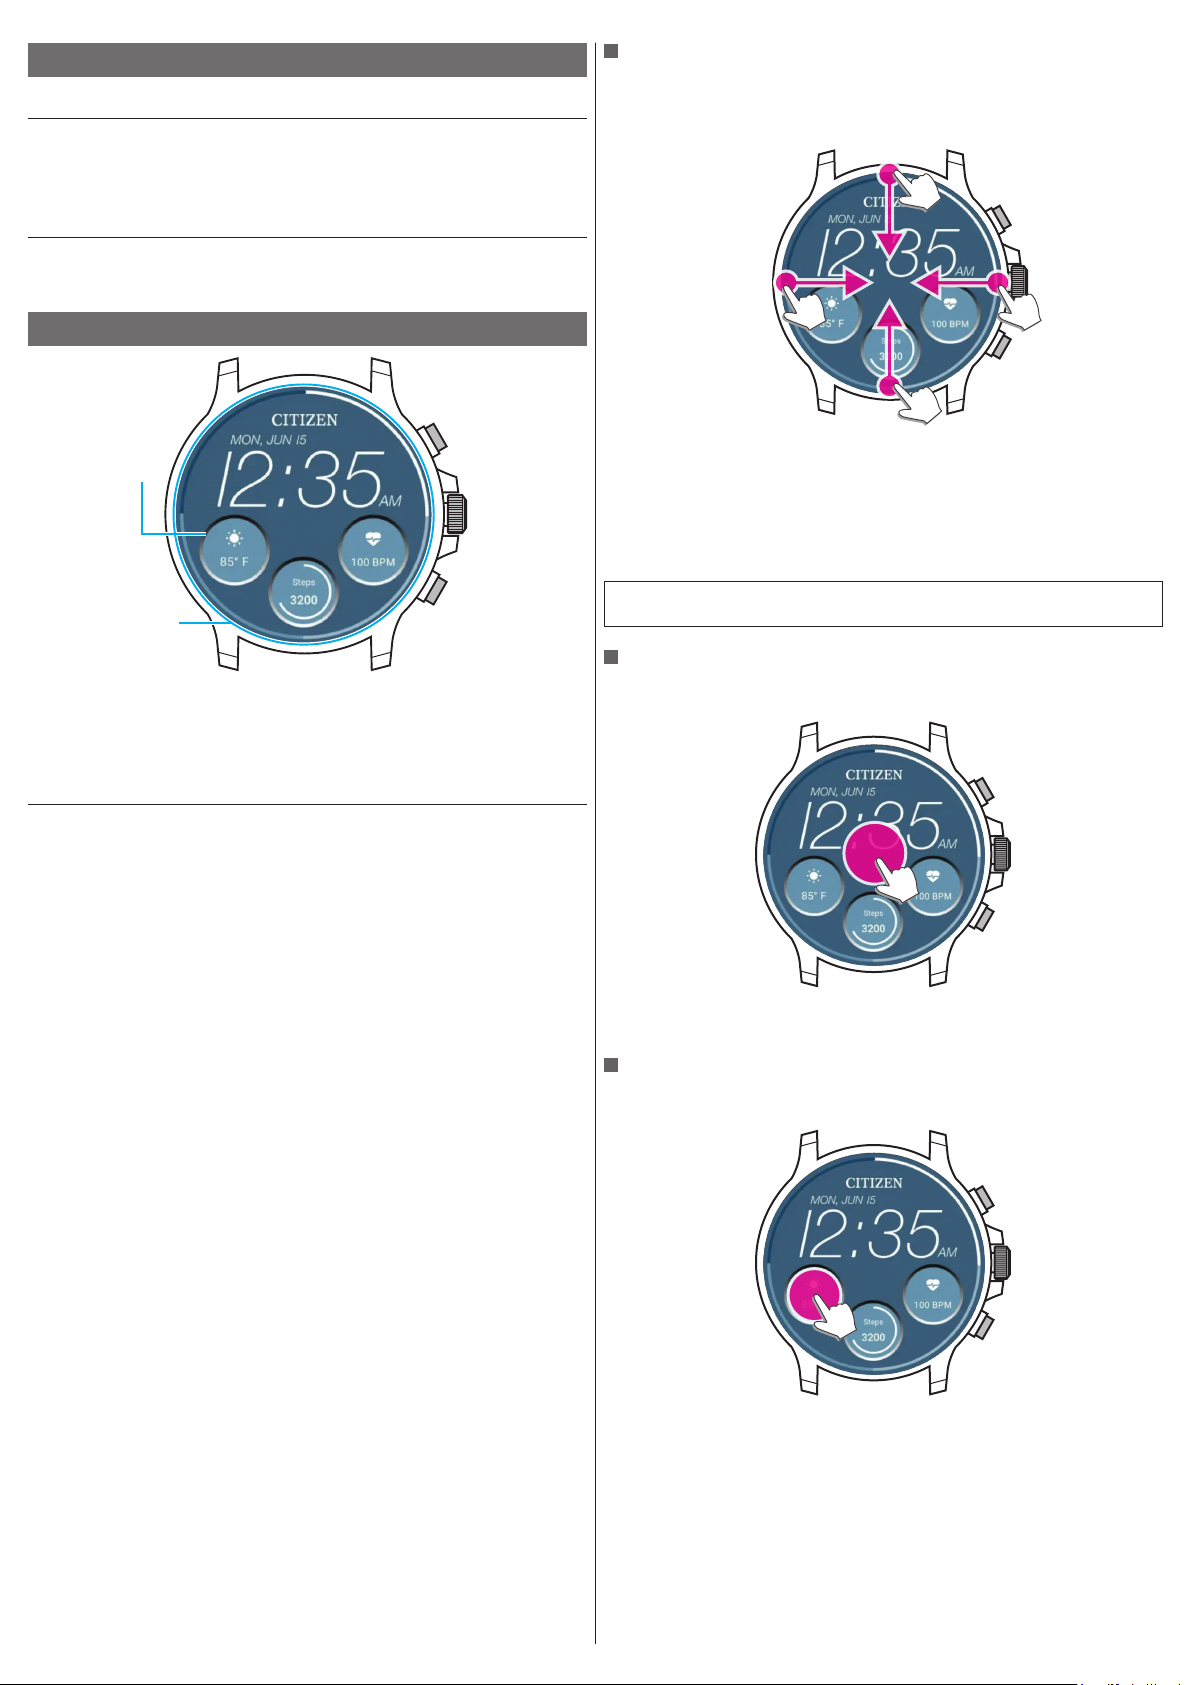
Touch screen display
You can use gestures such as tap, scroll and swipe to control the watch
like you do on your smartphone. You can also turn button
B
to scroll
the screen.
Watch face customization
You can customize appearance of the watch face and items to indicate
on it. Items on small windows can be tapped as shortcuts to them.
• Amazon, Alexa and all related logos are trademarks of Amazon.com, Inc. or its affiliates.
CONTENTS
Safety precautions..................................................................
1
Features.................................................................................
1
Before using this watch...........................................................
2
Protective stickers .................................................................................
2
Charging your watch..............................................................................
2
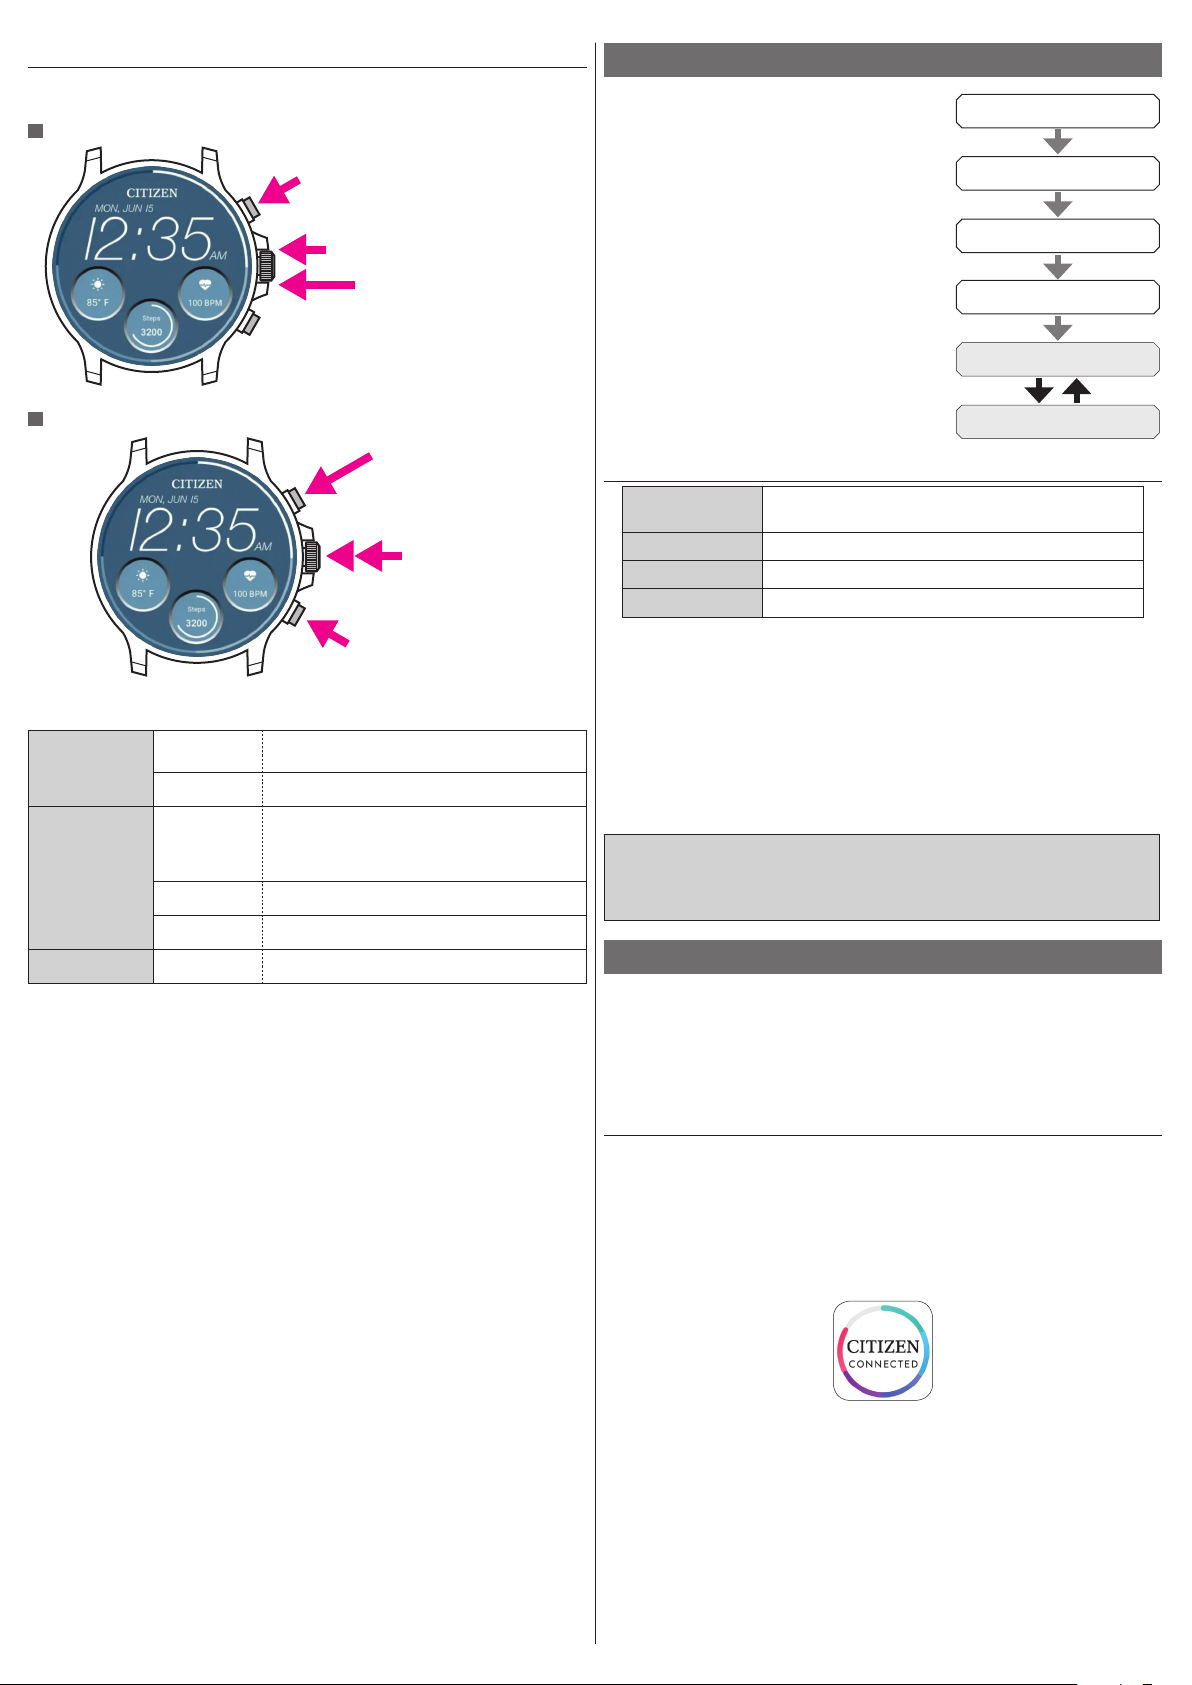
Component identification .......................................................
2
How to operate the display ....................................................................
2
Buttons of the watch .............................................................................
3
Before connecting with a smartphone.....................................
3
Requirements for connection.................................................................
3
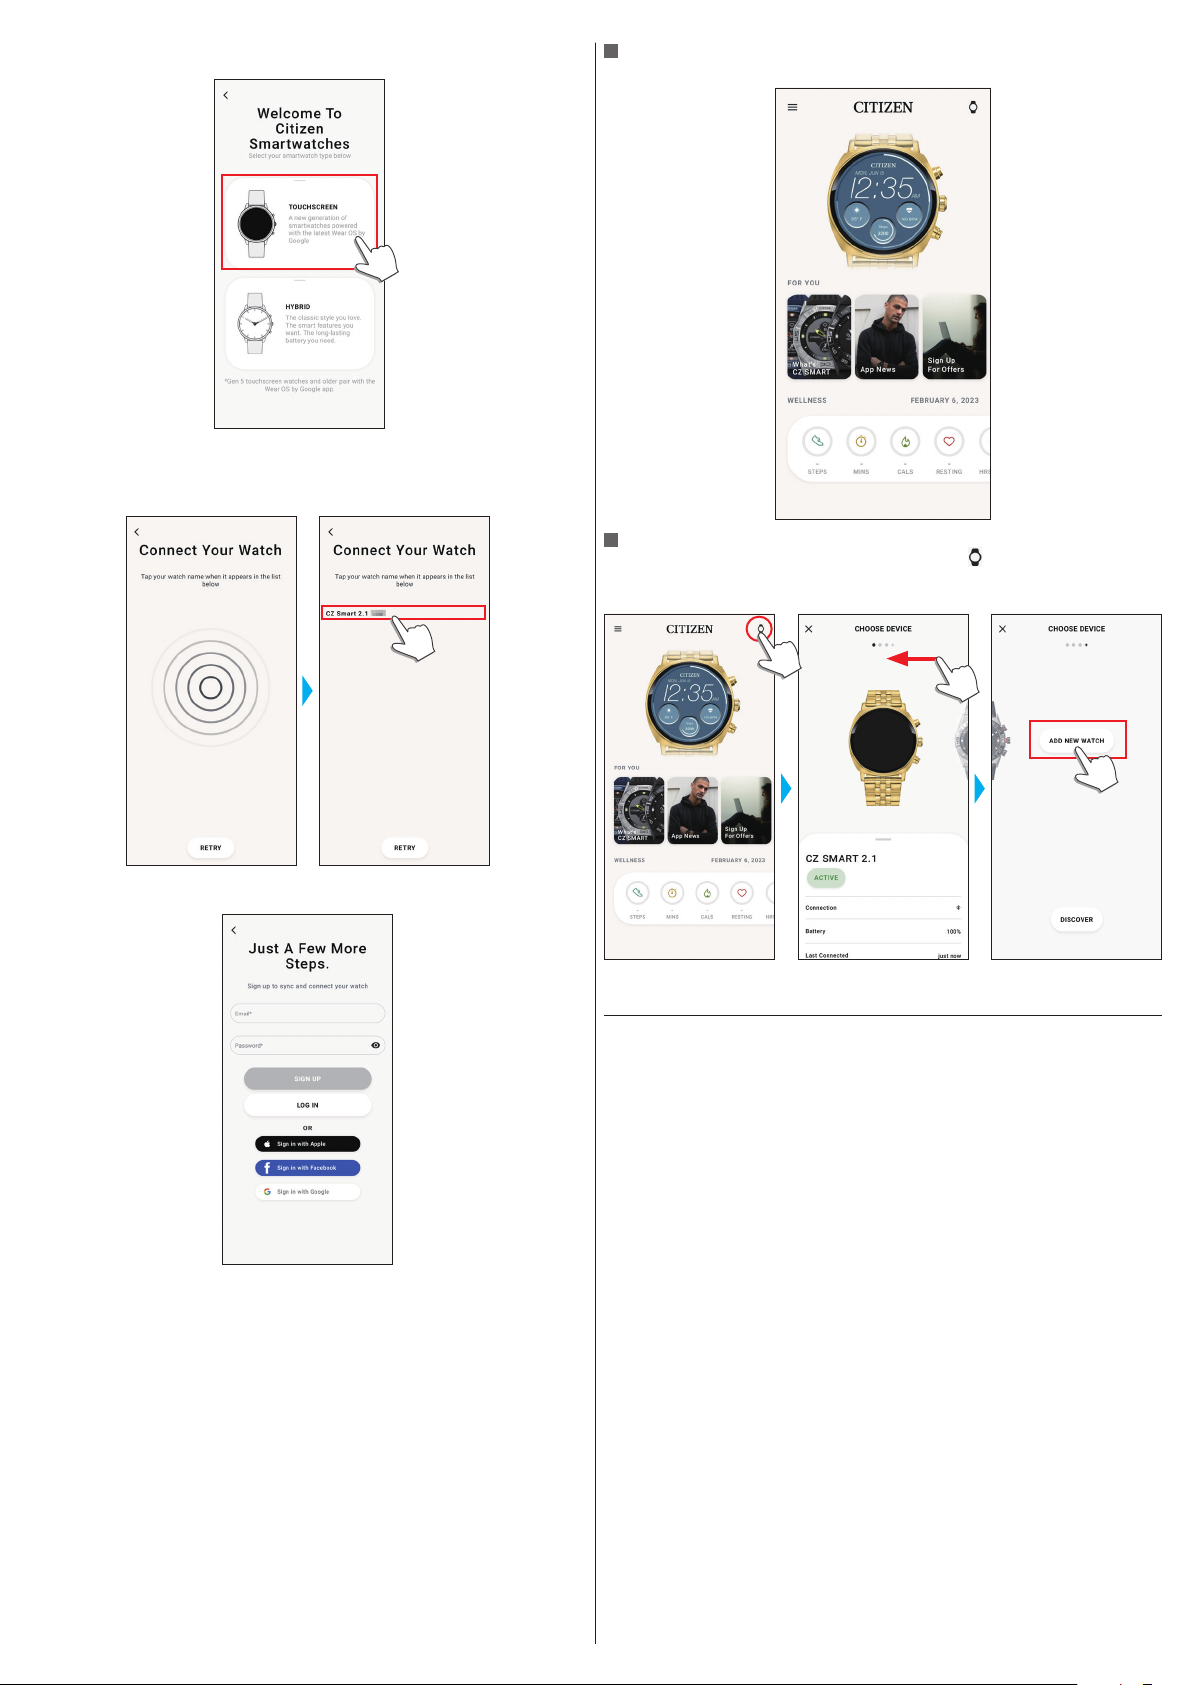
Execute pairing with the smartphone......................................
3
Executing pairing ..................................................................................
3
When pairing fails .................................................................................
4
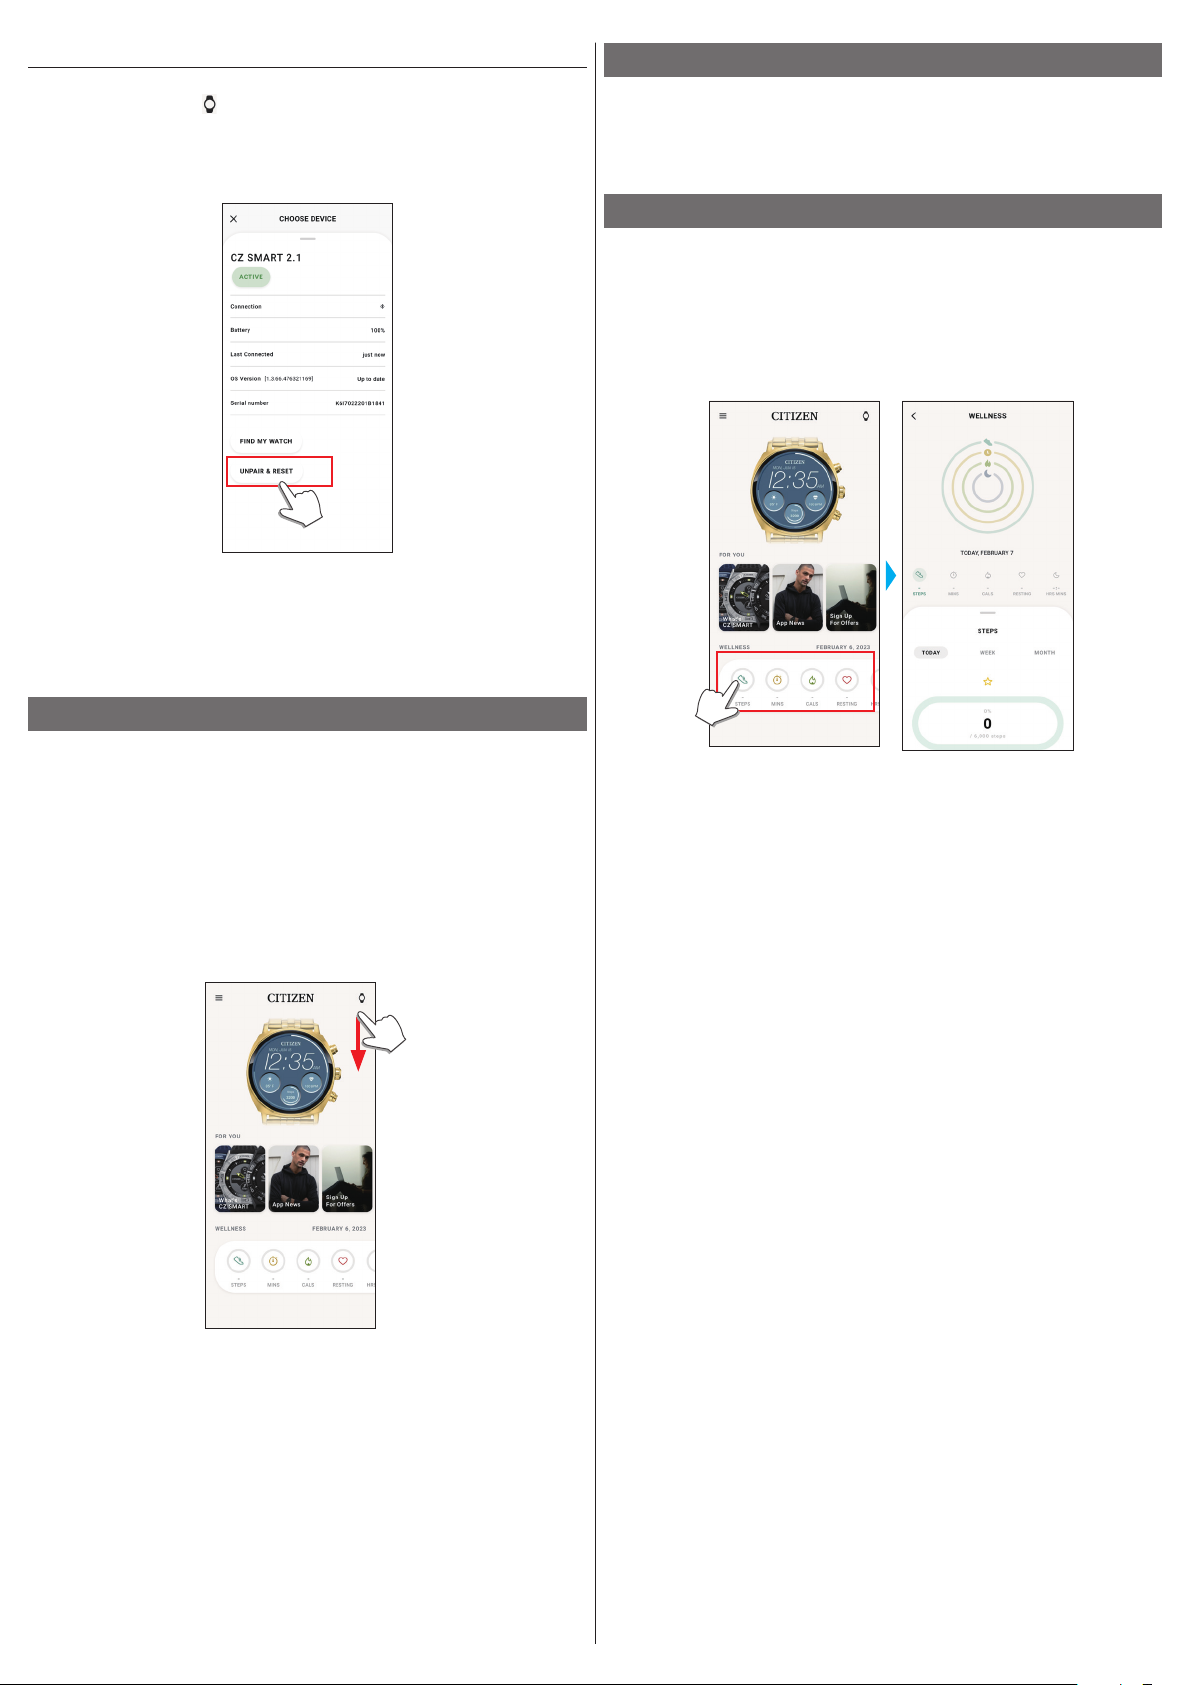
When connection fails after pairing (canceling pairing)..........................
5
Synchronizing your watch and smartphone .............................
5
Adjustment of the time and calendar ......................................
5
Acceleration sensor and optical sensor.....................................
5
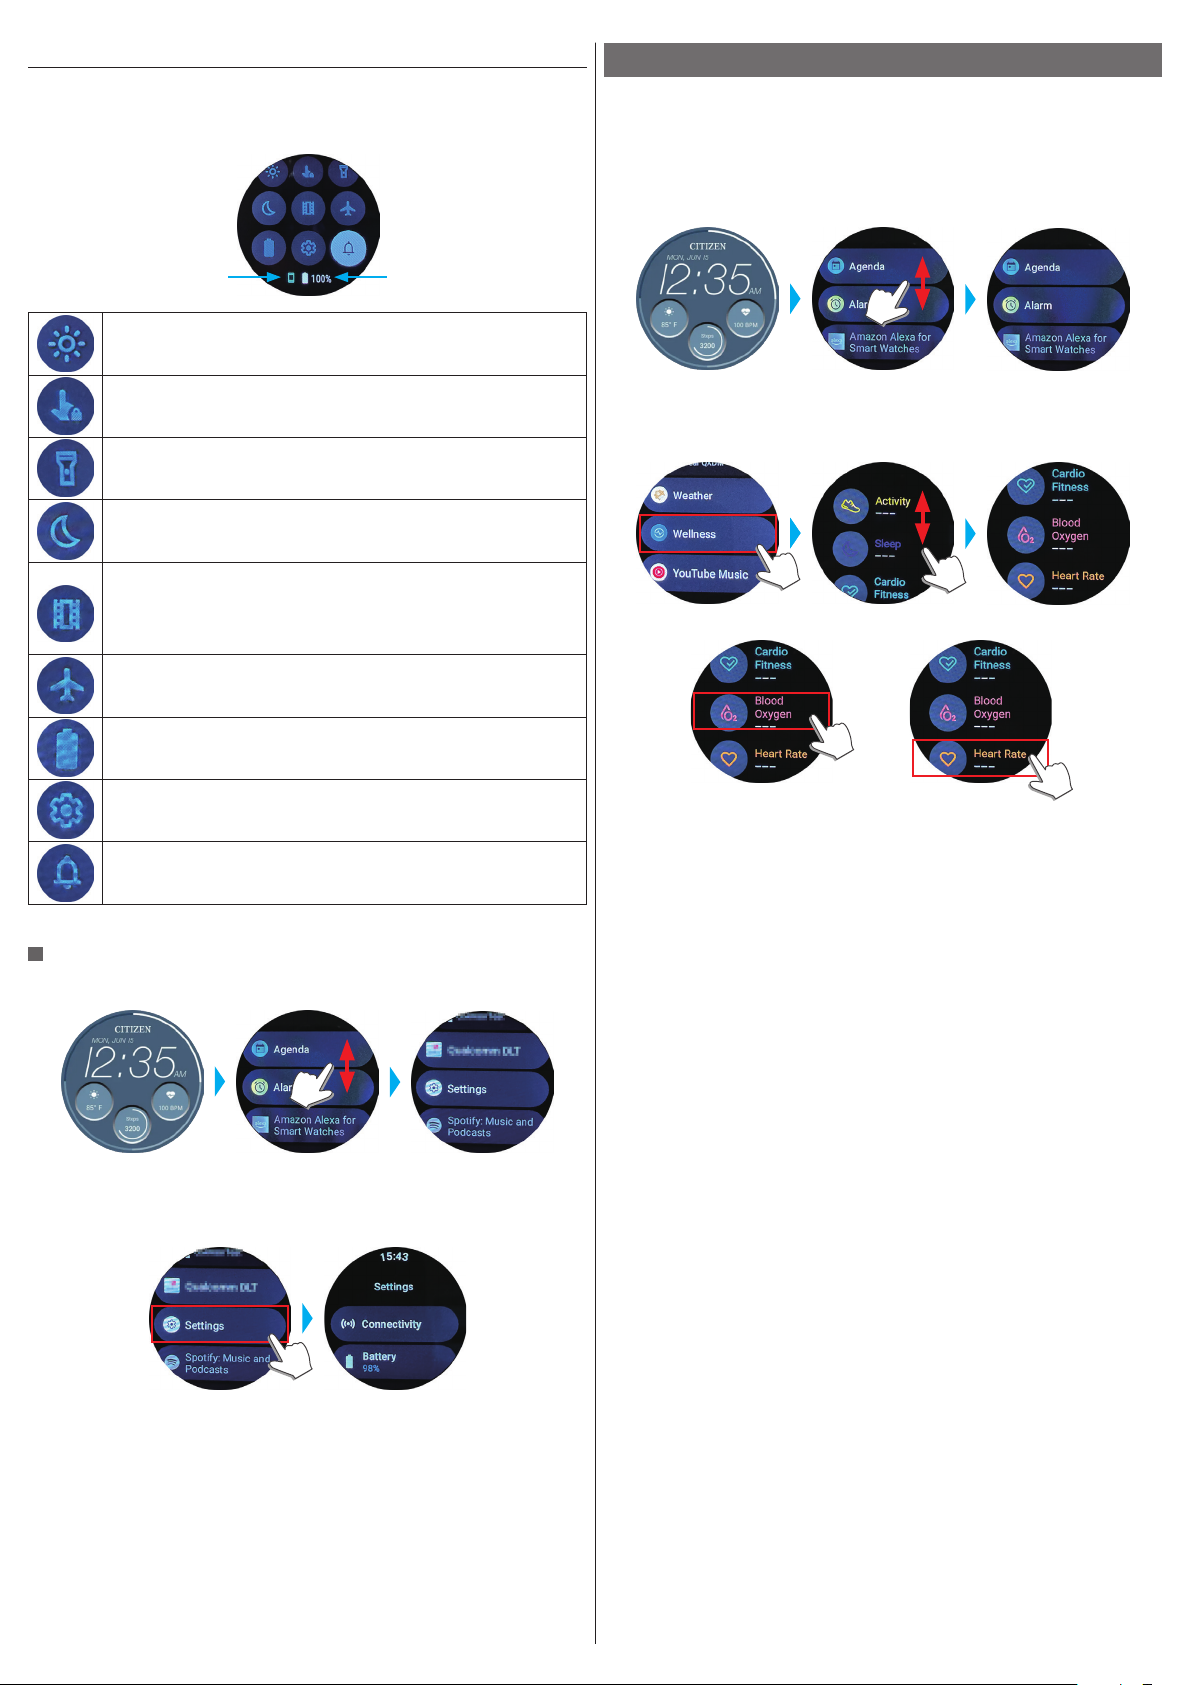
Settings on the watch body.....................................................
6
Quick menu ...........................................................................................
7
Measuring heart rate and blood oxygen levels.........................
7
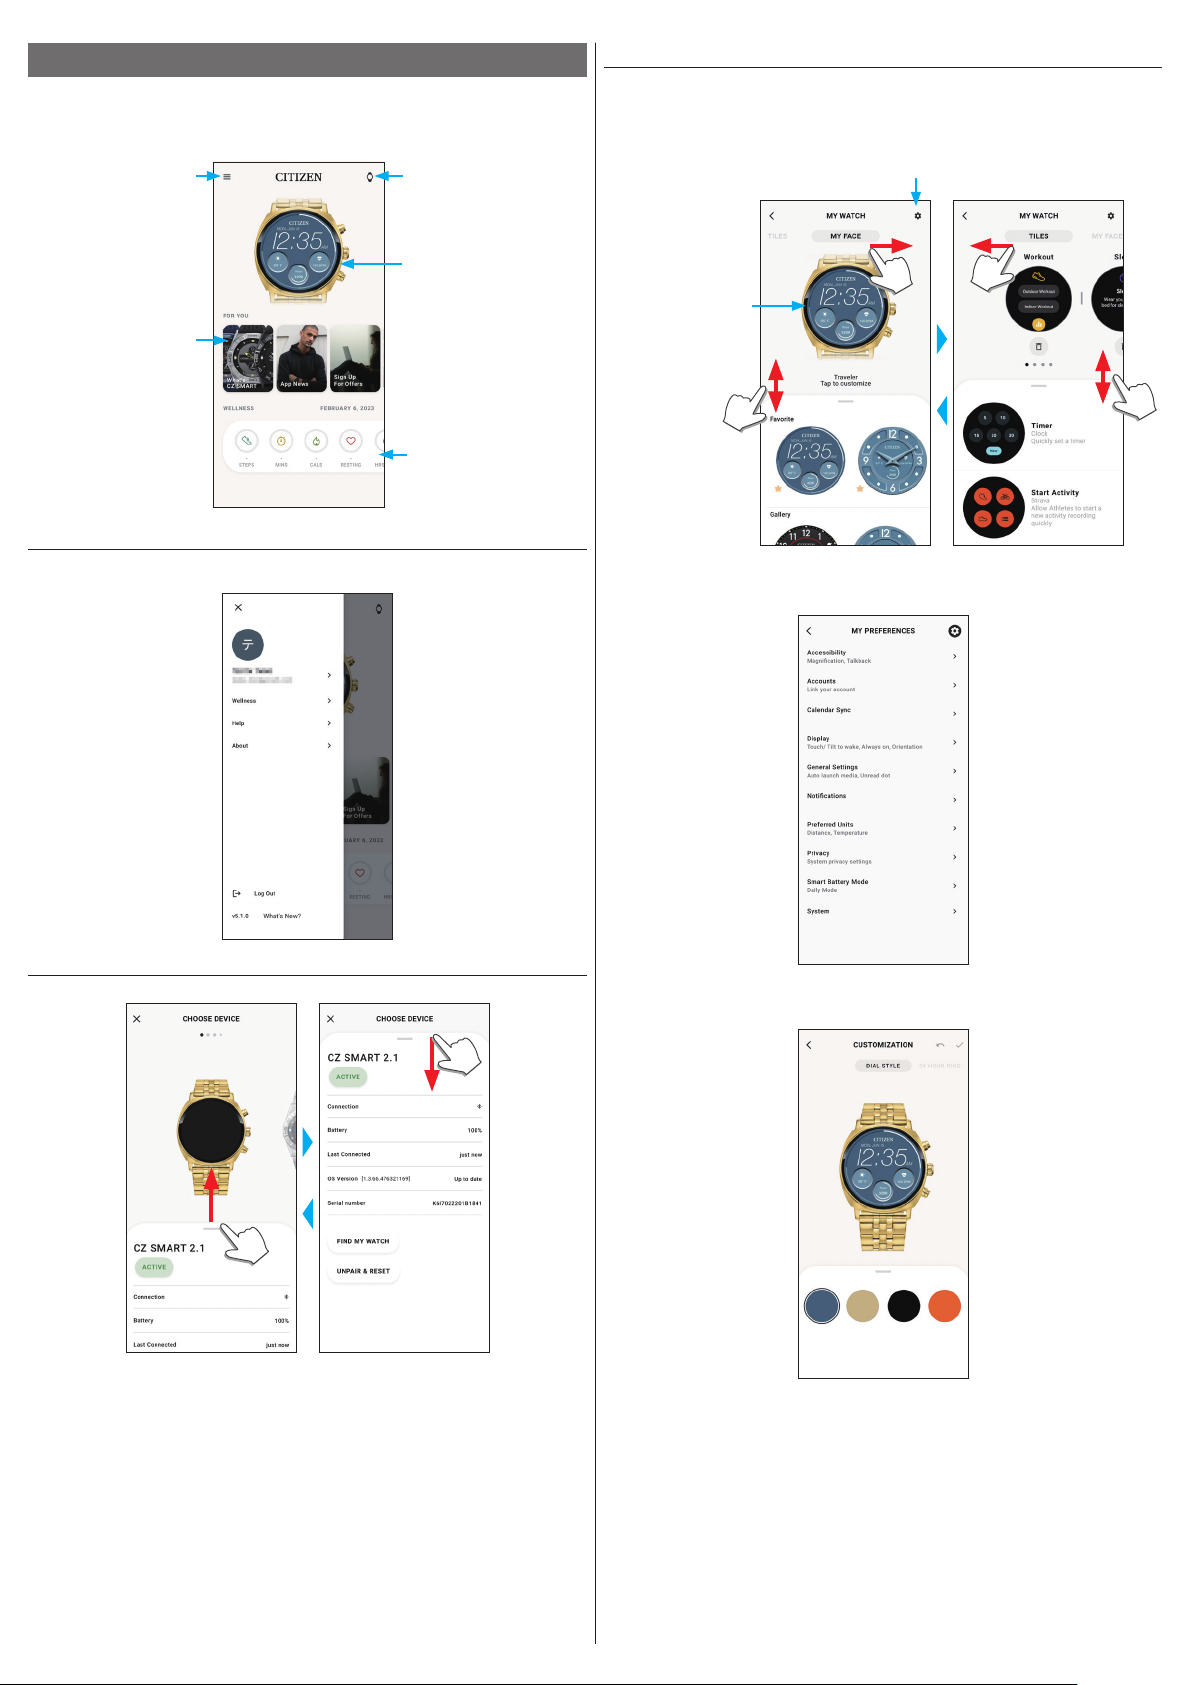
Screens of the dedicated app...................................................
8
Side menu .............................................................................................
8
[CHOOSE DEVICE] screen .........................................................................
8
[MY WATCH] screen ................................................................................
8
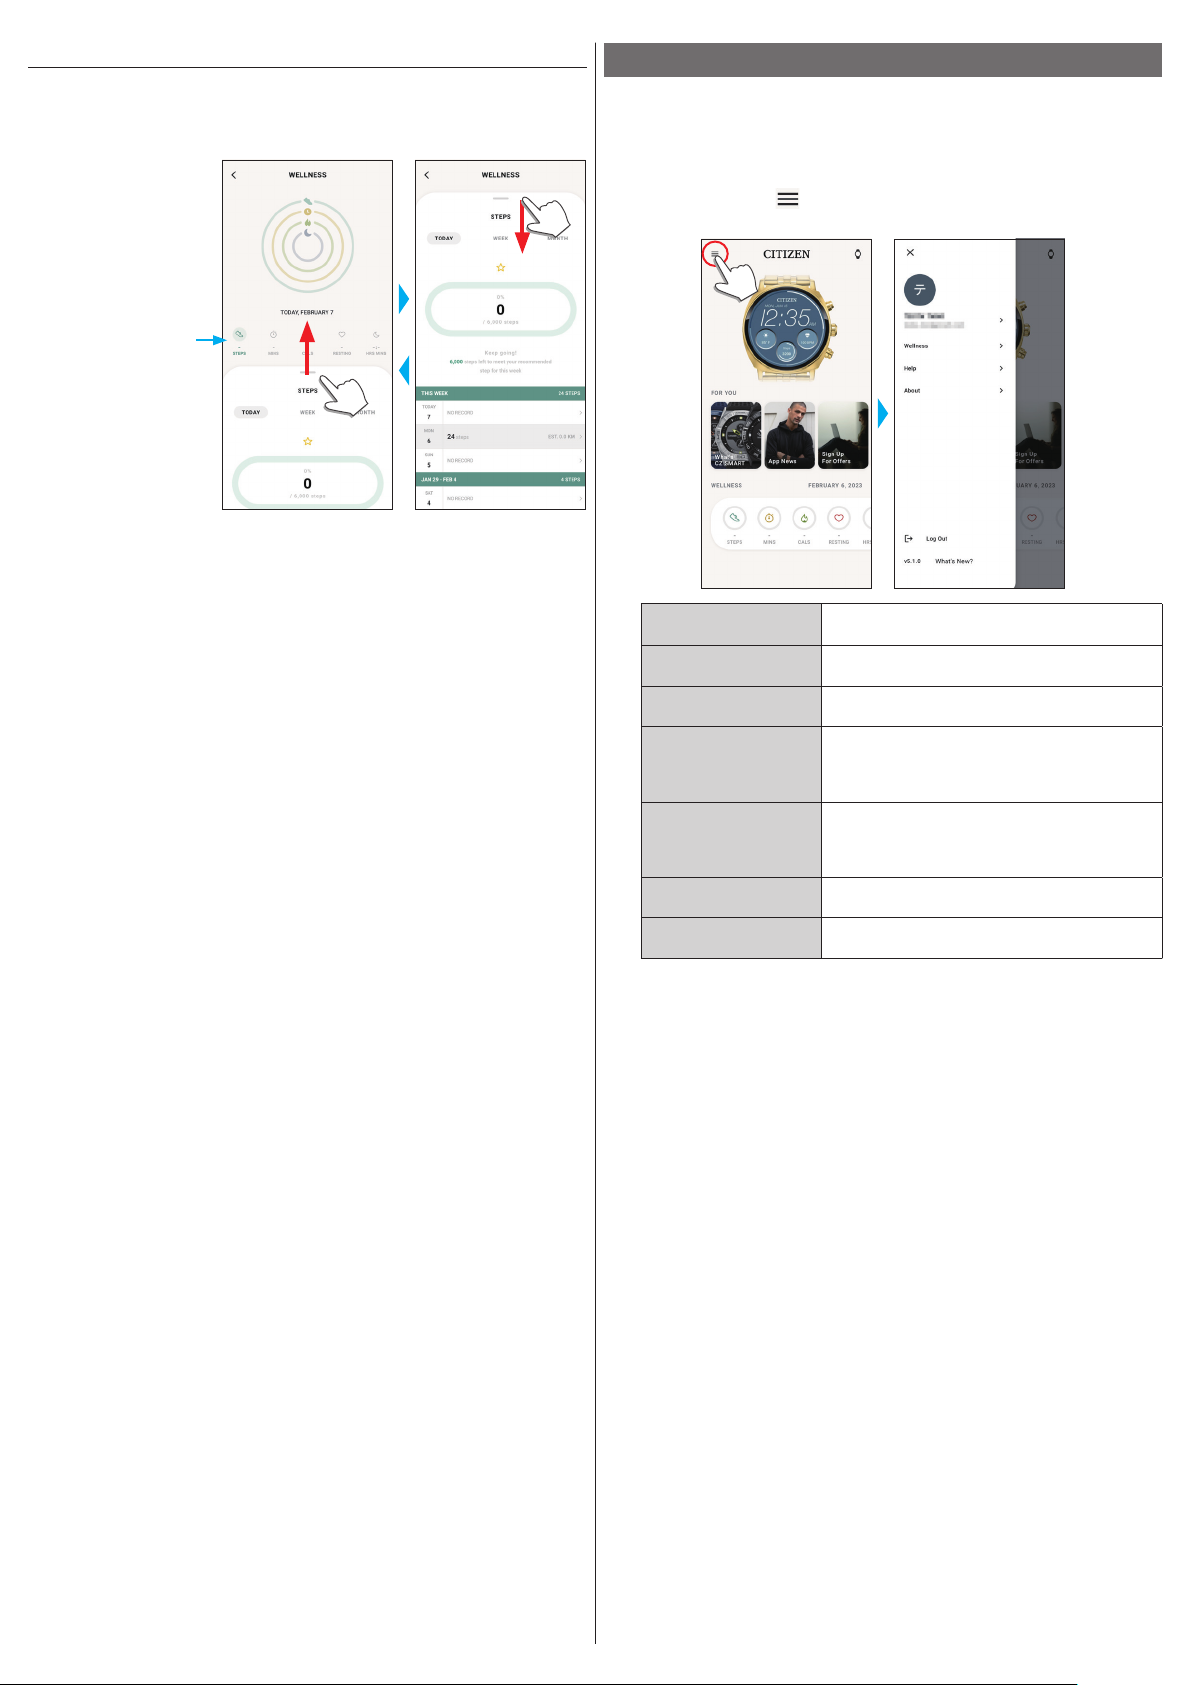
[WELLNESS] screen.................................................................................
9
Changing settings of the dedicated app...................................
9
Changing goal values of activities........................................................
10
Checking the status of the connected watch ..........................
11
Executing setting of the watch on the dedicated app .............
12
Preparing for Amazon Alexa..................................................
13
Using Amazon Alexa..............................................................
15
Changing [TILES] of the watch ...............................................
16
Changing [TILES] indicated on the dedicated app .................................
16
Changing [TILES] indicated through operation on the watch ................
17
Customizing watch face ........................................................
17
Changing the watch face using the dedicated app................................
17
Changing the watch face through operation on the watch ...................
17
Customizing watch face using the dedicated app .................................
17
Customizing watch face through operation on the watch.....................
18
Setting notification ..............................................................
19
About the app menu on the watch........................................
20
Bluetooth wireless technology.............................................
20
Specifications ......................................................................
20