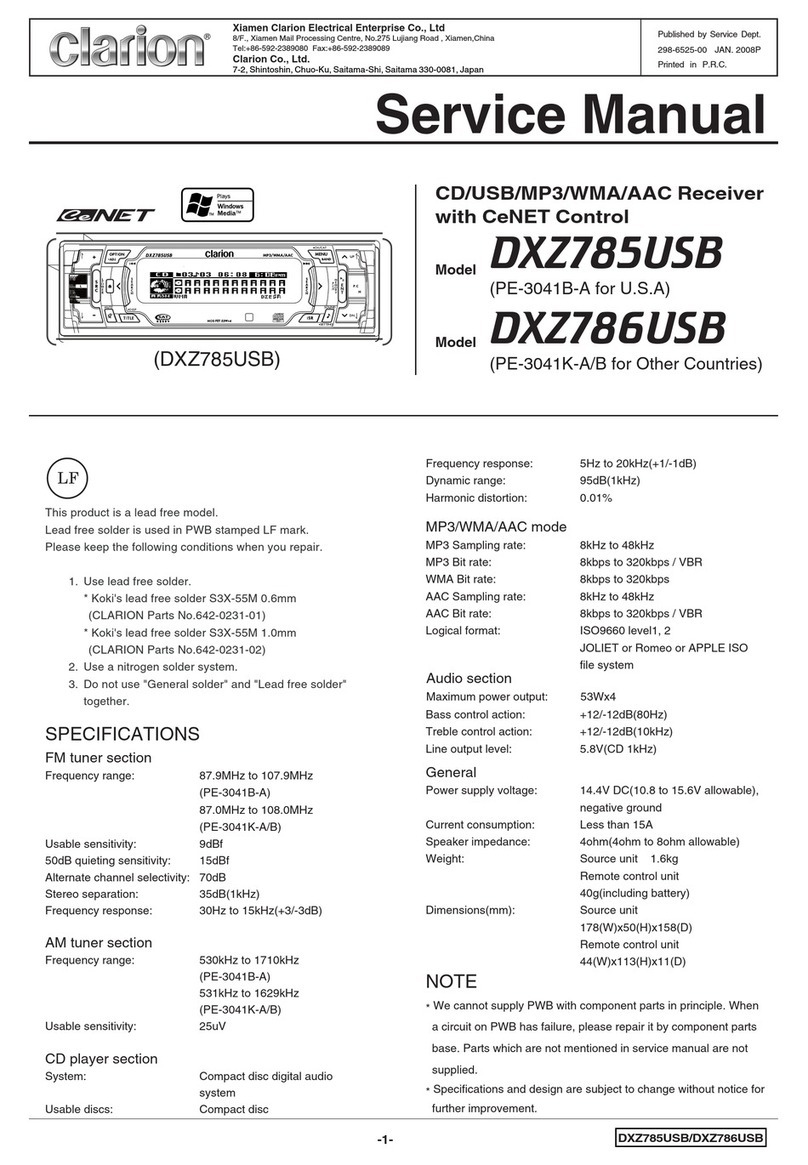
Clarion VX215A User manual

VX215A
Owner’s manual
DVD Multimedia Station With 6.2” Touch Panel Control
Hex_VX215A_OM.indd 1 6/30/15 2:04 PM

2 VX215A
English
Owner’s Manual
1. FEATURES............................................................................................................................................................4
2. PRECAUTIONS.....................................................................................................................................................5
3. CAUTIONS ON HANDLING..................................................................................................................................6
4. PANEL CONTROLS..............................................................................................................................................8
Functions of Buttons..............................................................................................................................................8
5. REMOTE CONTROL.............................................................................................................................................9
Remote Control Functions...................................................................................................................................10
6. BASIC OPERATIONS.........................................................................................................................................11
Turning on/off the power......................................................................................................................................11
Switching Source Modes.....................................................................................................................................11
Home Screen.......................................................................................................................................................11
Clock and Indicators Display ...............................................................................................................................11
Adjusting the Volume...........................................................................................................................................11
Radio Illumination................................................................................................................................................12
Mute Function......................................................................................................................................................12
Auxiliary Audio Input............................................................................................................................................12
Video Input Function............................................................................................................................................12
Parking Brake Safety...........................................................................................................................................12
Reverse Camera View.........................................................................................................................................12
7. RADIO MODE OPERATIONS.............................................................................................................................13
Listening to the Radio..........................................................................................................................................13
Seek Tuning.........................................................................................................................................................13
Manual Tuning.....................................................................................................................................................13
Autostore .............................................................................................................................................................13
Storing Preset Memory........................................................................................................................................14
Recalling a Preset Station...................................................................................................................................14
8. RDS OPERATIONS.............................................................................................................................................14
RDS (Radio Data System)...................................................................................................................................14
TA(TrafcAnnouncement) ..................................................................................................................................15
Emergency Broadcast.........................................................................................................................................15
PTY (Programme Type).......................................................................................................................................15
Volume Setting of TA, Emergency Broadcast, and PTY......................................................................................16
AF (Alternate Frequency) Function......................................................................................................................16
REG (Regional Programme)................................................................................................................................16
9. CD/USB MODE OPERATION.............................................................................................................................17
Discs....................................................................................................................................................................17
Watching/Listening to a disc................................................................................................................................18
Loading a CD.......................................................................................................................................................18
Eject the CD.........................................................................................................................................................18
USB .....................................................................................................................................................................18
Hot plugging function...........................................................................................................................................18
Connecting a USB memory device......................................................................................................................19
Watching/Listening to a track with USB memory device .....................................................................................19
Unplug the USB memory device..........................................................................................................................19
10. DVD VIDEO PLAYER OPERATIONS.................................................................................................................20
Showing DVD video mode screen.......................................................................................................................20
Play/Pause Playback...........................................................................................................................................20
Skip (Search) a Chapter......................................................................................................................................20
Skip (Search) a Title ............................................................................................................................................20
Fast Forward/Fast Backward Operation..............................................................................................................20
Repeat Playback..................................................................................................................................................20
Switching Audio ...................................................................................................................................................21
Contents
Hex_VX215A_OM.indd 2 6/30/15 2:04 PM

VX215A 3
English
English
Contents
Switching Subtitles...............................................................................................................................................21
Switching Angle ...................................................................................................................................................21
Zoom Operation...................................................................................................................................................21
11. CD/USB VIDEO OPERATIONS (MP4, AVI)........................................................................................................22
Play/Pause...........................................................................................................................................................22
Switch to Previous/Next File................................................................................................................................22
Fast Forward/Fast Backward Operation..............................................................................................................22
Repeat Playback..................................................................................................................................................22
Switching Subtitles...............................................................................................................................................22
Video File List (Directory) ....................................................................................................................................22
Zoom Operation...................................................................................................................................................22
12. CD/USB AUDIO OPERATIONS..........................................................................................................................23
Play/Pause Playback...........................................................................................................................................23
Switch to Previous/Next File or track...................................................................................................................23
Fast Forward/Fast Backward Operation..............................................................................................................23
Repeat Playback..................................................................................................................................................23
Random Playback................................................................................................................................................23
Album Art work.....................................................................................................................................................23
Selecting a Track on the Directory View..............................................................................................................24
Tag Display Function ...........................................................................................................................................24
13. CD/USB PICTURE OPERATIONS......................................................................................................................25
Showing CD/USB Picture Mode Screen..............................................................................................................25
Play/Pause Playback...........................................................................................................................................25
Switch to Previous/Next File or track...................................................................................................................25
Repeat Playback..................................................................................................................................................25
Zoom Operation...................................................................................................................................................25
Rotate Operation.................................................................................................................................................25
Effect Operation...................................................................................................................................................25
14. iPod/iPhone OPERATIONS ...............................................................................................................................26
Select iPod Mode.................................................................................................................................................26
Play/Pause Playback...........................................................................................................................................26
Switch to Previous/Next Track.............................................................................................................................26
Fast Forward/Backward.......................................................................................................................................26
Tag Display Function ...........................................................................................................................................26
Repeat Play.........................................................................................................................................................26
ShufePlay..........................................................................................................................................................26
Selecting a Song from iPod Menu.......................................................................................................................27
Available iPod Categories....................................................................................................................................27
Supported iPod/iPhone Devices..........................................................................................................................27
15. SETTINGS OPERATIONS..................................................................................................................................28
Select Settings.....................................................................................................................................................28
Balance/Fader Adjustment...................................................................................................................................28
Time Alignment Adjustment.................................................................................................................................29
Sound Effect Selection........................................................................................................................................29
Graphic Equalizer................................................................................................................................................29
Clock Adjustment.................................................................................................................................................30
General Settings..................................................................................................................................................30
16. TROUBLESHOOTING........................................................................................................................................32
17. ERROR DISPLAY ...............................................................................................................................................34
18. SPECIFICATIONS...............................................................................................................................................35
Hex_VX215A_OM.indd 3 6/30/15 2:04 PM

4 VX215A
English
Owner’s Manual
Expanding Systems
1. FEATURES
Note:
The items listed outside of the unit are the commercial products generally sold.
Hex_VX215A_OM.indd 4 6/30/15 2:04 PM

VX215A 5
English
English
For your safety, the driver should not watch any video
sources and/or operate the controls while driving. Please
note that watching and operating any video sources while
driving are prohibited by law in some countries. Also,
while driving, keep the volume to a level at which external
sounds can be heard.
Do not disassemble or modify this unit. It may cause an
accident,re,orelectricshock.
Do not use this unit when a trouble exists, such as no
screen content appears or no sound is audible. It may
causeanaccident,re,orelectricshock.Forthatcase,
consult your authorized dealer or a nearest Clarion ser-
vice center.
In case of a problem, such as any material has been en-
tered in the unit, the unit gets wet, or smoke or strange
smells come out of the unit, etc., stop using this unit im-
mediately, and consult your authorized dealer or a nearest
Clarion service center.
Usingitinthatconditionmaycauseanaccidentre, or
electric shock.
Useafusewiththesamespecicationonlywhenreplac-
ing the fuse.
Usingafusewithadifferentspecicationmaycausesa
re.
For the installation of this unit or a change in the installa-
tion, ask your authorized dealer or a nearest Clarion ser-
vice center for safety. Professional skills and experiences
are requires to do so.
As the driver, you alone are responsible for your driving
safety.
Inordertoavoidatrafcaccident,donotoperatethesys-
tem while driving.
In order to avoid a trafc accident, operate the system
only when the vehicle is stopped at a safe place and the
parking brake is on.
The software may contain inaccurate or incomplete infor-
mation due to the passage of time, changing circumstanc-
es, and the sources of information used. Please respect
currenttrafcconditionsandregulationsatalltimeswhile
driving.
Keep the amount of time spent viewing the screen while
driving to a strict minimum.
When the inside of the car is very cold and the player
is used soon after switching on the heater, moisture may
form on the disc (DVD/ CD) or the optical parts of the play-
er and proper playback may not be possible. If moisture
forms on the disc (DVD/CD), wipe it off with a soft cloth.
If moisture forms on the optical parts of the player, do not
use the player for about one hour. The condensation will
disappear naturally allowing normal operation.
Driving on extremely bumpy roads which cause severe
vibration may cause the sound to skip.
This unit uses a precision mechanism. Even in the event
that trouble arises, never open the case, disassemble the
unit, or lubricate the rotating parts.
2. PRECAUTIONS
WARNING
Hex_VX215A_OM.indd 5 6/30/15 2:04 PM

6 VX215A
English
Owner’s Manual
The operation panel will operate properly in a temperature
rangeof0˚to60˚C.
Do not allow any liquids on the set from drinks, umbrellas
etc. Doing so may damage the internal circuitry.
Do not disassemble or modify the set in any way. Doing so
may result in damage.
Subjecting the operation panel to shocks may result in
breakage, deformation or other damage.
Do not let cigarettes burn the display.
If a problem should occur, have the set inspected at your
store of purchase.
The remote control unit may not work if the remote control
sensor is exposed to direct sunlight.
In extremely cold weather, the display movement may
slow down and the display may darken, but this is not a
malfunction. The display will work normally when the tem-
perature increases.
Small black and shiny spots inside the liquid crystal panel
are normal for LCD products.
The USB memory sticks must be recognized as “USB
mass storage class” to work properly. Some models may
not operate correctly.
When the memorized data is lost or damaged by any
chance, Clarion shall not be liable for any damage.
When using an USB memory stick, we recommend that
you backup your data stored on it before by using a per-
sonal computer etc.
DatalesmaybebrokenwhenusingUSBmemorysticks
in the following situation: When disconnecting the USB
memory stick or turning the power off during writing or
reading data. When affected by static electricity or electric
noise. Connect/disconnect the USB memory stick when it
is not accessed.
Connecting with the computer is not covered.
Cleaning the cabinet
Use a soft, dry cloth and gently wipe off the dirt. For tough
dirt, apply some neutral detergent diluted in water to a soft
cloth, wipe off the dirt gently, and then wipe again with a
dry cloth.
Do not use benzene, thinner, car cleaner, etc., as these
substances may damage the cabinet or cause the paint
to peel. Also, leaving rubber or plastic products in contact
with the cabinet for long periods of time may cause stains.
Cleaning the liquid crystal panel
The liquid crystal panel tends to collect dust, so wipe it
off occasionally with a soft cloth. The surface is easily
scratched, so do not rub it with hard objects.
3. CAUTIONS ON HANDLING
Operation Panel
USB Port
Cleaning
For a longer service life, be sure to read the following cautions.
Hex_VX215A_OM.indd 6 6/30/15 2:04 PM

VX215A 7
English
English
Handling
New discs may have some roughness around the edges.
If such discs are used, the player may not work or the
sound may skip. Use a ball-point pen or the like to remove
any roughness from the edge of the disc.
Never stick labels on the surface of the disc or mark the
surface with a pencil or pen.
Never play a disc with any cellophane tape or other glue
on it or with peeling off marks. If you try to play such a
disc, you may not be able to get it back out of the DVD
player or it may damage the DVD player.
Do not use discs that have large scratches, are misshap-
en, cracked, etc. Use of such discs may cause missopera-
tion or damage.
To remove a disc from its storage case, press down on the
center of the case and lift the disc out, holding it carefully
by the edges.
Do not use commercially available disc protection sheets
or discs equipped with stabilizers, etc. These may dam-
age the disc or cause breakdown of the internal mecha-
nism.
Storage
Do not expose discs to direct sunlight or any heat source.
Do not expose discs to excess humidity or dust.
Do not expose discs to direct heat from heaters.
Cleaning
Toremovengermarksanddust,useasoftclothandwipe
in a straight line from the center of the disc to the circum-
ference.
Do not use any solvents, such as commercially available
cleaners, anti-static spray, or thinner to clean discs.
After using special disc cleaner, let the disc dry off well
before playing it.
On Discs
Never turn off the power and remove the unit from the car
with a disc loaded.
Handling Disc
Ball-point pen
Roughness
CAUTION
For your safety, the driver should not insert or eject a disc,
opening the operation panel while driving.
“Made for iPod” and “Made for iPhone” mean that an elec-
tronicaccessoryhasbeendesignedtoconnectspecical
lytoiPodoriPhone,respectively,andhasbeencertied
by the developer to meet Apple performance standards.
Apple is not responsible for the operation of this device or
its compliance with safety and regulatory standards.
Please note that the use of this accessory with iPod or
iPhone may affect wireless performance.
iPhone, iPod, iPod nano and iPod touch are trademarks
of Apple Inc., registered in the U.S. and other countries.
Copyright 2015 Google Inc.
Font used in this product is Licensed under the Apache
License, Version 2.0 (the “License”); you may not use this
leexceptincompliancewiththeLicense.Youmayobtain
a copy of the License at
http://www.apache.org/licenses/LICENSE-2.0
Unless required by applicable law or agreed to in writing,
software distributed under the License is distributed on
an “AS IS” BASIS, WITHOUT WARRANTIES OR CONDI-
TIONS OF ANY KIND, either express or implied.
SeetheLicenseforthespeciclanguagegoverningper-
missions and limitations under the License.
About the registered marks, etc.
Note:
Reverse engineering or disassembly is prohibited.
Hex_VX215A_OM.indd 7 6/30/15 2:04 PM

8 VX215A
English
Owner’s Manual
4. PANEL CONTROLS
Names of the Buttons and Their Functions
Main Unit
CD/DVD slot
CD insertion slot.
IR Sensor
Receiver for remote control unit (operating range: 30º in
all directions).
[ ] button
Eject a CD/DVD when it is loaded in the unit.
[ ]/[VOLUME]/[SRC]
Press the knob to turn on power.
Press and hold the knob to turn off the power.
Rotate the knob left or right to decrease or increase the
volume.
RESET hole
Reboot the system.
USB port
USB mass storage device/ iPod/ iPhone insertion.
AUX input
3.5mm Auxiliary jack insertion
Video input
Composite video connection (CVBS) jack insertion
behind the unit.
Touch screen
Resistive touch screen with 800x480 display resolution
Hex_VX215A_OM.indd 8 6/30/15 2:04 PM

VX215A 9
English
English
5. REMOTE CONTROL
Inserting the Battery
Turn over the remote control unit.
Press the retention tab and pull out the battery tray and
remove the old battery.
Insert the new CR2025 battery and slide the battery tray
back in the remote control the same direction that you re-
moved it. Please ensure the tray is inserted in the correct
direction.
Notes:
Misusemayresultinruptureofthebattery,producingleakageofuid
and resulting in personal injury or damage to surrounding materials.
Always follow these safety precautions:
Use only the designated battery.
Whenreplacing the battery,insertproperly, with +/-polarities oriented
correctly.
Donotsubjectbatterytoheat,ordisposeofinreorwater.Donot
attempt to disassemble the battery.
Dispose of used batteries properly.
CR2025 battery
Rear side
Rear cover
Hex_VX215A_OM.indd 9 6/30/15 2:04 PM

10 VX215A
English
Owner’s Manual
Remote Control Functions
iPod AUX Video In Settings
[SRC]
[TOP MENU]
[RETURN]
[MENU]
[BAND]
[AUDIO]
[SUBTITLE]
[ANGLE]
[ ] , [ ]
[], [ ]
[], [ ]
[]
[VOL+ / -]
No function.
No function.
No function.
No function. No function.
No function.
No function.
Switch between playback and
pause.
Toggle available
audio (DVD
video only).
Toggle available
angles (DVD
video only).
Toggle available
subtitles (video
only).
Exit Settings
and return to
previous mode.
Go to previ-
ous layer
(Directory).
Go to previous
layer (iPod
Menu).
Press the button to power on.
Press for less than 1 second to switch among source modes.
Press for more than 1 second to power OFF.
Toggle Home Screen (when the button is displayed on the touch screen).
Switch recep-
tion band.
No function.
No function.
No function.
No function.
No function.
No function.
No function.
No function.
Go to next/
previous
page in the
PTY Selection
Menu
(PTY must be
turned ON).
Move preset
channels up
and down.
Go to next/
previous page
in the Directory.
Move tracks/pictures/videos/
chapters up and down.
Press for more than 1 second
to perform Fast-forward/Fast-
backward.
Go to next/
previous page
in the iPod
Menu.
Toggle be-
tween the top
and bottom
portions of the
touch screen.
Increase and decrease volume (in all modes).
Select highlighted button.
Go to the next/previous tab/button.
Enter/exit PTY
Selection Menu
(PTY must be
turned ON).
Enter/exit
Directory.
Go to DVD
menu for DVD.
Enter/exit iPod
Menu.
CD/DVD/USB
Radio
Mode
Button
[ENT]
Hex_VX215A_OM.indd 10 6/30/15 2:04 PM

VX215A 11
English
English
6. BASIC OPERATIONS
Turning on/off the power
Note:
Be careful about using this unit for a long time without running the
engine. If you drain the car’s battery too much, you may not be able
to start the engine and this can reduce the service life of the battery.
1. Press the [ ]knob to turn on the power.
2. It automatically remembers its last source mode and will
automatically switch to display that mode.
3. Press the [ ] button for more than 1 second to turn off
the power of the unit.
Switching Source Modes
1. Press the [SRC] button to change the source mode.
2. Each time you press the [SRC] button, the source mode
changes in the following order:
Radio mode CD/DVD mode USB mode iPod
mode Video-in mode AUX mode Radio
mode…
Note:
The CD/DVD, USB, and iPod modes will be skipped if there is no
media in the unit.
3. The Home Screen allows access to each source mode
directly.
4. Press the button on the touch screen to access the
Home Screen.
5. Press the button on the touch screen to exit the
Home Screen.
Notes:
If the CD/DVD mode is selected when no disc is inserted, the
display shows “NO DISC”.
If the USB modeis selected when nodevice is inserted, the display
shows “NO USB”.
If the iPod mode is selected whenno device is inserted, the display
shows “NO iPod”.
Refer to “Home Screen” for more details.
Home Screen
1. Current Mode Display. Differs with each source mode.
2. Clock/Indicators Display.
3. Exit Home Screen Button.
4. Radio – Press the button to display the Radio mode.
5. CD/DVD—Press the button to display the CD/DVD
mode.
6. USB—Press the button to display the USB mode.
7. iPod— Press the button to display the iPod mode.
8. Settings—Press the button to display Settings.
9. Aux—Press the button to display the Auxiliary mode.
10.Video-in—Press the button to display the Video input
mode.
Clock and Indicators Display
The clock is displayed on the top right corner of the touch
screen. To adjust the clock, refer to “Settings Operations”.
The RDS indicators are displayed on the top right corner of
the touch screen, below the clock display. To adjust RDS
settings, refer to “RDS Operations”.
1. Clock Display
2. Home Screen Button
3. TP indicator
4. TA indicator
5. REG indicator
6. PTY indicator
7. AF indicator
Adjusting the Volume
Turning the [VOLUME] knob clockwise increases the vol-
ume; turning it counter-clockwise decreases the volume.
The volume bar will be displayed in the top right corner of
the touch screen.
* The volume level is from 0 (minimum) to 33 (maximum). The factory
default setting for this volume is “13”.
19
VOLUME
7 5 3
46
1 2
Hex_VX215A_OM.indd 11 6/30/15 2:04 PM

12 VX215A
English
Owner’s Manual
Radio Illumination
The radio illumination can be dimmed using the vehicle il-
lumination dimming switch.
Mute Function
Press the button on the left hand display, when avail-
able, to activate the mute function. Press the button again
to release mute.
Note:
The button is not available during Settings.
Auxiliary Audio Input
This system has AUX input at the front panel where you can
listen to sounds and music from external devices connected
to this unit.
1. Connect the external music player to theAUX input.
2. Press the [SRC] button or press the AUX button in the
Home Screen and select the AUX mode to access the
AUX function.
Note:
Use only 3.5mm stereo jack for the AUX input.
Video Input Function
This system has a video input at the back of the unit where
you view videos from external devices connected to this unit.
1. Connect the external video device to the video input.
2. Press the [SRC] button or press the Video-in button in the
Home Screen and select the Video-in mode to access the
video input function.
Note:
Use a composite video connection (CVBS) jack for the video input.
Parking Brake Safety
The video at the unit can only be displayed when the parking
brake is enabled (when the car is parked). The audio portion
of the video can still be played, but a blank screen will be
displayed in place of the video display.
Reverse Camera View
When the vehicle is set to reverse gear, the unit will display
the reverse camera view.
All video display will be disabled during reverse camera
view.
The system will return to the previous display after the re-
verse gear is released.
Note:
Reverse camera view is only available when the unit is powered ON.
Basic Operations
AUX
AUXILIARY
This unit is playing from external audio input
Hex_VX215A_OM.indd 12 6/30/15 2:04 PM
VX215A 13
English
English
7. RADIO MODE OPERATIONS
Listening to the Radio
1. Press the [SRC] button or press the Radio button on the
Home Screen to select Radio mode. The display will
change accordingly.
2. Press the [FM1/FM2/FM3/AM] button to select one of the
designated bands such as FM1, FM2, FM3 or AM. Each
time the button is pressed, the display will change in the
following order:
FM1 FM2 FM3 AM FM1…
1. FM1/FM2/FM3/AM Button
2. Station Name Display
3. PRESET Tab
4. SEEK Tab
5. RDS Tab
6. Tab Controls
7. Stereo Indicator Display
8. PTY Name Display
9. Frequency Display
10.Channel Display
Seek Tuning
1. Press the button to select the SEEK Tab. The
tab controls will change accordingly.
2. Press the [DX/LOC/MANU] button to select the seek
mode. The button display will change accordingly.
Every time the [DX/LOC/MANU] button is pressed, the
display will change:
DX LOC MANU DX…
Notes:
There are 2 types of seek tuning: DX Seek and LOCAL Seek.
DX Seek can automatically tune in to receivable broadcast stations;
LOCALSeek can tune in to only broadcast stations with good recep-
tion sensitivity.
3. Press the button to perform search in the direction of
higher frequencies.
4. Press the button to perform search in the direction of
lower frequencies.
Manual Tuning
1. Press the button to select the SEEK Tab. The
tab controls will change accordingly.
2. Press the [DX/LOC/MANU] button to select the MANU
Seek mode.
Note:
Manual Seek allows for manual tuning to any frequency regardless
of broadcast.
3. Press the button to perform a single step in the di-
rection of higher frequencies.
4. Press the button to perform a single step in the direc-
tion of lower frequencies.
Autostore
Auto store is a function for storing up to 6 stations that are
automatically tuned in sequentially. If 6 receivable stations
cannot be found then the remaining memory locations will
retain the previous station selections.
1. Press the button to select the SEEK Tab. The
tab controls display will change accordingly.
2. Press the [FM1/FM2/FM3/AM] button to select the de-
sired band.
3. Press the button to begin auto store. The 6 stations
with the strongest reception are stored automatically into
the preset channels.
1. Seek Up Button
2. Save Button
3. DX/LOC/MANU Button
4. Autostore Button
5. Seek Down Button
Hex_VX215A_OM.indd 13 6/30/15 2:04 PM

14 VX215A
English
Owner’s Manual
Radio Mode Operations
Storing Preset Memory
1. Preset Channel Buttons.
2. Cancel Button.
1. REG Button.
2. PTY Seek Button.
3. AF Button.
4. PTY Selection Button.
5. TA Button.
6. PTY Button.
7. PTY List.
8. Page Down Button.
9. Page Up Button.
10.Return Button.
Preset memory function can store up to 24 stations: Six sta-
tions each for FM1, FM2, FM3 and AM.
Note:
The present memory will be reset a few hours after disconnecting the
vehicle battery.
1. Press the [FM1/FM2/FM3/AM] button to select the de-
sired band.
2. Press the / button to tune into a desired station.
3. Press the SAVE button to store the current frequency.
4. Press the CANCEL button to cancel the storing process.
5. Press one of the 6 [PRESET] buttons to store the current
station into the preset memory. The tab controls display
will return to the previous layout.
Recalling a Preset Station
1. Press the PRESET button to select the PRESET Tab. The
tab controls will change accordingly.
2. A total of 24 preset positions (6-FM1, 6-FM2, 6-FM3,
6-AM) exists to store individual radio stations in memory.
Pressing the corresponding [PRESET] button recalls the
stored radio frequency automatically.
Storing Preset Memory
Press the RDS button to select the RDS Tab. The tab con-
trols will change accordingly.
This unit has a built-in RDS decoder system that supports
broadcast stations transmitting RDS data.
This system can display the name of the broadcast station
being received (PS) and can automatically switch to the
broadcast station with the best reception as you move long
distances (AF switching).
Also,ifatrafcannouncementorprogrammetypeisbroad-
cast from an RDS station, no matter what mode you are in,
this broadcast is received. Additionally, if EON information
is received, this information enables automatic switching of
other preset stations on the same network and interruption
ofthestationbeingreceivedwithtrafcinformationfromoth-
er stations (TP). This function is not available in some areas.
When using the RDS function, always set the radio to FM
mode.
The RDS feature consists of:
AF : Alternative Frequency
PS : Programme Service Name
PTY : Programme Type
EON : Enhanced Other Network
TP:TrafcProgramme
TA:TrafcAnnouncement
* RDS interrupt does not function during AM radio reception.
* When set receives RDS signal, and can read PS data, PS appears
in the display.
8. RDS OPERATIONS
Hex_VX215A_OM.indd 14 6/30/15 2:04 PM

VX215A 15
English
English
RDS Operations
TA (Trafc Announcement)
In the TA standby mode, when a trafc announcement
broadcaststarts,thetrafcannouncementbroadcastisre-
ceived as top priority regardless of the source mode so you
canlistentoit.Trafcprogramme(TP)automatictuningis
also possible.
* This function can only be used when “TP” is lit in the display. When
“TP” is lit, this means that the Radio Data System broadcast station
beingreceivedhastrafcannouncementprogrammes.
Turning on TA
1. Press the RDS button to select the RDS Tab. The tab
controls will change accordingly.
2. If you press the TA button when “TP” only is lit in the dis-
play, “TA” and “TP” will light up in the display and the unit
issettoTAstandbymodeuntilatrafcannouncementis
broadcast.
3.When a trafc announcement broadcast starts, the dis-
play will change.
Turning off TA
1. Press the RDS button to select the RDS Tab. The tab
controls will change accordingly.
2. During TA standby mode, press the TA button. The “TA”
indicator in the display goes off and TA standby mode is
cancelled.
3. If “TP” is not lit, press the the TA button to search for a
TP station.
Cancelling TA Interrupt
1. If you press the CANCEL buttonwhileatrafcannounce-
ment broadcast is being received, the trafc announce-
ment broadcast reception is cancelled and the unit returns
to the TA standby mode.
Searching for a TP station
1. When “TP” is not lit, if you press the TA button, “TA” in
the display lights up and the unit automatically searches
for a TP station.
2. If a TP station is not received the unit continues the
search operation. Press the CANCEL button to stop the
TP station searching.
Emergency Broadcast
If an emergency broadcast is received, all the source mode
operations are stopped. The display will change accordingly.
1. If you press the CANCEL button while an emergency
broadcast is being received, the emergency broadcast
reception is cancelled and the unit returns to the previous
mode.
PTY (Programme Type)
This function enables you to listen to a broadcast of the se-
lected programme type even if the unit is on a source mode
other than radio.
* Some countries do not have PTY broadcast.
* During TAstandby mode, a TP station has priority over a PTY broad-
cast station.
Turning on PTY
1. Press the RDS button to select the RDS Tab. The tab
controls will change accordingly.
2. If you press the PTY button, “PTY” in the display lights
up and PTY standby mode is turned on. When the se-
lected PTY broadcast starts, the display will change and
the PTY item name appears in the display
Turning off PTY
1. Press the RDS button to select the RDS Tab. The tab
controls will change accordingly.
2. During PTY standby mode, press the PTY button. The
“PTY” indicator in the display goes off and PTY standby
mode is cancelled.
Cancelling PTY Interrupt
1. If you press the CANCEL button while a PTY interrupt is
being received, the PTY interrupt is cancelled and the unit
returns to the PTY standby mode.
TRAFFIC
ANNOUNCEMENT
CANCEL
CANCEL
PTY PTY INTERRUPT
NEWS
CANCEL
EMERGENCY
BROADCAST
Hex_VX215A_OM.indd 15 6/30/15 2:04 PM

16 VX215A
English
Owner’s Manual
RDS Operations
Selecting PTY
1. Press the RDS button to select the RDS Tab. The tab
controls will change accordingly.
2. During PTY standby mode, press the button to
enter the PTY Selection Menu. The left display will
change accordingly.
3. There are 29 PTY items that can be selected.
PTY item
ENGLISH
News
Affairs
Info
Sport
Educate
Drama
Culture
Science
Varied
Pop M
Rock M
Easy M
Light M
Classics
Other M
Weather
Finance
Children
Social
Religion
Phone In
Travel
Leisure
Jazz
Country
Nation M
Oldies
Folk M
Document
CONTENTS
News
Today’s events
Information
Sports
Education
Drama
Culture
Science
Variety
Pop music
Rock music
Easy music
Light music
Classics
Other music
Weather
Finance
For children
Social
Religion
Phone in
Travel
Leisure
Jazz
Country
Nation music
Oldies
Folk music
Documentaries
Selecting PTY
1. Press the RDS button to select the RDS Tab. The tab
controls will change accordingly.
2. During PTY standby mode, press the button to
search for a PTY broadcast in the direction of a higher
frequency.
* If no station with the selected PTY broadcast can be received, the
unit returns to the previous receiving station.
Volume Setting of TA, Emergency
Broadcast, and PTY
The volume for TA, emergency broadcast, and PTY inter-
rupts can be set during their respective interrupts.
* The factory default setting is “15”.
During TA, emergency broadcast or PTY interrupt, turn the
[VOLUME] rotary knob to set the volume to the desired level
(0 to 33).
* When the interrupt ends, volume returns to the level it had before
interrupt.
AF (Alternate Frequency) Function
The AF function switches to a different frequency on the
same network in order to maintain optimum reception.
1. Press the RDS button to select the RDS Tab. The tab
controls will change accordingly.
2. Press the AF button and “AF” lights up in the display
screen. AF function is turned on.
3. WhenAF function is turned on, press the AF button and
the “AF” on the display screen is turned off.AF function is
turned off.
REG (Regional Programme)
When the REG function is ON, the optimum regional station
can be received. When this function is OFF, if the regional
station area switches as you drive, a regional station for that
region is received.
1. Press the RDS button to select the RDS Tab. The tab
controls will change accordingly.
2. Press the REG button and “REG” lights up in the display
screen. REG function is turned on.
3. When REG function is turned on, press the REG button
and the “REG” on the display screen is turned off. REG
function is turned off.
Notes:
This function is disabled when a national station such as BBC R2 is
being received.
The REG function ON/OFF setting is only valid when theAF function
is ON.
Hex_VX215A_OM.indd 16 6/30/15 2:04 PM

VX215A 17
English
English
9. CD/USB MODE OPERATION
Discs
Playable discs
This DVD video player can play the following discs.
Playable discs
CD TEXTDVD video discs Audio CD
Precautions when Creating MP3 les
Usable sampling rates and bit rates:
1. MP3 :Sampling rate 8 kHz-48 kHz,
Bit rate 16 kbps-320 kbps/VBR
2. WMA :Sampling rate 8 kHz-48 kHz,
Bit rate 16 kbps-320 kbps/VBR
3. AAC :Sampling rate 8 kHz-48 kHz,
Bit rate 16 kbps-320 kbps/VBR
File extensions
Alwaysaddaleextension“.MP3” or “.mp3”toaMP3le,
and “.WMA” or “.wma” to a WMA and “.M4A” or “.m4a” to
aAAC le extension by using single byte letters. If you
addaleextensionotherthanspeciedorforgettoadd
theleextension,thelecannotbeplayed.Inaddition,if
you use upper case and lower case letters (capital and
smallletters)mixedforleextensions,normalplaymay
not be possible.
Audio les other than MP3/WMA/AAC data cannot be
played.
Playingleswithaformatnotsupportedwillbeskipped.
File and disc not supported
Files and discs with following extensions are not support-
ed:*.AAC,*DLF,*.M3U,*.PLS,*.MP3PROles,leswith
DRM, open session discs.
To disable DRM (Digital Rights
Management)
When using Windows Media Player 10/11, click on TOOL
OPTIONS RIP MUSIC tab, then under Rip settings,
unclick the check box for COPY PROTECT MUSIC. Then,
reconstructles.
Notes:
PersonallyconstructedWMAlesareusedatyourownresponsibility.
DisablingDRMcanbedoneiftheleisrippedfromCD.
Logical format (File system)
When writing an MP3/WMA/AAC le on a disc, please
select “ISO9660 level 1 or level 2 (without including ex-
pansion format)” as the writing software format. Normal
playback may not be possible if the disc is recorded on
another format.
Thefoldernameandlenamecanbedisplayedasthe
title during MP3/WMA/AAC play.
Entering File and Folder Names
Ifthelenameandfoldernamecontainsthecharacteroth-
erthan code character list might cause the le and folder
names displayed incorrectly.
Picture File extensions
Alwaysaddaleextension“.JPEG” or “.JPG”topicturele
byusingsinglebyteletters.Ifyouaddapictureleextension
otherthanspeciedorforgettoaddtheleextension,the
lecannotbeplayed.
Playable video les
This system can play video les stored in the disc/USB
memory device.
*.avi les
Format: Xvid
Resolution: 720*480/576
Audio format: WMA/PCM/LPCM/AAC LC/MPEG
Audio(MP1/2/3)
*.mp4 les
Format: Xvid
Resolution: 720*480/576
Audio format: WMA/PCM/LPCM/AAC LC/MPEG-
Audio(MP1/2/3)
Note:
Improperformatsofthesupportedvideolesmayresultinirregular
playback behavior.
File extensions
Alwaysaddaleextension“.AVI” or “.MP4”tovideoleby
using single byte letters. If you add a video le extension
otherthanspeciedorforgettoaddtheleextension,the
lecannotbeplayed.
Note:
Largerlesmighttakealongertimetoload.
About CD
Logical format (File system)
Mode
File System
CD
ISO 9660 Level 1, 2,
Romeo or Joliet
CAUTION
Donottrytoputyourhandorngersinthediscinsertion
slot. Also never insert foreign objects into the slot.
Do not insert discs where adhesive comes out from cel-
lophane tape or a rental CD label, or discs with marks
where cellophane tape or rental CD labels were removed.
It may be impossible to extract these discs from the unit
and they may cause the unit to break down.
Notes:
Some CDs recorded on CD-R/RW mode may not be usable.
PBC feature for VCD is not supported in this unit.
Hex_VX215A_OM.indd 17 6/30/15 2:04 PM

18 VX215A
English
Owner’s Manual
Note on region numbers
The DVD video system assigns a region number to DVD
video players and DVD discs by sales area. DVD video
players sold in Asia can play back DVD discs with the re-
gion number “ALL”, “3” or any combination of numbers
that also incorporate a “3”.
The DVD video region number is marked on the disc
jacket as shown below.
CD/USB Mode Operations
3
ALL
13
4
Watching/Listening to a disc
If a disc has been loaded, press the [SRC] button or press
the button to select CD/DVD mode.
Notes:
When CDDA disc or DVD is loaded, the play mode is automatically
engaged.
WhenCDMP3discisrsttimeloaded,thesystemwillgotodirectory
display.
If you reinsert the same disc that you ejected last, the system will
playback where it left off.
Loading a CD
Insert a CD into the center of the CD insertion slot with the
labeled side facing up. The “READING” appears in the dis-
play and starts playing.
Notes:
Do not insert another disc forcefully.
Discs not bearing the logo mark and CD-ROMs cannot be played by
this unit.
Some CDs recorded in CD-R/CD-RW mode may not be usable.
8cm compact disc is not supported. Do not attempt to insert the disc
into the CD slot.
Eject the CD
Press the button, then the disc will be ejected. The unit
will direct return to Tuner mode and eject icon will showed on
the left side of the clock display.
Notes:
If you force a CD into CD slot before auto reloading, this can damage
the CD.
If a CD (12 cm) is left in the ejected position for 15 seconds, the CD
is automatically reloaded (Auto reload).
If you leave the ejected CD without removing it, it will be drawn into
the unit automatically after about 15 seconds.
USB
Thissystemcanplayaudioles(MP3/WMA/AAC)storedin
an USB memory which is recognized as “USB Mass Storage
Class device”. You can use your USB memory as an audio
devicebysimplecopyingdesiredaudiolesintoit.
Note:
This system will not operate or may operate improperly with some
USB memory.
About USB memory device
USB is an acronym for Universal Serial Bus, and refers
to an external bus standard supporting data rates of 12
Mbps.
This unit is compatible with USB 1.1/2.0/3.0 with maxi-
mum data transfer rates of 4800 Mbps.
USB memory devices that can be played by connecting
to the unit’s USB cable are limited to those recognized as
“USB mass storage class devices”; operation is not guar-
anteed with all USB memory devices.
Devices compatible with “USB Mass Storage Class” can
be used merely by connecting to the host device, without
need for special drivers or application software.
Consult the manufacturer of your USB memory device
for information regarding whether it is supported by “USB
Mass Storage Class” standards.
To prevent the accidental loss of data, always back up
important data on your computer.
This unit does not support connections to a computer. In
addition, connections made through a USB hub device
are also not supported.
When a USB memory device is composed of two or more
drives,onlytherstdrivewillbedetected.
USB memory devices with security functions cannot be
played.
The order in which tracks are recorded may differ depend-
ing on the USB memory device connected (the actual
playback order may not be the same as that indicated on
your computer’s display).
Hot plugging function
This unit has the ability to recognize the changes of connect-
ing and disconnecting an USB memory device.
Mode
File System USB
FAT16, FAT 32
Hex_VX215A_OM.indd 18 6/30/15 2:04 PM

VX215A 19
English
English
CD/USB Mode Operations
Connecting a USB memory device
1. Connect the USB memory device into the port with the
correct direction.
2. Always insert the USB memory device fully into the port.
Incomplete connections may cause the USB memory de-
vice not be recognized.
3. Depending on the number of tracks recorded, some
amount of time may be required until all tracks are read
into the unit. It will take some time to read the USB mem-
ory device before playback begins.
4. USB memory devices may have different shape depends
on brands. Some USB memory devices may not be able
to plug into the port due to the shape design. Please use
an extension cable instead.
5. Please reconnect the USB memory device when it cannot
be detected properly.
Notes:
Donot forcibly connect the USB memorydevice to the portwith incor-
rect direction as this will damage the USB memory device as well as
the USB slot.
Watching/Listening to a track with USB
memory device
1. If a USB memory device have been inserted, press [SRC]
or press the button to select the USB mode.
Notes:
WhenUSBmemorydeviceisrsttimeloaded,thesystemwillgoto
directory display.
If you reconnect the same device that you disconnected last, the
system will playback where it left off.
CAUTION
For safety driving purpose, avoid inserting the USB drive
directly into the USB port.
Please use an USB extension cable instead for USB con-
nection.
Always backup and save important data on your com-
puter.
Unplug the USB memory device
1. Remove the USB memory device from the USB slot dur-
ing playback, system will direct return to Tuner mode.
2. Remove the USB memory device from the USB slot dur-
ing reading, system will show “NO USB”. Press the screen
to return to Tuner mode.
Notes
Ifthedevicehasnosupportedles,“NOFILE”isdisplayed.
If you reconnect the same device that you disconnected last, the
system will resume the last playback position.
Hex_VX215A_OM.indd 19 6/30/15 2:04 PM

20 VX215A
English
Owner’s Manual
10. DVD VIDEO PLAYER OPERATIONS
1. Directory Button
2. Toggle Page Button
3. Play/ Pause Button
4. Next Chapter/ Fast Forward Button
5. Previous Chapter/ Fast Backward Button
6. Next Title Button
7. Previous Title Button
8. Current Playtime
9. Playtime Progress Bar
10.Total Playtime
11. Directory Path Display (DVD)
12.Current Mode Display
13.Title Chapter Display
14.Zoom Operation Button
15.Subtitle Switching Button
16.Audio Channel Switching Button
17.Angle Switching Button
18.Repeat Button
Showing DVD video mode screen
After disc is loaded, the play mode is automatically engaged.
Playing Video Files in DVD
If video le is playing, touch the screen of the playing
video to display Operation buttons.
The display will return to the playback screen if you do not
touch the screen for 10 seconds.
During DVD menu, you can directly select the option from
DVD menu by pressing the option on the screen.
Play/Pause Playback
1. Press the button to pause during playback.
2. Press the button to resume playback.
Skip (Search) a Chapter
Press CHAPTER or CHAPTER button during playback. Chapters
are skipped down or up from current locations, as many
times as the button is pressed, and playback start.
Skip (Search) a Title
Press TITLE or TITLE button during playback. Title are
skipped down or up from current locations, as many times
as the button is pressed, and playback start.
Fast Forward/Fast Backward Operation
Press CHAPTER or CHAPTER button and hold more than 1 sec-
ond to start fast backward or fast forward during playback.
Release the button will continue playing with normal speed.
Note:
The fast forward and fast backward speed may differ depending on
the disc.
Repeat Playback
1. Press the button to select the repeat status for
playback. The text will change accordingly.
2. Every time the button is pressed, the text will
change as:
RPT OFF CHAPTER RPT TITLE RPT RPT OFF
CHAPTER RPT (Chapter Repeat)
The current playing chapter will be played repeatedly. The
button will be displayed as “CHAPTER RPT”.
TITLE RPT (Title Repeat)
The current playing title will be played repeatedly. The
button will be displayed as “TITLE RPT”
RPT OFF (Repeat Off)
Disengage the unit from repeat play. During repeat off
mode, the button will be displayed as “RPT OFF”.
Hex_VX215A_OM.indd 20 6/30/15 2:04 PM
Table of contents
Other Clarion Car Receiver manuals

Clarion
Clarion DXZSSSMP User manual

Clarion
Clarion NX700 User manual

Clarion
Clarion VX405 User manual

Clarion
Clarion DB266MP User manual

Clarion
Clarion DXZ555MP User manual

Clarion
Clarion NX503E User manual

Clarion
Clarion M502 Repair manual

Clarion
Clarion DB185MP User manual

Clarion
Clarion DXZ865MP Instruction Manual

Clarion
Clarion CZ100A User manual

Clarion
Clarion DXZ866MP User manual

Clarion
Clarion VZ509A User manual

Clarion
Clarion DMX6655z User manual

Clarion
Clarion DB165 User manual

Clarion
Clarion CZ202 Repair manual

Clarion
Clarion CZ201E Repair manual

Clarion
Clarion VXZ646 User manual

Clarion
Clarion DUB278RMP User manual

Clarion
Clarion DRB3675R User manual

Clarion
Clarion DXZ775USB Instruction Manual