manuals.online logo
Brands
  1. Home
  2. •
  3. Brands
  4. •
  5. Clarke
  6. •
  7. Tools
  8. •
  9. Clarke CAT33B Installation and operation manual

Clarke CAT33B Installation and operation manual

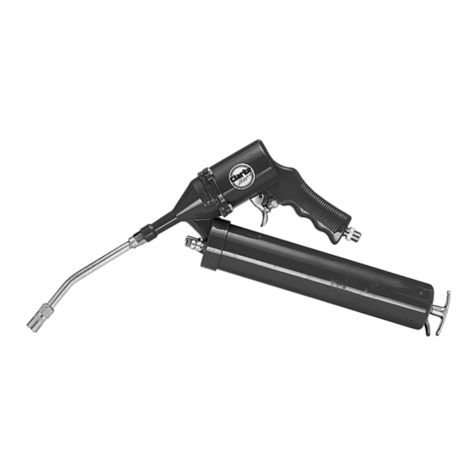
Thank you for purchasing this CLARKE, Grease Gun, designed for garage and automotive use, by
professionals and DIY users alike.
Before using the tool, please read this leaflet thoroughly and follow the instructions carefully, in doing
so you will ensure the safety of yourself and that of others around you, and you can look forward it
giving long and satisfactory service.
GUARANTEE
This CLARKE product is guaranteed against faulty manufacture for a period of 12 months from
the date of purchase. Please keep your receipt as proof of purchase.
This guarantee is invalid if the product is found to have been abused or tampered with in any
way, or not used for the purpose for which it was intended.
Faulty goods should be returned to their place of purchase, no product can be returned to us
without prior permission.
This guarantee does not effect your statutory rights.
CAT33B
OPERATING & MAINTENANCE
INSTRUCTIONS
SAFETY PRECAUTIONS
IMPORTANT
Failure to follow these precautions could result in
personal injury, and/or damage to property.
1. ALWAYS wear approved impact resistant safety
goggles. (Eye glasses are NOT safety glasses).
2. ALWAYS disconnect the tool when not in use,
before changing accessories and before carrying
out any maintenance
3. ALWAYS have trigger in the OFF position when
connecting to an air supply.
4. ALWAYS keep a safe distance between yourself
and other people when using the tool.
5. Maintain the tool with care. Keep it clean for
best and safest performance.
6. Quick change couplings should not be
located at the tool. They add weight and
could fail due to vibration.
7. DO NOT over-reach. Keep your proper footing
and balance at all times.
8. DO NOT force or misuse the tool. It will do a
better and safer job at the rate for which
it was designed.
9. DO NOT abuse hoses or connectors. NEVER
carry a tool by the hose, or yank it to
disconnect from the air supply. Keep hoses
away from heat, oil and sharp edges.
Check hoses for weak or worn condition
before use, and ensure that all connections
are secure.
10. DO NOT exceed 90 PSI at the tool.
11. DO NOT modify the tool in any way.
AIR SUPPLY
Tools of this type, operate on a wide range
of air pressures. It is recommended that
air pressure to this tool does not exceed
90 PSI, at the tool when running. Higher
pressure and unclean air, will shorten the
tools’ life because of faster wear, and
could be a safety hazard.
Water in the air line will cause damage to
the tool, ensure it is properly maintained
at all times.
The recommended procedure to connect
this tool to an air supply, is shown at fig. 1.
The air inlet used for connecting air supply,
has a standard ¼” BSP thread.
Line pressure, or hose inside diameter, should be increased to compensate for unusually long air hoses
(over 25 feet). Minimum hose diameter should be 5/16" (8mm) ID., and fittings should have the same
inside dimen.sions.
OPERATION
Ensure the air supply is disconnected before filling the grease chamber.
1. Unscrew and remove the grease chamber complete.
2. Enter a grease cartridge (available from your Clarke dealer), into the open end of the grease chamber,
then gently and progressively pull the piston rod (19) out fully, against spring pressure, whilst guiding the
cartridge into the chamber. Lock the piston Rod in place using the locking plate (21).
3. Clean the edge of the chamber before screwing back on to the body of the gun.
4. Release the piston rod by pressing the locking plate.
5. Open the Air vent valve (10) to expel any air in the chamber, and close again when solid grease is
expelled.

MAINTENANCE
Daily
1. Before use, drain water from air tank, air line and compressor.
2. If no line Lubricator is used, ensure that oil is applied to the tool (see below).
Weekly
Clean the air inlet filter.
Monthly
Run a few drops of oil through the tool. It may be entered into the tool air inlet (B), ensuring the strainer
is clear, or into the hose at the nearest connection to the air supply. Then run the tool. A rust inhibitive
oil, available from auto supply stores etc., is acceptable.
Be aware that factors other than the tool may effect its operation and efficiency, such as reduced
compressor output, excessive drain on the airline, moisture or restrictions in the line, or the use of
connectors of improper size or poor condition which will reduce air supply. Grit or gum deposits in the
tool may also reduce efficiency. This condition can be corrected by cleaning the air strainer and
flushing out the tool with gum solvent oil, or failing this, the tool should be dis-assembled, thoroughly
cleaned, dried and re-assembled.
Keep the tool clean at all times,
ACCESSORIES
A wide range of Airline accessories is available, including Filter/Regulators, Lubricators, High Pressure
Hoses from 5 to 100 Metres, etc. Contact your CLARKE dealer for further information, or CLARKE
International Spare Parts Department on 020 8988 7400
SPECIFICATIONS
Model No. ................................................... CAT 33B
Part No. ....................................................... 3110433
Air Inlet ........................................................ 1/4" BSP
Min. Hose Size (ID) ...................................... 5/16" (8mm)
Net Weight .................................................. 1.5 kg
PARTS LIST
No. Description Qty Part No.
1 Body 1 KLCAT3301
2 Air Connector 1 KLCAT3302
3 Trigger 1 KLCAT3303
4 Screw 4 KLCAT3304
5 Air punger 1 KLCAT3305
6 Short Spring Kit 1 KLCAT3306
7 Body Cap 1 KLCAT3307
8 Adapter 1 KLCAT3308
9 Extension w/nozzle 1 KLCAT3309
10 Air Vent Valve 1 KLCAT3310
11 Plug 1 KLCAT3311
12 Gasket 1 KLCAT3312
13 Nut 1 KLCAT3313
14 Flat Washer 1 KLCAT3314
15 Piston 1 KLCAT3315
16 Piston Support 1 KLCAT3316
17 Long Spring Kit 1 KLCAT3317
18 Grease Chamber 1 KLCAT3318
19 Piston Rod 1 KLCAT3319
20 Plunger Handle 1 KLCAT3320
21 Plate 1 KLCAT3321
No. Description Qty Part No.
For Spare Parts and Service, please contact your nearest dealer,
or CLARKE International, on one of the following numbers.
PARTS & SERVICE TEL: 020 8988 7400
PARTS & SERVICE FAX: 020 8558 3622
or e-mail as follows:
PARTS: [email protected]
SERVICE: [email protected]
PARTS AND SERVICE CONTACTS
PARTS DRAWING

Other manuals for CAT33B

1

Other Clarke Tools manuals

Clarke KIT700 Instruction Manual

Clarke

Clarke KIT700 Instruction Manual

Clarke CHT204 User manual

Clarke

Clarke CHT204 User manual

Clarke CHT204 User manual

Clarke

Clarke CHT204 User manual

Clarke CHT403 User manual

Clarke

Clarke CHT403 User manual

Clarke CAT151 Installation and operation manual

Clarke

Clarke CAT151 Installation and operation manual

Clarke CONTRACTOR CSJ100 Instruction Manual

Clarke

Clarke CONTRACTOR CSJ100 Instruction Manual

Clarke CFC100 Installation and operation manual

Clarke

Clarke CFC100 Installation and operation manual

Clarke METALWORKER CMSSCS User manual

Clarke

Clarke METALWORKER CMSSCS User manual

Clarke IT1500 Instruction Manual

Clarke

Clarke IT1500 Instruction Manual

Clarke CHT877 User manual

Clarke

Clarke CHT877 User manual

Clarke CHT706 User manual

Clarke

Clarke CHT706 User manual

Clarke CAT216 Installation and operation manual

Clarke

Clarke CAT216 Installation and operation manual

Clarke CEA150 Installation and operation manual

Clarke

Clarke CEA150 Installation and operation manual

Clarke SBR305 Instruction Manual

Clarke

Clarke SBR305 Instruction Manual

Clarke CHT697 Installation guide

Clarke

Clarke CHT697 Installation guide

Clarke X-PRO CAT170 Installation and operation manual

Clarke

Clarke X-PRO CAT170 Installation and operation manual

Clarke CONTRACTOR CLJ120 Instruction Manual

Clarke

Clarke CONTRACTOR CLJ120 Instruction Manual

Clarke CDTJ12 Instruction Manual

Clarke

Clarke CDTJ12 Instruction Manual

Clarke CHT637 Installation and operation manual

Clarke

Clarke CHT637 Installation and operation manual

Clarke CAT29B Installation and operation manual

Clarke

Clarke CAT29B Installation and operation manual

Clarke PC108 Assembly instructions

Clarke

Clarke PC108 Assembly instructions

Clarke CHT 141 User manual

Clarke

Clarke CHT 141 User manual

Clarke CAR15PC User manual

Clarke

Clarke CAR15PC User manual

Clarke CMC36B User manual

Clarke

Clarke CMC36B User manual

Popular Tools manuals by other brands

TRI tool 604SB manual

TRI tool

TRI tool 604SB manual

Crivit 292850 Instructions for use

Crivit

Crivit 292850 Instructions for use

Parkside 365023 2204 Translation of the original instructions

Parkside

Parkside 365023 2204 Translation of the original instructions

Holmatro GTR 53 EVO 3 Series manual

Holmatro

Holmatro GTR 53 EVO 3 Series manual

Kreg KHI-PULL-INT owner's manual

Kreg

Kreg KHI-PULL-INT owner's manual

APE 50 owner's manual

APE

APE 50 owner's manual

McElroy 1LC Operator's manual

McElroy

McElroy 1LC Operator's manual

AMF 84-55 UJ Parts and service manual

AMF

AMF 84-55 UJ Parts and service manual

Westfalia 82 47 84 Original instructions

Westfalia

Westfalia 82 47 84 Original instructions

Astro Pneumatic Tool 45080 manual

Astro Pneumatic Tool

Astro Pneumatic Tool 45080 manual

goliath TR7 User instructions

goliath

goliath TR7 User instructions

UMETA 85/PK Silver instructions

UMETA

UMETA 85/PK Silver instructions

XPOtool 61074 user manual

XPOtool

XPOtool 61074 user manual

Fein MULTIMASTER FMM 250 user guide

Fein

Fein MULTIMASTER FMM 250 user guide

STEELGREEN SG36 installation manual

STEELGREEN

STEELGREEN SG36 installation manual

KAN-therm AC 3000 Instructions for use

KAN-therm

KAN-therm AC 3000 Instructions for use

DÖRR EcoGun 246 Operation manual

DÖRR

DÖRR EcoGun 246 Operation manual

Lux Tools HLP-2000 LCD Original instruction

Lux Tools

Lux Tools HLP-2000 LCD Original instruction

manuals.online logo
manuals.online logoBrands
  • About & Mission
  • Contact us
  • Privacy Policy
  • Terms and Conditions

Copyright 2025 Manuals.Online. All Rights Reserved.