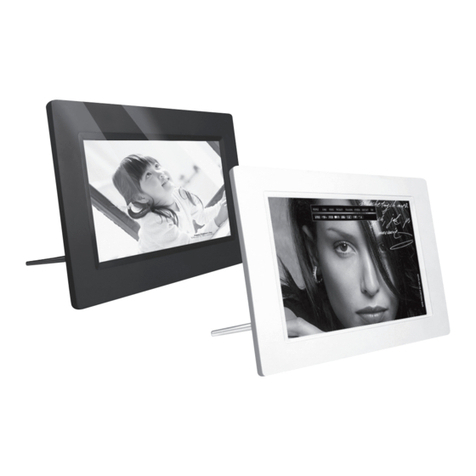
Clas Ohlson D3721 User manual

EnglishSvenskaNorskSuomi
7″ Digital Photo Album
Digitalt fotoalbum 7″
Digitaalinen valokuva-albumi 7″
Art.no Model
38-3848 D3721 Ver. 201006

2

3
English
7″ Digital Photo Album
Art.no 38-3848 Model D3721
Please read the entire instruction manual before use and save it for future reference.
We reserve the right for any errors in text or images and for making any necessary
technical changes to this document. If you should have any questions concerning
technical problems please contact our Customer Services.
Safety
Warning! Do not open the casing. Certain components within the product’s casing
carry dangerous currents. Contact with these may give you an electric shock.
• The product should only be repaired by qualified service technicians.
• The product should not be taken apart or modified.
• Do not place the product where it can fall into water or other liquids. Do not place
any objects which contain liquid on top of product, e.g. flower vases or drinks.
• Do not cover the ventilation openings. Do not place the product close to heat
sources such as on top of the radiator, TV, or on e.g. the sofa where the
ventilation holes risk being blocked.
• Always unplug the adaptor from the electrical outlet if the product is not
be used for an extended period.
• Do not expose the product to direct sunlight for prolonged periods.
• Do not use the product in damp, dusty, or dirty environments.
• Only use alightly moistened soft cloth with alittle washing up
liquid to clean the screen.
• Handle the screen carefully to avoid scratching it.
• Do not disconnect the mains adaptor while the frame is in use. The attached
memory storage device may be damaged. Neither should the connected
memory storage device be removed when the frame is in use.
Product description
Digital photo album capable of displaying pictures and playing music
(MP3) or video (MPEG4).
• Built-in speakers
• Built-in rechargeable battery
• 2 GB internal memory
• USB port and SD/SDHC card slot
• Comes with USB cable, mains adaptor and removable desktop stand

4
English
RESET ON OFF
OK
1
2
3
5 6
15 14 13 12 11
10
17
16
9
8
7
4
1. Headphone jack
2. SD/MMC memory card slot
3. Mini-USB port
4. Mains adaptor socket (5 V DC, 1.8 A)
5. Frame
6. LCD display
7. Move down
8. Move up
9. OK button
10. Escape button
11. Move right
12. Move left
13. Reset button
14. On/Off button
15. Power indicator light
16. Table stand attachment
17. Speakers

5
English
Getting started
Attaching the table stand
Screw the table stand on as shown in the picture.
Connecting to the power supply
1. Plug the mains adaptor’s DC plug into the adaptor socket (4) on the photo frame.
2. Then plug the adaptor into awall socket.
3. Set the On/Off switch (14) to ON to turn the frame on or OFF to turn it off.

6
English
Use
Startup mode
Turn on the photo album. The digital photo album starts up in whichever mode is
preset: calendar, image, music, film or acombination of music and image.
To change startup mode, press the escape button (10) twice to enter Function Select.
When the startup mode is either; image, music or film, the photo album will search for
files in the following order: SD/MMC memory card → USB memory → internal memory.
If there are no files, you will enter the Card Select (select storage medium) mode.
1. Use the left/right arrow buttons to
highlight Setup.
2. Press the OK button (9) to confirm
your selection.
3. Using the down button (7), highlight
StartupSet. You can now use the
arrow buttons left/right to select a startup
mode. Press the OK button (9) to confirm
your selection.
Selecting storage medium
1. Press the escape button (10) once or
several times to enter the Card Select
(storage medium selection) mode.
2. Use the navigation buttons left/right
to select amedium.
3. Press the OK button (9) to confirm
your selection.
Calendar
1. Press the escape button (10) once or
several times to come to the calendar.
2. Use the left/right arrow buttons to
advance through the months.
3. Use the up/down arrow buttons to
advance through the years.
4. In calendar mode, press the OK button (9)
or escape button (10) to enter the storage
medium selection mode.

7
English
1. Use the left/right/up/down arrow buttons
to select an image.
2. In thumbnail mode, press the OK button
(9) to view the selected image and start
aslideshow.
3. In thumbnail mode, press the escape button
(10) to move on to the Function Select mode.
Function select
1. Press the escape button (10) once or
several times to come to the Function
Select mode.
2. Use the left/right arrow buttons to select
aone of the functions. You can select
either; image, music, film, file or setup.
3. Press the OK button (9) to confirm
your selection.
Image
In Function Select mode, highlight Image and press the OK button (9).
You will enter the thumbnail mode:
In slideshow mode:
• Use the up/down arrow buttons to browse through the various background melodies.
• Hold in the right/left arrow buttons to lower or raise the volume of the
background music.
• Use the left/right arrow buttons to browse through the images.
Image setup:
1. In slideshow mode, press the OK button
(9) to move on to the Image Setup mode.
2. Use the up/down arrow buttons to select
aproperty for setting.
3. Use the left/right arrow buttons to change
the setting.
4. Press the escape button (10) to exit the
Image Setup menu.
Setup key
Brightness Use the left/right arrow buttons to adjust the brightness.
Zoom Zoom in on current image. Only works on separate images (not slideshow).
Rotate Rotate image clockwise.
Music Turns the background music on/off Press the OK button (9) to
confirm your selection.
Slideshow Select slide duration (3 sec – 1 hr). The arrows keys can also be used
to go to the next image during the slideshow. Press the OK button (9)
to confirm your selection.
PIC info Press the OK button (9) to display information about the current image.
8
English
Music
In Function Select mode, highlight Music and press the OK button (9).
You will enter the music mode:
1. Use the up/down arrow buttons to
advance through the music files.
2. Press the OK button (9) to play/
pause your selection.
3. Use the left/right arrow buttons
to lower or raise the volume.
4. Press the escape button (10) to
stop music playback.
Film
In Function Select mode, highlight Film and press the OK button (9). You will come to
the film list: Press the escape button (10) to return to the Function Select mode.
When in the film list:
1. Use the up/down arrow buttons
to select afilm file.
2. Press the OK button (9) to play/pause
your selection.
In playback mode:
• Quick presses on the left/right arrow but-
tons allow you to browse the music files.
• Hold in the left/right arrow button to fast
forward or backward.
• Press the escape button (10) to stop dis-
playing afilm and return to the file list.
• Press the arrow up button to open the
light settings. Use the left/right arrow but-
tons to adjust the brightness.
• Press the arrow down button to open the
volume settings. Use the left/right arrow
buttons to lower or raise the volume.

9
English
File processing
In Function Select mode, highlight File Processing and press the OK button (9).
You will come to the File Processing mode:
Deleting files
1. Use the up/down arrow buttons to select
the file you wish to delete.
2. Press the right arrow button to highlight
the file. A tick appears next to the file
name. If you wish to de-select the ticked
file, press the right arrow button again.
3. Hold in the OK button (9) until the menu
with Copy and Delete appear.
4. Press the down arrow button to highlight
Delete and then press OK (9) to confirm
your selection. Confirm once again.
5. Press the left arrow button to highlight
, and then press the OK button (9) to
confirm your selection and delete the file.
6. If, instead, you choose to keep the film,
press the escape button (10) or select
to exit the delete mode.
7. When the file has been deleted the
following display will appear:
8. Press the OK button (9) to end.

10
English
Copying files
1. Use the up/down arrow buttons to select
the file you wish to copy.
2. Press the right arrow button to highlight
the file. A tick appears next to the file name.
If you wish to de-select the ticked file, press
the right arrow button again.
3. Hold in the OK button (9) until the menu
with Copy and Delete appear.
4. Copy is highlighted. Press the OK button (9)
to confirm your selection.
5. Use the up/down arrow buttons to select
astorage location for the file you wish to
copy. Press the right arrow button to enter
the highlighted folder. Press the left arrow
button to go up one folder level again.
6. When you have selected astorage place,
press the OK button (9) to confirm and
start copying.
7. When the copying is finished, the following
display will appear:
8. Press the OK button (9) to end.

11
English
NOTE!
Setting the Time: Navigate between year, month, hour and minute using the left/
right arrow buttons. Set the values using the up/down arrow buttons.
4. Press the OK button (9) to save you settings. The escape button (10) does not
save your settings.
5. Press the escape button (10) to exit the Settings menu.
Connecting to acomputer
Connect the charger to acomputer using the included USB lead. It is now possible
for you to transfer and copy files from your computer to your digital photo album.
Care and maintenance
Wipe the surface clean using asoft damp cloth. Never use solvents or strong detergents.
Troubleshooting
Problem Solution
The device does not start/
no photo is shown.
Check that the mains adaptor is correctly connected.
The device automatically
switches to standby mode.
Disconnect the mains adaptor and then reconnect it.
The memory card cannot
be read.
Make sure that the files on the memory card are
supported by the device. See Specifications.
Some photos are upload-
ed quicker than others.
Images with high resolution take longer to load.
Use images with lower resolution for quicker display.
Settings
In Function Select mode, highlight Settings and press the OK button (9).
Press the escape button (10) to return to the Function Select mode.
1. You can set Language, Slideshow time,
Transition effect, Display mode, Music
repetition mode, Movie repeat mode,
Startup set or Time.
2. Use the up/down arrow buttons to select
aproperty for setting.
3. Use the left/right arrow buttons to change
the setting.

12
English
Disposal
Follow local ordinances when disposing of this product. If you are unsure of how to
dispose of this product, please contact your local authority.
Specifications
Dimensions 190 x 125 x 15 mm
Display screen 7″ colour TFT LCD, 16:9
Resolution 800 x 480 pixels
AC/DC adaptor In: 100-240 V AC, 50-60 Hz,
Out: 5 V DC, 1.8 A
Current draw ≤ 7.5 W
Built-in battery 3.7 V, 2100 mAh
Charging time approx 6 hours
Operating time approx 2 hours in display mode
USB port 2.0 (support for USB memory)
Memory card slot SD (Secure Digital), MMC (Multimedia Card) up to 32 GB
Internal memory 1 GB NAND flash
Picture format JPEG up to 16 mega pixels
Film format MPEG4
Audio format Mp3
Storage temperature - 20 °C to 60 °C
Operating temperature 0 °C to 40 °C

13
Svenska
Digitalt fotoalbum 7″
Art.nr 38-3848 Modell D3721
Läs igenom hela bruksanvisningen före användning och spara den sedan för framtida
bruk. Vi reserverar oss för ev. text- och bildfel samt ändringar av tekniska data. Vid tek-
niska problem eller andra frågor, kontakta vår kundtjänst (se adressuppgifter på baksidan).
Säkerhet
Varning! Öppna inte höljet! Farlig spänning finns oskyddat på vissa komponenter
inuti produktens hölje, kontakt med dessa kan ge elektrisk chock.
• Produkten får endast repareras av kvalificerad servicepersonal.
• Produkten får inte demonteras eller ändras.
• Placera inte produkten så att den kan falla ner ivatten eller annan vätska, ställ
inte några föremål som innehåller vätska på produkten, t.ex. blomvas eller dryck.
• Täck inte för ventilationsöppningarna. Placera inte heller produkten inärheten av
varma ställen som ovanför element, ovanpå en tv eller it.ex. ien soffa där ventila-
tionsöppningarna blockeras.
• Ta alltid ur nätadaptern från eluttaget om inte produkten ska användas
under en längre tid.
• Undvik att utsätta produkten för direkt solljus under längre tid.
• Använd inte produkten ifuktiga, dammiga eller smutsiga miljöer.
• Använd endast en mjuk tvättduk som är svagt fuktad med vatten
och milt diskmedel vid rengöring av skärmen.
• Var försiktig vid hantering av skärmen så att inte ytan repas eller
skadas på annat sätt.
• Koppla inte ifrån nätadaptern samtidigt som uppspelningen pågår.
Risk finns för att det anslutna minnet skadas. Ta inte heller bort det
anslutna minnet när uppspelning pågår.
Produktbeskrivning
Digitalt fotoalbum med möjlighet att visa bilder, lyssna på musik (MP3)
samt se på film (MPEG4).
• Inbyggd högtalare
• Inbyggt laddningsbart batteri
• 2 GB inbyggt internminne
• Uttag för USB-minne samt SD/SDHC-kort
• Levereras med batterieliminator, USB-kabel och löstagbart bordsstöd.

14
Svenska
RESET ON OFF
OK
1
2
3
5 6
15 14 13 12 11
10
17
16
9
8
7
4
1. Anslutning för hörlurar
2. Anslutning för minneskort (SD/MMC)
3. Mini-USB-anslutning
4. Anslutning för medföljande nätadapter
(5 V DC, 1,8 A)
5. Ram
6. LCD-display
7. Navigeringsknapp nedåt
8. Navigeringsknapp uppåt
9. OK-knapp
10. Escape-knapp
11. Navigeringsknapp höger
12. Navigeringsknapp vänster
13. Återställningsknapp
14. På/av-knapp
15. Indikatorlampa för på/av
16. Fäste för bordsstöd
17. Högtalare

15
Svenska
Att komma igång
Montering av bordsstöd
Skruva ibordsstödet enligt bilden.
Spänningsanslutning
1. Anslut den medföljande nätadapterns DC-kontakt till anslutningen (4) på fotoramen.
2. Anslut sedan nätadaptern till ett vägguttag.
3. Sätt strömbrytaren (14) iläge ON för att slå på fotoramen, och läge OFF för
att slå av den.

16
Svenska
Användning
Startläge
Slå på apparaten. Det digitala fotoalbumet startar idet läge som är förinställt:
antingen kalender, bilder, musik, film eller en kombination av musik och bilder.
För att byta startläge, tryck två gånger på escape-knappen (10) så att du
kommer till funktionsval.
När startläget är antingen bilder, musik eller film kommer apparaten att leta efter filer
iordning SD/MMC-minneskort → USB-minne → inbyggt minne. Om det inte finns
några filer kommer du till läge för att välja lagringsmedia.
1. Använd navigationsknapparna vänster/
höger och markera Setup (inställningar).
2. Tryck på OK-knappen (9) för att bekräfta
ditt val.
3. Använd navigationsknapp nedåt (7) och
markera StartupSet. Använd sedan
navigationsknappar vänster/höger för att
växla mellan de olika startlägena. Tryck på
OK-knappen (9) för att bekräfta ditt val.
Att välja lagringsmedia
1. Tryck på escape-knappen (10) en eller
flera gånger för att komma till läge för att
välja lagringsmedia.
2. Använd navigeringsknapparna vänster/
höger för att markera olika lagringsmedia.
3. Tryck på OK-knappen (9) för att bekräfta
ditt val.
Kalender
1. Tryck på escape-knappen (10) en eller
flera gånger för att komma till kalendern.
2. Använd navigeringsknapparna vänster/
höger för att stega mellan månader.
3. Använd navigeringsknapparna uppåt/
nedåt för att stega mellan år.
4. I kalenderläge, tryck på OK-knappen (9)
eller escape-knappen (10) för att komma
till läge för att välja lagringsmedia.

17
Svenska
1. Använd navigeringsknapparna vänster/
höger/uppåt/nedåt för att välja bild.
2. I miniatyrläge, tryck på OK-knappen (9) för
att titta på vald bild och starta bildspel.
3. I miniatyrläge, tryck på escape-knappen
(10) för att komma till funktionsval.
Funktionsval
1. Tryck på escape-knappen (10) en eller flera
gånger för att komma till funktionsval.
2. Använd navigeringsknapparna vänster/
höger för att markera olika funktioner.
Du kan välja mellan bilder (image), musik
(music), film (movie), filhantering (file) och
inställningar (setup).
3. Tryck på OK-knappen (9) för att
bekräfta ditt val.
Bilder
I läge för funktionsval, markera Bilder och tryck på OK-knappen (9).
Du kommer då till miniatyrläge:
I bildspelsläge:
• Använd navigeringsknapparna uppåt/nedåt för att stega mellan olika bakgrundsmelodier.
• Håll in navigeringsknapparna vänster/höger för att sänka eller höja volymen
på bakgrundsmusiken.
• Använd navigeringsknapparna vänster/höger för att stega mellan olika bilder.
Bildinställningar:
1. I bildspelsläge, tryck på OK-knappen (9) för
att komma till bildinställningar.
2. Använd navigeringsknapparna uppåt/nedåt
för att markera det du vill ställa in.
3. Använd navigeringsknapparna vänster/
höger för att ändra mellan olika inställningar.
4. Tryck på escape-knappen (10) för att
lämna bildinställningsmenyn.
Förklaring av inställningarna
Brightness Använd navigeringsknapparna vänster/höger för att minska/öka ljuset.
Zoom Zooma iaktuell bild. Fungerar endast vid visning av enstaka bild (ej bildspel).
Rotate Rotera bilden medurs.
Music Slå på eller av bakgrundsmusik. Tryck på OK-knappen (9) för att bekräfta ditt val.
Slideshow Välj tid för visad bild (3 sek – 1 h). Man kan manuellt gå till nästa bild med pil-
knapparna under bildspelet. Tryck på OK-knappen (9) för att bekräfta ditt val.
PIC info Tryck på OK-knappen (9) för att visa information för aktuell bild.

18
Svenska
Musik
I läge för funktionsval, markera Musik och tryck på OK-knappen (9).
Du kommer då till musikläget.
1. Använd navigeringsknapparna uppåt/
nedåt för att välja musikfil.
2. Tryck på OK-knappen (9) för att spela
upp/pausa vald musik.
3. Använd navigeringsknapparna vänster/
höger för att sänka eller höja volymen.
4. Tryck på escape-knappen (10) för att
stoppa uppspelning av musik.
Film
I läge för funktionsval, markera Film och tryck på OK-knappen (9). Du kommer då till
filmlistan. Tryck på escape-knappen (10) om du vill gå tillbaka till funktionsval.
I filmlistan:
1. Använd navigeringsknapparna uppåt/
nedåt för att välja filmfil.
2. Tryck på OK-knappen (9) för att visa/
pausa vald film.
I uppspelningsläge:
• Tryck kort på navigeringsknapparna vänster/
höger för att bläddra bland musikfilerna.
• Håll in navigeringsknapparna vänster/
höger för att spola bakåt eller framåt.
• Tryck på escape-knappen (10) för att
stoppa visning av film och gå tillbaka
till fillistan.
• Tryck på navigationsknapp uppåt för att
öppna ljusinställningen. Använd navige-
ringsknapparna vänster/höger
för att minska eller öka ljuset.
• Tryck på navigationsknapp nedåt för att
öppna volyminställningen. Använd navige-
ringsknapparna vänster/höger
för att sänka eller höja volymen.

19
Svenska
Filhantering
I läge för funktionsval, markera Filhantering och tryck på OK-knappen (9).
Du kommer då till filhanteringsläget.
Radera filer
1. Använd navigeringsknapparna uppåt/
nedåt för att välja den fil du vill radera.
2. Tryck på navigeringsknapp höger för
att markera filen. En bock visas bredvid
filnamnet. Tryck på navigeringsknapp
höger igen om du vill avmarkera filen.
3. Håll in OK-knappen (9) tills menyn med
Copy (Kopiera) och Delete (Radera) visas.
4. Tryck på navigeringsknapp nedåt för att
markera Delete (Radera) och tryck sedan
på OK-knappen (9) för att bekräfta ditt val.
Nu ska du bekräfta raderingen en gång till.
5. Tryck på navigeringsknapp vänster för
att markera , och tryck sedan på OK-
knappen (9) för att bekräfta ditt val att
radera filen.
6. Om du istället väljer att låta filen vara kvar,
tryck på escape-knappen (10) eller välj
för att lämna raderingsläget.
7. När filen har raderats visas följande bild:
8. Tryck på OK-knappen (9) för att avsluta.

20
Svenska
Kopiera filer
1. Använd navigeringsknapparna uppåt/nedåt
för att välja den fil du vill kopiera.
2. Tryck på navigeringsknapp höger för
att markera filen. En bock visas bredvid
filnamnet. Tryck på navigeringsknapp
höger igen om du vill avmarkera filen.
3. Håll in OK-knappen (9) tills menyn med
Copy (Kopiera) och Delete (Radera) visas.
4. Copy (Kopiera) är markerat. Tryck på sedan
på OK-knappen (9) för att bekräfta ditt val.
5. Använd navigeringsknapparna uppåt
och nedåt för att välja den plats där du
vill spara den fil du ska kopiera. Tryck
på navigeringsknapp höger för att gå
in iden markerade mappen. Tryck på
navigeringsknapp vänster för att gå upp
en mappnivå igen.
6. När du har valt lagringsplats, tryck på
OK-knappen (9) för att bekräfta ditt val
och starta kopieringen.
7. När kopieringen är klar visas följande bild:
8. Tryck på OK-knappen (9) för att avsluta.
This manual suits for next models
1
Table of contents
Languages:
Other Clas Ohlson Digital Photo Frame manuals

Clas Ohlson
Clas Ohlson KD0807-B01 User manual

Clas Ohlson
Clas Ohlson DPF-108P User manual

Clas Ohlson
Clas Ohlson 38-5196 User manual

Clas Ohlson
Clas Ohlson DP730AD-UK User manual

Clas Ohlson
Clas Ohlson PF283A2 User manual

Clas Ohlson
Clas Ohlson KD0706-S08-UK User manual

Clas Ohlson
Clas Ohlson PF173C2 User manual

Clas Ohlson
Clas Ohlson PF103A2-A User manual

Clas Ohlson
Clas Ohlson PF-10DN-502V3RC User manual

Clas Ohlson
Clas Ohlson PF-7AW-103-UK User manual