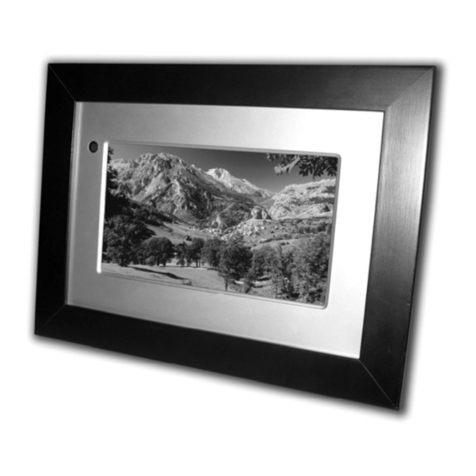
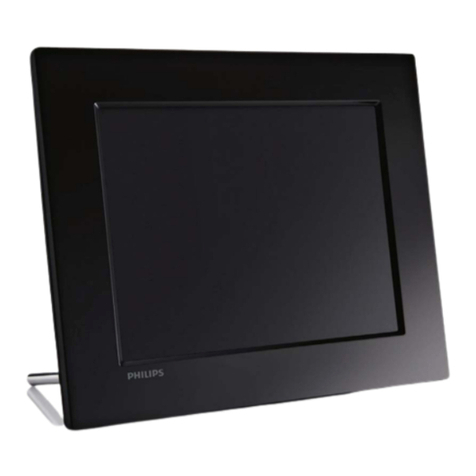
Clas Ohlson PF-10DN-502V3RC User manual

EnglishSvenskaNorskSuomi
10″ Digital photo frame
Digital fotoram 10″
Digital fotoramme 10″
Digitaalinen valokuvakehys 10″
Art.no Model
38-4084 PF-10DN-502V3RC Ver. 201012

2

3
English
10
″
Digital photo frame
Art. no 38-4004 Model PF-10DN-502V3RC
User guide
Read through the entire user guide before using the product and save the guide for future
reference. We cannot accept responsibility for any errors in the text or pictures and reserve
the right to make changes to technical data. If you have technical problems or questions,
contact our customer services.
Contents
1. Safety s. 3
2. Description of the product s. 4
3. Keys and functions s. 4
4. Getting started s. 6
5. Operation and settings s. 8
6. Care and maintenance s. 15
7. Waste management s. 15
8. Troubleshooting chart s. 16
9. Specifications s. 16
1. Safety
• Only qualified service personnel may repair the product.
• Do not dismantle or modify the product.
• Do not place the product where it may fall into water or some other liquid.
Make sure that it is standing firmly.
• Use only the mains adapter supplied. Always unplug the mains adapter from
the wall socket if the product is to be unused for a long period.
• Do not place heavy or sharp objects on the display. Protect the mains cable
from sharp edges and corners. Make sure that is does not get crushed.
• The product is only intended to be used indoors.
• Do not locate the product close to hot radiators or stoves.
• Do not use the product in humid, dusty or dirty surroundings.
• Do not unplug the mains adapter while photos are being displayed,
as this might damage the memory card. Do not remove the memory card
while photos are being displayed.

4
English
1
2
3 4 5 6 7 8
12 13
9
10
11
2. Description of the product
• Digital photo frame with 10-inch colour screen.
• Resolution 1024×768, image format 4:3.
• Displays your digital photos without a computer.
• Connection for USB stick or memory card (SD/MMC/MS).
• Slideshow with or without background music and many different display effects.
• Repetition function on playback of music, images and film.
• Support for MPEG-1, MPEG-2, MPEG-4 and M-JPEG formats.
• Support for mp3 and WMA.
• Built-in loudspeakers.
• Clock and calendar display.
• Alarms (four different times).
• Supplied with remote controller and mains adapter.
• ON/OFF-button
3. Keys and functions
Photo frame
1. [MENU] Open main menu
2. [◄] Move left
3. [▲] Move up
4. [►ll] Start/pause display or confirm a choice
5. [►] Move right
6. [▼] Move down
7. [ ] Back to previous menu
8. [ON/OFF] Switch photo frame on or off
9. Connection for memory card (SD/MMC/MS)
10. Connection for USB stick
11. Connection for supplied main adapter
12. Support
13. Fixing for support

5
English
14
15
16
17
18
19
20
21
22
23
24
25
26
27
28
29
30
31
Remote controller
14. [ ] Switch photo frame on or off.
15. [▲] Move up or previous photo/track/film.
16. [◄] Move left or (when you are showing photos) show previous photo.
17. [MENU] Press to open main menu.
18. [▼] Move down or next photo/track/film.
19. [◄◄] Choose previous photo when you are showing photos. Choose previous page when
showing thumbnails. Fast rewind (music/film).
20. [ ] Press to zoom in to photo.
21. [ ] Change aspect ratio, 4:3 or 16:9.
22. [VOL+] Increase volume.
23. [SETUP] Open setup menu.
24. [OK] Start playback or pause or confirm choice.
25. [►] Move right or (when displaying photos) next photo.
26. [OSD] Show/quit OSD menu (the OSD menu is displayed at the bottom of the screen).
27. [ ] Go to the previous menu.
28. [►►] Choose next photo (when showing photos). Choose next page when showing
thumbnails. Fast forward (music/film).
29. [ ] Start slideshow with background music*.
30. [♫] Starts or stops music playback during a slideshow.
31. [VOL-] Reduces volume.
* Only if the connected memory contains music files.

6
English
CR2025
4. Getting started
Insert the battery into the remote controller
The remote controller is powered by 1 × CR2025 battery (3 V).
• Remove any protective plastic from the battery. Insert the battery as shown in the illustration.
Observe the polarity markings.
• When the remote controller no longer works even when held close to the sensor on
the digital photo frame, fit a new battery.
Fitting the support
• Remove the support (12) from its magnetic holder on the back of the photo frame.
• Screw the support into its hole (13). Screw it in firmly (clockwise) but do not overtighten.
• When the support has been fitted, the frame can be stood on its long or short side.

7
English
Connecting the mains adapter
Connecting a memory card or a USB stick
1. Connect the supplied mains adapter to
a 230 V wall socket.
2. Then connect the DC plug of the mains
adapter to DC IN (11) on the photo frame.
3. Move the switch on the back of the photo
frame to the ON position to turn on
the photo frame.
NOTE!
Normally the ON/OFF button (14) on the remote
controller is used to switch on the photo frame or
set it to standby mode, but to turn off the photo
frame completely the switch (8) on the back of
the photo frame must be set to OFF. Always
unplug the mains adapter from the wall socket if
the product is to be unused for a long period.
Memory card
The following memory cards can be used:
Secure Digital (SD)
Multimedia Card (MMC)
Memory Stick (MS)
• Carefully insert the memory card into the slot (9).
• To remove the memory card, carefully pull it straight out.
• NOTE: Do not remove the memory card when it is being
used to display photos or other files.
USB stick
• Carefully insert a USB stick into the USB port (10)
• To remove the stick or player, pull it straight out.
• NOTE! Do not remove the USB stick when it is being
used to display photos or other files.

8
English
5. Operation and settings
Main menu
NOTE!
The first time the photo frame is started or if it has been reset to its factory default settings,
a language must be chosen from the menu that appears. Choose your language and confirm
by pressing [OK] (24) on the remote controller or [►ll] (4) on the back of the photo frame.
If the photo frame is started without a USB stick or a memory card connected, the main menu is
displayed with Clock, Calendar and Setup on the display.
If the photo frame is started with a memory card and/or USB stick connected, the photo frame
automatically starts to display a slideshow if photos are stored in the memory. To interrupt
the slideshow and return to the main menu press [MENU] (17) on the remote controller or
[MENU] (1) on the back of the photo frame.
If both a memory card and a USB stick are connected when the photo frame is powered on,
the main menu looks like this:
Choose functions and navigate in the menus with [▼] [▲] [◄] [►] on the remote controller or on
the back of the photo frame. Confirm your choices by pressing [OK] (24) on the remote controller
or [►ll] (4) on the back of the photo frame. To back up in the menus press [ ] (27) or (7).
SD/
MMC/MS Displayed when a memory card
is connected/inserted.
USB Displayed when a USB-stick is
connected/inserted.
Clock Choose this to display a clock
on the screen.
Calendar Choose this to display
the calendar on the screen.
Setup To change the screen settings.

9
English
If SD/MMC/MS or USB is chosen, the following submenus appear
Photo
(to open press [OK] or [►ll])
To open the [OSD] menu, press [OSD] (26) on the remote controller or the MENU button (1) on
the back of the photo frame.
NOTE! Can only be displayed when a photo has been chosen and is being displayed or when
the slideshow is running.
• Choose a function with the [◄] [►] buttons and control the functions with [OK] on
the remote controller or [►ll] on the back of the photo frame.
• The photos in the memory are displayed
as thumbnails.
To display the photos one by one,
choose a photo and press [OK] or [►ll].
Then choose more photos one at a time
by pressing [◄] [►].
• To start a slideshow, press [ ] (29) on
the remote controller (it takes a few
seconds for the slideshow to start) or
press [►ll] on the back of the frame.

10
English
Music
(to open press [OK] or [►ll])
• If there are files of different types on the
same memory, such as music, video
and photo files, the following menu
appears:
OSD menu during photo display
Zoom in on the photo. Press several times to choose magnification: ×2, ×4, ×8 or ×16
and back to the starting position. When the photo has been enlarged and the OSD menu
disappears from the screen (after a few seconds), you can move around in the photo with [▼]
[▲] [◄] [►].
Start or stop music playback (if there are music files on the memory).
Reduce volume.
Increase volume.
Return to the beginning of the OSD menu.
To start or stop the slideshow,
press [OK] or [►ll].
Show the previous photo.
Show the next photo.
Choose different playback/repetition
options for the slideshow. The choices
appear in small text on the screen.
Rotate the photo. Press several times
until the photo is displayed the right
way up.
I◄
►I
II
Audio
Picture
Subtitle
Video
• Choose Audio and a list of available music files is displayed.
• In the list and the OSD menu that appears automatically when an audio file is played,
navigate and confirm as described above.

11
English
To start or stop the slideshow,
press [OK] or [►ll].
Choose previous audio file.
Choose next audio file.
Fast rewind.
Fast forward.
Choose a repetition option
(One, All or OFF).
Reduce volume.
Increase volume.
Return to the beginning of the OSD
menu.
OSD menu when playing back music files
◄◄
►►
I◄
►I
II
Video
(to open press [OK] or [►ll])
• If there are files of different types on the
same memory, such as music, video and
photo files, the following menu appears:
Audio
Picture
Subtitle
Video
• Choose Video and a list of available video files is displayed.
• Navigate and confirm as described above.
• To open the [OSD] menu, press [OSD] (26) on the remote controller or
MENU (1) on the back of the photo frame.

12
English
OSD menu when playing video files
Files
(to open press [OK] or [►ll])
• If there are files of different types on the
same memory, such as music, video
and photo files, the following menu
appears:
To start or stop the video,
press [OK] or [►ll].
Show the previous video.
Show the next video.
Fast rewind.
Fast forward.
Choose a repetition option
(One, All or OFF).
◄◄
►►
Zoom in on the video. Press several times to choose magnification: ×2, ×4, ×8 or ×16 and
back to the starting position.
Reduce volume.
Increase volume.
Return to the beginning of the OSD menu.
I◄
►I
II
Audio
Picture
Subtitle
Video
• Navigate in the list and confirm as described above.
• You can also copy files between connected memories.
• NOTE! Write protection may be active on the memory cards.
Check the setting of the write-protect switch.

13
English
Copying files
To copy files you need to have two memory
devices connected to the photo frame, a
USB stick and a memory card.
1. Choose the file you want to copy with
[▲] or [▼].
2. Press [►] to select the file. The file is
highlighted with a √. (To deselect the file,
press [►] again.)
3. To select more files repeat steps 1 and 2.
4. Press [OSD]. A menu with the options
COPY and DELETE appears to the right
of the file list.
5. Select COPY with [▲] or [▼] and press [OK] to confirm.
A list showing other connected memory devices appears.
6. Choose the memory to copy the files to with [◄] [►] .
7. Press [OK] to start copying.
8. When copying is complete, “Finished” appears.
Deleting a file
1. Choose the file you want to delete with [▲] or [▼].
2. Press [►] to select the file. The file is highlighted with a √.
(To deselect the file, press [►] again.)
3. To select more files repeat steps 1 and 2.
4. Press [OSD]. A menu with the options COPY and DELETE appears to the right of the file list.
5. Select DELETE with [▲] or [▼] and press [OK] to confirm.
6. Use [◄] and [►] to choose YES to confirm deletion or NO to quit without
deleting the file(s). Press [OK] to complete deletion. NOTE! This action cannot be undone!
7. When the files have been deleted, “Finished” appears.
8. Press [OK] to exit.
If Clock is chosen
The clock appears on the display together
with a thumbnail slideshow and
the alarm times.

14
English
If Calendar is chosen
The calendar appears on the display together
with the clock, alarm times and a thumbnail
slideshow.
If Setup is chosen, the following submenus appear
Photo Setup, where you can
make settings for
• Slide show time 3 s, 5 s, 15 s,
1 minute and 15 minutes.
• Photo mode: Full Screen or
Standard Screen.
• Transition effect: Off or Random.
• Date stamp (show detailed information
about the photo): Off or On.
• Shuffle (display photos in
random order): Off or On.
Music Setup, where you can select
• Repeat Off (no repeat).
• Repeat One (repeat the current track).
• Repeat All.
Video Setup, where you can select
• Repeat Off.
• Repeat One (repeat the current track).
• Repeat All.
Clock/Calendar setup
• Time mode: Digital clock/Analog clock.
• Show photo: On/Off (show/don’t show thumbnail when displaying clock and calendar).
• Set Time: hh/mm.
• Set Date: year, month, day.
• Set Date format: year, month, date – date, month, year, etc.
• Set Time format: 12 or 24 hours.

15
English
Alarm setup
• Alarm 1 – 4 (set time, function and signal for four alarms) Alarm 1, Alarm 2, etc.
• Ringtone volume (for alarms 1 – 4): 1, 2, 3, 4, 5 or 6.
General setup
• Language (to change the language of the menus).
• Brightness (of the display): +3, +2, +1, 0, -1, -2, -3.
• Contrast (of the display): +3, +2, +1, 0, -1, -2, -3.
• Saturation (colour saturation of the display): +3, +2, +1, 0, -1, -2, -3.
• Auto start (how the photo frame starts after switch-on): Photo, Main menu, Clock, Calendar.
• Power on (sets the time for automatic switch-on): hh/mm.
• Power off (sets the time for automatic switch-off): hh/mm.
• Hint time (sets the time for which key functions are displayed on the screen):
0, 5, 10 and 20 seconds.
• Default (resets the photo frame to factory settings).
NOTE!
• Before you set switch-on and switch-off times, the clock of the photo frame must be set
(see Clock/Calendar setup).
• If the switch-on or switch-off time has already passed, the photo frame will switch
on or off at the set time on the next day.
• For the Power on function to work: Switch the photo frame off only with the [ ] button (14)
on the remote controller. Do not switch it off with the switch (8) on the back of the photo
frame.
6. Care and maintenance
• Before cleaning the photo frame, make sure that it is switched off and that
the mains adapter has been unplugged from the wall socket.
• Wipe with a soft, damp cloth. Do not use solvents or powerful cleaning agents.
Never spray liquid on the photo frame.
• To clean the LCD display, use a clean, soft, lint-free cloth. If necessary, use a commercially
available cleaning agent to clean the LCD screen.
7. Waste management
When the time comes to dispose of the product, do so in accordance with local regulations.
If you are unsure how to proceed, ask your local authority.

16
English
8. Troubleshooting chart
Why can’t the photo frame
display all the files on the
memory card/USB stick?
• Some memory cards are not compatible with the photo frame.
Use a compatible memory card.
• Wrong image format (only JPEG images are supported).
A memory card is connected
to the photo frame, but the
photo frame cannot read it.
• Make sure that you are using a memory card that is supported by
the photo frame.
• Make sure that the memory card is correctly connected.
• Wrong file format (only JPEG images are supported).
• NOTE: Some digital camera save photos in a non-standard file
format. Check the user guide for the camera.
Some photos load more
quickly than others.
• Photos with a high resolution take longer to load.
Use lower-resolution photos for faster display.
• The recommended resolution is 800 x 600 pixels.
• NOTE: The highest supported resolution is 8000 x 8000 pixels.
The photo frame does not start
/ no photos are displayed.
• Check that the mains adapter is correctly connected.
• Check that the switch (8) is set to ON.
How do I rotate a photo?
• Open the OSD menu (in photo display mode) with the OSD button (26).
• Use [◄] and [►] to go to in the OSD menu.
• Press [OK] (24) several times to rotate the photo to the required
position.
• NOTE! The photos return to their original position when you switch
off the photo frame.
Which resolution is best? • The recommended resolution is 800 x 600 pixels.
The highest resolution is 8000 x 8000 pixels.
The remote controller does
not work.
• Check the battery in the remote controller and fit a new battery
if necessary.
• Aim the remote controller directly at the photo frame. Hold the
remote controller closer to the photo frame. Check that there are no
obstacles between the remote controller and the sensor.
9. Specifications
Display 10” LCD, TFT, 4:3, 1024×768
I/O Remote controller, DC IN
Supply voltage AC-adapter (in: 100–240 V AC, 50–60 Hz, out: DC 5 V 2 A)
USB port USB 2.0
Supported memory card formats SD (Secure Digital), MMC (Multimedia Card), MS (Memory Stick)
Supported image format JPEG (highest resolution: 8000 x 8000)
Supported audio formats MP3, WMA
Supported video formats MPEG-1, MPEG-2, MPEG-4, M-JPEG
Loudspeakers Built-in
Storage temperature -20 ºC to +60 ºC, < 90 % RH
Working temperature 0 ºC to 45 ºC, < 80 % RH
Size 265.5 × 215 × 22.5 mm
Weight 638.6 g

17
Svenska
Digital fotoram 10
″
Art.nr 38-4004 Modell PF-10DN-502V3RC
Bruksanvisning
Läs igenom hela bruksanvisningen före användning och spara den sedan för framtida bruk.
Vi reserverar oss för ev. text- och bildfel samt ändringar av tekniska data. Vid tekniska problem
eller andra frågor, kontakta vår kundtjänst (se adressuppgifter på baksidan).
Innehållsförteckning
1. Säkerhet s. 17
2. Produktbeskrivning s. 18
3. Knappar och funktioner s. 18
4. Att komma igång s. 20
5. Användning och inställningar s. 22
6. Skötsel och underhåll s. 29
7. Avfallshantering s. 29
8. Felsökningsschema s. 30
9. Specifikationer s. 30
1. Säkerhet
• Produkten får endast repareras av kvalificerad servicepersonal.
• Produkten får inte demonteras eller ändras.
• Placera inte produkten så att den kan falla ner i vatten eller annan vätska,
se till att den alltid står stadigt.
• Använd endast den bifogade nätadaptern. Ta alltid ur nätadaptern från
eluttaget om inte produkten ska användas under en längre tid.
• Placera inte tunga eller vassa föremål på displayen. Skydda nätkabeln från
vassa kanter och hörn och se till att den inte kommer i kläm.
• Produkten är endast avsedd för inomhusbruk.
• Placera inte produkten för nära heta element eller kaminer/spisar.
• Använd inte produkten i fuktiga, dammiga eller smutsiga miljöer.
• Koppla inte ifrån nätadaptern samtidigt som uppspelningen pågår. Risk finns för att det
anslutna minnet skadas. Ta inte heller bort det anslutna minnet när uppspelning pågår.

18
Svenska
1
2
3 4 5 6 7 8
12 13
9
10
11
2. Produktbeskrivning
• Digital fotoram med 10″ färgskärm
• Upplösning: 1024×768, bildformat: 4:3
• Visar dina digitala bilder utan dator.
• Anslutning för USB-minne eller minneskort (SD/MMC/MS).
• Bildspel med eller utan bakgrundsmusik och många olika visningseffekter.
• Repetitionsfunktion på uppspelning av både musik, bilder och film.
• Stöd för MPEG-1, MPEG-2, MPEG-4 samt M-JPEG-format.
• Stöd för mp3 och WMA.
• Inbyggda högtalare.
• Visning av klocka och kalender.
• Alarm (4 olika tider).
• Levereras med fjärrkontroll och nätadapter.
• ON/OFF-knapp
3. Knappar och funktioner
Fotoram
1. [MENU] Öppna huvudmenyn
2. [◄] Förflytta dig till vänster
3. [▲] Förflytta dig uppåt
4. [►ll] Starta visning/gör paus i visning/bekräfta ett val
5. [►] Förflytta dig till höger
6. [▼] Förflytta dig nedåt
7. [ ] Gå tillbaka till föregående meny
8. [ON/OFF] Slå på/stäng av fotoramen
9. Anslutning för minneskort (SD/MMC/MS)
10. Anslutning USB-minne
11. Anslutning för medföljande nätadapter
12. Stödben
13. Fäste för stödben

19
Svenska
14
15
16
17
18
19
20
21
22
23
24
25
26
27
28
29
30
31
Fjärrkontroll
14. [ ] Slå på/stäng av fotoramen
15. [▲] Förflytta dig uppåt/visa föregående bild/spår/film
16. [◄] Förflytta dig till vänster/visa föregående foto när du visar bilder
17. [MENU] Tryck för att öppna huvudmenyn
18. [▼] Förflytta dig nedåt/nästa bild/spår/film
19. [◄◄] Välj föregående foto när du visar bilder. Välj föregående sida när miniatyrbilder
(thumbnails) visas, snabbspola bakåt (musik/film).
20. [ ] Tryck för att zooma i bilden
21. [ ] Ändra bildformat, 4:3 eller 16:9
22. [VOL+] Höjer volymen
23. [SETUP] Öppna inställningsmenyn
24. [OK] Starta uppspelning/gör paus i uppspelning/bekräfta val.
25. [►] Förflytta dig till höger/visa nästa foto när du visar bilder.
26. [OSD] Visa/lämna OSD-menyn, vilken visas längst ner på skärmen.
27. [ ] Gå till föregående meny
28. [►►] Välj nästa foto när du visar bilder. Välj nästa sida när miniatyrbilder (thumbnails) visas,
snabbspola framåt (musik/film).
29. [ ] Starta bildspel med bakgrundsmusik*.
30. [♫] Startar eller stoppar musikuppspelning vid pågående bildspel.
31. [VOL-] Sänker volymen.
* Endast om det anslutna minnet innehåller musikfiler.

20
Svenska
CR2025
4. Att komma igång
Sätt i batteriet i fjärrkontrollen
Fjärrkontrollen drivs av 1 × CR2025 - batteri (3 V).
• Sätt i batteriet som bilden visar, observera polaritetsmärkningen. Ta bort ev. skyddsplast.
• Byt batteri när fjärrkontrollen inte fungerar trots att den hålls nära sensorn på den digitala
fotoramen.
Montera stödbenet
• Ta bort stödbenet (12) från sin magnetiska hållare på baksidan av fotoramen.
• Skruva fast stödbenet i sitt skruvhål (13). Skruva fast ordentligt (medurs) men överdra inte.
• När stödbenet är monterat kan ramen ställas på endera lång- eller kortsida.
Table of contents
Languages:
Other Clas Ohlson Digital Photo Frame manuals

Clas Ohlson
Clas Ohlson PF-7AW-103-UK User manual

Clas Ohlson
Clas Ohlson PF173C2 User manual

Clas Ohlson
Clas Ohlson 38-5196 User manual

Clas Ohlson
Clas Ohlson PF103A2-A User manual

Clas Ohlson
Clas Ohlson DP730AD-UK User manual

Clas Ohlson
Clas Ohlson PF283A2 User manual

Clas Ohlson
Clas Ohlson KD0706-S08-UK User manual

Clas Ohlson
Clas Ohlson KD0807-B01 User manual

Clas Ohlson
Clas Ohlson PF-8DN-283V3RTC User manual

Clas Ohlson
Clas Ohlson KD0805 User manual