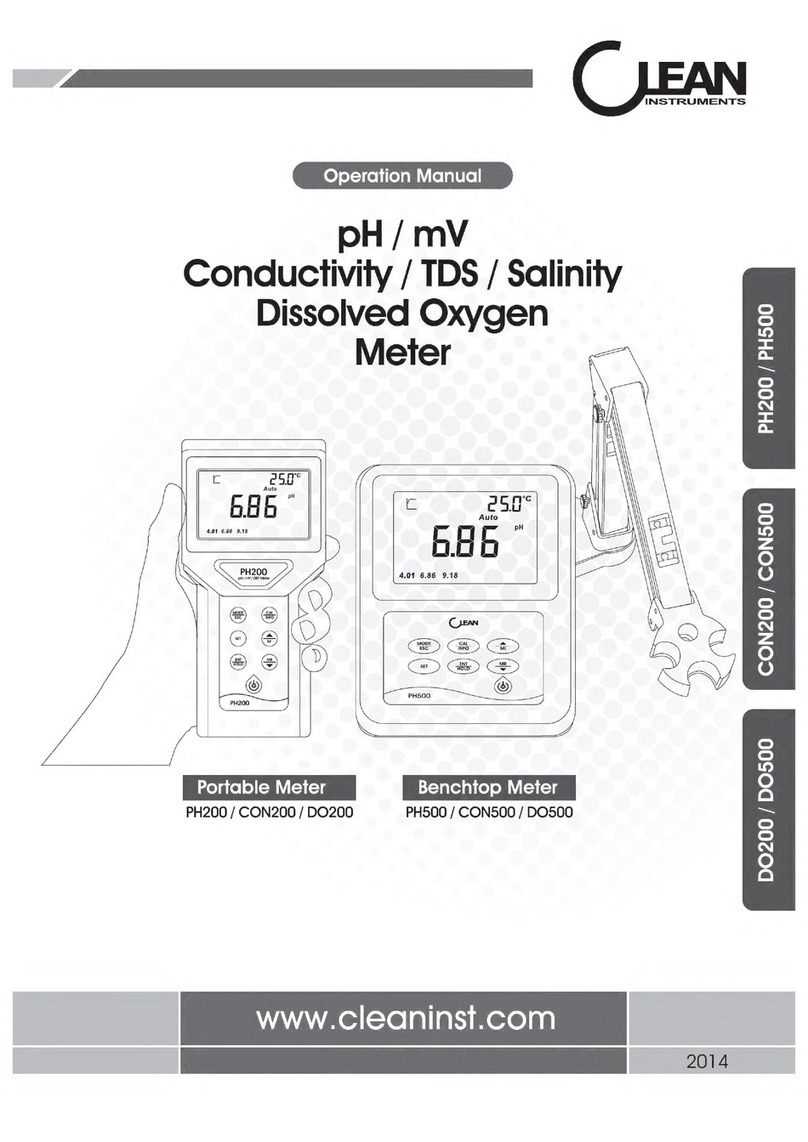
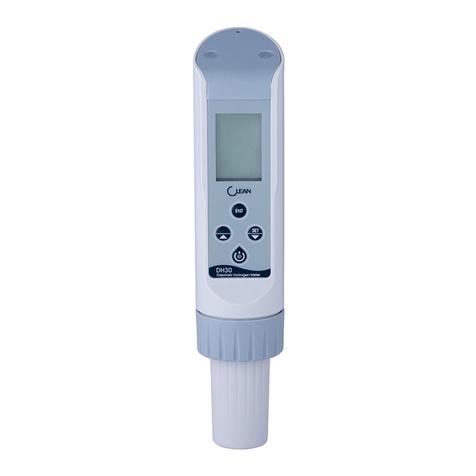
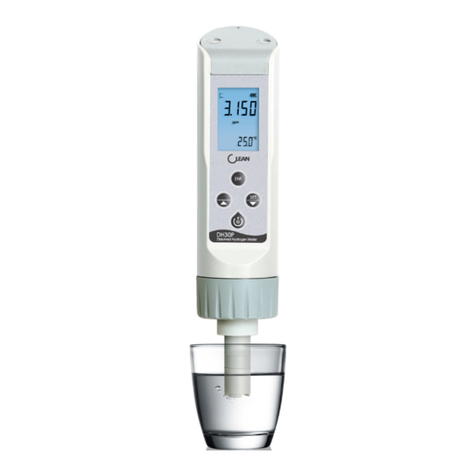
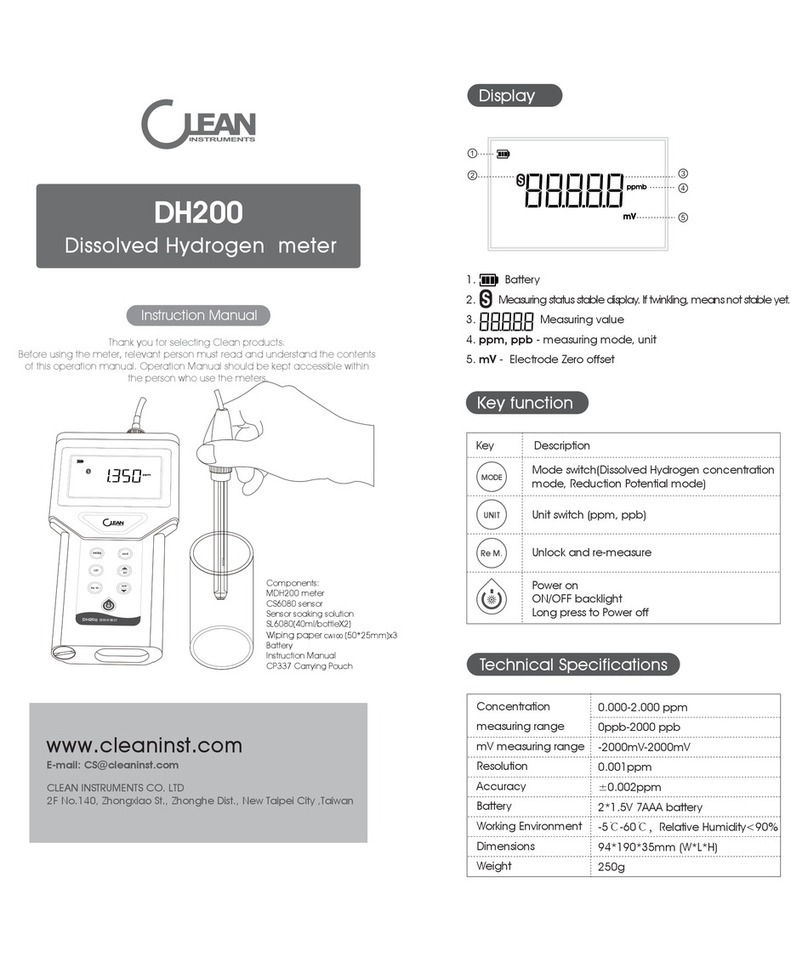
CLEAN Instruments PH200 User manual

MODE
ESC
CAL
INFO
MI
SET
ENT
HOLD
MR
DO200
CLEAN INSTRUMENTS
2006, No.511 Tianmu W. Rd. Shanghai 200070, China
11F No.25,Siwei St., Zhonghe Dist.,New Taipe City 23570, Taiwan
www.cleaninst.com
2013.07
www.cleaninst.com
Meter
Meter
PH200/CON200/DO200
Operation Manual
Conductivity / TDS / Salinity
Dissolved Oxygen
PH200CON200DO200
pH/ORP

Dissolved oxygen(mg/L)
14.64
14.22
13.82
13.44
13.09
12.74
12.42
12.11
11.81
11.53
11.26
11.01
10.77
10.53
10.30
10.08
9.86
9.66
9.46
9.27
Temperature°C
20
21
22
23
24
25
26
27
28
29
30
31
32
33
34
35
36
37
38
39
Dissolved oxygen(mg/L)
9.08
8.90
8.73
8.57
8.41
8.25
8.11
7.96
7.82
7.69
7.56
7.43
7.30
7.18
7.07
6.95
6.84
6.73
6.63
6.53
Temperature°C
0
1
1
2
3
4
5
6
7
8
10
11
12
13
14
15
16
17
18
19
7.7.3 Factory defaults
Corresponding interface
P - 01
P - 02
P - 04
P - 05
Item
Atmospheric Pressure
Salinity
Auto Lock
Auto power off
Backlight
Unit of the displayed value
Factory Defaults
1013 mBar
0.0 g/L
OFF
ON
OFF
%
7.7.2 Water saturated dissolved oxygen in different temperature
(Atmospheric Pressure 101325Pa100% RHSalinity 0‰)
42
TABLE OF CONTENTS
1 Preface
1.1 Before Use
1.2 In Use
1.3 Safety
2 Basic Operation
2.1 Battery
2.2 Electrode Installation
2.3 Shell
2.4 Power on/off and Backlight
3 Key Panel
3.1 Key instruction
3.2 Key function
4 Appearance
4.1 Display
4.2 Display Character Table
5.1 Technical Specifications
5.2 Browse the parameter
5.3 pH Set UP
5.3.1 P01 pH Standard Solution
5.3.2 P02 Manual Temperature setting
5.3.3 P03 Temperature Offset setting
5.3.4 P04 Auto Lock Function setting
5.3.5 P05 Auto Power Off Setting
5.3.6 P06 Clearing Memory Function
5.3.7 P07 Reverting to Factory Default Setting
5.4 Calibration Mode
5.5 Measurement Mode
5.6 Storage of Data
5.7 Calibration Parameter and Setting Parameter
5.8 Appendix
6.1 Technical Specifications
6.2 Browse the parameter
6.3 Set UP
6.3.1 P01 Cell Constant (K)
6.3.2 P02 Temperature Compensation Base
噝噝噝噝噝噝噝噝噝噝噝噝噝噝噝噝噝噝噝噝噝噝噝噝噝噝噝噝噝噝噝噝噝噝噝噝噝噝噝噝噝噝噝噝噝噝噝噝噝噝噝噝噝噝噝噝噝噝噝噝噝噝噝噝噝噝噝噝噝噝
噝噝噝噝噝噝噝噝噝噝噝噝噝噝噝噝噝噝噝噝噝噝噝噝噝噝噝噝噝噝噝噝噝噝噝噝噝噝噝噝噝噝噝噝噝噝噝噝噝噝噝噝噝噝噝噝噝噝噝噝噝噝噝噝噝噝噝
噝噝噝噝噝噝噝噝噝噝噝噝噝噝噝噝噝噝噝噝噝噝噝噝噝噝噝噝噝噝噝噝噝噝噝噝噝噝噝噝噝噝噝噝噝噝噝噝噝噝噝噝噝噝噝噝噝噝噝噝噝噝噝噝噝噝噝噝噝噝噝噝噝
噝噝噝噝噝噝噝噝噝噝噝噝噝噝噝噝噝噝噝噝噝噝噝噝噝噝噝噝噝噝噝噝噝噝噝噝噝噝噝噝噝噝噝噝噝噝噝噝噝噝噝噝噝噝噝噝噝噝噝噝噝噝噝噝噝噝噝噝噝噝噝噝噝
噝噝噝噝噝噝噝噝噝噝噝噝噝噝噝噝噝噝噝噝噝噝噝噝噝噝噝噝噝噝噝噝噝噝噝噝噝噝噝噝噝噝噝噝噝噝噝噝噝噝噝噝噝噝噝噝噝噝噝噝噝噝噝噝噝噝噝噝噝噝噝
噝噝噝噝噝噝噝噝噝噝噝噝噝噝噝噝噝噝噝噝噝噝噝噝噝噝噝噝噝噝噝噝噝噝噝噝噝噝噝噝噝噝噝噝噝噝噝噝噝噝噝噝噝噝
噝噝噝噝噝噝噝噝噝噝噝噝噝噝噝噝噝噝噝噝噝噝噝噝噝噝噝噝噝噝噝噝噝噝噝噝噝噝噝噝噝噝噝噝噝噝噝噝噝噝噝噝噝噝噝噝噝噝噝噝噝噝噝噝噝噝噝噝噝噝噝噝噝噝
噝噝噝噝噝噝噝噝噝噝噝噝噝噝噝噝噝噝噝噝噝噝噝噝噝噝噝噝噝噝噝噝噝噝噝噝噝噝噝噝噝噝噝噝噝噝噝
噝噝噝噝噝噝噝噝噝噝噝噝噝噝噝噝噝噝噝噝噝噝噝噝噝噝噝噝噝噝噝噝噝噝噝噝噝噝噝噝噝噝噝噝噝噝噝噝噝噝噝噝噝噝噝噝噝噝噝噝噝噝噝噝噝噝噝噝
噝噝噝噝噝噝噝噝噝噝噝噝噝噝噝噝噝噝噝噝噝噝噝噝噝噝噝噝噝噝噝噝噝噝噝噝噝噝噝噝噝噝噝噝噝噝噝噝噝噝噝噝噝噝噝噝噝噝噝噝噝噝噝
噝噝噝噝噝噝噝噝噝噝噝噝噝噝噝噝噝噝噝噝噝噝噝噝噝噝噝噝噝噝噝噝噝噝噝噝噝噝噝噝噝噝噝噝噝噝噝噝噝噝噝噝噝噝噝噝噝噝噝噝噝噝噝噝噝
噝噝噝噝噝噝噝噝噝噝噝噝噝噝噝噝噝噝噝噝噝噝噝噝噝噝噝噝噝噝噝噝噝噝噝噝噝噝噝噝噝噝噝噝噝噝噝噝噝噝噝噝噝噝噝噝噝噝噝噝噝噝噝噝噝
噝噝噝噝噝噝噝噝噝噝噝噝噝噝噝噝噝噝噝噝噝噝噝噝噝噝噝噝噝噝噝噝噝噝噝噝噝噝噝噝噝噝噝噝噝噝噝噝噝噝噝噝噝噝噝噝噝噝噝噝噝噝噝噝噝噝噝噝噝噝噝
噝噝噝噝噝噝噝噝噝噝噝噝噝噝噝噝噝噝噝噝噝噝噝噝噝噝噝噝噝噝噝噝噝噝噝噝噝噝噝噝噝噝噝噝噝噝噝噝噝噝噝
噝噝噝噝噝噝噝噝噝噝噝噝噝噝噝噝噝噝噝噝噝噝噝噝噝噝噝噝噝噝噝噝噝噝噝噝噝噝噝噝噝噝噝噝噝噝噝噝噝噝噝噝噝噝噝噝噝噝噝噝噝噝噝噝噝噝噝
噝噝噝噝噝噝噝噝噝噝噝噝噝噝噝噝噝噝噝噝噝噝噝噝噝噝噝噝噝噝噝噝噝噝噝噝噝噝噝噝噝噝噝噝噝噝噝
噝噝噝噝噝噝噝噝噝噝噝噝噝噝噝噝噝噝噝噝噝噝噝噝噝噝噝噝噝噝噝噝噝噝噝噝噝噝噝噝噝噝噝噝噝噝噝噝噝
噝噝噝噝噝噝噝噝噝噝噝噝噝噝噝噝噝噝噝噝噝噝噝噝噝噝噝噝噝噝噝噝噝噝噝噝噝噝噝噝噝噝噝噝噝噝噝噝噝噝噝噝噝噝噝噝噝噝噝噝噝噝
噝噝噝噝噝噝噝噝噝噝噝噝噝噝噝噝噝噝噝噝噝噝噝噝噝噝噝噝噝噝噝噝噝噝噝噝噝噝噝噝噝噝噝噝噝噝噝
噝噝噝噝噝噝噝噝噝噝噝噝噝噝噝噝噝噝噝噝噝噝噝噝噝噝噝噝噝噝噝噝噝噝噝噝噝噝噝
噝噝噝噝噝噝噝噝噝噝噝噝噝噝噝噝噝噝噝噝噝噝噝噝噝噝噝噝噝噝噝噝噝噝噝噝噝噝噝噝
噝噝噝噝噝噝噝噝噝噝噝噝噝噝噝噝噝噝噝噝噝噝噝噝噝噝噝噝噝噝噝噝噝噝噝噝噝噝噝噝噝噝
噝噝噝噝噝噝噝噝噝噝噝噝噝噝噝噝噝噝噝噝噝噝噝噝噝噝噝噝噝噝噝噝噝噝噝噝噝噝噝噝噝噝噝噝噝噝
噝噝噝噝噝噝噝噝噝噝噝噝噝噝噝噝噝噝噝噝噝噝噝噝噝噝噝噝噝噝噝噝噝噝噝噝噝噝噝噝
噝噝噝噝噝噝噝噝噝噝噝噝噝噝噝噝噝噝噝噝噝噝噝噝噝噝噝噝噝
噝噝噝噝噝噝噝噝噝噝噝噝噝噝噝噝噝噝噝噝噝噝噝噝噝噝噝噝噝噝噝噝噝噝噝噝噝噝噝噝噝噝噝噝噝噝噝噝噝噝噝噝噝噝
噝噝噝噝噝噝噝噝噝噝噝噝噝噝噝噝噝噝噝噝噝噝噝噝噝噝噝噝噝噝噝噝噝噝噝噝噝噝噝噝噝噝噝噝噝噝噝噝噝噝噝
噝噝噝噝噝噝噝噝噝噝噝噝噝噝噝噝噝噝噝噝噝噝噝噝噝噝噝噝噝噝噝噝噝噝噝噝噝噝噝噝噝噝噝噝噝噝噝噝噝噝噝噝噝噝噝噝噝
噝噝噝噝噝噝噝噝噝噝噝噝噝噝噝噝噝噝
噝噝噝噝噝噝噝噝噝噝噝噝噝噝噝噝噝噝噝噝噝噝噝噝噝噝噝噝噝噝噝噝噝噝噝噝噝噝噝噝噝噝噝噝噝噝噝噝噝噝噝噝噝噝噝噝噝噝噝噝噝噝噝噝噝噝
噝噝噝噝噝噝噝噝噝噝噝噝噝噝噝噝噝噝噝噝噝噝噝噝噝噝噝噝噝噝噝噝噝噝噝噝噝噝噝噝噝噝噝
噝噝噝噝噝噝噝噝噝噝噝噝噝噝噝噝噝噝噝噝噝噝噝噝噝噝噝噝噝噝噝噝噝噝噝噝噝噝噝噝噝噝噝噝噝噝噝
噝噝噝噝噝噝噝噝噝噝噝噝噝噝噝噝噝噝噝噝噝噝噝噝噝噝噝噝噝噝噝噝噝噝噝噝噝噝噝噝噝噝噝噝噝噝噝噝噝
噝噝噝噝噝噝噝噝噝噝噝噝噝噝噝噝噝噝噝噝噝噝噝噝噝噝噝噝噝噝噝噝噝噝噝噝噝噝噝噝噝噝噝噝噝噝噝噝噝噝噝噝噝噝噝噝噝噝噝噝噝噝噝噝噝噝噝噝噝噝噝噝
噝噝噝噝噝噝噝噝噝噝噝噝噝噝噝噝噝噝噝噝噝噝噝噝噝噝噝噝噝噝噝噝噝噝噝噝噝噝噝噝噝噝噝噝噝噝噝噝噝噝噝噝
噝噝噝噝噝噝噝噝噝噝噝噝噝噝噝噝噝噝噝噝噝噝噝噝噝噝噝噝噝
01
01
01
01
02
02
02
02
02
03
03
03
04
04
05
06
07
07
08
08
09
10
11
12
12
13
14
15
16
17
18
19
20
20
21
21
22
pH / ORP
Conductivity / TDS / Salinity

Average Atmospheric Pressure ph/kPa
101.3
100.1
98.8
97.6
96.4
95.2
94.0
92.8
91.7
90.5
89.4
88.3
87.2
86.1
85.0
84.0
82.9
81.9
80.9
79.9
78.9
77.9
76.9
76.0
75.0
74.1
73.2
72.3
Altitude h/m
2800
2900
3000
3100
3200
3300
3400
3500
3600
3700
3800
3900
4000
4100
4200
4300
4400
4500
4600
4700
4800
4900
5000
5100
5200
5300
5400
5500
Average Atmospheric Pressure ph/kPa
71.4
70.5
69.6
68.7
67.9
67.0
66.2
65.4
64.6
64.6
63.0
62.2
61.4
60.7
59.9
59.2
58.4
57.7
57.0
56.3
55.6
54.9
54.2
53.5
52.9
52.2
51.6
50.9
Altitude h/m
0
100
200
300
400
500
600
700
800
900
1000
1100
1200
1300
1400
1500
1600
1700
1800
1900
2000
2100
2200
2300
2400
2500
2600
2700
7.7.1 The corresponding Average Atmospheric Pressure with the Altitude
7.7 APPENDIX
41
噝噝噝噝噝噝噝噝噝噝噝噝噝噝噝噝噝噝噝噝噝噝噝噝噝噝噝噝噝噝噝噝噝
噝噝噝噝噝噝噝噝噝噝噝噝噝噝噝噝噝噝噝噝噝噝噝噝噝噝噝噝噝噝噝噝噝噝噝噝噝噝噝噝噝噝噝噝噝噝噝噝噝噝噝噝噝噝噝噝噝噝噝噝
噝噝噝噝噝噝噝噝噝噝噝噝噝噝噝噝噝噝噝噝噝噝噝噝噝噝噝噝噝噝噝噝噝噝噝噝噝
噝噝噝噝噝噝噝噝噝噝噝噝噝噝噝噝噝噝噝噝噝噝噝噝噝噝噝噝噝噝噝噝噝噝噝噝噝噝噝噝噝
噝噝噝噝噝噝噝噝噝噝噝噝噝噝噝噝噝噝噝噝噝噝噝噝噝噝噝噝噝噝噝噝噝噝噝噝噝噝噝噝噝噝噝噝
噝噝噝噝噝噝噝噝噝噝噝噝噝噝噝噝噝噝噝噝噝噝噝噝噝噝噝噝噝噝噝噝噝噝噝噝噝噝噝
噝噝噝噝噝噝噝噝噝噝噝噝噝噝噝噝噝噝噝噝噝噝噝噝噝噝噝噝噝
噝噝噝噝噝噝噝噝噝噝噝噝噝噝噝噝噝噝噝噝噝噝噝噝噝噝噝噝噝噝噝噝噝噝噝噝噝噝噝噝噝噝噝噝噝噝噝噝噝噝噝噝噝噝
噝噝噝噝噝噝噝噝噝噝噝噝噝噝噝噝噝噝噝噝噝噝噝噝噝噝噝噝噝噝噝噝噝噝噝噝噝噝噝噝噝噝噝噝噝噝噝噝噝噝噝噝噝噝噝噝噝噝噝噝噝噝噝噝
噝噝噝噝噝噝噝噝噝噝噝噝噝噝噝噝噝噝噝噝噝噝噝噝噝噝噝噝噝噝噝噝噝噝噝噝噝噝噝噝噝噝噝噝噝噝噝噝噝噝噝噝噝噝噝噝噝噝噝噝噝噝噝噝噝噝噝噝
噝噝噝噝噝噝噝噝噝噝噝噝噝噝噝噝噝噝噝噝噝噝噝噝噝噝噝噝噝噝噝噝
噝噝噝噝噝噝噝噝噝噝噝噝噝噝噝噝噝噝噝噝噝噝噝噝噝噝噝噝噝噝噝噝噝噝噝噝噝噝噝噝噝噝噝噝噝噝噝噝噝噝噝噝噝噝噝噝噝
噝噝噝噝噝噝噝噝噝噝噝噝噝噝噝噝噝噝噝噝噝噝噝噝噝噝噝噝噝噝噝噝噝噝噝噝噝噝噝噝噝噝噝噝噝噝噝噝噝噝噝噝
噝噝噝噝噝噝噝噝噝噝噝噝噝噝噝噝噝噝噝噝噝噝噝噝噝噝噝噝噝噝噝噝噝噝噝噝噝噝噝噝噝噝噝噝噝噝
噝噝噝噝噝噝噝噝噝噝噝噝噝噝噝噝噝噝噝噝噝噝噝噝噝噝噝噝噝噝噝噝噝噝噝噝噝噝噝噝噝噝噝噝噝噝噝噝
噝噝噝噝噝噝噝噝噝噝噝噝噝噝噝噝噝噝噝噝噝噝噝噝噝噝噝噝噝噝噝噝噝噝噝噝噝噝噝噝噝噝噝噝噝噝噝噝噝噝噝噝噝噝噝噝噝噝噝噝噝噝噝噝噝噝噝噝噝噝噝噝
噝噝噝噝噝噝噝噝噝噝噝噝噝噝噝噝噝噝噝噝噝噝噝噝噝噝噝噝噝噝噝噝噝噝噝噝噝噝噝噝噝噝噝噝噝噝
噝噝噝噝噝噝噝噝噝噝噝噝噝噝噝噝噝噝噝噝噝噝噝噝噝噝噝噝噝噝噝噝噝噝噝噝噝噝噝噝噝噝噝噝噝
噝噝噝噝噝噝噝噝噝噝噝噝噝噝噝噝噝噝噝噝噝噝噝噝噝噝噝噝噝噝噝噝噝噝噝噝噝噝噝噝噝噝噝噝噝噝噝噝
噝噝噝噝噝噝噝噝噝噝噝噝噝噝噝噝噝噝噝噝噝噝噝噝噝噝噝噝噝噝噝噝噝噝噝噝噝噝噝噝
噝噝噝噝噝噝噝噝噝噝噝噝噝噝噝噝噝噝噝噝噝噝噝噝噝噝噝噝噝噝噝噝噝噝噝噝噝噝噝噝噝噝噝噝噝
噝噝噝噝噝噝噝噝噝噝噝噝噝噝噝噝噝噝噝噝噝噝噝噝噝噝噝噝噝噝噝噝噝噝噝噝噝噝噝
噝噝噝噝噝噝噝噝噝噝噝噝噝噝噝噝噝噝噝噝噝噝噝噝噝噝噝噝噝噝
噝噝噝噝噝噝噝噝噝噝噝噝噝噝噝噝噝噝噝噝噝噝噝噝噝噝噝噝噝噝噝噝噝噝噝噝噝噝噝噝噝噝噝噝噝噝噝噝噝噝噝噝噝噝噝噝噝噝噝噝噝噝噝噝噝
噝噝噝噝噝噝噝噝噝噝噝噝噝噝噝噝噝噝噝噝噝噝噝噝噝噝噝噝噝噝噝噝噝噝噝噝噝噝噝噝噝噝噝噝噝噝噝噝噝噝噝
噝噝噝噝噝噝噝噝噝噝噝噝噝噝噝噝噝噝噝噝噝噝噝噝噝噝噝噝噝噝噝噝噝噝噝噝噝噝噝噝噝噝噝噝噝噝噝噝噝噝噝噝噝噝噝噝噝
噝噝噝噝噝噝噝噝噝噝噝噝噝噝噝噝噝噝噝噝噝噝噝噝噝噝噝噝噝噝噝噝噝噝噝噝噝噝噝噝噝噝噝噝
噝噝噝噝噝噝噝噝噝噝噝噝噝噝噝噝噝噝噝噝噝噝噝噝噝噝噝噝噝噝噝噝噝噝噝噝噝噝噝噝噝噝噝噝噝噝噝
噝噝噝噝噝噝噝噝噝噝噝噝噝噝噝噝噝噝噝噝噝噝噝噝噝噝噝噝噝噝噝噝噝噝噝噝噝噝噝噝噝噝噝噝噝噝噝噝噝噝噝噝噝噝噝
噝噝噝噝噝噝噝噝噝噝噝噝噝噝噝噝噝噝噝噝噝噝噝噝噝噝噝噝噝噝噝噝噝噝噝噝噝噝噝噝噝噝噝噝噝噝噝噝噝噝噝噝噝噝噝噝噝噝噝噝噝噝噝噝噝噝
噝噝
噝噝噝噝噝噝噝噝
噝噝噝噝噝噝噝噝噝噝噝噝噝噝噝噝噝噝噝噝噝噝噝噝噝噝噝噝噝噝噝噝噝噝噝噝噝噝噝噝噝噝噝噝噝噝噝噝噝噝噝噝噝噝噝噝
噝噝噝噝噝噝噝噝噝噝噝噝噝噝噝噝噝噝噝噝噝噝噝噝噝噝噝噝噝噝噝噝噝噝噝噝噝噝噝噝噝噝噝噝噝噝噝噝噝噝
噝噝噝噝噝噝噝噝噝噝噝噝噝噝噝噝噝噝噝噝噝噝噝噝噝噝噝噝噝噝噝噝噝噝噝噝噝噝噝噝噝噝噝噝噝噝噝噝噝噝噝噝噝噝噝噝噝噝噝噝噝噝噝噝噝噝噝噝噝
噝噝噝噝噝噝噝噝噝噝噝噝噝噝噝噝噝噝噝噝噝噝噝噝噝噝噝噝噝噝噝噝噝噝噝噝噝噝噝
噝噝噝噝噝噝噝噝噝噝噝噝噝噝噝噝噝噝噝噝噝噝噝噝噝噝噝噝噝噝噝噝噝噝
6.3.3 P03 Conductivity Temperature Factor
6.3.4 P04 TDS Factor
6.3.5 P05 Temperature modified Factor
6.3.6 P06 Auto Lock Function Setting
6.3.7 P07 Auto Power Off Setting
6.3.8 P08 Clearing Memory Function
6.3.9 P09 Reverting to Factory Default Setting
6.4 Setting Parameter
6.5 Calibration
6.6 Appendix
6.6.1 Conductivity sensor measuring range
6.6.2 Factory Defaults
7.1 Technical Specifications
7.2 Browse the parameter
7.3 Set UP
7.3.1 P01 Atmospheric Pressure
7.3.2 P02 Salinity Compensation
7.3.3 P03 Temperature Offset
7.3.4 P04 Auto Lock Function Setting
7.3.5 P05 Auto Power Off Setting
7.3.6 P06 Clearing Memory Function
7.3.7 P07 Reverting to Factory Default Setting
7.4 Calibration
7.5 Measurement Mode
7.6 Storage of Data
7.6.1 Storage of measuring data
7.6.2 Browse on data storage
7.6.3 Setting parameter
7.7 APPENDIX
7.7.1 The corresponding Average Atmospheric Pressure with the Altitude
7.7.2 Water saturated dissolved oxygen in different temperature
7.7.3 Factory defaults
8 GENERAL INFORMATION
8.1 Warranty
8.2 Return Of Malfunction Instruments
8.3 Guidelines Or Returning Unit For Repair
22
23
23
24
24
25
26
27
28
29
29
29
30
31
32
32
32
33
33
34
34
35
36
37
38
39
39
39
40
41
41
42
42
43
43
43
43
Dissolved Oxygen
DO200

1 Preface
1.1 Before Use
1.2 In Use
The meter may only be carried out by trained experts.
1.3 Safety
!
Unqualified meter should not be installed and used.
The meter should be used under the required working condition.
The meter should not be opened and repaired by clients themselves.
!
Please make sure to cut the power off when you open the cover to carry on any operation.
Thank you for selecting CLEAN meter.
Although the meter use advanced technology and meet
the requirements of current safety rules, improper use can still threaten the safety of users, and / or
cause harmful influences to factory and other equipments. Therefore, before using the
meter, relevant person must read and understand contents of this operation manual.
Operation manual should be kept accessible within the person who use the meter.
If you have problems which are not mentioned or can not be explained in this manual, please
contact CLEAN local customer service center. They will be very glad to help you.
Modified meter should not be used. Manufacturers and suppliers do not bear
responsibility for the damage and lost caused by modifying instruments without
permission. Clients should bear all the risks.
This instrument is IP67 rated. Please use waterproof cable glands when you connect
the cable. Also,please loose it when you open the cover. After connecting the
cable, please tighten the cable conductor according to the following instruction
with cable ties, or it will cause danger such as cable conductor or interface falls off
when open the cover.
On any unmentioned use or the use that contradict with the technical parameters the operators
should bear the responsibility.
Other conditions of right use include:
- Remarks and requirements stated in operation manual.
- Local safety regulations on safe operation.
- Information and warning of products that are used together with the meter in the contract.
(chassis, electrode, etc.)
- Required operating environment and working condition.
7.6.3 Setting parameter
1. Long press to enter into Setting parameter when in measurement mode. Press to
check through all the parameters.
2. Press to quit and go back to measurement mode.
0140
DO200

2 Basic Operation
2.1 Battery
2.4 Power on/off and Backlight
Use the coin to remove the battery cover by following the “-” direction.
Insert 2*7AAA batteries in the battery compartment with the correct Positive and Negative poles.
Tight the battery cover by following the “+” direction.
2.2 Electrode Installation
2.3 Shell
You can refer to the Electrode operation manual for use and maintenance. The direction of the red
dot marker on the Electrode and the salient point on the unit should be the same when install the
electrode to the unit. Remove the electrode by pulling out the clamp on the electrode.
This series of meter is portable and water-proof, with IP67 rated. If the meter accidentaly touches
water or other fluids, pls wipe it clean immediately. The meter function is not affected usually. But if
affected and cannot use, (possibly because of the battery cover is not tight and penetrated by
water). Please contact our company or CLEAN local customer service center. They will be very glad
to help you.
Power on
Short press power on/off key to start the meter. You can hear the indicator tone and whole screen
displayed within 1 second.
Power off
Long press the power on/off key to power off the meter.
Auto power off in 10 minutes if without any operation.
LCD backlight
Short press power on/off key to control if turn on the backlight or not.
7.6.1 Storage of measuring data
7.6.2 Browse on data storage
7.6 Storage of Data
1.If you need to save the measuring data once it is stabilized, press , the Lot no. will be shown
on the upper right of the screen. Press “ ” to save the data. You can also press to not
save. The meter will automatically go back to measurement mode after data saved. The unit at
most can save 50 sets data. The screen will show “OVER” if more than 50 sets reminds you the
memory card is full.
2.Enter into setting mode P-06 if you need to delete the saved data forever. You can refer to
Clearing memory function.
1. Press to enter into the browse on the data storage , the Lot no. will be shown and data
twinkling. Press to check all the saved data. Press to go back to measuring mode. If
showed “NONE” means no data is saved yet.
2. If you quit and re-entering during checking the data, the meter will freeze in the last set of data.
3902
DO200
PH200 CON200
DO200
+
-
M
SET
ENT
HOLD
MR
DO200

7.5 Measurement Mode
1. You can first set the meter per your request. Otherwise, the setting will be factory defaults.
2. Before each measuring, first lay aside the electrode for around 15mins to fully activate the
sensor after the electrode is connected with the meter.
3. After power on, press to select the operation mode (% or mg/L).
4. Immerse the electrode in the solution and stir gently. The measuring mark will twinkle. You can
read the value once the data is stabilized and shows the stable symbol .
5. If the Auto Lock Function is ON, the meter can lock the measured value after the reading had
stabilized and display . Press to unlock.
6. If the changed temperature is needed, you can refer to P-03 Temperature Offset.
3 Key Panel
Key Description
Power on
ON/OFF backlight
Long press to Power off
Mode switch
Exit from current mode operation
Data setting
Enter into calibration mode
Long press to enter into parameter browsing
Freeze or unlock the displayed value
Store the displayed value into memory
Increment values or scroll through the next options available
Recall stored values from the memory
Decrement values or scroll through the next options available
Short press: Short press means release the key once after pressing. (If there is no mark out below,
default it as Short press)
Long press: Long press means press the key for 3 seconds and release.
Hold: Hold means not release the key, used in adjusting data and accelerate after a certain time.
Not release the key until the value is set as needed.
3.2 Key function:
3.1 Key instruction
0338
DO200

7.4 Calibration
Illustration on the calibration point symbols:
1. The“Air” is shown at the right bottom of the screen during and after air calibration.
2. The “Zero” is shown at the right bottom of the screen during and after air calibration.
3. Both“Air” and “Zero” is shown after 2 points calibration.
Note:
You can press back to the measurement mode during calibration and all the calibration
point is saved. When the measured signal is out-ranged, the sign “Err” will be showed, possibly
the aging electrode or the polluted standard solutions lead to this.
1. In measurement mode, press to enter calibration process. .
2. First point calibration-100% air calibration: put the sensor in air, after you get a stable value or the
stable symbol shows up, press key to confirm 100.0% saturated dissolved oxygen point.
3. After pressing , the electrode Slope will be showed on the screen. Then automatically
initiate second point calibration -0% point calibration.
1. Dip the sensor in standard solution, when the value is stable, press key to confirm 0% point.
Then system go back to measurement mode.
2. If you need to adjust the Atmospheric Pressure Compensation and the Salinity Compensation
according to local situation. You can set in P-01 and P-02.
Note: Factory defaults first point 100% air calibration. If you don’t need to calibrate 0% point,
press key to go back to measurement mode.
After air calibration, the meter will automatically initiate second point calibration:
4 Appearance
1 Measuring Status-Calculating
2 Measuring Status-Stable Value
3 Electrode inserted display
4 Setup display
5 Offset - Electrode Offset
6 Slope - Electrode Slope
7 Done - Calibration Done
8 mVȠPHȠmAȠc$Ƞ%mSȠuSȠc$Ƞmg/LȠppmȠpptg/LmBar - Unit of Measurement
9
Auto / Manual - Temperature Compensation
10 4.01Ƞ7.00Ƞ10.01
Calibrated Points -USA Buffer Standard
11
4.01Ƞ6.86Ƞ9.18
Calibrated Points - NIST Buffer Standard
4.1 Display
3704
DO200

4.2 Display Character Table
Sensor
Automatic Temperature Compensation
Manual Temperature Compensation
Automatic Temperature Compensation
Manual Temperature Compensation
Electrode Slope
autolock
Auto Off
no stored data
Clear data
place of the stored data
Sensor Offset
Menu item
Password Setting
Factory Defaults
Sensor Slope 1
Sensor Slope 2
Save Data
Error
On
Off
No
Yes
Temperature value Over
Temperature value Under
Full Data Storage
Measuring Value Over
Measuring Value Under
TDS
Salinity
Temperature Base
Coefficient
Offset
nA output of electrode
Sensor slope
Atmospheric pressure
Salinity
%
mg/L
DO electrode voltage
Buffer Solution
NIST Standard
USA Standard
7.3.7 P07 Reverting to Factory Default Setting
In P-07, you can select NO or YES to not reverting or reverting to factory settings by pressing .
Please refer to above description steps to set up P-07.
If select YES, the meter will revert all the settings to factory defaults and all the settings will lost
forever. The unit will restart at the same time.
You can go to next parameter setting by pressing , or pressing key to quit and go
back to measurement mode.
Note:
1. During setting, you can press key to quit setting whenever necessary.
2. During setting, you can adjust anything twinkling by pressing . If it is the data
twinkling, you can speedy adjust the data by pressing .
0536
DO200

New design, Comfortable holding, Easy carrying , Simple Operation
65*40mm, large LCD with backlight for easy meter information reading
IP67 rated, dustproof and waterproof, Floats on water
Up to 3 points auto-buffer-recognition: Zero offset, Slope of Acid/Alkali
segment, Ensure accurate measuring results for the full range
One key to check through all the settings, including: Zero offset, Slope
of Acid/Alkali segment, and all the settings
Auto lock function
50 data sets memory stores and recalls
Auto Power off saves battery after 10-mins non-use
2*1.5V 7AAA battery, long battery life
CP337 Operating Carrying Pouch
·
·
·
·
·
·
·
·
·
·
PH200 Meter
pH / ORP 7.3.6 P06 Clearing Memory Function
In P-06, you can set the Clearing Memory Function.
Please refer to above description steps to setup P-06.
If select YES, the meter will clear all the saved data.
You can go to next parameter setting by pressing , or press key to quit and go
back to measurement mode.
3506
PH200
DO200
PH200
MODE
ESC
CAL
INFO
MI
SET
ENT
HOLD
MR

5.1 Technical Specifications
Range
Resolution
Accuracy
Range
Resolution
Accuracy
Range
Resolution
Accuracy
Power supply
Working time
NIST
USA
Environment
Memory
-2.00 16.00 pH
0.01 pH
±0.2% F.S.
-2000~2000 mV
1 mV
± 0.2% F.S.
-10.0 °C~110.0 °C
0.1 °C
± 0.2 °C
2*7 AAA batteries
>500 hrs
4.006.869.18
4.017.0010.01
-5 °C~60 °C, Relative humidity90%
50 sets
pH
ORP
Temperature
Power
pH Buffer Kinds
Others
5.2 Browse the parameter
7.3.4 P04 Auto Lock Function Setting
7.3.5 P05 Auto Power Off Setting
In P-04, you can set the Auto Lock Function.
Please refer to above description steps to setup P-04.
If the Auto Lock Function is ON, the meter can lock the measured value after the reading had
stabilized and display . Press to unlock.
You can go to next parameter setting by pressing , or press key to quit and go
back to measurement mode.
In P-05, you can set the Auto Power Off Function.
Please refer to above description steps to setup P-05.
If the Auto Power Off is ON, the meter will power off if no operation in 10mins.
You can go to next parameter setting by pressing , or press key to quit and go
back to measurement mode.
0734
PH200
DO200
Long press for 3 seconds in measurement mode.
Then press or to browse the parameters
1. Zero offset
2. Slope
3. High/Low segment of the slope
4. Buffer kinds
5. Temperature compensation
6. Hold Auto Lock
7. Auto power off
8. Battery power

5.3.1 P01 pH Standard Solution
5.3 pH Set Up
After power-up, the unit will enter the measurement mode. Factory default is pH measuring
mode. You can switch between the pH measurement mode and the ORP measurement mode
by pressing the Key.
Press to enter SET up step; Press to enter the Electrode Calibration mode.
In P-01, you can select a group of buffer solutions as a standard: USA (10.017.004.01) or NIST
(4.016.869.18).
Please refer to above description steps to set up P-01.
You can go to next parameter setting by pressing , or pressing key to quit and
go back to measurement mode.
Factory default: NIST
7.3.2 P02 Salinity Compensation
7.3.3 P03 Temperature Offset
In P-02, you can set up Salinity concentration value for compensation to get the better
measurement result.
Please refer to above description steps to setup P-02.
Range: 0.0-40.0mg/L
You can go to next parameter setting by pressing , or press key to quit and go
back to measurement mode.
In P-03, you can set up temperature offset value for better measurement result.
Please refer to above description steps to setup P-03.
Range: +10°C
You can go to next parameter setting by pressing , or press key to quit and go
back to measurement mode.
3308
PH200
DO200

5.3.2 P02 Manual Temperature setting
After entering P-02, you can set the manual temperature by pressing . Long press
for speedy setting. Confirm your setting by pressing .
Manual Temperature setting range: 0°C --100°C.
Please refer to above description steps to set up P-02.
You can go to next parameter setting by pressing , or pressing key to quit and go
back to measurement mode.
Note:
1. Please make sure the Temperature Electrode is UNPLUGGED when manual Temperature
compensation. Otherwise, the unit will display “Err” and go back to the set up menu for fresh
operation. The “Manual” is displayed beneath the main screen normally.
2. It is not working to unplug the Temperature Electrode while setting. You have to set again after
removing the electrode and quit the current mode.
7.3.1 P01 Atmospheric Pressure
7.3 pH SET UP
In measurement mode, press to switch between Saturation Percentage and Oxygen
concentration mg/L. Press to enter into parameter setting mode.Press to enter into
electrode calibration mode.
In P-01, you can adjust Atmospheric Pressure value for compensation to get the better measure-
ment result.
Please refer to above description steps to setup P-01.
Range: 600mbar-1400mbar.
You can go to next parameter setting by pressing , or press key to quit and go
back to measurement mode.
0932
PH200
DO200
7.2 Browse the parameter
Long press for 3 seconds in measurement mode.
Then press or to browse the parameters
1. Working voltage
2. Slope
3. Zero offset
4. Manual Temperature compensation
5. Atmospheric Pressure
6. Salinity
7. Hold Auto Lock
8. Auto power off
9. Battery power

5.3.3 P03 Temperature Offset setting
After entering P-03, you can set the temperature to the appropriate value by pressing
according to the actual temperature. Long press for speedy setting. Confirm your
setting by pressing .
Temperature Offset range: +10°C.
Please refer to above description steps to set up P-03.
You can go to next parameter setting by pressing , or pressing key to quit and
go back to measurement mode.
Note:
1. Please make sure the Temperature Electrode is PLUGGED when Temperature Offset setting.
Otherwise, the unit will display “Err” and go back to the set up menu for fresh operation. The
“Auto” will be displayed beneath the main screen the screen normally.
2. It is not working to plug the Temperature Electrode while setting. You have to set again after
plugging in the electrode and quit the current mode.
7.1 Technical Specifications
Range
Resolution
Accuracy
Range
Resolution
Accuracy
Range
Resolution
Accuracy
Range
Resolution
Default
Range
Resolution
Default
Power supply
Working time
Humidity
0.0%嗣400.0%
0.1%
±0.2% F.S.
0.00 mg/L嗣40.00 mg/L
0.01 mg/L
±0.2% F.S.
when compensating:0.0 °C嗣50.0 °C
when testing:0.0 °C嗣50.0 °C
0.1 °C
±0.2 °C
600 mbar嗣1400 mbar
1 mbar
1013 mbar
0.0 g/L嗣40.0 g/L
0.1 g/L
0.0 g/L
2*7AAA batteries
>500 hrs
-5 °C嗣60 °C喑Relative humidity喡90%
Testing items
Saturation Percentage
Oxygen concentration
Temperature
Settings
Atmospheric Pressure
Salinity
Others
Power
Environment
3110
PH200
DO200

Dissolved Oxygen
New design, Comfortable holding, Easy carrying , Simple Operation
65*40mm, large LCD with backlight for easy meter information reading
IP67 rated, dustproof and waterproof, Floats on water
Unit display: mg/L or %
One key to check through all the settings, including: Zero offset, slope
and all the settings
Galvanic cell mode, without polarization, easy measuring
Auto lock function
50 data sets memory stores and recalls
Auto Power off saves battery after 10-mins non-use
2*1.5V 7AAA battery, long battery life
CP337 Operating Carrying Pouch
·
·
·
·
·
·
·
·
·
·
·
DO200 Meter
5.3.4 P04 Auto Lock Function setting
After entering P-04, you can select ON or OFF the Auto Lock Function by pressing . If the
Auto Lock Function is ON, the meter can lock the measured value after the reading had stabilized
and display . Press to unlock.
Please refer to above description steps to set up P-04.
You can go to next parameter setting by pressing , or pressing key to quit and go
back to measurement mode.
1130
PH200
DO200
DO200
MODE
ESC
CAL
INFO
MI
SET
ENT
HOLD
MR

5.3.5 P05 Auto Power Off Setting
5.3.6 P06 Clearing Memory Function
After entering P-05, you can select ON or OFF the Auto Power Off by pressing . If the
Auto Power Off is ON, the meter will power off if no operation in 10mins.
Please refer to above description steps to set up P-05.
You can go to next parameter setting by pressing , or pressing key to quit and go
back to measurement mode.
After entering P-06, you can select NO or YES to not clear or clear the data by pressing .
If select YES, the meter will clear all the saved data.
Please refer to above description steps to set up P-06.
You can go to next parameter setting by pressing , or pressing key to quit and go
back to measurement mode.
6.6.1 Conductivity sensor measuring range:
Range
0.000~4.000 S/cm
0.00~40.00 S/cm
0.0~400.0 S/cm
0.00~40 .00 S/cm
0.0~400.0 S/cm
0~4000 S/cm
0.0~400.0 S/cm
0~4000 S/cm
0~40.00 mS/cm
0~4000 S/cm
0~40.00 mS/cm
0~400.0 mS/cm
Cell Constant
K=0.01 cm
K=0.1 cm
K=1 cm
K=10 cm
Resolution
0.001 S/cm
0.01 S/cm
0.1 S/cm
0.01 S/cm
0.1 S/cm
1 S/cm
0.1 S/cm
1 S/cm
0.01 mS/cm
1 S/cm
0.01 mS/cm
0.1 mS/cm
6.6 Appendix
6.6.2 Factory Defaults
Measurement Range
0.01, 0.1, 1, 10
15.0~35.0 °C
0.00~10.00%
0.40~1.00
0.48~0.65
+10 °C of the indicated temperature
OFF or ON
ON or OFF
Instrument Constant
Cell constant type
Temperature Base
Conductivity variance ratio per temperature
TDS factor
Salinity factor
Temperature bias
Auto Lock function
Auto Power off function
Initial value
1.0
25.0 °C
2.00%
0.50
0.65
0.0 °C
OFF
ON
2912
PH200
CON200

5.3.7 P07 Reverting to Factory Default Setting
After entering P-07, you can select NO or YES to not reverting or reverting to factory settings by
pressing . If select YES, the meter will revert all the settings to factory defaults and all
the settings will lost forever. The unit will restart at the same time.
Please refer to above description steps to set up P-07.
You can go to next parameter setting by pressing , or pressing key to quit and
go back to measurement mode.
Note:
1. During setting, you can press key to quit setting whenever necessary.
2. During setting, you can adjust anything twinkling by pressing . If it is the data
twinkling, you can speedy adjust the data by pressing .
6.5 Calibration
1. In measurement mode, press to enter calibration mode.
2. Dip the electrode into standard solution.
3. After you get a stable current value or the is showed, press to adjust the value
figures to match with the standard solution. Adjustable range is +30% of the stable current value.
Press to finish the calibration process.
4. The value of cell constant K indicates the status of the electrode.
1. before using new sensors or new meter;
2. when the sensor been used for a long time and lead to a widely deviation measuring result.
3. when reference temperature or temperature factor need to be changed.
Note: Calibration must be done in the following three occasions:
Calibration step
13
28
PH200
CON200

6.4 Setting Parameter
1. Long press to enter into Setting parameter when in measurement mode. Press
to check through all the parameters.
2. Press to quit and go back to measurement mode.
5.4 Calibration Mode
2. Inset the electrode in the pre-set standard solution. You can refer to P-01 explanation on the
standard solution setting.
3. Press and wait the measuring value to be stabilized. Then press to confirm. The
offset slope will be shown after the calibration.
Note: System defaults first point calibration is 6.86pH or 7.00pH.
After the first point calibration, the second point calibration will begin automatically. Then the third
point calibration will be continued. The meter will back to measurement mode after all the
calibration is done.
Note:
You can press back to the measurement mode during calibration and all the calibration
point is saved. When the measured signal is out-ranged, the sign “Err” will be showed, possibly
the aging electrode or the polluted standard solutions lead to this.
change
standard
solution
change
standard
solution
1 pH Calibration
2714
PH200
CON200

6.3.9 P09 Reverting to Factory Default Setting
In P-09, you can select NO or YES to not reverting or reverting to factory settings by
pressing .
Please refer to above description steps to set up P-09.
If select YES, the meter will revert all the settings to factory defaults and all the settings will lost
forever. The unit will restart at the same time.
You can go to next parameter setting by pressing ,or pressing key to quit and go
back to measurement mode.
Note:
1. During setting, you can press key to quit setting whenever necessary.
2. During setting, you can adjust anything twinkling by pressing . If it is the data twinkling
, you can speedy adjust the data by pressing .
5.5 Measurement Mode
1. You can first set the meter per your request. Otherwise, the setting will be factory defaults.
2. Use tap water or distilled water to clean the pH and the temperature electrode, removing the
adhesive impurities on the surface of electrode.
3. After power on, press to select the operation mode (pH or mV).
4. Immerse the pH and the temperature electrode in the solution and stir gently. The measuring
mark will twinkle. You can read the value once the data is stabilized and shows the stable mark.
Note:
1. When the screen shows “Auto” means the temperature sensor is working and shows the actual
temperature upper right corner. You can refer to the “Temperature Offset setting” if a revision on
the temperature is required.
2.If the “Manual” is shown below the screen means the temperature electrode is disconnected
and is manual temperature compensation. Factory default is 25C You can refer to P-02 “
Manual temperature setting” to adjust the temperature.
3. The measuring value is stabilized when the screen showed , The is showed if the
Auto Lock Function is on. Press to unlock.
1526
PH200
CON200

6.3.8 P08 Clearing Memory Function
In P-08, you can set the Clearing Memory Function.
Please refer to above description steps to setup P-08.
If select YES, the meter will clear all the saved data.
You can go to next parameter setting by pressing , or press key to quit and go
back to measurement mode.
5.6.1. Storage of measuring data
5.6.2. Browse on data storage
5.6 Storage of Data
1.If you need to save the measuring data once it is stabilized, press , the Lot no. will be shown
on the upper right of the screen. Press to save the data. You can also press to not
save. The meter will automatically go back to measurement mode after data saved. The unit at
most can save 50 sets data. The screen will show “OVER” if more than 50 sets reminds you the
memory card is full.
2.Enter into setting mode P-06 if you need to delete the saved data forever. You can refer to
Clearing memory function.
1. Press to enter into the browse on the data storage , the Lot no. will be shown and data
twinkling. Press to check all the saved data. Press to go back to measuring mode. If
showed “NONE” means no data is saved yet.
2. If you quit and re-entering during checking the data, the meter will freeze in the last set of data.
2516
PH200
CON200

6.3.6 P06 Auto Lock Function Setting
In P-06, you can set the Auto Lock Function.
Please refer to above description steps to setup P-06.
If the Auto Lock Function is ON, the meter can lock the measured value after the reading had
stabilized. Press to unlock.
You can go to next parameter setting by pressing ,or press key to quit and go
back to measurement mode.
6.3.7 P07 Auto Power Off Setting
In P-07, you can set the Auto Power Off Function.
Please refer to above description steps to setup P-07.
If the Auto Power Off is ON, the meter will power off if no operation in 10mins.
You can go to next parameter setting by pressing , or press key to quit and go
back to measurement mode.
5.7 Calibration Parameter and Setting Parameter
1. Long press to enter into Setting parameter when in measurement mode. Press
to check through all the Calibration parameters and Setting parameter.
2. Press to quit and go back to measurement mode.
1724
PH200
CON200
Other manuals for PH200
1
This manual suits for next models
2
Table of contents
Other CLEAN Instruments Measuring Instrument manuals
