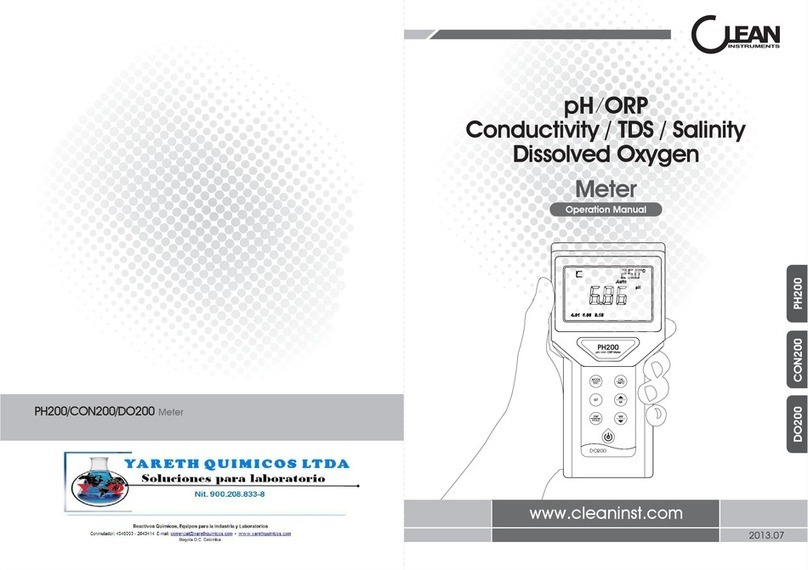
CLEAN Instruments PH200 User manual

(
J
INSTRUMENTS
Operation
Manual
pH
/
mV
Conductivity
/
TDS
/
Salinity
I
o
Dissolved
Oxygen
3
Meter
È
Les
a
S
EE)
fT
646
5
£20
9
=
||
|-
BBb
2
SX
A
4.01
6.86
9.18
O
a
Das
Se
Pi
:
O e
>
-
eo
[|t
/
S
Portable
Meter
Benchtop
Meter
PH200
/
CON200
/
DO200
PH500
/
CON500
/
DO500
o
©
Te)
Q
Q
=
o
o
q
Q
e
WWW
.cleaninst.com
fe
T_T
2014

TABLE
OF
CONTENTS
(CH
de
Le?
WEE
EE
01
2
Basic
Operation
—
EE
02
2.1
Battery
«e
HÀI
Hen
02
2-2
Electrode
Installation
së
SEENEN
rap
yh
EN
meth
REESE
REFUS
02
TRI
C
NEEN
02
2.4
Power
on/off
and
Backlight
EE
02
3
Key
Panel
EE
03
3.1
Key
instruction
—
mme
m
en
mmama
nn
man
m
namana
nanenane
nwa
minane
mwema
03
3.2
Key
FUNCTION
—
«e
n
03
4
Appearance
—
e
nen
nnne
04
4,1
Display
EEE
EE
RO
ROTA
04
4.2
Display
Character
Table...
05
Ln
06
5.1
Technical
Specifications
.--..............................................
07
5.2
Browse
the
parameter
.
........................00/22/
i
07
5.3
PH
Set
Up
|
eee]
08
5.3.1
PO]
pH
Standard
Solution
—
--
eM
08
5.3.2
P02
Manual
Temperature
setting
ET
09
5.3.3
PO3
Temperature
Offset
setting
—
———————
ere
10
5.3.4
POA
Auto
Lock
Function
setting
—
«e
11
5.3.5
PO5
Auto
Power
Off
Setting
"Ie
E
12
5.3.6
P06
Clearing
Memory
Function
—
«eI
12
5.3.7
PO7
Reverting
to
Factory
Default
Setting
—
|
«e
13
5.4
Calibration
Mode
^
e
o
RR
RR
EE
E
AFER
RE
EE
RS
ER
l4
5.5
Measurement
Mode
...........................
eese
15
5.6
Storage
öf
DATA
=.
RER
Petre
qa
REPE
x
16
5.7
Calibration
Parameter
and
Setting
Parameter
..................
17
5.8
Appendix
.
EE
18
WAUME
KUUA
UR
i
6.1
Technical
Specifications
—
..........
eee
20
6.2
Browse
the
parameter
`
E
21
6.3
Set
Up
oe
22
6.3.1
PO1
Cell
Constant
(k)
"ERE
22
6.3.2
PO2
Temperature
Compensation
Base...
23
6.3.3
PO3
Conductivity
Temperature
Factor
—
«e
23
6.39.4
POA
IDS
FACTOR
——
seesestesesestsessesesesseekese£teesfseeseriee9etetr'
ee
neg
ee
24

6.3.5
PO5
Temperature
modified
Factor
eee.
6.3.6
P06
Auto
Lock
Function
Setting
SREL
Eie
RENE
on
EXER
URL
EES
Ree
6.3.7
PO7
Auto
Power
Off
Setting
—
«HH
6.3.8
P08
Clearing
Memory
Function
see
6.3.9
PO?
Reverting
to
Factory
Default
setting.
sese
rns
6.4
Setting
Parameter
—
^s
rx
RR
rh
E
ERR
REIHE
RE
RR
e
e
ceri
6.5
Calibration.
`
see
rrr
Herr
anh
sy
eden
LR
ERO
6.6
Appendix
——————Á————
NA
WA
TA
6.6.1
Conductivity
sensor
measuring
range
—
«M
6.6.2
Factory
Defaults
—
«nennen
eene
nnne
nena
ne
Dissolved
Oxygen
`
INSS
7.1
Technical
Specifications
————
———
ERN
7.2
Browse
the
parameter
`
......
Bee
73
Set
Up
SETET
7.3.1
POI
Atmospheric
PIOSSU[O:-
—
assassinii
anta
RR
seas
EISE
ER
hers
eas
7.3.2
PO2
Salinity
Compensation
—
«eee
7.3.3
PO3
Temperature
ONSET
sr
d
SEN
KEE
ENER
tr
rer
EEEE
CE
ER
ne
t
uni
7.3.4
POA
Auto
Lock
Function
Setting
T
7.3.5
PO5
Auto
Power
Off
Setting
—
«eR
7.3.6
PO6
Clearing
Memory
Function
ee
EE
7.3.7
PO7
Reverting
to
Factory
Default
Setting
—
«e
eee
e
eee
e
eens
7.4.
Calibrationi
IIIA
7.5
Measurement
Mode
—
_...-e
eee
cece
iii
7.6
Storage
Of
Data
ROER
EE
AE
EET
7.6.1
Storage
of
measuring
daO
Doc
cp
E
7.6.2
Browse
on
data
storage
—
«eR
7.6.3
Setting
parameter
AA
E
2:7
APPENDIX
Aaa
7.7.1
The
corresponding
Average
Atmospheric
Pressure
with
the
Altitude
--
7.7.2
Water
saturated
dissolved
oxygen
in
different
temperature
........
7.7.3
Factory
defaults.
sassi
data
ES
UCRETS
Y
EE
E
TES
8
GENERAL
INFORMATION
—
RM
He
8.1
Warranty
ee
8.2
Return
Of
Malfunction
Instruments
«ica
8.3
Guidelines
Or
Returning
Unit
For
Repair
—
«e

1
Preface
Thank
you
for
selecting
CLEAN
meter.
Although
the
meter
use
advanced
technology
and
meet
the
requirements
of
current
safety
rules,
improper
use
can
still
threaten
the
safety
of
users,
and
/
or
cause
harmful
influences
to
factory
and
other
equipments.
Therefore,
before
using
the
meter,
relevant
person
must
read
and
understand
contents
of
this
operation
manual.
Besides
the
reasonable
prices,
Clean
meters
also
have
the
following
advantages:
-
Simple
operation.
This
operation
manual
provides
you
clear
and
easy
operation
guidance.
-Humanized
design,
Comfortable
holding.
-Multiple
accessories
available,
such
as
sensors,
buffer
solution
etc.
Portable
Meter
Benchtop
meter
PH
PH200
PH500
Conductivity
/
TDS
/
Salinity
CON200
CON500
Dissolved
Oxygen
DO200 DO500
Safety
-
Never
expose
the
meter
in
the
explosive
environment!
Part
of
the
shell
case
is
not
airtight
and
the
invasion
of
spark
or
the
corrosion
caused
by
the
invasive
gas
may
cause
explosion.
ee
-
Please
follow
the
operation
manual
and
the
laboratory
safety
regulations
when
use
the
chemicals
and
solutions.
Safety
precautions
>
-Never
split
the
shell
case.
-Only
the
OEM
maintenance
staff
is
allowed
to
maintain
the
meter.
-Following
environment
effect
should
be
avoided:
Violent
vibration
Expose
to
sunlight
for
a
long
time
Atmospheric
humidity
more
than
9596
Corrosive
gas
Ambient
temperature
below
than
-10'C
or
more
than
60'C
Strong
electric
or
magnetic
field
01

02
2
Basic
Operation
2.1
Battery
—
(
200
Series
)
PH200
/
CON200
/
DO200
Use
a
coin
to
remove
the
battery
cover
by
following
the
"-"
direction.
Insert
2*1.5V
7AAA
batteries
in
the
battery
compartment
with
The
correct
Positive
and
Negative
poles.
Tight
the
battery
cover
by
following
the
"+"
direction.
2.2
Electrode
Installation
You
can
refer
to
the
Electrode
operation
manual
for
use
and
maintenance.
The
direction
of
the
red
dot
marker
on
the
Electrode
and
the
salient
point
on
the
unit
should
be
the
same
when
install
the
electrode
to
the
unit.
Remove
the
electrode
by
pulling
out
the
clamp
on
the
electrode.
PH200
/
PH500
CON200
/
DO200
/
CON500
/
DO500
2.3
Shell
This
series
of
meter
is
portable
.
If
the
meter
accidentaly
touches
water
or
other
fluids,
please
wipe
it
clean
immediately.
The
meter
function
is
not
affected
usually.
But
if
affected
and
cannot
use.
please
contact
our
company
or
CLEAN
local
customer
service
center.
They
will
be
very
glad
to
help
you.
2.4
Power
on/off
and
Backlight
Power
on
Short
press
power
on/off
key
to
start
the
meter.
The
whole
screen
displayed
within
1
second.
Power
off
Long
press
the
power
on/off
key
to
power
off
the
meter.
Auto
power
off
in
10
minutes
if
without
any
operation.
LCD
backlight
Short
press
power
on/off
key
to
control
if
turn
on
the
backlight
or
not.

3
Key
Panel
3.1
Key
instruction
Short
press:
Short
press
means
release
the
key
once
after
pressing.
(If
there
is
no
mark
out
below,
default
it
as
Short
press)
Long
press:
Long
press
means
press
the
key
for
3
seconds
and
release.
Hold:
Hold
means
not
release
the
key,
used
in
adjusting
data
and
accelerate
after
a
certain
time.
Not
release
the
key
until
the
value
is
set
as
needed.
3.2
Key
function:
Description
Power
on
ON/OFF
backlight
Long
press
to
Power
off
Mode
switch
Exit
from
current
mode
operation
Enter
into
calibration
mode
Long
press
to
enter
into
parameter
browsing
Freeze
or
unlock
the
displayed
value
Press
to
unlock
in
measurement
mode
Store
the
displayed
value
into
memory
Increment
values
or
scroll
through
the
next
options
available
Press
to
browse
the
saved
data
in
measurement
mode
|
Recall
stored
values
from
the
memory
i
Decrement
values
or
scroll
through
the
next
options
available
©
Press
to
browse
the
saved
data
in
measurement
mode
03

04
4
Appearance
4.1
Display
oO
Rr
(8
A
PIDE
LENT
SNE?
A
ULULIULI
K=
TDS
RES
SAL
Error
Auto
Manual
LI,
LI,
LI,
LI
E
CAL
Done
Offset
i i
CT
Battery
power
L^
Measuring
Status
-
Calculating
a
Measuring
Status
-
Stable
Value
d
Electrode
inserted
display
19
Setup
display
A
Auto
lock
E
Memory
4B8BB*
Temperature
TDS
-
Total
dissolved
solids
k=
-
Cell
Constant
SAL
-
Salinity
Manual
-
Manual
Temperature
Compensation
Auto
-
Automatic
Temperature
Compensation
mV,
PH,
mA,
°C,
%
,
mS,
uS,
°C,
mg/L.
ppm,
ppt.
g/L,
mBar
-
Unit
of
Measurement
Offset
-
Electrode
Offset
CAL
-
Calibration
Done
-
Calibration
Done
Slope
-
Electrode
Slope
Air
-
Air
Calibration
Zero
-
Zero
Calibration
4.01, 6.86.
9.18
Calibrated
Points
-
NIST
Buffer
Standard
4.01,
7.00.
10.01
Calibrated
Points
-
USA
Buffer
Standard

4.2
Display
Character
Table
T
I
I
I
r
I
I
Ei
Ia
EE
E
EE
L
I
Automatic
Temperature
Compensation:
I
Auto
Off
no
stored
data
Clear
data
place
of
the
stored
data
Sensor
Offset
Menu
item
Buffer
Solution
NIST
Standard
USA
Standard
Temperature
Base
OQ
o
D
o
D
I
3
I
Je.
I
|
I
r
I
1
L
I
I
I
r
I
|
L
|
I
1
r
I
I
de
I
I
|
r
i
i
L
I
I
I
r
I
I
L
|
I
i
r
i
I
i
I
|
I
r
|
I
L
1
i
I
alia
Gaba
ata
cadi
au
in
a
ni
da
it
dt
Sai
ai
Late
badia
della
dba
ada
ii
ii
na
lai
|
Password
Setting
DO
electrode
voltage
05

pH
/
mV
PH200
Portable
Meter
PH500
Benchtop
Meter
2014
New
Model!
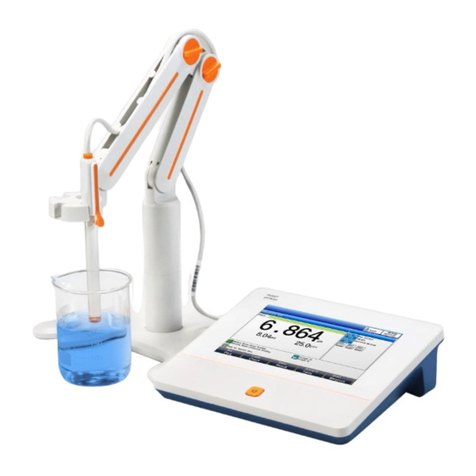
Brief
and
exquisite
design,
space
saving,
easy
calibration
with
calibrated
points
displayed,
optimum
accuracy,
simple
operation
comes
with
high
luminant
backlight.
It
is
your
reliable
partner
for
routine
applications
in
laboratories,
productions
plants
and
schools.
e
All-weather
precise,
Comfortable
holding,
Easy
carrying
,
Simple
Operation
e
65*40mm,
large
LCD
with
backlight
for
easy
meter
information
reading
e
|P67
rated,
dustproof
and
waterproof,
Floats
on
water
-
[PH200]
*
Upto
3
points
auto-buffer-recognition:
Zero
offset,
Slope
of
Acid/Alkali
segment,
PO
ac
N
e
oO
c
5
a=
q
O
oO
ensure
accurate
measuring
results
for
the
full
range
*
One
key
to
check
through
all
the
settings,
including:
Zero
offset,
Slope
of
Acid/Alkali
segment,
and
all
the
settings
e
Auto
lock
function
*
50
data
sets
memory
stores
and
recalls
*
Auto
Power
off
saves
battery
after
10-mins
non-use
e
2*1.5V
7AAA
battery,
long
battery
life
-
[PH200]
e
CP337
Operating
Carrying
Pouch
-
[PH200]
*
Economical,
easy
to
operate,
cost
saving
e
Detachable
Electrode
Stand
organizes
multiple
electrodes
neatly,
easy
installing
at
either
left
or
right
side
and
holds
them
firmly
in
place
-
[PH500]
06

5.1
Technical
Specifications
pH
|
Range
;
-2.00
~
16.00
pH
|
Resolution
|
0.01
pH
|
Accuracy
i
+0.2%
F.S.
ORP
i
Range
i
-2000~2000
mV
EE
ue
Deu
MEE
EE
IMMENSE
MEE
O
:
Resolution
vo
1mV
Les)
P------------r----------------------------------------------------4
LO
MAS
EEN,
SS
Temperature
:
Range
i
-10,0°C~110.0
°C
o
!
Resolution
'
0.1°C
©
ener
gr
EEE
EEE
ET
peer
uud
«
i
Accuracy
|
+
0.2°C
d
Power
:
Powersupply
!
—
2*1.5V
7AAA
batteries
|
Transformer
100
~
240V
!
Working
time
'
—>500
hrs
ML
pH
Buffer
Kinds
|
NIST
i
4.00,
6.86,
9.18
i
USA
:
401,
7.00,
10.01
Others
i
Environment
|
-5
*C—60
°C,
Relative
humidity<90%
i
Memory
i
50
sets
Dimensions
|
94*190*35mm
(W*L*H)
,
140*210*35mm
(W*L*H)
Weight
|
250g
|
660g
5.2
Browse
the
parameter
Long
press
for
3
seconds
in
measurement
mode.
Then
press
A
or
to
browse
the
parameters.
.
Zero
offset
Slope
.
High/Low
segment
of
the
slope
.
Buffer
kinds
.
Temperature
compensation
.
Hold,
Auto
Lock
.
Auto
power
off
.
Battery
power
-
[PH200]
o
YO
Om
P
WNT

5.3
pH
Set
Up
5.3.1
PO1
pH
Standard
Solution
USA
SALE
4.01 6.86 9.18
É
250"
%
buF
401
7.00
1001
i
E
d
685
©
ro:
OY
e
*
—
büF
*
—
büF
E
E
ni
Sk
GAL
dI
Les
Les
*
After
power-up,
the
unit
will
enter
the
measurement
mode.
Factory
default
is
pH
measuring
mode.
You
can
switch
between
the
pH
measurement
mode
and
the
ORP
measurement
mode
by
pressing
the
Key.
*
Press
©
to
enter
SET
up
step;
Press
to
enter
the
Electrode
Calibration
mode.
e
|n
P-01,
you
can
select
a
group
of
buffer
solutions
as
a
standard:
USA
(4.01,
7.00,
10.01)
or
NIST
(4.01,
6.86,
9.18).
*
Please
refer
to
above
description
steps
to
set
up
P-01.
e
You
can
go
to
next
parameter
setting
by
pressing
©
,
Or
pressing
key
to
quit
and
go
back
to
measurement
mode.
Factory
default:
USA
Note:
1.
During
setting,
you
can
press
key
to
quit
setting
whenever
necessary.
2.
During
setting,
you
can
adjust
anything
twinkling
by
pressing
(2)
©)
If
it
is
the
data
twinkling,
you
can
speedy
adjust
the
data
by
pressing
08

5.3.2
PO2
Manual
Temperature
setting
*
After
entering
P-02,
you
can
set
the
manual
temperature
by
pressing
DE
.
Long
press
DE
for
speedy
setting.
Confirm
your
setting
by
pressing
ES
i
*
Manual
Temperature
setting
range:
0°C-100°C.
*
Please
refer
to
above
description
steps
to
set
up
P-02.
*
You
can
go
to
next
parameter
setting
by
pressing
DE
,
Or
pressing
key
to
quit
and
go
back
to
measurement
mode.
Note:
1.
Please
make
sure
the
Temperature
Electrode
is
UNPLUGGED
when
manual
Temperature
compensation.
Otherwise,
the
unit
will
display
"Err"
and
go
back
to
the
set
up
menu
for
fresh
operation.
The
“Manual”
is
displayed
beneath
the
main
screen
normally.
2.
It
is
not
working
to
unplug
the
Temperature
Electrode
while
setting.
You
have
to
set
again
after
removing
the
electrode
and
quit
the
current
mode.
09
eo
o
LO
25
A.
=
Les
Les
N
ba
Ou

5
-L
N
O
(©)
=
E?
-L
Qı
e
[e]
10
5.3.3
P03
Temperature
Offset
setting
After
entering
P-03,
you
can
set
the
temperature
to
the
appropriate
value
by
pressing
DE
according
to
the
actual
temperature.
Long
press
®©
for
speedy
setting.
Confirm
your
setting
by
pressing
.
Temperature
Offset
range:
+10*C.
Please
refer
to
above
description
steps
to
set
up
P-03.
You
can
go
to
next
parameter
setting
by
pressing
DE
,
Or
pressing
key
to
quit
and
go
back
to
measurement
mode.
Note:
1.
Please
make
sure
the
Temperature
Electrode
is
PLUGGED
when
Temperature
Offset
setting.
Otherwise,
the
unit
will
display
"Err"
and
go
back
to
the
set
up
menu
for
fresh
operation.
The
"Auto"
will
be
displayed
beneath
the
main
screen
the
screen
normally.
2.
It
is
not
working
to
plug
the
Temperature
Electrode
while
setting.
You
have
to
set
again
after
plugging
in
the
electrode
and
quit
the
current
mode.

5.3.4
P04
Auto
Lock
Function
setting
Hd
CI
*
mn
mu
le
LIT
In
è
ES
AW
Hd Hd
1$
SAU
J
I
le
=
eo
o
LO
=
a.
=
e
o
N
ba
Ou
*
After
entering
P-04,
you
can
select
ON
or
OFF
the
Auto
Lock
Function
by
pressing
®©
.
If
the
Auto
Lock
Function
is
ON,
the
meter
can
lock
the
measured
value
after
the
reading
had
stabilized
and
display
A
.
Press
to
unlock.
HOLD
+
Please
refer
to
above
description
steps
to
set
up
P-04.
*
You
can
go
to
next
parameter
setting
by
pressing
DE
,
Or
pressing
key
to
quit
and
go
back
to
measurement
mode.
11

5.3.5
P05
Auto
Power
Off
Setting
5
-L
N
O
oO
5
-L
Qı
e
[e]
*
Affer
entering
P-05,
you
can
select
ON
or
OFF
the
Auto
Power
Off
by
pressing
DE
ifthe
Auto
Power
Off
is
ON,
the
meter
will
power
off
if
no
operation
in
10mins.
*
Please
refer
to
above
description
steps
to
set
up
P-05.
*
You
can
go
to
next
parameter
setting
by
pressing
AS
,
OF
pressing
key
to
quit
and
go
back
to
measurement
mode.
5.3.6
P06
Clearing
Memory
Function
IJ
*
ca
OG
LLr
YES
*
After
entering
P-06,
you
can
select
NO
or
YES
to
not
clear
or
clear
the
data
by
pressing
DE.
If
select
YES,
the
meter
will
clear
all
the
saved
data.
*
Please
refer
to
above
description
steps
to
set
up
P-06.
*
You
can
go
to
next
parameter
setting
by
pressing
DE.
or
pressing
key
to
quit
and
go
back
to
measurement
mode.
12

5.3.7
P07
Reverting
to
Factory
Default
Setting
$
dEF
mm
{LI
=
&
JEF
dEF dEF
% %
dE
3
LLP
e
O
LO)
-L
Qu
==
e
[e]
N
-L
Qu
*
After
entering
P-07,
you
can
select
NO
or
YES
to
not
reverting
or
reverting
to
factory
settings
by
pressing
A
.
If
select
YES,
the
meter
will
revert
all
the
settings
to
factory
defaults
and
all
the
settings
will
lost
forever.
The
unit
will
restart
at
the
same
time.
*
Please
refer
to
above
description
steps
to
set
up
P-07.
*
You
can
go
to
next
parameter
setting
by
pressing
È
,
Ot
pressing
key
to
quit
and
go
back
to
measurement
mode.
Note:
1.
During
setting,
you
can
press
key
to
quit
setting
whenever
necessary.
2.
During
setting,
you
can
adjust
anything
twinkling
by
pressing
©
.
If
it
is
the
data
twinkling,
you
can
speedy
adjust
the
data
by
pressing
9
;
13

PO
ac
N
e
[en]
==
5
mm
Qı
O
oO
14
5.4
Calibration
Mode
1
pH
Calibration
E
250"
CA
250"
db
CA
250"
Auto
h
"i
G
pH
b
H
H
pH
"i
g
mV
"i
rm
m
pH
Wi
ML
i
—
_
|
—
LLI
LI
7.00
4.01
7.00
10.01
CA
250"
A
ds
250"
change
a
standard
U
ri
d
E
H
q
H
%
ma
i
solution
LI
—»
L
—
LU
4.01
7.00
10.01
p
7.00
4.01
7.00
10.01
CA
250"
db
eau:
E
250"
change
pH
pH
we
gg
gp
-
nn
solution
.
I
—
—
Pp
(LLI
4.01
7.00
10.01
SE
7.00
10.01
4.01
7.00
10.01
2.
Inset
the
electrode
in
the
pre-set
standard
solution.
You
can
refer
to
P-01
explanation
on
the
standard
solution
setting.
3.
Press
and
wait
the
measuring
value
to
be
stabilized.
Then
press
to
confirm.
The
offset
slope
will
be
shown
after
the
calibration.
Note:
System
defaults
first
point
calibration
is
6.86pH
or
7.00pH.
After
the
first
point
calibration,
the
second
point
calibration
will
begin
automatically.
Then
the
third
point
calibration
will
be
continued.
The
meter
will
back
to
measurement
mode
after
all
the
calibration
is
done.
Note:
You
can
press
back
to
the
measurement
mode
during
calibration
and
all
the
calibration
point
is
saved.
When
the
measured
signal
is
out-ranged,
the
sign
"Err"
will
be
showed,
possibly
the
aging
electrode
or
the
polluted
standard
solutions
lead
to
this.

5.5
Measurement
Mode
1.
You
can
first
set
the
meter
per
your
request.
Otherwise,
the
setting
will
be
factory
defaults.
2.
Use
tap
water
or
distilled
water
to
clean
the
pH
and
the
temperature
electrode,
removing
the
adhesive
impurities
on
the
surface
of
electrode.
3.
After
power
on,
press
to
select
the
operation
mode
(pH
or
MV).
4.
Immerse
the
pH
and
the
temperature
electrode
in
the
solution
and
stir
gently.
The
measuring
mark
will
twinkle.
You
can
read
the
value
once
the
data
is
stabilized
and
shows
the
stable
mark.
250"
250"
Auto
Auto
e
O
LO)
-L
Qu
==
e
[e]
N
-L
Qu
6.86
`
BAB
`
4.01
7.00
10.01
4.01
7.00
10.01
Note:
1.
When
the
screen
shows
“Auto”
means
the
temperature
sensor
is
working
and
shows
the
actual
temperature
upper
right
corner.
You
can
refer
to
the
“Temperature
Offset
setting”
if
a
revision
on
the
temperature
is
required.
2.
If
the
“Manual”
is
shown
below
the
screen
means
the
temperature
electrode
is
disconnected
and
is
manual
temperature
compensation.
Factory
default
is
25ºC.
You
can
refer
to
P-02
"
Manual
temperature
setting
"
to
adjust
the
temperature.
3.
The
measuring
value
is
stabilized
when
the
screen
showed
a
,
The
A
is
showed
if
the
Auto
Lock
Function
is
on.
Press
to
unlock.
15

PO
ac
N
e
[en]
==
5
mm
Qı
O
oO
16
5.6
Storage
of
Data
5.6.1.
Storage
of
measuring
data
eso
E
50°
Auto Auto
BHB
`
BHB
`
4.01
7.00
10.01
4.01
7.00
10.01
1.If
you
need
to
save
the
measuring
data
once
it
is
stabilized,
press
,
the
Lot
no.
will
be
shown
on
the
upper
right
of
the
screen.
Press
to
save
the
data.
You
can
also
press
to
not
save.
The
meter
will
automatically
go
back
to
measurement
mode
after
the
data
saved.
The
unit
at
most
can
save
50
sets
data.
The
screen
will
show
"OVER"
if
more
than
50
sets
reminds
you
the
mernory
card
is
full.
2.Enter
into
setting
mode
P-06
if
you
need
to
delete
the
saved
data
forever.
You
can
refer
to
Clearing
memory
function.
5.6.2.
Browse
on
data
storage
Auto
BA
bB
4.01
7.00
10.01
dal
pH
1.
Press
to
enter
into
the
browse
on
the
data
storage
,
the
Lot
no.
will
be
shown
and
data
twinkling,
Press
A
Gin
check
all
the
saved
data.
Press
to
go
back
to
measuring
mode.
If
showed
“NONE”
means
no
data
is
saved
yet.
2.
If
you
quit
and
re-entering
during
checking
the
data,
the
meter
will
freeze
in
the
last
set
of
data.

5.7
Calibration
Parameter
and
Setting
Parameter
E
sm
SEN
©
SEN
se
SEN
ub
©.
oar
DT
sse
DP
gas
OG
usa
OG
på
OG
ner
LI
ADF
bRE
on
LE
e
(©)
LO)
-L
Qu
==
e
[e]
N
-L
Qu
1.
Long
press
to
enter
into
Setting
parameter
when
in
measurement
mode.
Press
9
to
check
through
all
the
Calibration
parameters
and
Setting
parameter.
2.
Press
to
quit
and
go
back
to
measurement
mode.
Other manuals for PH200
1
This manual suits for next models
5
Table of contents
Other CLEAN Instruments Measuring Instrument manuals
