closomat Asana User manual
THE ORIGINAL SHOWER TOILET
CLOSOMAT®
Asana
OPERATING INSTRUCTIONS
SWISS
MADE
THE ORIGINAL SHOWER TOILET

2

3
3
DEAR CUSTOMER
Thank you for deciding on the CLOSOMAT, the
original shower toilet since 1957. The Asana
model is the latest development by our
company, and offers you even greater
additional comfort than the well-known benefits
of the CLOSOMAT.
The CLOSOMAT design, which has been tried
and trusted for many decades, is based on the
positive interaction between personal hygiene,
health, well-being and comfort. It makes use of
the power of natural elements – water and air –
and puts these in the right order, in the right
place at the right time, and in the right quantities.
The often neglected intimate areas of the body
are thoroughly washed and at the same time
gently massaged by water jets. The
temperature and pulsing effects which can also
be selected (wellness functions) enhance blood
circulation. These are the features which are
the key to a long-term feeling of freshness.
After a short adjustment period, and regular use,
you will notice an increased feeling of well-
being which you will never want to do without.
To ensure that you can fully benefit from using
your new sanitaryware from the outset, you will
find the individual operating steps and a lot of
useful information in these operating
instructions. Please read these instructions
carefully, and pay particular attention to the
instructions on pages 28 and 29.
Even if you are already very familiar with
CLOSOMAT, we recommend reading these
instructions so that you can become familiar
with the differences between this and previous
models.
The different functions rely on an integrated
system of technical components which have
been deliberately generously dimensioned in
CLOSOMAT: quiet operation, excellent
reliability and a long serviceable life. It is
nevertheless always advisable to service and
maintain equipment. Depending on the water
quality in your region (for instance ‘hard water’),
having the shower toilet serviced by specially
trained technicians is recommended at regular
intervals. Contact our service department
without obligation to find a solution which meets
your needs.
Yours sincerely,
Closomat

4
NB
Gives you important information.
Draws attention to a possible danger.
4

5
CONTENTS
1. DESCRIPTION OF ASANA 6
2. SUMMARY OF OPERATING INSTRUCTIONS FOR STANDARD FUNCTIONS 9
3. USE AS A NORMAL WC 10
4. CLOSOMAT READY TO OPERATE 10
5. ODOUR EXTRACTION 10
6. SHOWER FUNCTION 11
6.1 Bidet function 11
6.1.1 Boost bidet function jet 12
6.2 Lady shower 13
6.3 Wellness programme 15
7. WARM AIR DRYING 16
8. SOFT-CLOSE SEAT AND LID 17
9. ORIENTATION/FUNCTION LIGHT 17
10. BOILER ECONOMY SETTING 18
11. CLOSOMAT HYGIENE SYSTEM 18
12. WIRELESS REMOTE CONTROL (OPTIONAL) 19
13. CARE AND CLEANING 20
13.1 Shower jet 20
13.2 Warm air jet 21
13.3 Seat and lid / casing 22
14. FUNCTION TEST/DEMONSTRATION 23
15. MAINTENANCE AND SERVICING 24
15.1 Regular servicing 24
15.2 Changing the active carbon filter 24
16. TIPS AND HINTS FOR PROBLEM-SOLVING 26
17. IMPORTANT INFORMATION 28
17.1 Important for safe use 28
17.2 Important for care and maintenance 29
18. TECHNICAL DATA AND INFORMATION 30
5
6
6
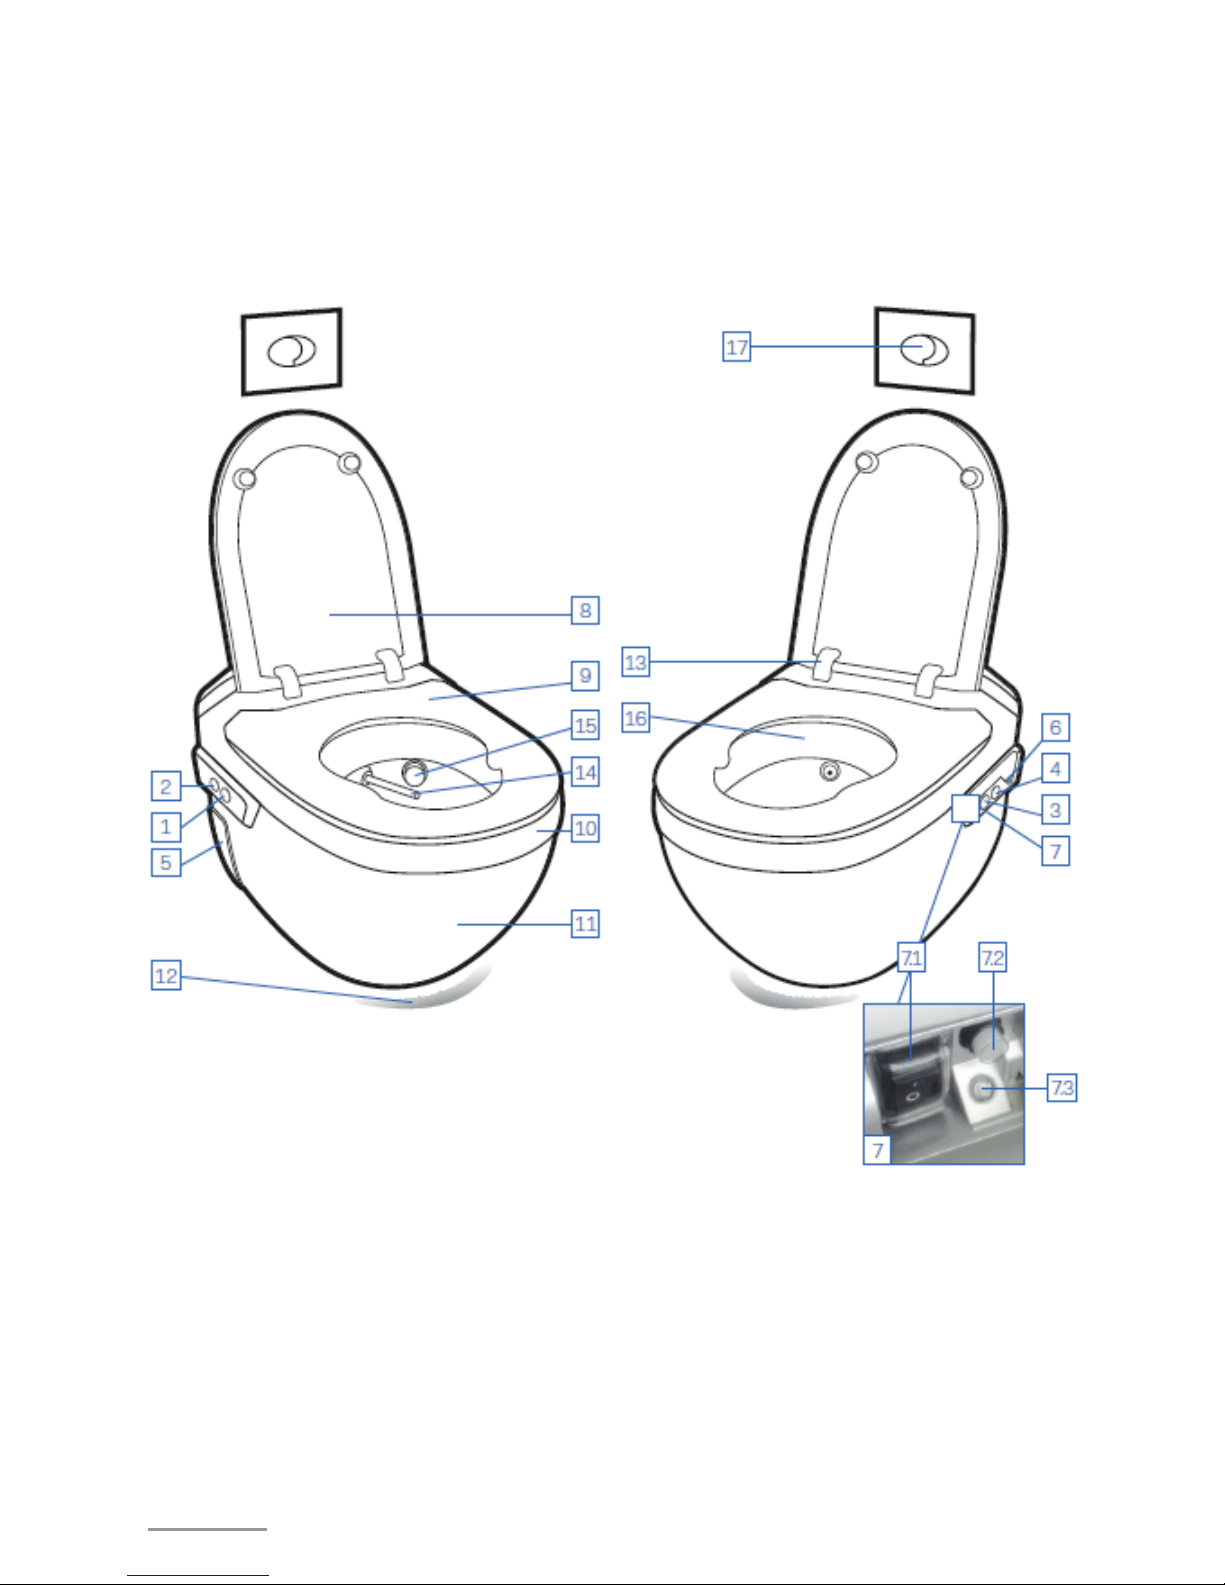
1. DESCRIPTION OF SHOWER TOILET

7
1
Raised front left-hand push-button *
(main button): “Bidet function” and “Stop
shower/warm air”
2
Recessed back left-hand push-button *:
“Lady shower” and “Stop shower/warm
air”
3
Raised front right-hand push-button *:
“Boost jet” and “Stop odour extraction”
4
Recessed back right-hand push-button
*: “Reduce jet”
5
6
Drawer for active carbon filter
7
Control Panel (concealed behind filter
drawer)
7.1
Main On/Off switch
7.2
Economy switch
7.3
LED operating light
8
Seat lid
9
Seat
10
Porcelain bowl
11
Bowl casing
12
Orientation/operating light
13
Hinges
14
Shower nozzle
15
Warm air nozzle
16
Flushing rim
17
Standard WC flush push-buttons
* “left/right-
hand side” of the toilet in this case
refers to the view from the front!
7

8
8
NAME PLATE
The name plate is located on the left-hand side of the unit below the porcelain rim. It gives the
following details:
THE ORIGINAL SHOWER TOILET
Type: Asana2 No.: 15.00099.150616
AC 230V3 50 Hz4
1100 W5 4.5 A6
Boiler: 1.4 l7 0 Pa8
22 June, 201510
CLOSOMAT9 CH-8424 EMBRACH
1 Name (logo)
2 Type of sanitaryware
3 Nominal voltage
4 Mains frequency
5 Wattage
6 Power consumption
7 Boiler capacity
8 Boiler pressure
9 Manufacturer
10 Production date
11 Symbol identifying electrical apparatus in
accordance with 2002/96/EC
12 Symbol “Read instructions”
13 Symbol “Note enclosed documents”
14 CE mark
15 Protection type
16 Serial number
Subject to modification

9
2. SUMMARY OF OPERATING INSTRUCTIONS FOR STANDARD
FUNCTIONS
Desired function
Action
Standard WC flush
Press push-button in standing position
Odour extraction
Starts automatically when you sit down
Stop odour extraction
Touch the front push-button with your left hand
Bidet function
Touch the front push-button or keep it pressed in seated
position
Boost jet
When the shower is operating, touch the front push-button
with your left hand (several times if required)
Reduce jet
When the shower is operating, touch the rear push-button
with your left hand (several times if required)
Lady shower
When seated, touch the rear push-button with your right
hand, or keep it pressed (jet boosting and wellness function
s
inactive)
Warm air drying
Drier starts automatically after shower ends
Warm air Stop
When the air drying is running, touch the front or rear push-
button with your right hand
Warm air cooler
When the air drying is running, touch the rear push-button
with your left hand (several times if required)
Warm air hotter
When the air drying is running, touch the front push-button
with your left hand (several times if required)
In the operating instructions, “left” or “right”-hand refers to
your seated position.
9

10
10
3. USE AS A STANDARD WC
Start standard WC flush: press or activate one of the two flush buttons on the
above flush-plate.
4. CLOSOMAT READY TO OPERATE
The CLOSOMAT is ready to operate when the main switch 1 (On/Off) on the
unit is switched on and the power supply is guaranteed. This switch is located
in the control panel behind the aperture for the active carbon filter drawer
(Photo A). The unit always remains switched on. For longer periods of non-use
(more than about 5 days), it is recommended that the unit is switched off. As
soon as the unit is switched on, a short initialisation programme runs during
which CLOSOMAT must not be used, and the orientation light (blue) and
operating light 3 (yellow) flash. The economy button 2 also flashes, which
indicates that the boiler is heating up. The shower system is activated and
becomes ready to operate only when someone sits on the seat.
5. ODOUR EXTRACTION
Odour extraction is activated as soon as someone sits on the particularly ergonomic and comfortable
warm-touch seat. Unpleasant odours are extracted from the inside of the bowl, passed through an active
carbon filter and blown back into the room as “neutralised” air. This function remains activated either
until the person stands up, or touches the odour extraction Stop button (seated: left hand, front push-
button) or the shower function is started (seated: right hand, front push-button).

11
6. SHOWER FUNCTION
6.1. BIDET FUNCTION
After a bowel movement, don’t reach for toilet paper, simply remain
seated upright. After activating the bidet function push-button, the
shower spray arm extends and the shower system is activated. When
the shower spray arm has reached the right position, the shower
process starts with a gentle shower jet. Please make sure that you are
sitting far enough back. Particular attention should be paid to this if
children are using they toilet, as they tend to sit further forwards. There
is a short time delay, as WC flushing starts automatically after the start
of the washing phase to ensure that the wellness phase (showering
followed by warm air
drying) takes place after the bowl has been flushed
clean. Afterwards the shower nozzle is retracted into its protected
storage position, and in the process is sprayed clean. The warm air
drying process then starts automatically, and lasts for approx. 3
minutes.
There are two ways of starting the bidet function process:
- Keep the bidet function push-button pressed in
- Touch the bidet function push-button
a) Keep the bidet function
push-button pressed in
(Photo B)
When seated, press the raised
front push-button with your right
hand (Photo B) and keep it
pressed in. Showering will now
continue until the push-button is
released (max. 1 minute).
Afterwards the warm air drier
starts automatically.
b) Touch the bidet function
push-button
(Photo C)
When seated, press the raised
front push-button lightly with your
right hand and release (Photo C).
The bidet function process
described above will now run
automatically (showering process
approx. 30 seconds). Afterwards
the warm air drier starts
automatically.
NB:
By touching the same push-
button again, or simply by
standing up, the showering or
drying process can be stopped
midway.
11

12
12
If you wish to change the pre-set showering time, this can be done as
follows (setting range from 15 - 45 sec.): whilst the bidet function is on
(hold push-button pressed in), press both push-buttons (front and rear)
simultaneously with your left hand (Photo D) and keep them pressed in.
When you reach the desired showering time, release the shower button
with your right hand (Photo E), and then also release both push-buttons
with your left hand. The new bidet functioning time is now programmed
in.
6.1.1 BOOST BIDET FUNCTION JET
If during the showering process described above you would like to
change the intensity of the jet, e.g. for a deeper cleaning effect or to
enjoy an invigorating water jet massage, you can adjust it as follows:
Boost intensity:
Whilst the shower is running,
touch the raised front push-button
once or several times with your
left hand until it reaches the
required intensity (Photo F).
Reduce intensity:
Whilst the shower is running,
touch the recessed rear push-
button once or more with your left
hand until it reaches the required
intensity (Photo G).
NB:
After use, the system returns to its
standard settings.

13
6.2 LADY-SHOWER
Please make sure that you are sitting far enough back. After activating
the lady-shower push-button (Photo H), the shower spray arm extends
and the shower system is activated. When the shower nozzle has
reached the lady-shower position, the shower process starts with a
gentle shower jet. There is a short time delay, as WC flushing starts
automatically after the start of the washing phase to ensure that the
wellness phase (showering followed by warm air drying) takes place
after the bowl has been flushed clean. Afterwards the shower nozzle is
retracted into its protected storage position, and in the process is
sprayed clean. The warm air drying process then starts automatically,
and lasts for approx. 3 minutes.
There are two ways of starting the lady-shower process:
- Keep the lady-shower push-button pressed in
- Touch the lady-shower push-button
c) Keep the lady-shower push-
button pressed in (Photo I)
When seated, press the recessed
rear push-button with your right
hand (Photo B) and keep it
pressed in. Showering will now
continue until the push-button is
released (max. 1 minute).
Afterwards the warm air drier
starts automatically.
d) Keep the lady-shower push-
button pressed in (Photo J)
When seated, press the recessed
rear push-button with your right
hand (Photo B) and keep it
pressed in. Showering will now
continue until the push-button is
released (max. 1 minute).
Afterwards the warm air drier
starts automatically.
NB:
By touching the same push-
button again, or simply by
standing up, the showering or
drying process can be stopped
midway.
13
14
14
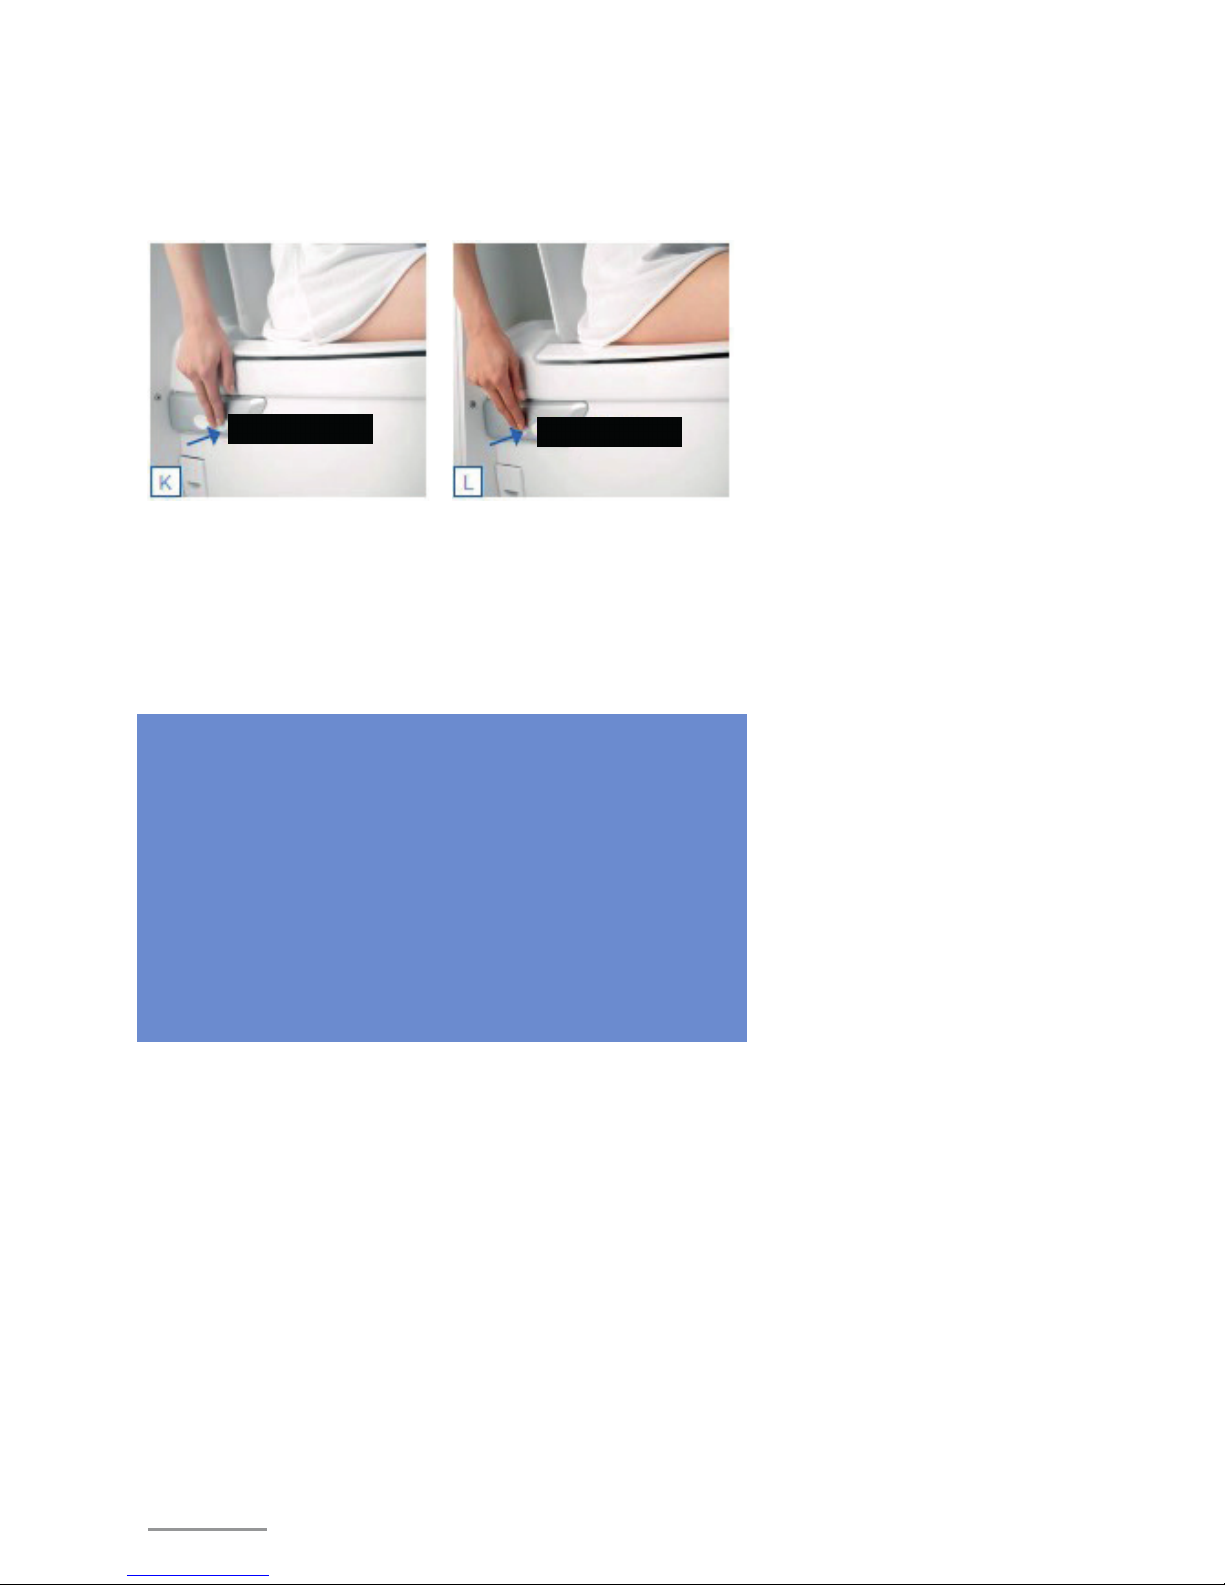
To change directly from bidet function to lady-shower position or from
lady-shower to bidet position or back again, follow this procedure: when
the bidet function is working, press for approx. 2 seconds on the front
push-button (Photo K) with your right hand, and release. The shower
will be interrupted and move to the lady-shower position.
If the lady-shower has been started, when the shower is in progress,
press for approx. 2 seconds on the rear push-button (Photo L) with your
right hand, and release.
The shower will be interrupted and move to the
bidet function position. If you wish to change directly to the lady position
again, press the front push-button (Photo K) for 2 seconds. The shower
will be interrupted and will move forwards into the lady position.
• A gentle spray intensity is pre-set for the lady-shower. The push-
buttons for boost/reduce will therefore not work. The wellness
functions are similarly not available for the lady-shower setting.
• After surgery or if you have open wounds, the CLOSOMAT –
shower should be avoided until healing is sufficiently well
advanced. Where there are medical reasons for avoiding
moisture, ensure that you are clean and dry, for instance by using
toilet paper.
• If the lady-shower and bidet function are to be used during the
same session, it is recommended that the lady-shower is used
first.
2 seconds
2 seconds

15
If you wish to change the pre-set shower time, the process is as follows
(setting range from 15 - 45 sec.): whilst the lady-shower is on (hold
push-button pressed in), press both push-buttons (front and rear)
simultaneously with your left hand (Photo M) and keep them pressed in.
When you reach the desired showering time, release the shower button
with your right hand (Photo N), and then also release both push-buttons
with your left hand. The new lady-showering time is now programmed
in.
6.3 WELLNESS PROGRAMME (ONLY FOR BIDET FUNCTION)
Whilst the bidet function is on, four wellness functions can be switched
on by touching the recessed rear push-button as shown below:
Press once: rotating
spray
Press twice: pulsating
spray
Press three times:
variable-temperature
spray
Press four times: all
three wellness
functions combined
Press five times:
back to normal
shower
15
16
16
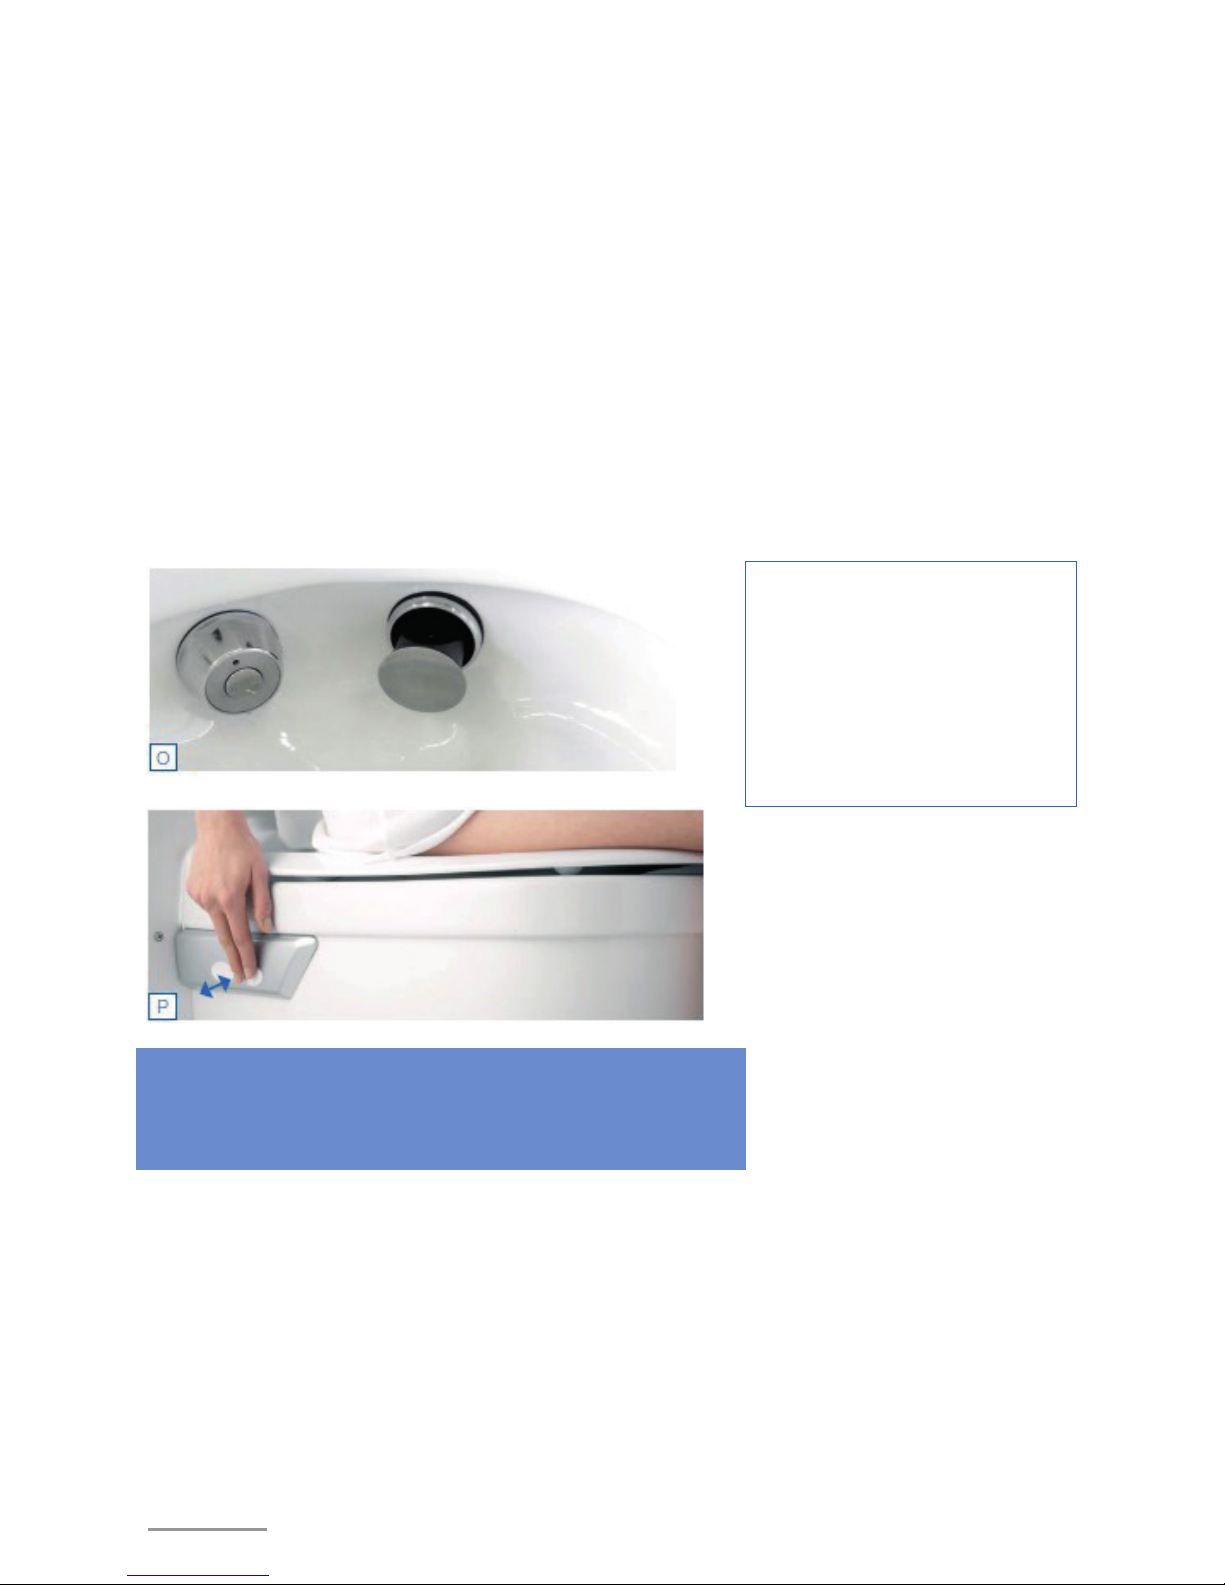
7. WARM AIR DRYING
When the showering process has finished, just relax and stay seated.
The warm air drying starts automatically (Photo O) and runs for approx.
3 minutes, then turns off by itself. If you continue to stay seated, the
system switches to odour extraction. The drying function can also be
stopped by simply getting off the seat, or by touching the front or rear
push-button (Photo P) with your right hand.
Gradual heat reduction
The initially high temperature which feels comfortable on wet skin is
automatically reduced. At the same time this is kind to sensitive areas
of skin.
Warm air temperature setting
The air temperature can be reduced during the drying process by
touching the rear push-button with your left hand, and increased by
touching the front push-button.
ATTENTION:
The normal WC flush must not
be activated during the drying
process, as water can
otherwise get into the warm air
duct.
As the CLOSOMAT can be used to stimulate the bowels, to prevent
soiling of the open warm air nozzle, the drying process should be
stopped immediately in such circumstances!
17
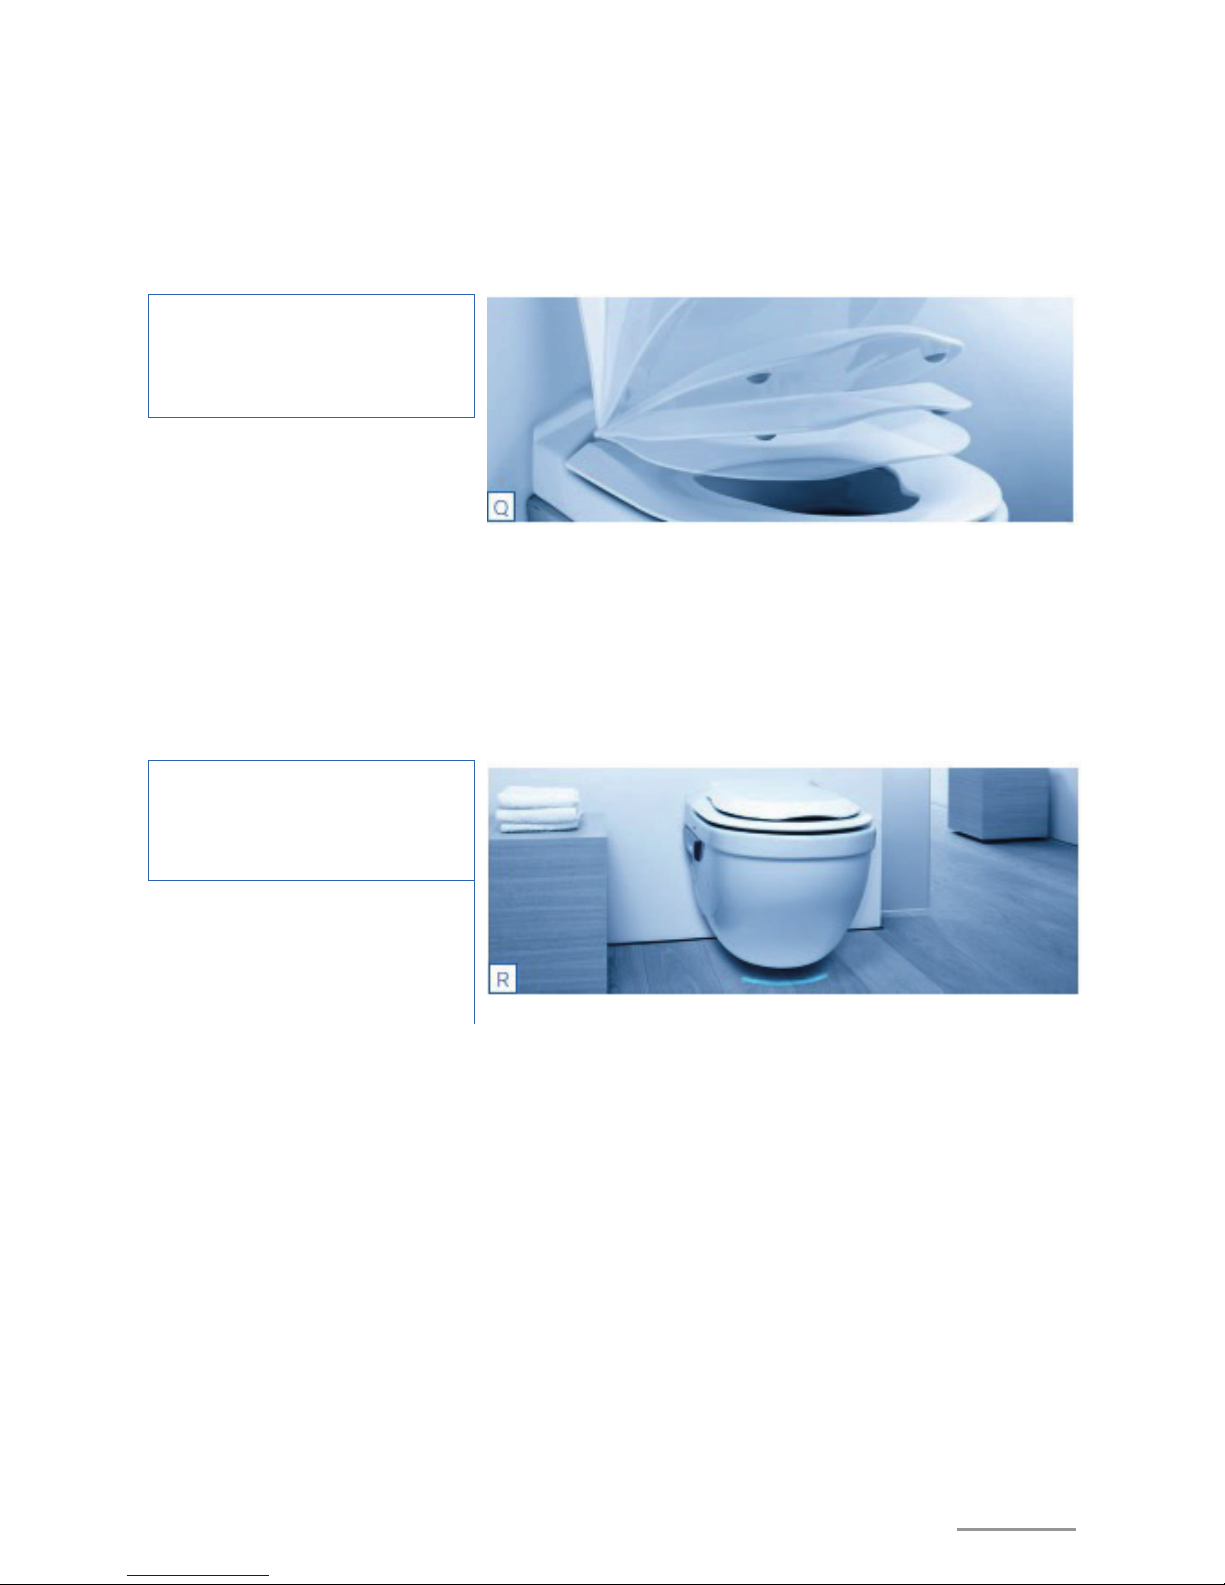
8. SOFT-CLOSE SEAT AND LID
The shock-absorbing technology installed as standard in the hinges
prevent the seat and lid from closing with a sudden impact (Photo Q).
This tried and tested special maintenance-free design from CLOSOMAT
provides end-position cushioning, but allows the seat and lid to be lifted
and easily closed again absolutely without resistance.
ATTENTION:
Do not press seat and lid
down manually.
9. ORIENTATION/OPERATING LIGHT
The blue arc projected onto the floor on the one hand shows that the unit
is switched on (Photo R), and at night-time also helps you find your way
if, for instance, you wish to avoid turning bright lights on.
NB:
If the light is flashing, please see
page 26.
17

18
18
10. BOILER ECONOMY SETTING
Normally CLOSOMAT keeps the shower water in the well-insulated
boiler always available at the right temperature. If the economy setting
is activated, the boiler only starts to heat up when you sit down. It then
takes five minutes for water to reach body temperature and be available.
This function is suitable for WCs not in regular use.
To activate the economy setting: the round
“push button” (Photo S) is located in the
control panel behind the aperture for the
active carbon filter compartment. Press
button and check: if the light is permanently
on, the economy setting is activated. During
the heating process, the button flashes in
both function options, whether the economy
setting is activated or not.
11. CLOSOMAT HYGIENE SYSTEM
Decades of experience and innovation lie behind the CLOSOMAT
Hygiene System (CHS™). The original focus was on personal hygiene,
ergonomics and comfort. This includes, amongst other things, unique
features such as:
• Simple, logical operation
• A comfortable sitting position
• Vertical shower spray
• Washing and drying over a clean bowl
Since then there have been other new developments, particularly from
a clinical/medical perspective, and the CLOSOMAT Asana’s technical
innovations take these into account. The boiler water undergoes 30
minutes’ heat treatment once a week. This action suppresses the
growth of bacteria and guarantees water quality. To ensure that the
shower water always remains at body temperature, the hot water is
mixed with fresh cold water via a sophisticated mixing system. In terms
of comfort, even with a shower flow rate of up to 5 litres/minute, this
unique system offers the possibility of showering at body temperature
for between 30 and 50 seconds.
19
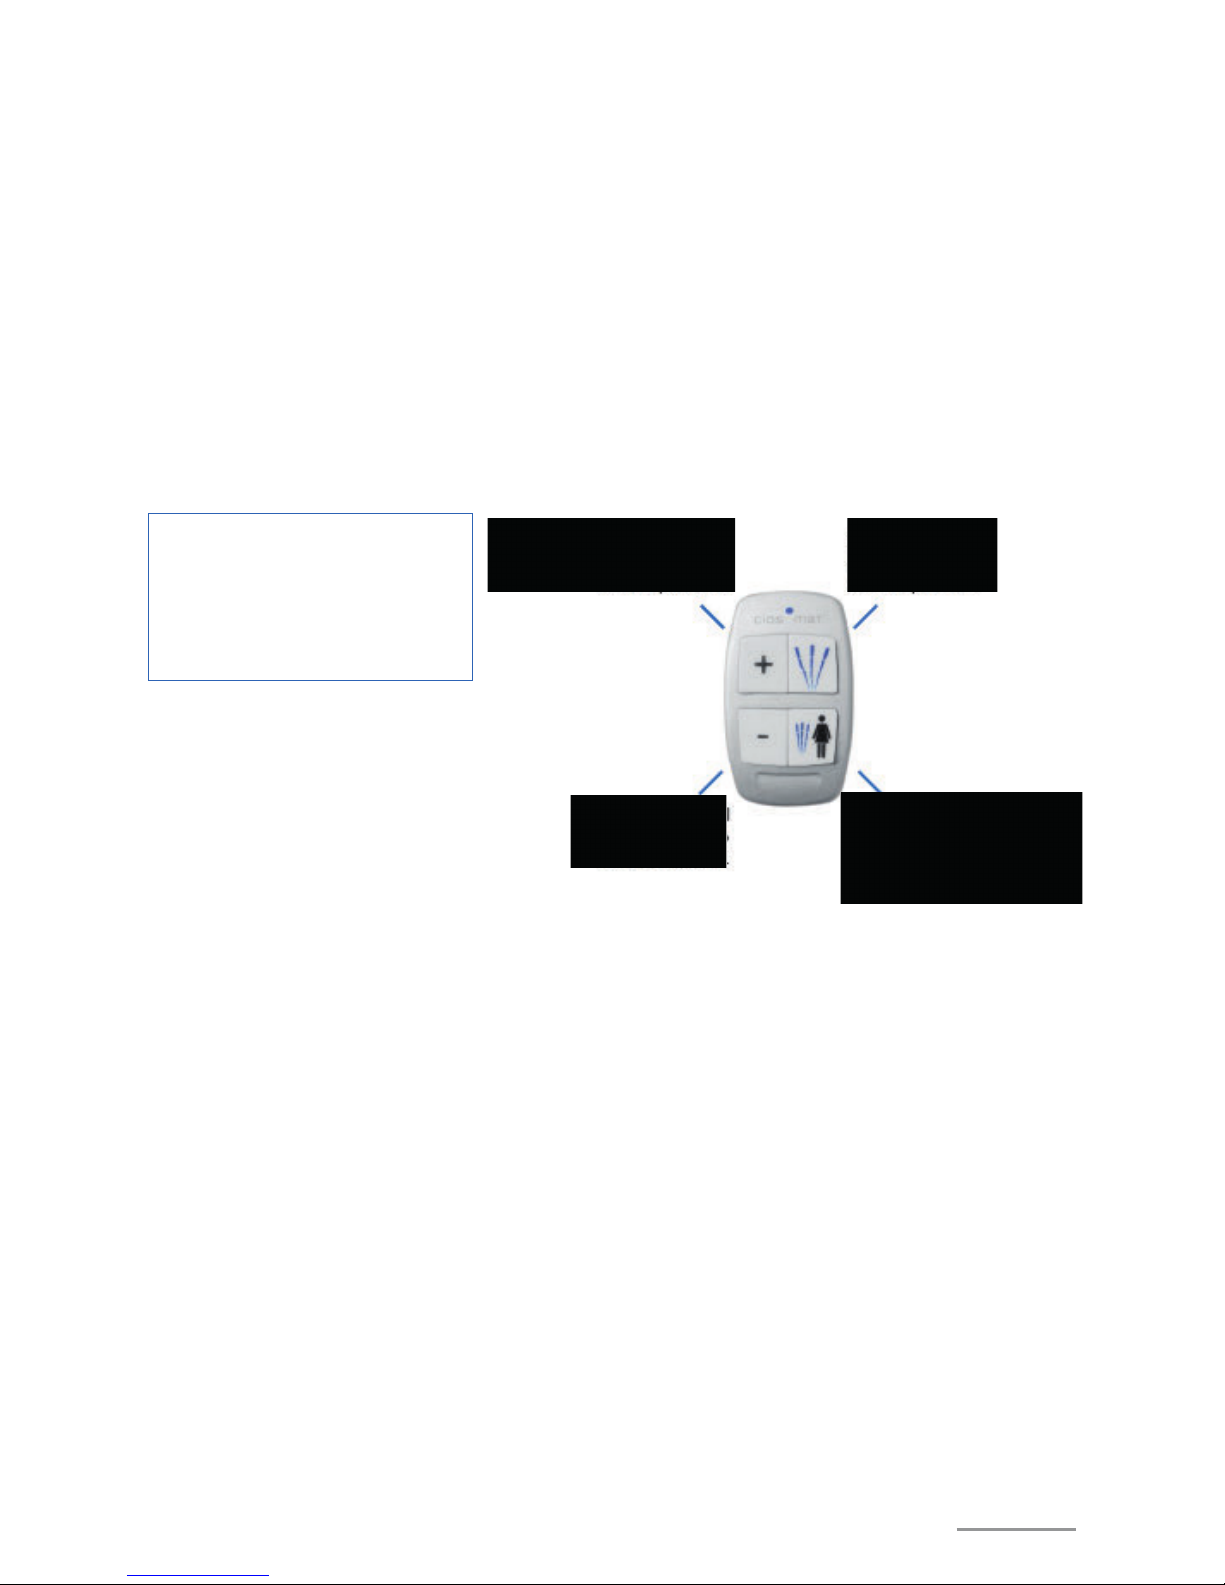
12. WIRELESS REMOTE CONTROL (OPTIONAL)
The Asana remote control makes use of 4 big buttons with the same
functions as the push-buttons on the toilet. This means that you will
quickly master its intuitive logic without having to read endless
instructions.
A further unique feature is that this remote control does not need
batteries. The radio signals are triggered by excitation of a piezo element
which, when affected by the audible and perceptible “click”, automatically
produces its own energy for a one-off “command”. So you don’t have to
worry about changing batteries – and it’s also more environmentally
friendly!
NB:
For showering, only use the touch
control so that the other functions
can still be called up (only one
button can be pressed at once).
“Boost” shower jet (or odour
extraction “off”)
see section 6.1.1
Bidet function
(
start/stop), see
section
6.1
Lady-shower (start/stop),
s
ee chapter 6.2 and
w
ellness options for bidet
function, see section
6.3
“Reduce” shower
jet, see section
6.1.1
19
20
20
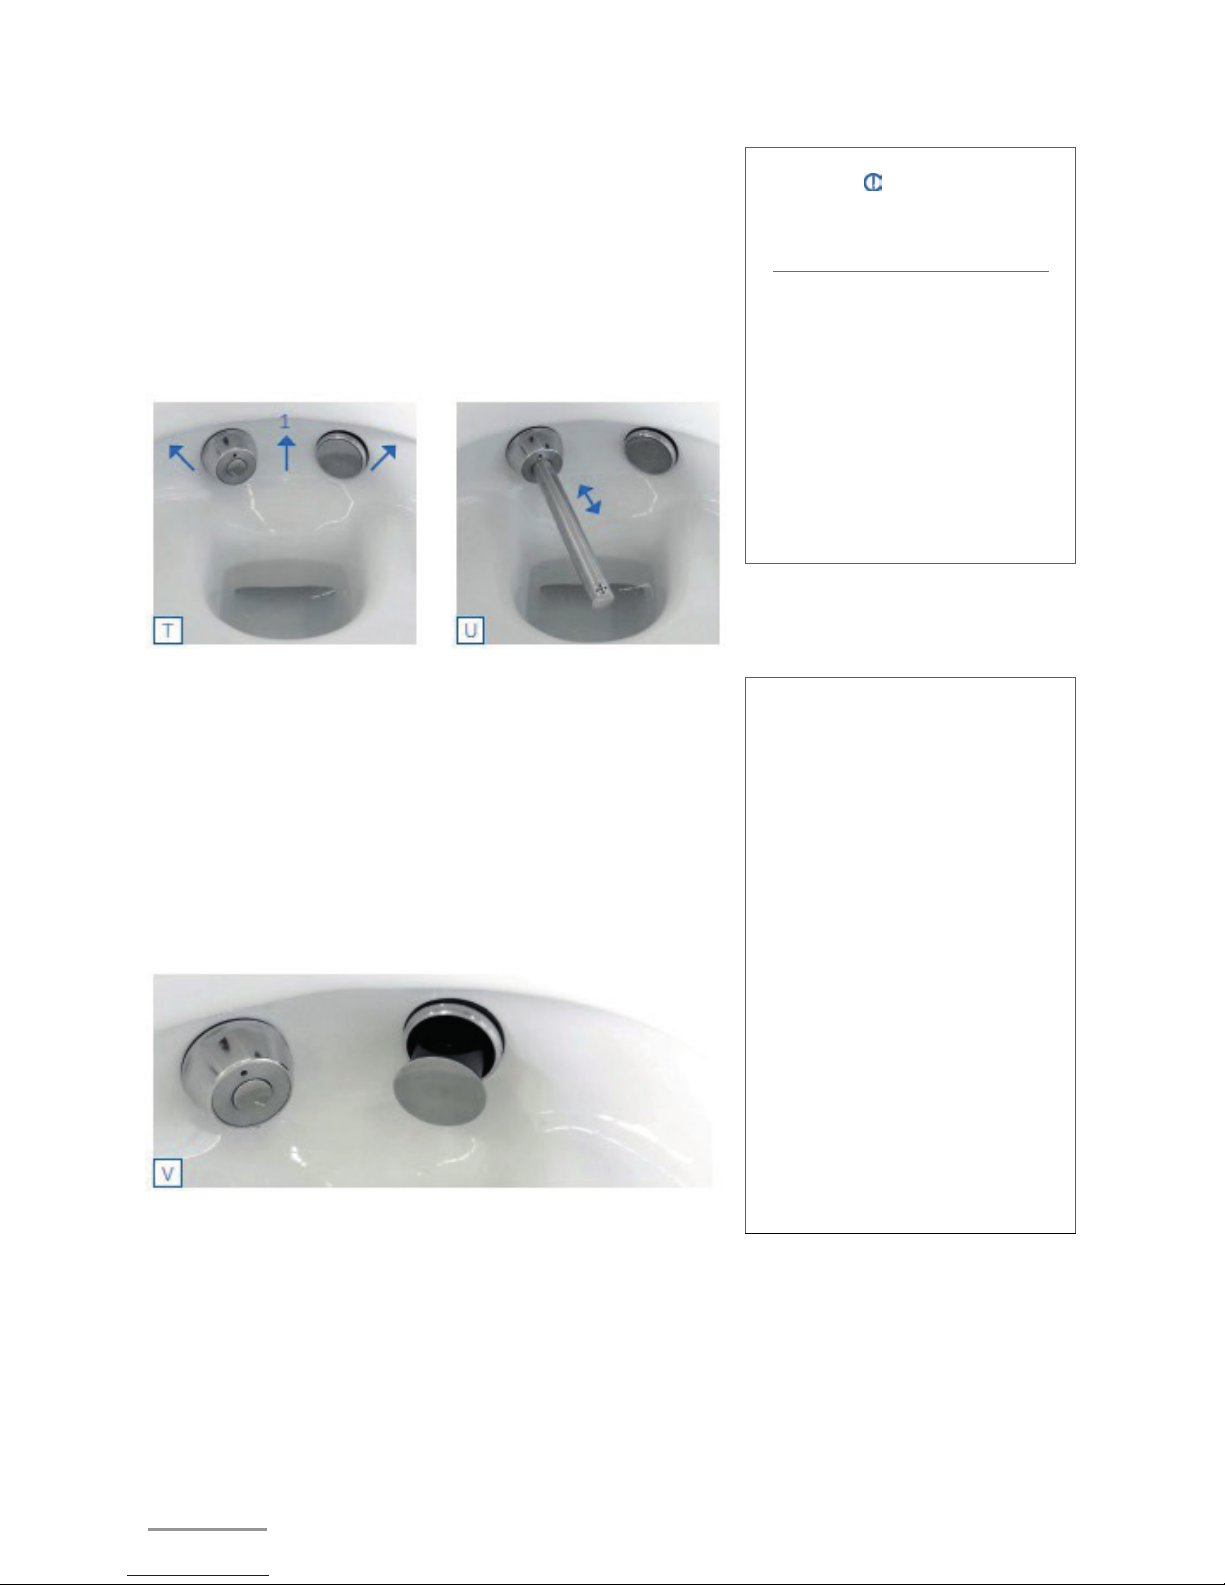
13. CARE AND CLEANING
CLOSOMAT should be cleaned by hand like a conventional toilet. The
bowl is made of high-quality sanitaryware porcelain and should be
cleaned with products that contain no bleach. Similarly, for the stainless
steel heads of the shower and warm water nozzles. If WC brushes are
used and strong descaling agents are left in the bowl to work, the seat
and lid should be raised. Do not use any permanent WC-deodorising
agents, either on the flushing rim or cistern (for environmental reasons
and to prevent blockages in the outflow). Ensure that the slot and
apertures 1 (Photo T) below the “en
closed” flushing rim remain free from
limescale deposits so that the full flushing action is always possible.
WARNING
Wear gloves during cleaning work,
and protect eyes from spray.
If the shower head fails to return
to its normal storage position
even after initialisation (switch
unit on and off again after 30
seconds), please contact
customer services.
13.1 SHOWER NOZZLE (PHOTO U)
The shower spray head which extends and retracts telescopically does
not get dirty either in its working position or when concealed. There is
also an integral system which sprays the nozzle every time it retracts.
If you nevertheless wish to make the nozzle accessible for cleaning
purposes, it can be extended “dry” as follows: when no weight is on the
seat, press the front push-buttons on the left and right simultaneously
for at least 2 seconds. The nozzle will remain in this position for 10
minutes before it automatically retracts and the warm air spray (Photo
V) extends out (13.2).
Table of contents
Other closomat Toilet manuals


Popular Toilet manuals by other brands


Kohler
Kohler K-4744 Installation and care guide

SFA
SFA SANICOMPACT Series installation instructions

American Standard
American Standard VF-1862 quick start guide

Cinderella
Cinderella Classic NA installation manual

Kohler
Kohler K-4026T-2A-0 Homeowner's guide

American Standard
American Standard CCAS3162 quick start guide


