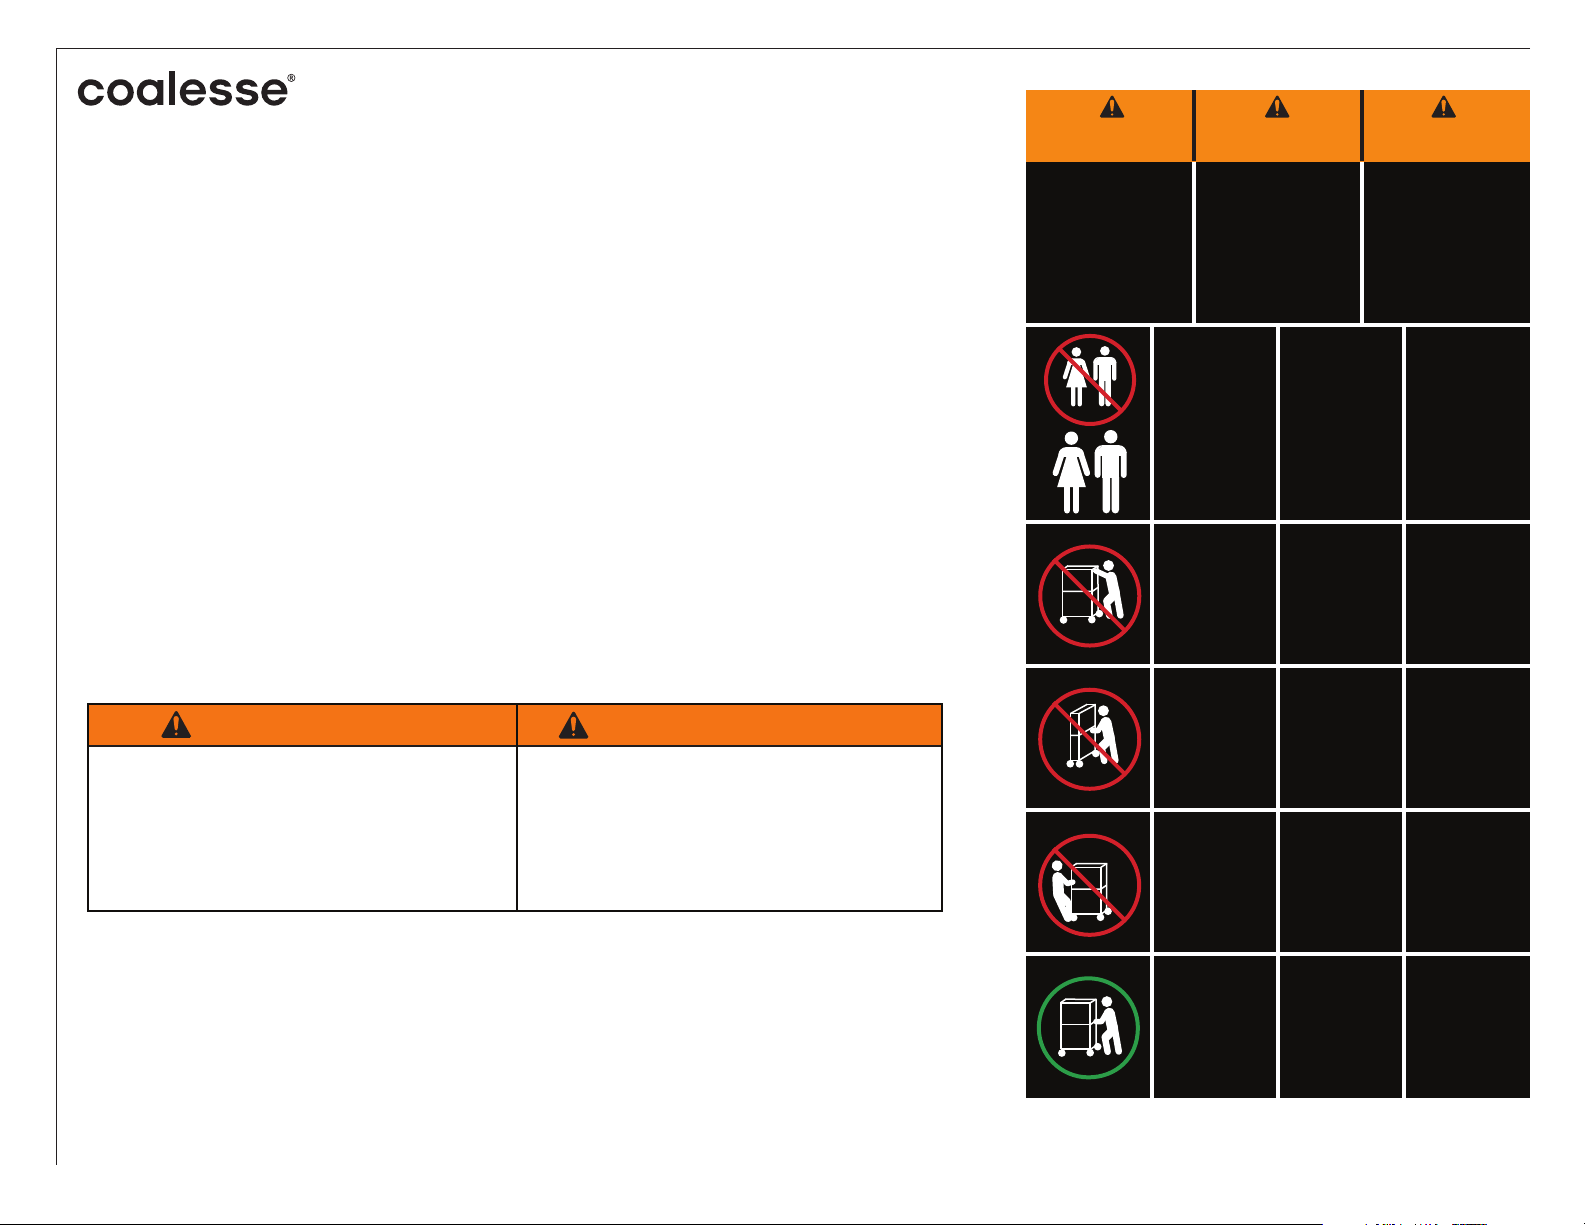
IMPORTANT SAFETY INSTRUCTIONS
When using an electrical furnishing, basic precautions should always be followed,
including the following: Read all instructions before using the media:scape.
DANGER
- To reduce the risk of electric shock:
Always unplug this furnishing from the electrical outlet before cleaning.
DANGER
- Pour réduire les risques de choc électrique:
Débranchez toujours cet appareil de la prise électrique immédiatement après son
utilisation.
WARNING
- To reduce the risk of burns, fire, electric shock, or injury to
persons:
1) Unplug from outlet before putting on or taking off parts.
2) Use this furnishing only for its intended use as described in these instructions. Do
not use attachments not recommended by the manufacturer.
3) Never operate this furnishing if it has a damaged cord or plug, Return the
furnishing to a service center for examination and repair.
4) Keep the cord away from heated surfaces.
5) Never operate the furnishing with the air openings blocked. Keep the air openings
free of lint, hair, and the like.
6) Never drop or insert any object into any opening.
7) Do not use outdoors.
8) Do not operate where aerosol (spray) products are being used or where oxygen is
being administered.
9) Risk of Electric Shock - Connect this furnishing to a properly grounded outlet only.
See Grounding Instructions.
AVERTISSEMENT
- Pour réduire les risques de brûlures,
d'incendie, d'électrocution ou de blessures aux personnes:
1) Débranchez de la prise de courant avant d'ajouter ou de retirer des pièces.
2) Utilisez cet appareil que pour son utilisation prévue telle que décrite dans ces
instructions. Ne pas utiliser de fixations non recommandées par le fabricant.
3) Ne faites jamais fonctionner cet appareil s'il dispose d'une prise ou d'un cordon
endommagé. Renvoyez l'appareil à un centre de services pour examen et réparation.
4) Gardez le cordon loin de surfaces chauffées.
5) Ne faites jamais fonctionner l'appareil avec des orifices d'air bloqués. Assurez-vous
que les orifices d'air ne sont pas bloqués par des fibres, des cheveux, etc.
6) N'insérez jamais ou ne laissez jamais tomber n'importe quel objet dans n'importe
quel orifice.
7) N'utilisez jamais à l'extérieur.
8) Ne faites pas fonctionner lorsque des produits aérosol (bombe) sont utilisés ou
lorsque l'oxygène est administré.
9) Risque d'Electrocution - Branchez cet appareil seulement à une prise de courant
correctement mise à la terre. Voir Instructions de Mise à la Terre.
SAVE THESE INSTRUCTIONS
This appliance is intended for commercial use only.
Connect this appliance to a properly grounded outlet only. See Grounding Instructions.
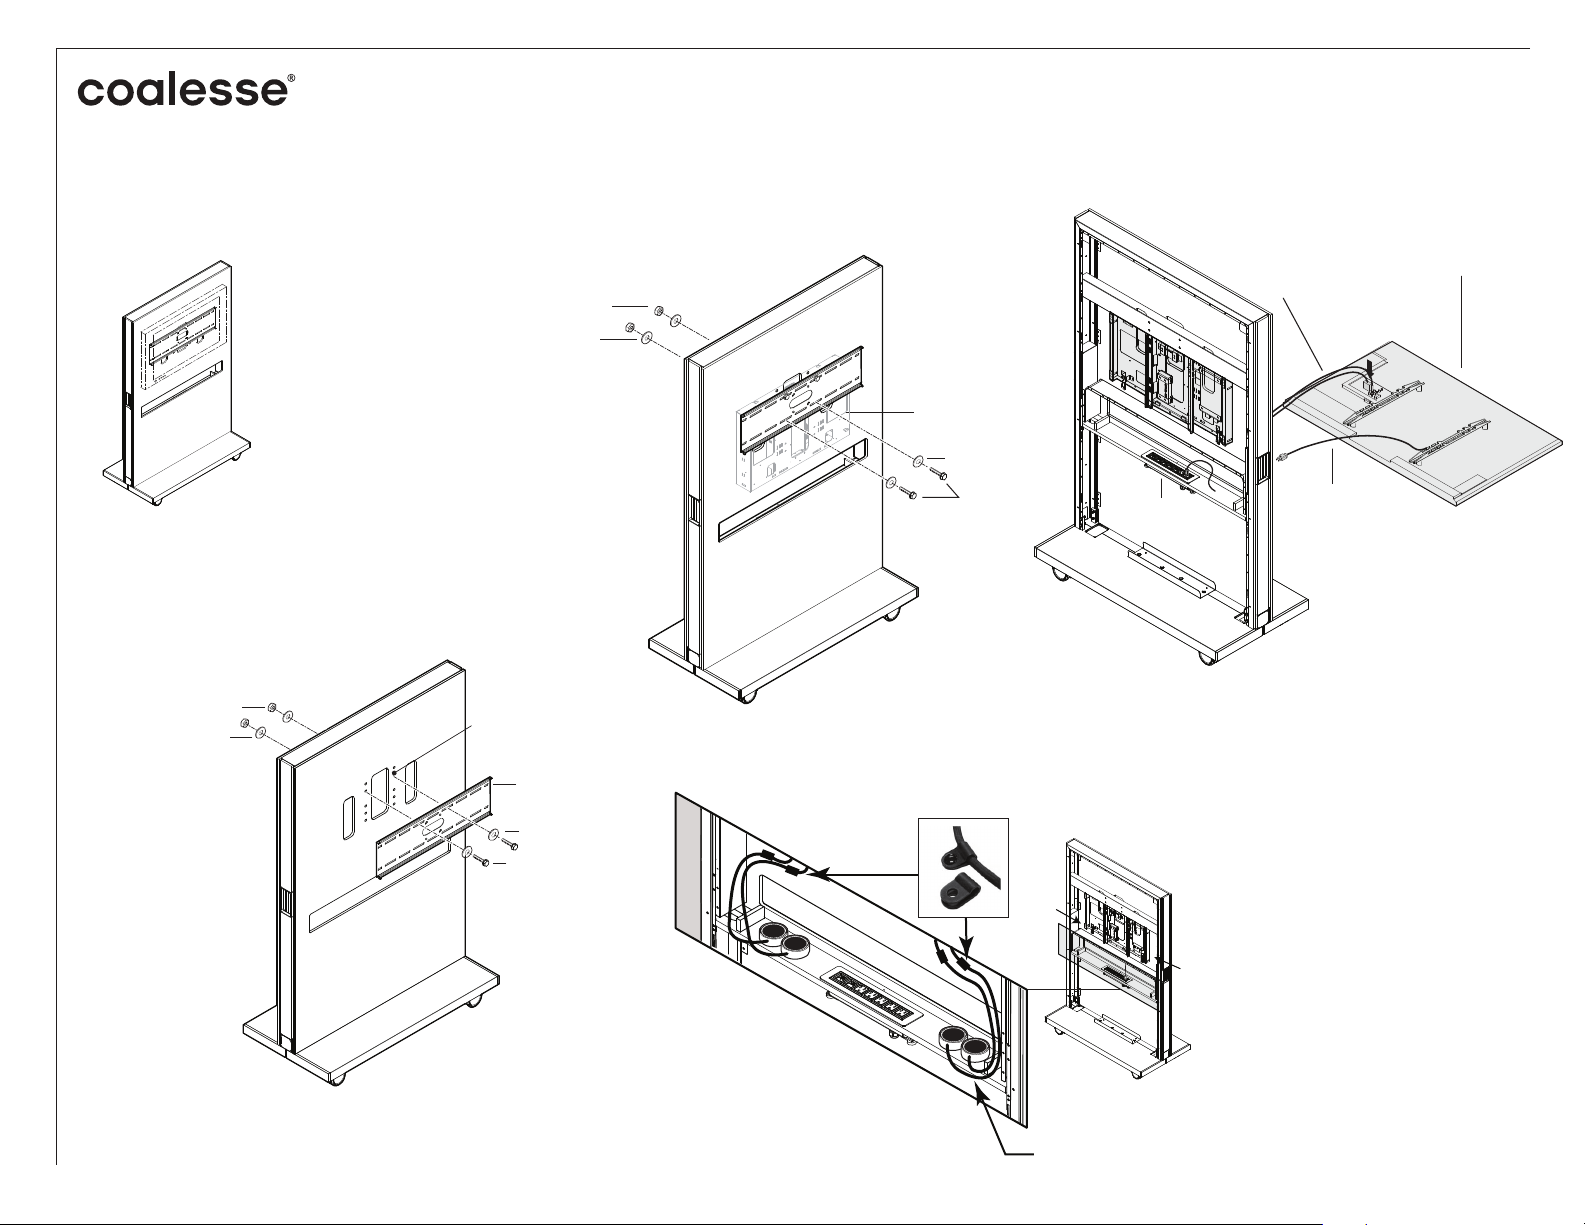
Operating Instructions
Please refer to the attached Installation Instructions.
User-Maintenance Instructions
The receptacle power block is equipped with a circuit breaker that will shut off power in
an overload condition. Press to reset the circuit breaker to restore power.
GROUNDING INSTRUCTIONS
This product must be grounded. If it should malfunction or breakdown, grounding
provides a path of least resistance for electric current to reduce the risk of electric
shock. This product is equipped with a cord having an equipment-grounding conductor
and a grounding plug. The plug must be plugged into an appropriate outlet that is
properly installed and grounded in accordance with all local codes and ordinances.
DANGER
- Improper connection of the equipment-grounding conductor
can result in a risk of electric shock. Check with a qualified electrician or serviceman if
you are in doubt as to whether the product is properly grounded. Do not modify the
plug provided with the product - if it will not fit the outlet, have a proper outlet installed
by a qualified electrician.
DANGER
- Le fait de ne pas brancher correctement le fil de mise à la terre
peut entraîner un risque de choc électrique. Consultez un électricien ou un expert en
réparation électrique en cas de doute quant au raccordement à la terre de l'appareil.
Ne modifiez pas la fiche dont est doté l'appareil; si vous n'arrivez pas à la brancher
dans la prise de courant, faites installer une fiche appropriée par un électricien qualifié.
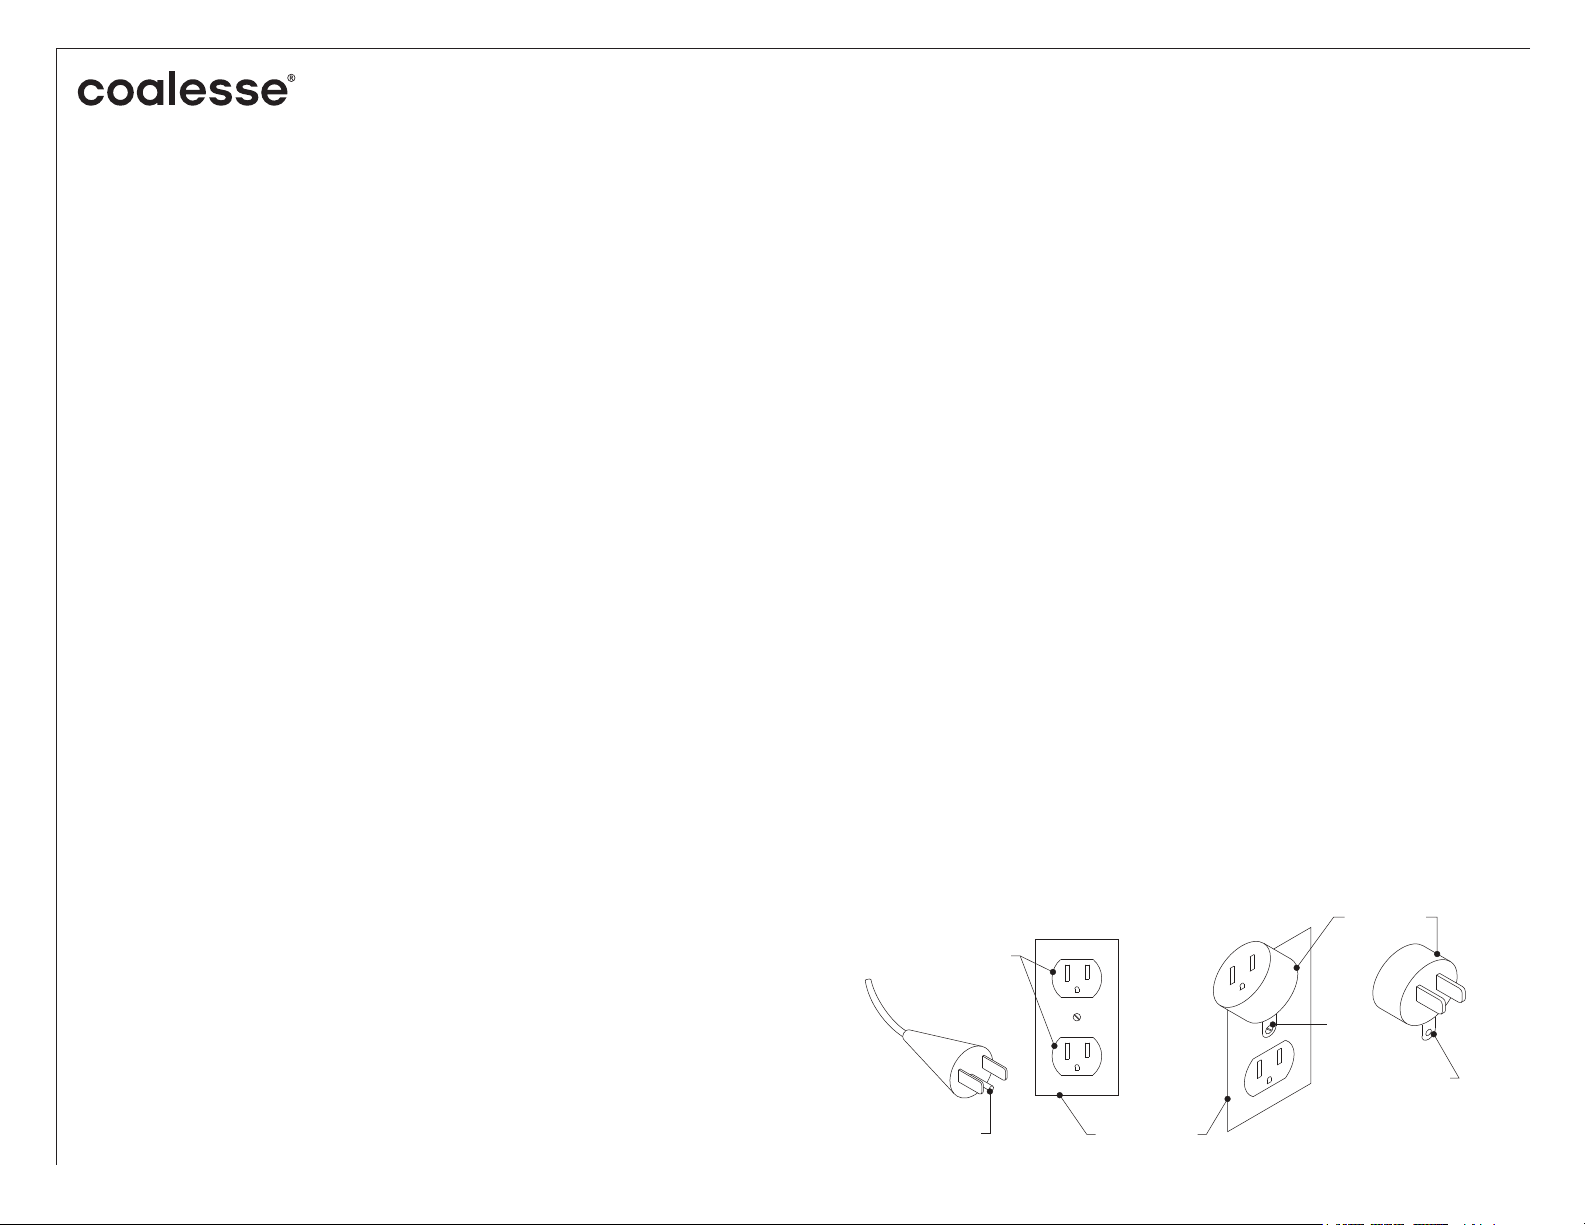
This product is for use on a nominal 120-V circuit and has a grounding plug that looks
like the plug illustrated in sketch A in Figure 67.1. Make sure that the product is
connected to an outlet having the same configuration as the plug. No adapter should
be used with this product.
GROUNDED
OUTLET
GROUNDING
PIN
GROUNDED
OUTLET BOX
Figure 67.1
Grounding methods
(A) (B)
METAL
SCREW
ADAPTER
TAB FOR
GROUNDING SCREW
Page 2 of 5
939500682 Rev E