4
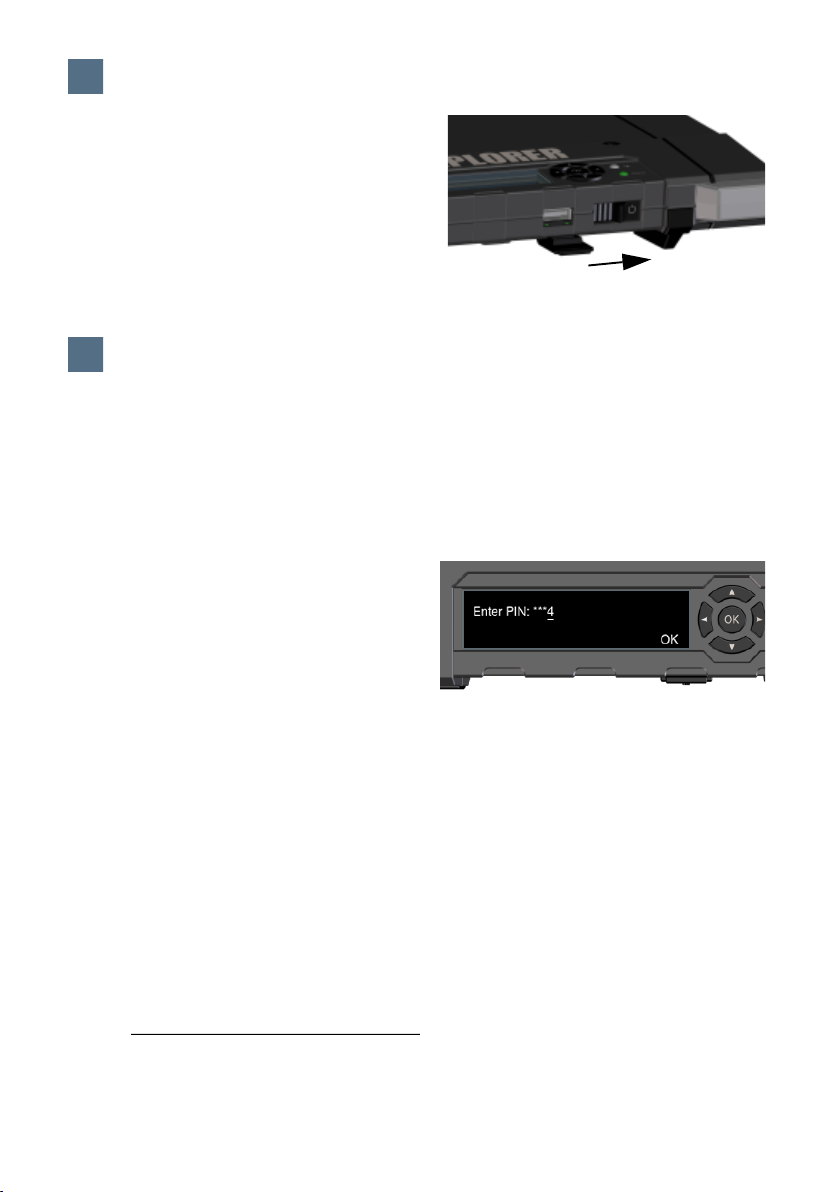
Slide and hold the power button until the
Status LED lights up. This may take some
seconds.
When the Status LED flashes slowly or is
constant green, and the display shows
Ready, the terminal is ready for use.
To switch off, hold the power button until
the Status LED flashes yellow.
This step is only needed if the SIM card for your EXPLORER 710 requires a PIN and you want
to communicate on the satellite network.
To enter the PIN from the display and keypad, do as follows:
a. When the display shows Enter PIN?,
highlight the text using the arrow keys
and press OK.
b. Press or a number of times until
the first digit is correct.
c. Press OK to go to the next digit.
The previous digit is indicated by a *.
d. After pressing OK to enter the last digit,
press OK again to apply the PIN.
For an overview of the display and keypad, see Display panel overview on page 11.
To enter the PIN from the web interface, do as follows:
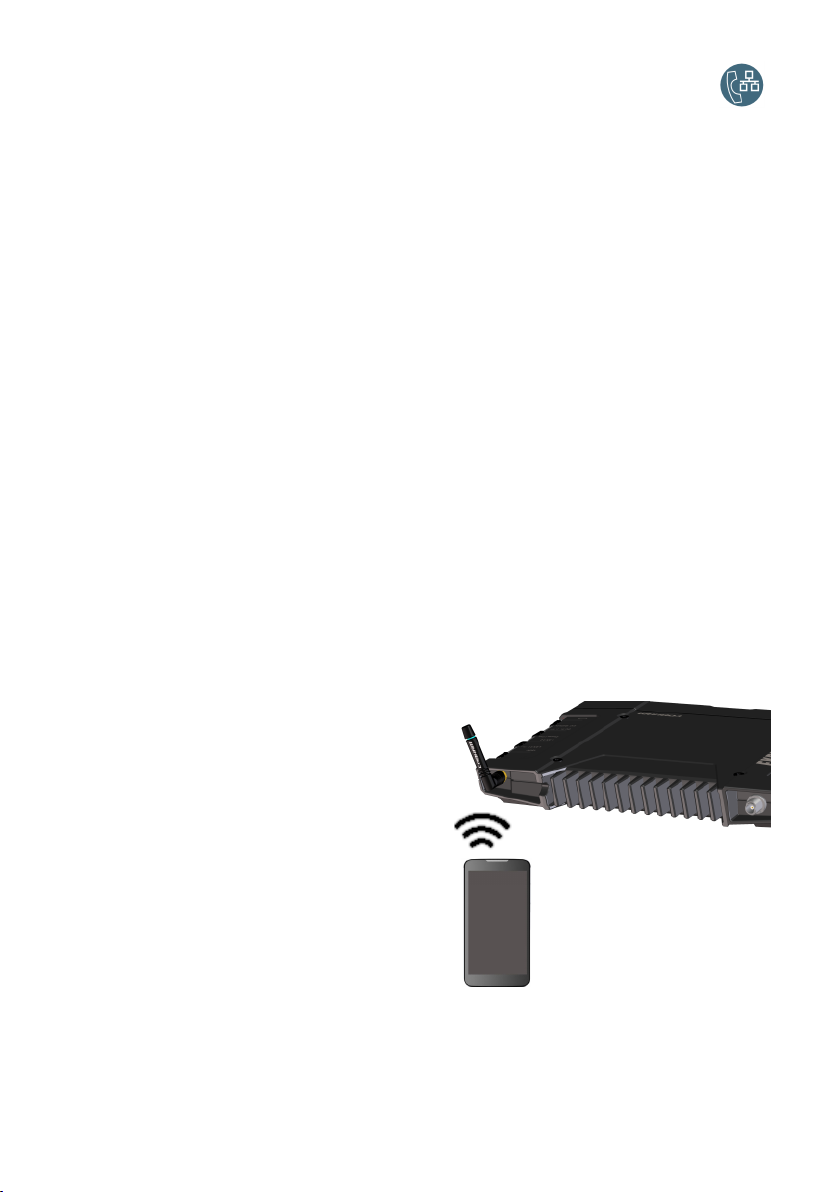
a. Connect a computer to the terminal
using the LAN or WLAN interface.
b. Start your Internet browser.
c. Enter “ut.bgan” in the address field.1
If a PIN is required, the web interface
will now prompt you for a PIN.
d. Type in the PIN and click OK.
e. If you do not enter a PIN code now, you
can enter it later from the alarm list.
Click at the top of the page to
access the list.
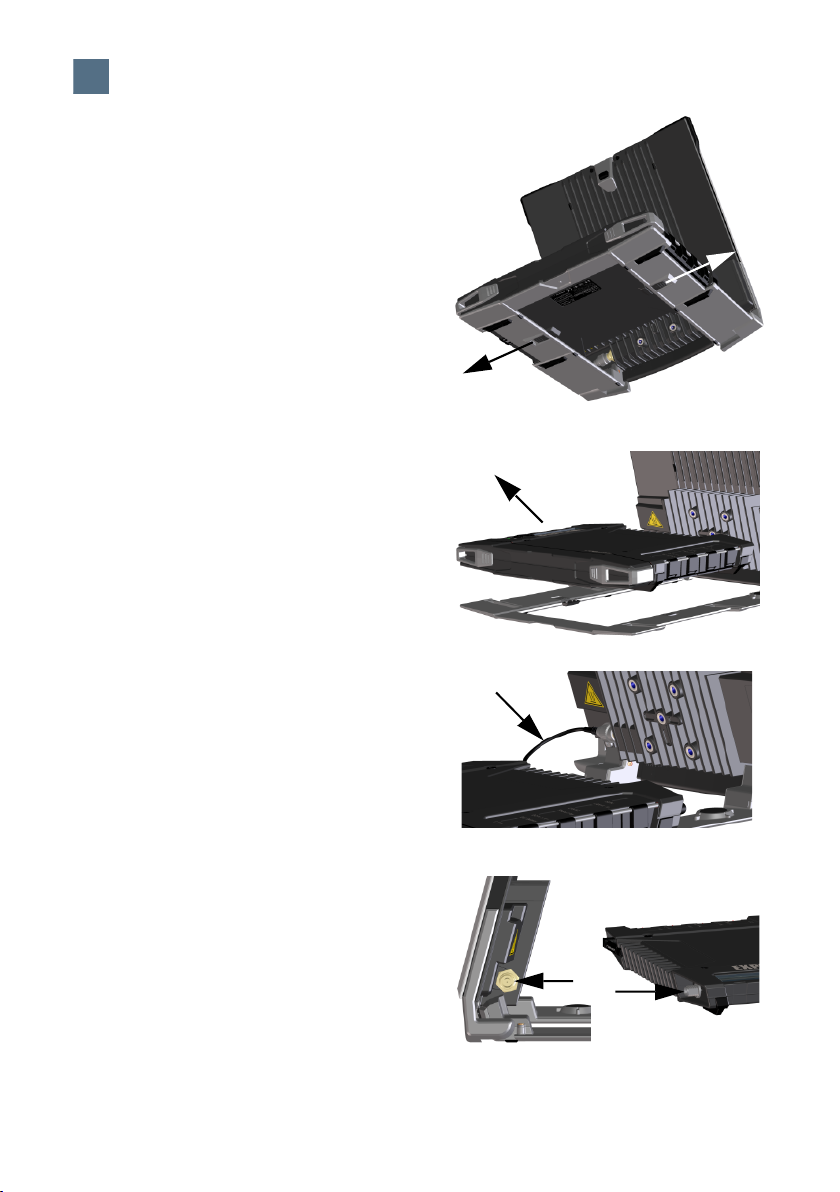
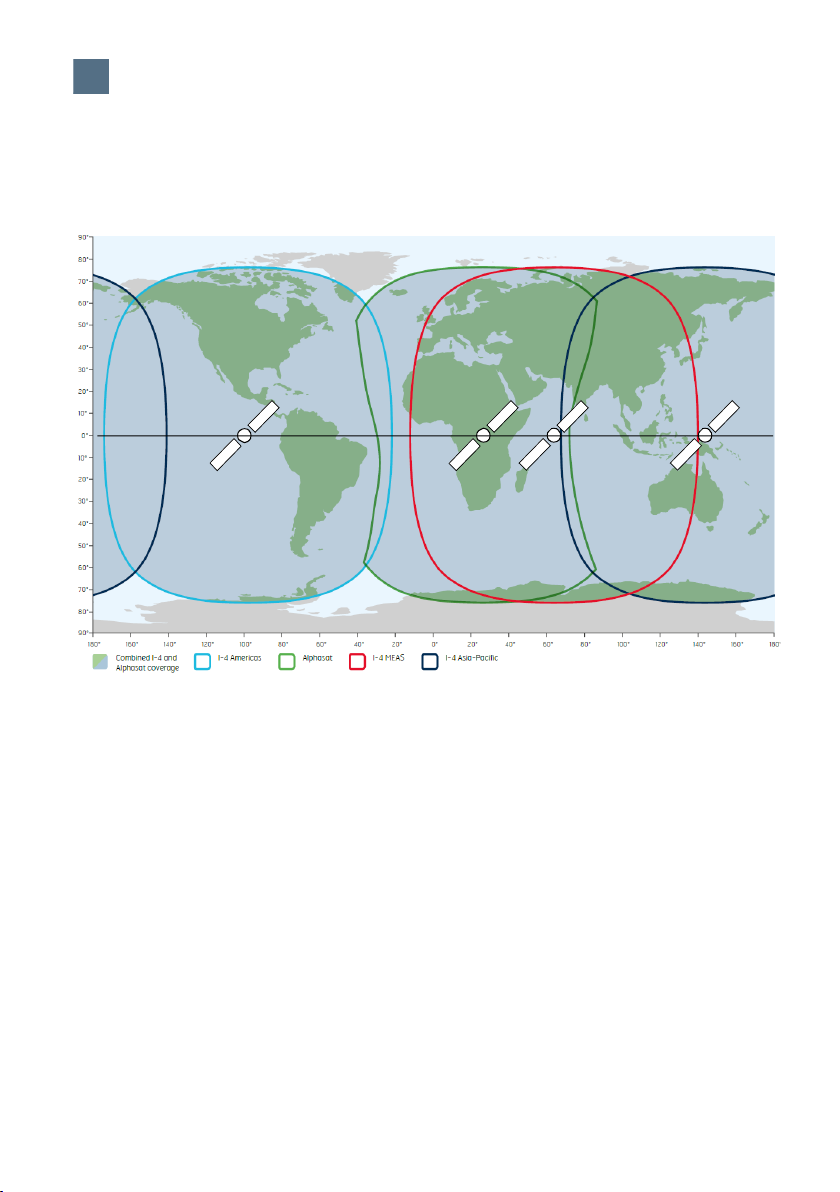
5
Switch on the EXPLORER 710
5
6
Enter the PIN (if necessary)
6
Enter PIN: **_
1. You can also enter the local IP address of the terminal (default 192.168.0.1). To see the
local IP address in the display, enter the menu and select Properties > IP Address.