manuals.online logo
Brands
  1. Home
  2. •
  3. Brands
  4. •
  5. Cobra
  6. •
  7. Computer Hardware
  8. •
  9. Cobra Fi2000 User manual

Cobra Fi2000 User manual

®23801 E. La Palma Ave., Yorba Linda, Ca 92887 Ph. 714.692.8180, Fax. 714.692.5016
www.fi2000r.com
04/11
1
*Cobra®recommends you always wear a helmet while r iding. Please never operate your motorcycle while under
the influence of alcohol and/or drugs. Enjoy the new look of your motorcycle and please ride safely.
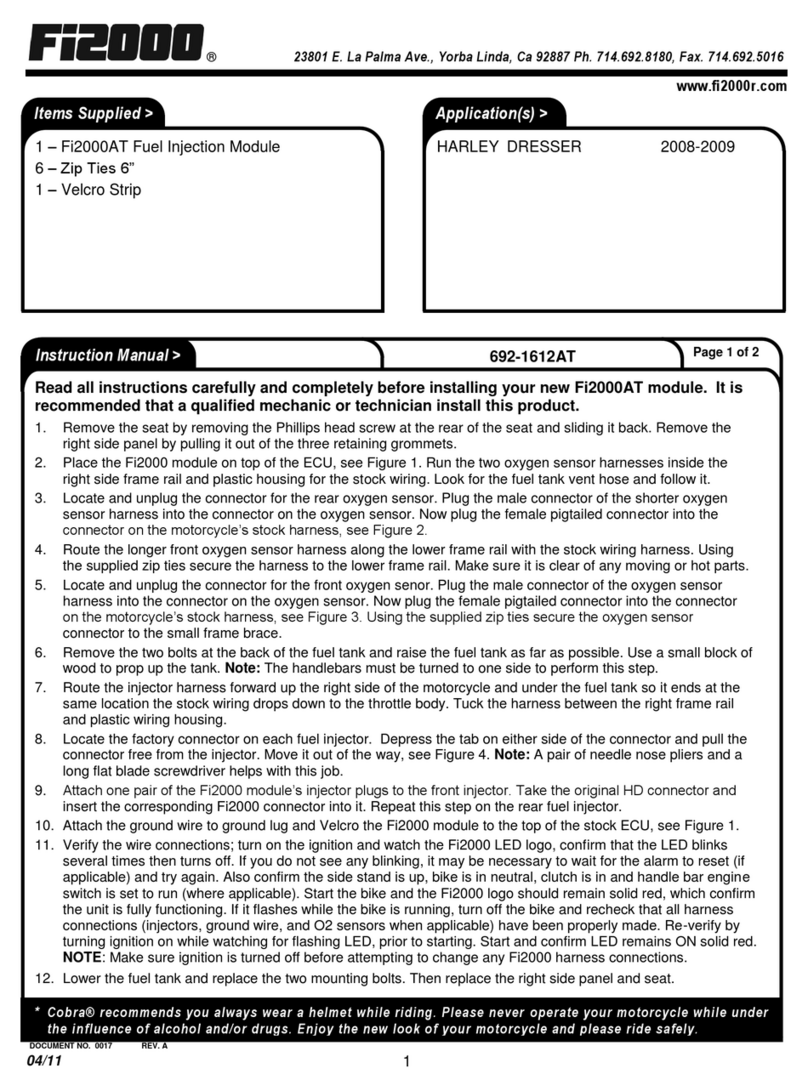
Items Supplied >
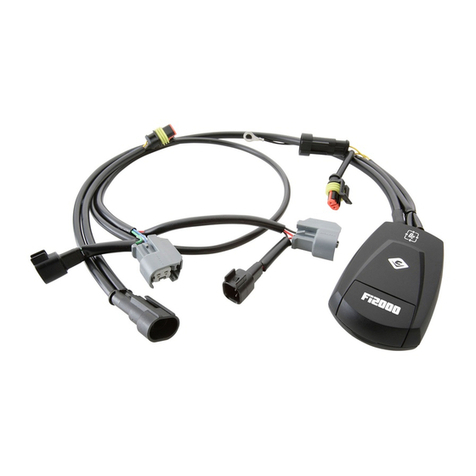
1 –Fi2000AT Fuel Injection Module
5 –Zip Ties 6”
2 –Velcro Strips
Application(s) >
HARLEY SPORTSTER 07-13
Instruction Manual >
Read all instructions carefully and completely before installing your new Fi2000AT module.
It is recommended that a qualified mechanic or technician install this product.
1. Remove the seat and left side cover, (first pull top of cover outward, then bottom of cover upward to release
from mounting tabs). Remove the bolt at the rear of the fuel tank and prop the tank up as high as possible
without striking the front of it on triple clamp to gain access to fuel injectors.
2. Locate the factory connector on each fuel injector. And by squeezing on both sides pull them away from the
injectors.
3. Disconnect the main fuse block located on the battery hold down strap and then Velcro the Fi2000 module to
the battery hold down strap so that the module housing is no higher than the top of the battery. Now use the
extra Velcro pad to re attach the main fuse block, see Figure 1.
4. Feed the Fi2000 wire harness up along the left side of the frame, resting in the plastic main harness guide so
the connectors end up in the injector area. The fuel injectors can rotate on their base, rotate them towards the
left side, (towards the horn), as far as they will go to allow Fi2000 connector to fit on injector. Do not force them
any further then they will rotate.
5. Using the longer Fi2000 injector harness, mate the Fi2000 female connector onto the front fuel injection
connector, (it will look a little different then the stock female Harley connector.) Plug the male Fi2000 connector
into the original female Harley connector. Repeat using the shorter harness for the rear injector. Make sure to
keep the correct orientation for the front and rear injectors and connector harnesses, see Figure 2.
6. It is now time to install the oxygen sensor harnesses. Locate the rear O2connector that is directly behind the
rear cylinder on the right hand side. Slide it downwards until it releases then unplug it. Plug the corresponding
Fi2000 connectors from the shorter harness into the Harley connectors and clip the Harley female connector
back onto its original mounting spot.
7. Now route the longer O2harness down and forward along the left side bottom frame rail. Ziptie the harness in 3
places. The connectors will end up at the front O2connection. Unplug the factory connection and again plug the
corresponding Fi2000 connectors into the matching Harley connectors. Use one ziptie and the factory U-clip to
hold the connections to the frame down tube. See Figure 3.
8. Attach the ground wire to the ground lug on the backside of the primary chain case area.
9. Verify the wire connections; turn on the ignition and watch the Fi2000 LED logo, confirm that the LED blinks
several times then turns off. If you do not see any blinking, it may be necessary to wait for the alarm to reset (if
applicable) and try again. Also confirm the side stand is up, bike is in neutral, clutch is in and handle bar engine
switch is set to run (where applicable). Start the bike and the Fi2000 logo should remain solid red, which confirm
the unit is fully functioning. If it flashes while the bike is running, turn off the bike and recheck that all harness
connections (injectors, ground wire, and O2 sensors when applicable) have been properly made. Re-verify by
turning ignition on while watching for flashing LED, prior to starting. Start and confirm LED remains ON solid red.
NOTE: Make sure ignition is turned off before attempting to change any Fi2000 harness connections.
10. Re-install the seat and left side cover.
692-1620AT
Page 1 of 2
DOCUMENT NO. 0017 REV. A
®23801 E. La Palma Ave., Yorba Linda, Ca 92887 Ph. 714.692.8180, Fax. 714.692.5016
www.fi2000r.com
04/11
2
Instruction Manual >
692-1620AT
Page 2 of 2
DOCUMENT NO. 0018 REV. A
FIGURE 1
Fi2000 MODULE
FRONT
Fi2000 HARNESS
ROUTED TO
FUEL
INJECTORS
GROUND WIRE
CONNECTED TO
FRAME LUG
REAR O2
SENSOR
CONNECTED
WITH REAR
Fi2000 REAR
HARNESS
HARNESS ROUTED
TO BOTTOM LEFT
FRAME RAIL AND
FRONT O2SENSOR
CONNECTOR
FIGURE 2
REAR Fi2000 INJECTOR
CONNECTOR ON REAR
INJECTOR
ORIGINAL REAR FEMALE
H.D. INJECTOR
CONNECTOR WITH MALE
Fi2000 CONNECTOR
FRONT Fi2000 INJECTOR
CONNECTOR ON FRONT
INJECTOR
ORIGINAL FRONT FEMALE
H.D. INJECTOR
CONNECTOR WITH MALE
Fi2000 CONNECTOR
FIGURE 3
Fi2000
HARNESS
WITH O2
SENSOR
CONNECTOR
STOCK
HARNESS
WITH Fi2000
FEMALE
HARNESS
CONNECTOR
LEFT FRONT
FRAME DOWN
TUBE
NOTE: For California riders we offer Air Resources Board approved Fi2000R ARB units. (ARB E.O. No. D-633-1). All
other Fi2000 models are not legal for street use in California.

Other Cobra Computer Hardware manuals

Cobra Fi2000 User manual

Cobra

Cobra Fi2000 User manual

Cobra Fi2000 User manual

Cobra

Cobra Fi2000 User manual

Popular Computer Hardware manuals by other brands

Renesas M37515T-PTC user manual

Renesas

Renesas M37515T-PTC user manual

NXP Semiconductors TWR-SB0410-36EVB user guide

NXP Semiconductors

NXP Semiconductors TWR-SB0410-36EVB user guide

Roland VS20-VGA owner's manual

Roland

Roland VS20-VGA owner's manual

Siemens SIMATIC CP 541 manual

Siemens

Siemens SIMATIC CP 541 manual

Sierra Wireless AirCard 59x quick start guide

Sierra Wireless

Sierra Wireless AirCard 59x quick start guide

Clas Ohlson ExpressCard BU3020 instruction manual

Clas Ohlson

Clas Ohlson ExpressCard BU3020 instruction manual

evertz 3067VIP-3G-36x4 user manual

evertz

evertz 3067VIP-3G-36x4 user manual

Mercury Security M5-2K Installations and specifications

Mercury Security

Mercury Security M5-2K Installations and specifications

Pico Macom PFAP550MS Installation and operation manual

Pico Macom

Pico Macom PFAP550MS Installation and operation manual

LC-POWER Gaming 978BG user manual

LC-POWER

LC-POWER Gaming 978BG user manual

Analog Devices ADRV902 Series troubleshooting guide

Analog Devices

Analog Devices ADRV902 Series troubleshooting guide

Leadtek W05G0194 Quick installation guide

Leadtek

Leadtek W05G0194 Quick installation guide

Intel BX80623I32100 datasheet

Intel

Intel BX80623I32100 datasheet

LA Audio MPX10 Operation manual

LA Audio

LA Audio MPX10 Operation manual

Bull 5088 installation manual

Bull

Bull 5088 installation manual

AXIOMTEK eBOX560-300-FL Quick installation guide

AXIOMTEK

AXIOMTEK eBOX560-300-FL Quick installation guide

Korg EXB-PCM-03 PRODUCT SUPPORT & FAQ

Korg

Korg EXB-PCM-03 PRODUCT SUPPORT & FAQ

H3C LSXM1SFF08B1 Installing and Removing

H3C

H3C LSXM1SFF08B1 Installing and Removing

manuals.online logo
manuals.online logoBrands
  • About & Mission
  • Contact us
  • Privacy Policy
  • Terms and Conditions

Copyright 2025 Manuals.Online. All Rights Reserved.