English
Getting Started Page 7Getting Started Page 7
English
Install the Batteries
Remove the battery compartment door by slid-1.
ing it toward the base of the camera.
Insert two (2) “AA” alkaline batteries. Be sure to2.
match their polarities to those indicated in the
diagram inside the battery compartment.
Replace the battery compartment door and3.
snap it into place.
The battery used in this device may present
a re or chemical burn if mistreated. Do not
disassemble, incinerate, or heat the batteries.
Used batteries should be disposed of safely.
Keep batteries out of the reach of children.
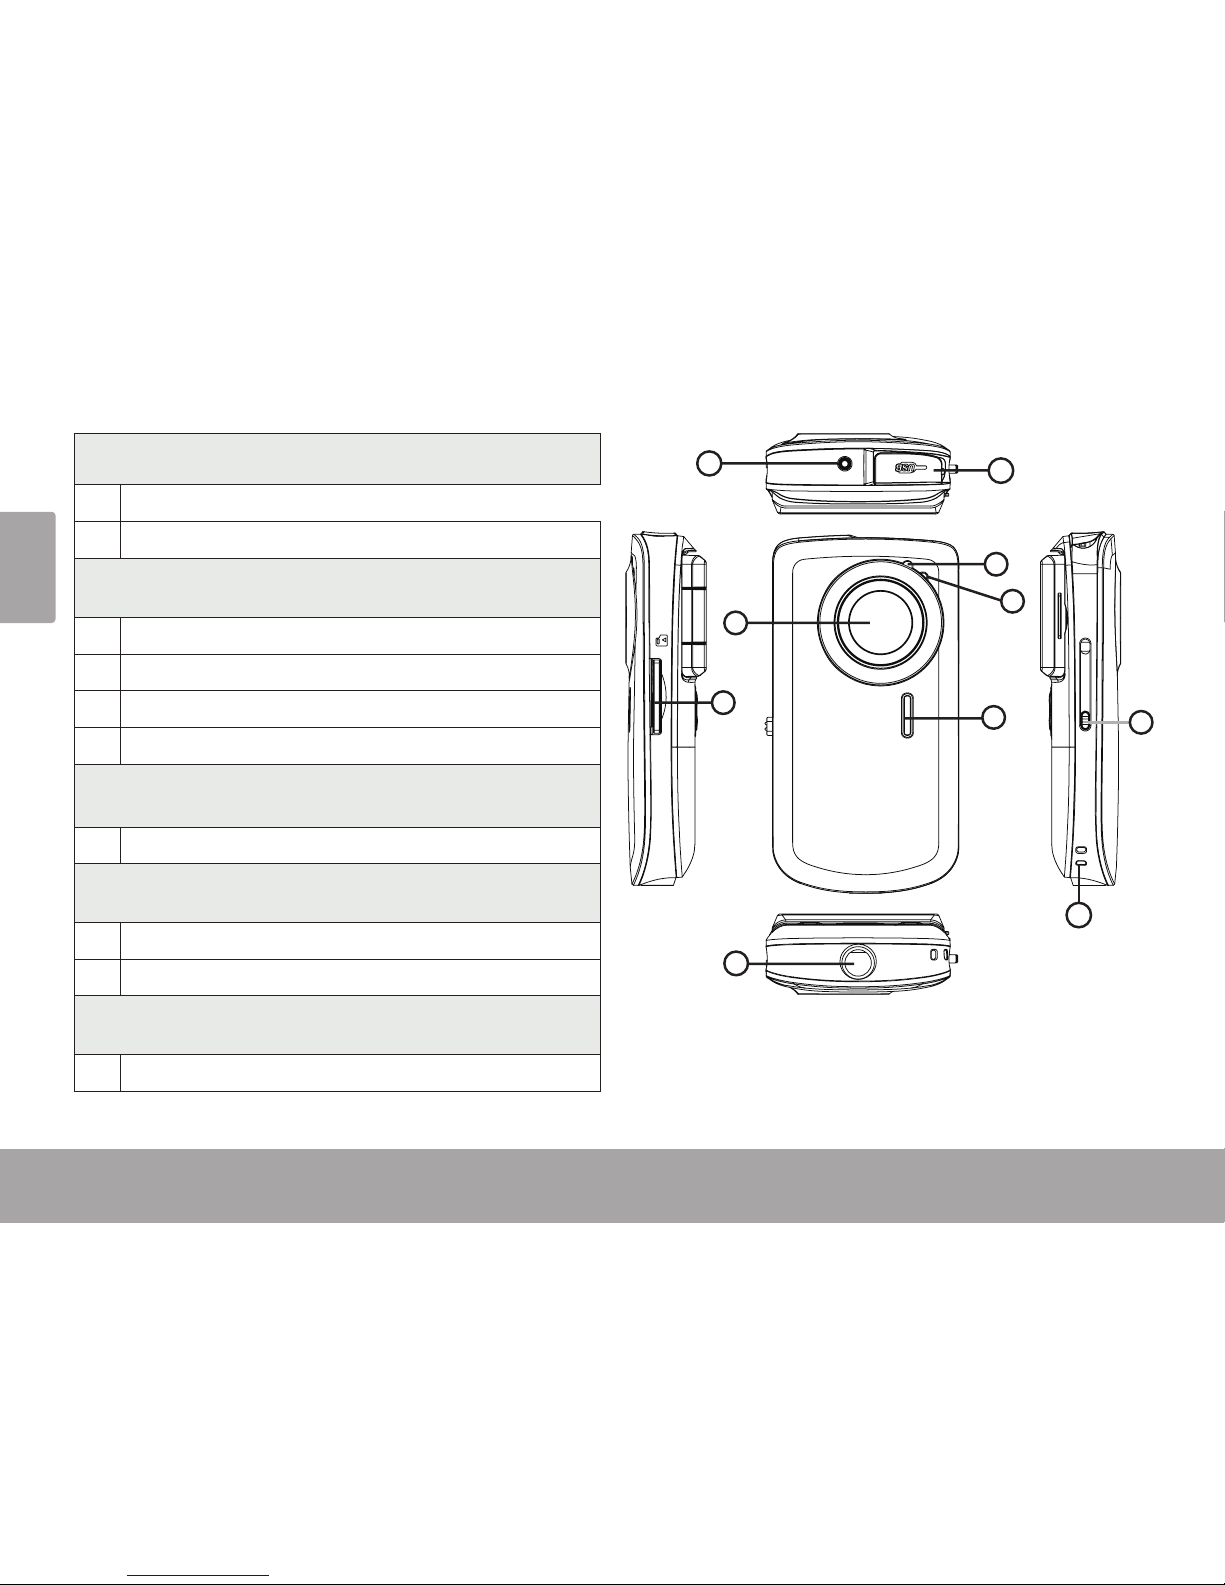
Insert a Memory Card
This camera records to SD or SDHC memory cards.
The maximum supported card size is GB.
Make sure that the write1.
protection switch on the
memory card is set to the
“unlocked” position.
Install the memory card by2.
inserting it gently into the
card slot on the left side of
the video camera. Push the
card until it clicks into place. Make sure the card
is properly aligned as indicated by the marking
next to the card slot.
To release and remove the card, press the card3.
in; it will spring out of the slot. Grasp the card by
its edge to remove it.
To avoid data corruption, turn o the digital
video camera before inserting or removing
a memory card.
Getting StartedÂ
Please read and complete the following steps to begin using your digital video camera.