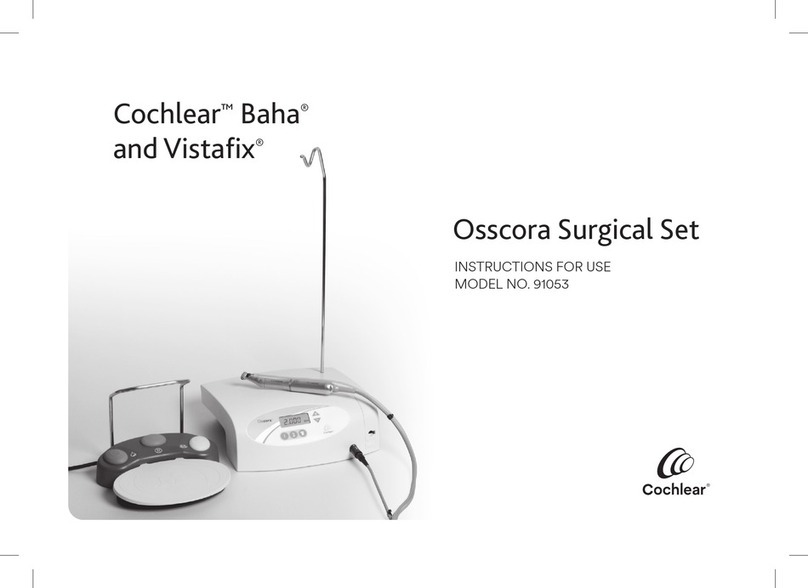
Cochlear Osscora 91051 User manual

Osscora™Surgical Set
Instructions for Use
Model no. 91051/91052/91053

Symbols
Warning
Risk of injury.
Attention
Important notes to prevent
damage occurring.
General explanations
Without risk to
persons or objects.
Sterilisable
Up to the stated temperature.
Thermo washer
Disinfectable.
Only for USA
Caution: Federal law (USA) restricts this device to sale by or on the order of a medical practitioner.

Contents
Chapter Page
10. Factory settings 17
11. Control unit operation 19
12. Error messages 23
13. Disinfection, cleaning, sterilisation 25
14. Osscora contra-angle handpiece 28
15. Osscora accessories 44
16. Servicing 45
17. Technical data 47
Chapter Page
1. Introduction 4
2. Safety notes 5
3. Unpacking 8
4. Equipment supplied 9
5. Description of front panel 10
6. Description of rear panel 11
7. Description of motor with cable 12
8. Starting operation - General 13
9. Starting operation - Foot control 14

English
4
1. Introduction
Responsibility of the manufacturer
Cochlear Bone Anchored Solutions AB can only
accept responsibility for the safety, reliability and
performance of the Osscora surgical set when
there is compliance with the following directions:
• TheOsscorasurgicalsetmustbeusedin
accordance with these Instructions for Use.
• TheOsscorasurgicalsethasnocomponents
which can be repaired by the user. Assembly,
modifications or repairs must be undertaken by
authorised personnel only.
• Theelectricalinstallationatthepremisesmust
comply with the regulations applicable in your
country.
• Unauthorisedopeningoftheequipmentinvalidates
all claims under warranty and any other claims.
For your safety and the safety of your patients
These Instructions for Use explain how to use your
Cochlear product. However, we must also warn
against possible hazardous situations. Your safety, the
safety of your team, and of course, the safety of your
patients is of paramount importance to us.
It is therefore essential to read the safety notes on
pages 5 to 7.
Intended use
Osscora surgical set with contra-angle handpiece is intended to
be used for Baha®and/or Vistafix®surgery including:
• Dermatomeuse
• Drilling
• Threadcutting
• Implantplacementandremoval
Osscora surgical set with contra-angle handpiece is intended to
be used in operating rooms and to be used by trained surgeons
and operating room staff.
Osscora surgical set is CE-marked according to Medical Device
Directive 93/42/EEC.

English
5
2. Safety notes
Cardiac pacemaker function
Use of the Osscora surgical set involves the
generation of magnetic fields, which are below the
interference threshold limit according to EN 50061
Ad1. Even under adverse conditions, there is no
likelihood of serious harm to the patient. The Osscora
surgical set is designed for the intermittent operating
mode S3 with an operating time of 4 minutes and a
pause time of 10 minutes.
Please ensure that you carry out the following
instructions:
– Only fit the contra-angle handpiece when the
motor is at a complete standstill.
– Never touch rotary instruments which are still
rotating.
– Never touch the chuck mechanism of the contra-
angle handpiece while it is still running.
– Always ensure correct operating conditions and
that adequate cooling is delivered.
– Avoid overheating at the treatment site.
Inappropriate use
Improper use, in addition to incorrect assembly,
installation, modification or repairs of the Osscora
surgical set or non-compliance with our instructions
invalidates all claims under warranty and any other
claims.

English
6
2. Safety notes
Motor and foot control
The motor and foot control are approved for
use in zone M (AP).
Please note that at low speeds, it is more difficult to
determine that the motor is running.
Danger zones M and G
In accordance with IEC 60601-1 /UL 60601-1, the
control unit is not suitable for use in potentially
explosive atmospheres or with potentially explosive
mixtures of anaesthetic substances containing oxygen
or nitrous oxide.
Control unit
The control unit is classed as “conventional equipment”
(closed equipment without protection against the
ingress of water).
The Osscora surgical set control unit is designed only
to be used with the Osscora contra-angle handpiece.

English
7
2. Safety notes
Coolant
The Osscora surgical set is designed for use with
physiological saline solution. Use only suitable
irrigation fluids and comply with the medical data
and instructions from the manufacturer. Use the
supplied irrigation tubing set or accessories supplied
by Cochlear. Coolant bottle or coolant bag can be
obtained from a pharmacist.
Sterility of irrigation tubing set
Sterile irrigation tubing sets are supplied with the
equipment. These irrigation tubings are disposable
articles and must be thrown away after each
treatment!
Please note the expiry date and the relevant
regulations for disposal of irrigation tubing.
Rotational energy
Fast deceleration of the bur can, at times, cause the
selected torque to be overloaded as a result of the
rotational energy stored in the drive system.
Mains cable
Only connect to an earthed socket outlet.
Power failure
In the event of a power failure, if the control
unit is switched off, or when alternating
between programs, the last values set are
saved and reactivated on power-up.
System failure
A total system failure of the Osscora surgical
set does not constitute a critical fault.
Intermittent operating mode S3 (4min/10min)
When there is a current consumption of
max. 0.8 A for 91051 and 91052 and 1.6
A for 91053 (with pump switched on), the
permissible relative load time is 4 minutes to
10 minutes pause time.

English
8
3. Unpacking
The packaging is environmentally friendly and can be disposed
of by industrial recycling companies. However, we recommend
that you keep the original packaging.
u Lift out insert with stand.
v Remove foot control and insert.
w Lift out insert with control unit.
x Remove irrigation tubing set.
y Remove carton containing
motor, mains cable, handle
and contra-angle handpiece.

English
9
4. Equipment supplied
91051 Osscora surgical set
230 V (Europe)
91052 Osscora surgical set
230 V (Asia Pacific)
91053 Osscora surgical set
115 V
Control unit, 230 V Control unit, 230 V Control unit, 115 V
Foot control S-N1 Foot control S-N1 Foot control S-N1
Motor with 3,5 m cable incl. motor
protective cover, locking pins (2 pcs)
and clips (10 pcs)
Motor with 3,5 m cable incl. motor
protective cover, locking pins (2 pcs) and
clips (10 pcs)
Motor with 3,5 m cable incl. motor
protective cover, locking pins (2 pcs) and
clips (10 pcs)
Osscora contra-angle handpiece Osscora contra-angle handpiece Osscora contra-angle handpiece
Irrigation tubing set (6 pcs) Irrigation tubing set (6 pcs) Irrigation tubing set (6 pcs)
Mains cables (4 pcs)
(Europe) (UK, IRL) (CH) (DK)
Mains cables (3 pcs)
(AUS, NZ) (Europe) (UK, IRL)
Mains cable (1 pcs)
(USA, CAN, JAP)
Stand Stand Stand

English
10
5. Description of front panel
Motor connection socket
Display
OPEN
Pump arm
Program buttons Pump arm
Stand holder
P1 P2 P3

English
11
6. Description of rear panel
Connecting socket
for foot control
Fuse holder with 2 fuses (250 V–1.25A slow-blow)Power socket
Power switch
ON/OFF
Stand holder

English
12
7. Description of motor with cable
The motor may not be dismantled!
The motor bearings are lubricated for life. No oil
lubrication or other maintenance is necessary.
To prevent the instrument on the motor attachment
from turning during the transmission, the locking pin
supplied can be pushed into one of the two holes
(see illustration).
Test run
– Start the motor.
– If you observe dysfunctions (e.g. vibrations,
unusual noise, overheating, coolant supply failure
or leakage) contact your service agent. For details,
please contact your local Cochlear office.

English
13
8. Starting operation–General
u Connect the mains cable
and foot control.
v Connect the motor cable.
Note the positioning.
w Insert the stand.
Note the positioning.
x Fit the irrigation tubing set.
y Close pump arm.
d
a
b
c

English
14
9. Starting operation–Foot control
GREEN
Pump
ON/OFF
GREY
Start motor
VARIABLE or ON/OFF
(Factory setting = variable)
ORANGE
Change program
Program 1 to 3
YELLOW
Change motor direction
forward/reverse drive

English
15
9. Starting operation–Foot control
Reverse operation
You can switch between forward and reverse operation by
pressing the YELLOW button. On selecting reverse operation,
an audible signal can be heard and the selected program button
flashes. Before the motor starts in reverse operation, 3 audible
warning signals are given.
Changing program
The programs 1–3 can be selected in ascending sequence by
operating the ORANGE button.
When changing from program 3 to program 1, a longer
confirmation signal is heard.
With each program change, the motor direction is automatically
set to forward operation.
Pump ON/OFF
Only when the motor is stationary can the pump be switched
on or off by operating the GREEN button of the foot control.
When pump operation is active, the pump symbol appears on
the display.

English
16
9. Starting operation–Foot control
To change from VARIABLE to ON / OFF
Keep program button P3 depressed throughout
this procedure!
uPress P3 for approx. 4 seconds.
v Keep P3 depressed and simultaneously
press PLUS and MINUS.
w Keep P3 depressed and carry out adjustment.
01 = VARIABLE (factory setting)–Press PLUS button.
00 = ON/OFF–Press MINUS button.
After changeover the program button P3 illuminates
and is active!

English
17
10. Factory settings
Factory settings
P1– P3 P1 P2 P3
Forward
P3
Reverse
Factory setting rpm 2000 2000 15 30
Adjustable range rpm 15–2000 15–2000 – –
Motor direction Forward Forward Forward Reverse
Pump Off On Off Off
Factory setting
Ncm
Max. Max. 20 20
Adjustable range
Ncm
––5–50 5–50
Intermediate stage
Ncm
––32 32

English
18
10. Factory settings
Factory setting always starts with program 1 (P1).
uSwitch off the control unit.
v Keep P1 depressed and simultaneously switch on
the control unit.
w Keep P1 depressed as long as on the display
the adjustment “DE FAU” appears.
Reset factory settings

English
19
11. Control unit operation
Activate the required program (P1–P3) by pressing the
corresponding program button. During selection an audible
signal can be heard and the program button is illuminated.
On the display the selected program appears with the
adjusted range in rpm:
Display adjustments
– P1–P2 speed
– P3 torque
Pump operation
ON/OFF
Display adjustments
– P3 torque in Ncm
– P1–P2 speed in rpm
Error messages
– Motor temperature too high
– Motor connection
Changing the program (P1–P3)

English
20
11. Control unit operation
Keeping PLUS/MINUS depressed activates the repeat function
and the values are continuously increased/decreased.
Press program button (P1–P2).
Increase speed
Decrease speed
Changing the speed (P1–P2)
This manual suits for next models
2
Table of contents
Other Cochlear Medical Equipment manuals
Popular Medical Equipment manuals by other brands

DAKOTA SUPPLIES
DAKOTA SUPPLIES moppitt Usage instructions

Joerns Healthcare
Joerns Healthcare Oxford Hoyer Professional Elevate Service manual

RxPerfect
RxPerfect TimeCap & Bottle user guide

Instramed
Instramed EazyPro user manual

Boston
Boston SpyGlass User reference guide

VRI
VRI 2NET Communicator Quick install