manuals.online logo
Brands
  1. Home
  2. •
  3. Brands
  4. •
  5. Cofem
  6. •
  7. Security Sensor
  8. •
  9. Cofem EYEHOME+CO User manual

Cofem EYEHOME+CO User manual

Thanks for buying the EYEHOME+CO wireless carbon monoxide (CO) alarm.
This user guide contains important informaon on starng operaon and
using the devise. Store this user guide in a safe place for future reference.
These instrucons are a part of this product – bear this in mind if you pass on
this product to others.
Please take a few minutes to thoroughly read the user’s guide and familiarize
yourself and your family with its operaon.
Cauon:
• This CO alarm is designed for indoor use only. DO not expose to rain or
moisture. DO not knock or drop the detector. DO not open or tamper with
the alarm as this could cause malfuncon.
• The alarm will not protect against the risk of carbon monoxide poisoning
when the baery has drained.
• Installaon of the alarm should not be used as a substute for proper
installaon, use and maintenance of fuel burning appliances including
appropriate venlaon and exhaust systems.
1. POSITIONING THE SMOKE ALARM
When choosing your installaon locaons, make sure you can hear the alarm
from all sleeping areas. If you install only one CO alarm in your home. Not in
the basement or furnace room. The recommended posion for the unit
should be at least 1.8 meters (about 6 feet) above the floor level. Far away
metal installaon.
Recommended installaon locaons:
The following suggesons are intended to help you with the placement and
installaon of your CO alarm.
• Place out of the reach of children. Under no circumstance should
children be allowed to handle the CO alarm.
• Install in a bedroom or hallway located close to the sleeping area. Take
special care to verify the alarm can be heard in sleeping areas.
• It is recommended that a CO alarm be installed on each level of a
mullevel home.
• Locate 1~3 meter (3.3~10feet) away from all fuel burning appliances.
• Placing at eye level allows for opmum monitoring of the red and green
indicator lights.
• Insure that all vents of the unit are unobstructed.
• Do not install in dead air spaces such as peaks of vaulted ceilings, or
gabled roofs.
• Do not install in turbulent air from ceiling fans.
• Do not place near fresh air vents or close to doors and windows that
open to the outside.
• Keep the CO alarm away from excessively dusty, dirty, or greasy areas
such as kitchens, garages and furnace rooms. Dust, grease and household
chemicals can affect the sensor.
• Keep out of damp and humid areas such as the bath room. Avoid
spraying aerosols near the CO alarm.
• Do not install in areas where the temperature is below -10ºC or hoer
than 40ºC.
• Do not place behind curtains or furniture. CO must be able to reach the
sensor for the unit to accurately detect CO.
• Do not place near metal objects, otherwise it will affect the distance of
wireless signal transmission.
2. EYEHOME+CO OVERVIEW
POWER indicator: The POWER indicator (green LED) is used to indicate power
status of the CO alarm or remote alarm status of the CO alarm. The POWER
indicator will flash every 30 seconds.
FAULT indicator: The FAULT indicator (yellow LED) is used to indicate fault
warning status of the CO alarm.
ALARM indicator: The ALARM indicator (red LED) is used to indicate local
alarm status of the CO alarm.
TEST buon: The TEST&SILENCE buon is used to test the detectors. Press
and hold 2 seconds then release to enable TEST buon. In 2 seconds.
SILENCE buon: The SILENCE buon is used to silence the unit during alarm.
Press and hold 2 seconds to silence the alarm for 5 minutes.
Alarm sounder: The alarm sounder is used to send out local CO alarm
warning and remote CO alarm status and fault warning informaon.
3. OPERATION AND TESTING
Start up: Aer connecng the baery, all three LEDs light up briefly and the
CO alarm confirms start-up with a beep.
Aer power on, 30 seconds before the green LED flash every 3 seconds, this
is preheated state. 30 seconds later the green LED flashing every 30 seconds
indicates the unit is funconing properly.
Normal operaon: The POWER indicator (green LED) flashing every 30
seconds.
Fault warning: If the unit chirps once every 30 seconds, with FAULT indicator
(yellow LED)will be flash. It indicates the CO alarm is in malfuncon
condion. That means your CO alarm has no detecng funcon and no
respond CO.
Replace baery, if condion connues, the CO alarm has malfunconed.
Replace immediately. Please contact us to more service.
Low baery voltage warning: If the unit chirps twice every 30 seconds, with
FAULT indicator (yellow LED)will be flash. It indicates the baery is low. You
need to replace the baery.
Note: The unit will not protect against the risk of carbon monoxide poisoning
when the baery has drained.
End of life warning:
If the unit chirps 3 mes every 30 seconds with FAULT indicator (yellow LED)
flash. It indicates end of life of CO alarm. You need to immediately replace the
CO alarm.
Local CO alarm warning
When the unit detects a dangerous level of CO, the unit will emit a loud alarm
paern. The alarm signal paern is 4 quick beeps followed by 5 seconds of
silence. This cycle repeats as long as a dangerous CO condion exists. The red
alarm LED will flash the same paern.
This signal will repeated unl the alarm resets aer dissipaon of CO or the
alarm signal is manually silenced.
Remote CO alarm warning: When the unit detects other unit in alarm status,
the unit will emit a loud alarm paern. The alarm signal paern is 4 quick
beeps followed by 5 seconds of silence. This cycle repeats as long as a
dangerous CO condion exists. The green alarm LED will flash the same
paern.
This signal will repeated unl the local alarm resets aer dissipaon of CO or
the local alarm signal is manually silenced.
Local CO alarm warning silence: If the unit is under the CO alarm warning,
enable the TEST&SILENCE buon, it will come into silence status for 5
minutes, and ALARM indicator (red LED) sll keep flashing. At the same me,
ALARM indicator
(red LED)
Sounder
POWER indicator
(green LED)
FAULT indicator
(yellow LED)
TEST/SILENCE
buon
FABRICANTE DE PRODUCTOS CONTRA INCENDIOS - FIRE PROTECTION MANUFACTURER
Ctra. de Molins de Rei a Rubí, Km. 8,4 - 08191 RUBÍ (Barcelona) SPAIN.
Tlf.: +34 935 862 690 - Fax:+34 936 999 261 - cofem@cofem.com - www.cofem.com
628010 - MAY18
1973
EYEHOME+CO
(english)
all other remote CO alarm in the wireless communicaon rang also into
silence status for 5 minutes.
Note: The alarm signal will re-energized within 5 minutes from the me the
TEST&SILENCE buon is operated if the concentraon of CO surrounding the
alarm remains at 45ppm or greater.
Human alarm sounds: If the unit come into the status of CO alarm warning,
the unit will start in a lower volume (<80dB) for around 10 seconds, then
issuing a normal volume (>85dB). It will avoid people to be scared suddenly
by a very loud alarm sound.
Test the unit: To test the unit, press and hold TEST&SILENCE buon about 0.2
seconds then release to enable TEST&SILENCE buon, you should hear alarm
sound paerns and with a corresponding ALARM indicator (red LED) flash.
The test alarm sound paern includes: 4 short beeps (normal volume),
5seconds pause.
If other unit have been in the same network, also ring alarm sound and with
a corresponding ALARM indicator (green LED) flash.
NOTE:
• Aer the TEST&SILENCE buon is enabled, the alarm sounds and the red
alarm light flashes. This does not indicate that CO is present.
• Test the unit weekly! If at any me your unit does not perform as
described, replace it immediately.
4. WIRELESS INSTRUCTIONS
Wireless internet alarm instrucon: The EYEHOME+CO supports to be
interconnect with EYEHOME+. If you purchase more than one of the types of
products, please put them into the same network according to the following
steps.
Networking steps without host: 1) Arbitrarily select a product as master,
connecng the baery. In 2 seconds, press the buon three mes in the
warm-up state or the normal standby state, this product into the host
network state, while the red light will be lit about 10s. If you want to exit the
network state, press the buon.
2) Choose other products as a slave, connecng the baery. In 2 seconds,
press the buon three mes in the warm-up state or the normal standby
state, this product will be automacally with the host network. If the network
is successful, the red light will flash many mes, while the master and the
slave has a sound. The master will extend the network me about 10 s.
3) According to step two, networking other products.
4) Aer all product networking, arbitrarily select a product, press the test
buon, this product is issued to test alarm sound, other products will ring one
by one in 8 seconds.
CAUTION: Marked as the master of the product, remember it, if you
purchasing a new EYEHOME+CO, you must use this product as a master for
networking.
Networking steps MDAHWF: This product can access the smart home host, if
you purchasing a host, according to the following steps to access the host
network.
1) Make sure the host into networking status (see instrucons of the
MDAHWF).
2) Choose a product, connecng the baery. In 2 seconds, press the buon
three mes in the warm-up state or the normal standby state, this product
will be automacally with the host network. If the network is successful, the
red light will flash three mes, the product has a sound.
Clear network status: Aer networking wireless funcons begin to work, if
you want to exit the wireless funcon, follow this steps.
1) Remove the baery.
2) Press the buon and don't let go. And then connecng the baery, the red
led will on 5 seconds, 5 seconds later, when the red light is off, then release
the buon.
3) When the buon is released, the red light is lit for 3 seconds. In these 3
seconds, press the buon, you can clear the network. Aer the success of the
product will be a ring.
5. WHAT TO DO IF THE ALARM SOUNDS
WARNING! Acon of this device indicates the presence of dangerous levels of
CO! CO can be fatal! If the alarm sounds:
If a carbon monoxide apparatus iniates an alarm signal it is recommended
that the following acons are taken in the order given:
1) Keep calm and open all doors and windows to increase the rate of
venlaon, but see also item a) below. Stop using all fuel-burning appliance
and ensure, if possible, that they are turned off, e.g. for gas appliances,
isolate the emergency control valve.
2) If the alarm connues to be acvated, then evacuate the premises. Leave
the doors and windows open, and only re-enter the building when the alarm
has stopped. In mul-occupancy and mul-storey premises, ensure that all
the occupants are alerted to the risk.
3) Get medical help for anyone suffering the effects of carbon monoxide
poisoning and advise that carbon monoxide inhalaon is suspected.
4) Telephone the appropriate appliance servicing and/or maintenance agency
or, when necessary, the relevant fuel supplier on their emergency number or
the naonal Gas Emergency Service Provider, if appropriate, so that the
source of carbon monoxide emissions can be idenfied and corrected. Unless
the reason for the alarm is obviously spurious, do not use the fuel-burning
appliance again, unl they have been checked and cleared for use by a
competent person according to naonal regulaons.
6. BATTERY INSTALLATION/REPLACEMENT
Twice chirps with corresponding FAULT indicator (yellow LED) flashing twice
every 30 seconds indicates that the baery is low baery, you must to replace
the baery with baery specified, please see “8. TECHNICAL INFORMATION”
To install or replace the baery in unit, please perform the following steps:
1) Take down the unit from screw heads of the wall.
2) Open baery compartment.
3) Remove the old baery, and replaced by new baery.
4) Close baery compartment.
5) Hook the alarm body over the screw heads onto keyholes in back of the
unit.
6) Test alarm using the TEST&SILENCE buon, if the tesng alarm is ok, means
the product can work normally.
WARNING! Use only the baery specified. Use of different baery may have
a detrimental effect on the CO alarm. A good safety measure is to replace the
baery at least once a year.
NOTE: Re install immediately aer cleaning and then test unit using the
TEST&SILENCE buon!
7. GENERAL MAINTENANCE
To keep your CO alarm in good working order, please follow these simple
steps:
1) Verify the unit's alarm sound and indicators operaon by enable the
TEST&SILENCE buon once a week.
2) Remove the unit from the wall and clean the alarm cover and vents with a
so brush aachment once a month to remove dust and dirt.
3) Never use detergents or other solvents to clean the unit.
4) Avoid spraying air fresheners, hair spray or other aerosols near the CO
alarm.
5) Do not paint the unit. Paint will seal the vents and interfere with the
sensor's ability to detect CO. Never aempt to disassemble the unit or clean
inside. This acon will void your warranty.
FABRICANTE DE PRODUCTOS CONTRA INCENDIOS - FIRE PROTECTION MANUFACTURER
Ctra. de Molins de Rei a Rubí, Km. 8,4 - 08191 RUBÍ (Barcelona) SPAIN.
Tlf.: +34 935 862 690 - Fax:+34 936 999 261 - cofem@cofem.com - www.cofem.com
1973
EYEHOME+CO
(english)
6) As soon as possible, place the CO alarm back in its proper locaon to assure
connuous protecon from carbon monoxide poisoning.
7) When household cleaning supplies or similar contaminants are used, the
area should be venlated.
WARNING:
• If the apparatus is tampered with, this have the risk of malfuncon
electric shock or malfuncon.
• The following substances can affect the sensor and may cause false
acons: methane, propane, isobutene, isopropanol, ethylene, benzene,
toluene, ethyl acetate, hydrogen sulfide, sulfur dioxides, alcohol based
products, paints, thinner, solvents, adhesives, hair sprays, aer shaves,
perfumes and some cleaning agents.
• Your CO alarm will not be operaonal and will not monitor for CO levels
without baery.
• This apparatus is designed to protect individuals from the acute effects
of carbon monoxide exposure. It will not fully safeguard individuals with
specific medical condions. If in doubt consult a medical praconer.
8. TECHNICAL INFORMATION
Model: EYEHOME+CO
Type of apparatus: Type A
Power Supply: DC 3V (2pcs alkaline baery)
Recommend baery type: GP GN15A / Raymax LR6
Sensor Type: Electrochemical
Product life: 10 years aer inial power up
Sensivity Seng: Conforms to EN 50291-1:2010+A1:2012 standard.
30PPM Without alarm before 120 minutes
50PPM Between 60 to 90 minutes
100PPM Between 10 to 40 minutes
300PPM Less than 3 minutes
Standby Current:<50μA (average)
Alarm Current: <20mA (average)
Operaon Ambient Condion: -10~+40ºC, 30~95% non-condensing
Storage/Transport Ambient Condion: -20~+50ºC, 10~95% non-condensing
Alarm sound : ≥85DB at 100cm @3.2±0.5KHz pulsing alarm
CO alarm silence: about 5 minutes
Frequency Range : 868~870MHz
Wireless transmission distance : >50 meters (in open distance)
NOTE: This CO alarm is designed to detect carbon monoxide gas from any
source of combuson. It is not designed to detect any other gas.
9. GUARANTEE
Cofem grants a 2 years guarantee, starng from the purchase date of the
product. If the smoke alarm becomes defecve during the guarantee period,
the smoke alarm will be replaced with a new one if the defecve one is sent
to Cofem. The guarantee covers manufacturing or material defects in the
product, if the smoke alarm has been used according to the user instrucons
and the guarantee period neither has nor expired. The guarantee period for a
smoke alarm that has been replaced with a new one is the same as that of the
original smoke alarm. The guarantee is not valid if 1) the product is used,
maintained, or tested contrary to the user instrucons, 2) the defect has been
caused by a negligent act by other than Cofem, or 3) if the product has been
modified or treated with force, or if it the guarantee receipt is missing. The
guarantee does not cover costs due to installaon or baery replacement.
Cofem responsibility does not in any case exceed the price of a new smoke
alarm. Cofem is not responsible for any damage or loss that has been caused
by a non-working smoke alarm. This guarantee does not affect rights enacted
by law.
10. INSTALLATION
1) Drilling two ф 5.0mm holes in the wall, the distance between two holes
center is 30mm(1.18 inch),then inserng two plasc stopper provided into
the holes.
2) Insert the two screws provided unl the screw heads are approximately
5mm from wall.
3) Test the unit by using the TEST&SILENCE buon. Ensure the unit sound is
alarm paern.
4) Hook the unit over the screws onto keyholes in back of unit.
As you install the baery on the unit, maybe it will sound for several minutes,
then stop and enter in normal operaon mode. If it always sounds, please call
our agent.
FABRICANTE DE PRODUCTOS CONTRA INCENDIOS - FIRE PROTECTION MANUFACTURER
Ctra. de Molins de Rei a Rubí, Km. 8,4 - 08191 RUBÍ (Barcelona) SPAIN.
Tlf.: +34 935 862 690 - Fax:+34 936 999 261 - cofem@cofem.com - www.cofem.com
1973
EYEHOME+CO
(english)

Other Cofem Security Sensor manuals

Cofem A30X Series Quick start guide

Cofem

Cofem A30X Series Quick start guide

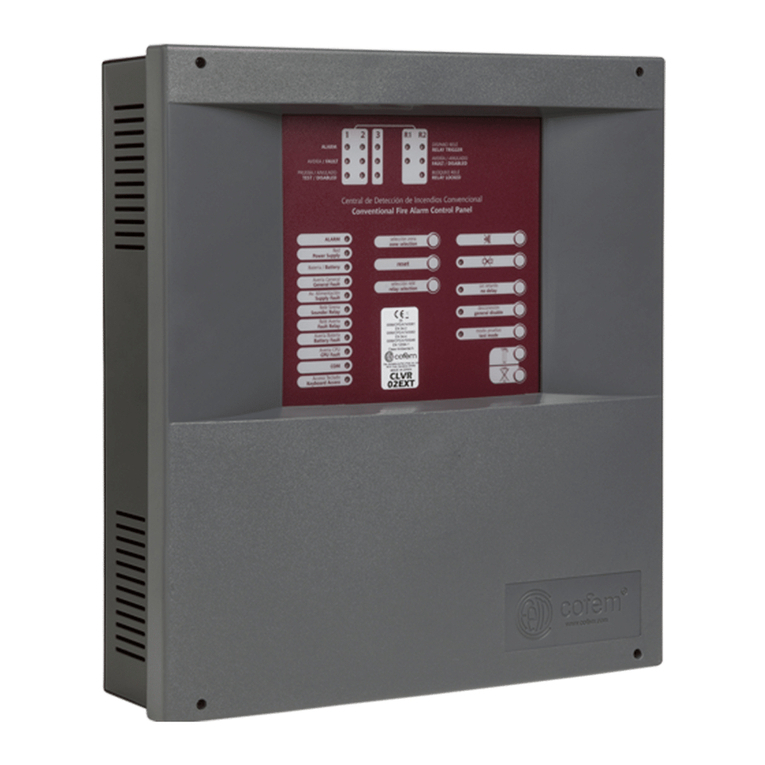
Cofem CLVR02EXT User manual

Cofem

Cofem CLVR02EXT User manual

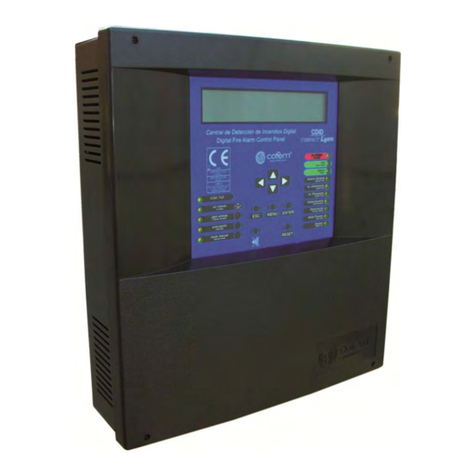
Cofem COMPACT LYON User manual

Cofem

Cofem COMPACT LYON User manual

Popular Security Sensor manuals by other brands

Assa Abloy Yale EF-PIR manual

Assa Abloy

Assa Abloy Yale EF-PIR manual

Visonic DISCOVERY DUO installation instructions

Visonic

Visonic DISCOVERY DUO installation instructions

RKI Instruments 35-3001-12H Operator's manual

RKI Instruments

RKI Instruments 35-3001-12H Operator's manual

IMMOOS SS1 oGB operating instructions

IMMOOS

IMMOOS SS1 oGB operating instructions

Tyco Visonic SD-304C PG2 installation instructions

Tyco

Tyco Visonic SD-304C PG2 installation instructions

Afriso EURO-INDEX OWWG 3 operating instructions

Afriso EURO-INDEX

Afriso EURO-INDEX OWWG 3 operating instructions

Bosch ISC-BDL2-W12 installation guide

Bosch

Bosch ISC-BDL2-W12 installation guide

EXTOL Craft 97270 user manual

EXTOL Craft

EXTOL Craft 97270 user manual

jablotron JA-151TH manual

jablotron

jablotron JA-151TH manual

Vimar By-alarm 01720 quick start guide

Vimar

Vimar By-alarm 01720 quick start guide

TiTLEY Scientific Anabat Scout user manual

TiTLEY Scientific

TiTLEY Scientific Anabat Scout user manual

Gas Clip Technologies Multi Gas Clip Infrared quick start guide

Gas Clip Technologies

Gas Clip Technologies Multi Gas Clip Infrared quick start guide

STI F3SJ-AM P Series user manual

STI

STI F3SJ-AM P Series user manual

Smartenit ZBMS3 quick start guide

Smartenit

Smartenit ZBMS3 quick start guide

Chuango PIR-918C user manual

Chuango

Chuango PIR-918C user manual

System Sensor SPECTRAlert CH24 Series Installation and maintenance instructions

System Sensor

System Sensor SPECTRAlert CH24 Series Installation and maintenance instructions

GORBEL Tether Track Installation, operation & maintenance manual

GORBEL

GORBEL Tether Track Installation, operation & maintenance manual

Visonic CLIP MCW installation instructions

Visonic

Visonic CLIP MCW installation instructions

manuals.online logo
manuals.online logoBrands
  • About & Mission
  • Contact us
  • Privacy Policy
  • Terms and Conditions

Copyright 2025 Manuals.Online. All Rights Reserved.