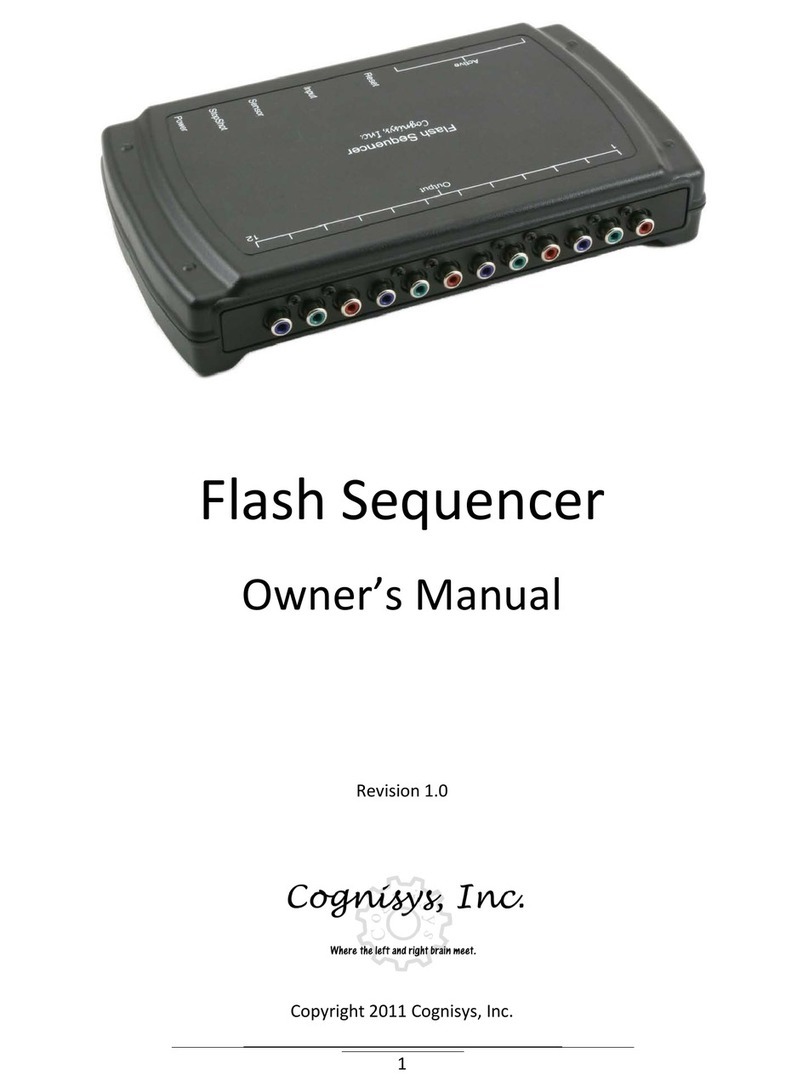
Cognisys SCOUT User manual

1
Owner’s Manual
Revision 1.2
Copyright 2019 Cognisys, Inc.

2
Table of Contents
1. SAFETY INSTRUCTIONS .................................................................................................................................. 6
2. GETTING STARTED ......................................................................................................................................... 6
2.1 WHAT IS THE SCOUT CAMERA CONTROLLER? .........................................................................................................7
2.2 WHAT IS INCLUDED ...........................................................................................................................................8
2.3 INSTALLING LENS TUBE.......................................................................................................................................9
2.4 QUICK START GUIDE ..........................................................................................................................................9
2.5 BATTERY INSTALLATION ....................................................................................................................................10
2.6 CLEANING AND CARE .......................................................................................................................................11
2.6.1 Cleaning .................................................................................................................................................11
2.6.2 Care and storage....................................................................................................................................11
2.6.3 Maintaining Weatherproof Design ........................................................................................................12
2.7 THE SCOUT CAMERA CONTROLLER .....................................................................................................................13
2.7.1 Internal connections / buttons / indicators............................................................................................13
2.7.2 External connections..............................................................................................................................14
2.8 CAMERA CONNECTION .....................................................................................................................................15
2.9 WAKING THE CAMERA CONTROLLER ...................................................................................................................16
2.10 DOWNLOAD THE APP .......................................................................................................................................16
2.11 CONNECTING TO THE CAMERA CONTROLLER.........................................................................................................16
2.11.1 PC/Mac connection ...........................................................................................................................16
2.11.2 Android Connection ...........................................................................................................................17
2.11.3 iOS connection...................................................................................................................................18
3. NAVIGATING THE APP ................................................................................................................................. 19
3.1 CONNECTION STATUS ......................................................................................................................................19
3.1.1 PC / Mac / Android connection..............................................................................................................19
3.1.2 iOS connection .......................................................................................................................................19
3.2 GLOBAL BUTTONS ...........................................................................................................................................19
3.2.1 Find Devices ...........................................................................................................................................20
3.2.2 Read Config............................................................................................................................................20
3.2.3 Write Config ...........................................................................................................................................21
3.2.4 Shutter ...................................................................................................................................................21
3.2.5 Outputs Off ............................................................................................................................................21
4. SETTINGS..................................................................................................................................................... 22
4.1 SETTINGS NAVIGATION MAP .............................................................................................................................22
4.2 SETTING DESCRIPTIONS ....................................................................................................................................24
4.2.1 # Pics ......................................................................................................................................................24
4.2.2 Camera Settings.....................................................................................................................................24
4.2.2.1 Activate ......................................................................................................................................................... 24
4.2.2.2 Input Source.................................................................................................................................................. 25
4.2.2.3 # pics ............................................................................................................................................................. 25
4.2.2.4 Pre-trig time.................................................................................................................................................. 25

3
4.2.2.5 On time ......................................................................................................................................................... 26
4.2.2.6 Off time......................................................................................................................................................... 26
4.2.2.7 On Time 2+.................................................................................................................................................... 26
4.2.2.8 Off Time 2+ ................................................................................................................................................... 26
4.2.2.9 HP Limit......................................................................................................................................................... 26
4.2.2.10 Final Off......................................................................................................................................................... 27
4.2.2.11 Extend On...................................................................................................................................................... 27
4.2.2.12 Extend Off ..................................................................................................................................................... 27
4.2.2.13 Periodic Half-Press ........................................................................................................................................ 27
4.2.3 Aux Settings ...........................................................................................................................................28
4.2.3.1 Time Window................................................................................................................................................ 28
4.2.4 Shot Limit ...............................................................................................................................................28
4.2.4.1 Limit Window................................................................................................................................................ 29
4.2.4.2 Limit Timeout................................................................................................................................................ 29
4.2.4.3 Limit Enabled ................................................................................................................................................ 29
4.2.5 Time Settings .........................................................................................................................................30
4.2.5.1 On Time......................................................................................................................................................... 30
4.2.5.2 Off Time ........................................................................................................................................................ 30
4.2.5.3 Window Enabled ........................................................................................................................................... 30
4.2.6 Wireless Settings....................................................................................................................................31
4.2.6.1 Channel ......................................................................................................................................................... 31
4.2.6.2 Wakeup Speed .............................................................................................................................................. 31
4.2.7 Wifi Settings...........................................................................................................................................31
4.2.7.1 Security ......................................................................................................................................................... 31
4.2.7.1.1 Open......................................................................................................................................................... 32
4.2.7.1.2 WPA.......................................................................................................................................................... 32
4.2.7.2 Key ................................................................................................................................................................ 32
4.2.7.3 Channel ......................................................................................................................................................... 32
4.2.7.4 Timeout......................................................................................................................................................... 32
4.2.8 Flash Settings .........................................................................................................................................33
4.2.8.1 Ready Wait.................................................................................................................................................... 33
4.2.9 Power Settings .......................................................................................................................................33
4.2.9.1 Camera Power............................................................................................................................................... 33
4.2.9.2 Camera Wake................................................................................................................................................ 33
4.2.9.3 LED Debug..................................................................................................................................................... 33
4.2.10 Infrared Settings ................................................................................................................................33
4.2.10.1 Enabled ......................................................................................................................................................... 34
4.2.10.2 Mode............................................................................................................................................................. 34
4.2.11 Time lapse Settings............................................................................................................................34
4.2.11.1 # pics ............................................................................................................................................................. 34
4.2.11.2 Elapsed.......................................................................................................................................................... 34
4.2.11.3 Interval.......................................................................................................................................................... 34
4.2.11.4 Sensor Starts ................................................................................................................................................. 34
4.2.12 Software Version ...............................................................................................................................35
4.2.13 Voltage ..............................................................................................................................................35
4.2.14 Load ScoutCam Defaults....................................................................................................................35
5. EXAMPLES ................................................................................................................................................... 36
5.1 CAMERA SETTINGS ..........................................................................................................................................36
5.2 FULL WIRELESS...............................................................................................................................................38

4
5.3 WIRED FLASHES..............................................................................................................................................40
5.4 VIDEO RECORDING ..........................................................................................................................................42
5.5 MAXIMUM BATTERY LIFE..................................................................................................................................43
5.5.1 AA Batteries ...........................................................................................................................................43
5.5.2 Li-Ion Pack..............................................................................................................................................44
6. INSTALLING THE REFLASH SOFTWARE (OPTIONAL)...................................................................................... 45
6.5 WINDOWS INSTALLATION .................................................................................................................................45
6.6 OS XINSTALLATION.........................................................................................................................................45
7. TROUBLESHOOTING .................................................................................................................................... 46
8. SPECIFICATIONS .......................................................................................................................................... 48
9. WARRANTY ................................................................................................................................................. 49
10. REVISION HISTORY .................................................................................................................................. 50

5
Table of Figures
Figure 1 - Connecting Windows .................................................................................................................. 17
Figure 2 - Connecting OS-X .........................................................................................................................17
Figure 3 - Connecting Android .................................................................................................................... 18
Figure 4 - Connecting iOS............................................................................................................................ 18
Figure 5 - Mac/PC Global Buttons (at top).................................................................................................. 19
Figure 6 - Android Global buttons (under hamburger icon)....................................................................... 20
Figure 7 - iOS Global Buttons (at top) .........................................................................................................20

6
1. Safety Instructions
WARNING indicates a potentially hazardous situation which, if not avoided, could result in death
or serious injury.
Follow all CAUTION notices to reduce the risk of personal injury, prevent damage to the Scout
equipment, accessories, and devices (computers, cameras, flashes, etc). Failure to follow all
CAUTION notices may void your warranty. CAUTION may also indicate a potentially hazardous
situation which, if not avoided, may result in personal injury.
The safety alert symbol precedes a general CAUTION or WARNING statement.
The electrical hazard symbol precedes an electric shock hazard CAUTION or WARNING
statement.
CAUTION: Only use approved power sources for Scout equipment. Use of other power
adapters or batteries may damage the controller and/or attached equipment.
CAUTION: Misuse of Scout equipment could potentially damage your equipment. Cognisys, Inc.
will not be held liable for damage to your equipment. If you have questions about safety please
contact us!
2. Getting Started
The latest version of this manual is available on our website at:
https://www.cognisys-inc.com/downloads/scout/ScoutCamera.pdf
The graphics/menus included in this manual may not be identical to the software that you are
running. Improvements and adjustments to the software may happen prior to an updated
version of the manual.
Not big on reading manuals? (What? No thumbs-up? We worked hard on this you know!) We
have a few real world setups in the “5 - Examples” section. There is also the “Quick Start” in
“2.4 - Quick Start Guide”. You can always come back to the technical details if you get stuck.
You really should finish reading this section though – it goes through battery replacement and
the basic care of the camera controller and box.

7
2.1 What is the Scout Camera Controller?
The Scout camera controller finally answers difficult questions for long-term trail photography
and videography:
What do you do with the camera?
How to keep it dry?
How do you get the sensor to tell the camera it’s time to take a photograph?
How do you control how many pictures are taken?
Put a hole in a box and run wires? Critters love to eat and play with the wires.
Let’s go over the features:
•Weatherproof housing for your DSLR/mirrorless camera
•Wifi connectivity to your computer, tablet, or phone to adjust settings
•Wireless connectivity to other Scout products
oReceiver/PIR sends wireless trigger signal to camera controller
oCamera controller sends wireless signal to Scout Flashes
oCamera controller sends wireless signal to Scout LEDs
•Customizable camera control (number of pictures, time windows, etc)
•Auxiliary lighting support for video – 3 aux outputs
•Complex multiple triggering options
oPIR #1 activates lighting bank on the left
oPIR #2 activates lighting bank on the right
oReceiver #1 starts video recording
oReceiver #2 takes several still photographs
•Time-lapse feature
•Can limit the number of shots to reduce nuisance triggers (curious squirrels)
•Optional power for your camera
•Multiple ¼-20 tripod mounts
•Security options for python cables and locks
•Power: 8 AA batteries or an optional Li-Ion pack. Battery packs can be doubled for long-
term deployments
•> 100 days of battery life (use-case dependent)
•Wide operating temperature range: -40C – 85C (-40F – 185F)

8
2.2 What is Included
The Scout Camera Controller includes:
•Scout Camera Box
•Scout Camera Controller
•Lens tube
•Customizable foam or (optional) quick-release clamp kit
•8xAA battery pack or (optional) Li-Ion battery and charger
•¼-20 mounting bracket
•Free PC/Mac application for setup
If you purchased the Scout Camera Controller as a kit it may include additional accessories.

9
2.3 Installing Lens Tube
The lens tube is completely sealed (including the glass inside the filter). It has a sealing o-ring to
make contact with the Camera Box. The tube should be screwed on until it just makes contact
with the Camera Box. Then give the tube another ¼ turn. Do not overtighten!
2.4 Quick Start Guide
Want to be up and running in just a few minutes? Here’s the quick-start guide:
1. Modify the camera box foam to fit your camera leaving a little room on the left side for your shutter
release cable. If you purchased the quick-release kit then attach the plate to the bottom of your
camera and attach your camera to the camera box.
2. Plug in your camera’s shutter cable into the camera and then into the camera jack on the controller:
3. Plug in the battery pack into the Camera Controller’s power connector.
4. Screw the lens tube onto the camera box until the lens tube just touches the sealing surface of the
camera box. Then give the lens tube another ¼ turn. Do not overtighten!
5. Enable the Camera Control mode on your Scout Receiver: “Settings->System->Use CamCtrl”
6. Turn on the Camera Controller.
7. Walk through the Scout Receiver beam and you’ll have a picture!
Of course, this just gets you started – if you want to be a power user you’ll want to download
the app! See section “2.10 - Download the app”.

10
2.5 Battery Installation
Battery installation is a simple process and because the Scout Camera Controller has excellent
battery life – you won’t have to do it often!
The Camera Controller requires eight AA (LR6) batteries. You can use either alkaline, lithium, or
rechargeable varieties. You can optionally use (and we recommend) the Scout Li-Ion battery
pack for even longer life. For details about maximizing battery life see section “5.5 - Maximum
Battery Life”.
1. Be sure the camera box is clean prior to opening otherwise dirt may compromise the
weatherproof seal.
2. Open the two latches on each side of the handle.
3. Insert the battery pack as shown in the above photo.
4. Secure the hook and loop strap around the battery pack.
5. Plug the battery pack into the camera controller.
6. Verify the camera box seal is clean prior to closing the lid to prevent water leakage.
You can also power the Scout Camera Controller with external power using the optional power
cable available here:
https://www.cognisys-inc.com/store/3pin-extpwr-cable.html
You do not need to remove the internal batteries when using external power but you should
remove the batteries if the camera controller will not be used for an extended period.
Note: Do not store Li-Ion battery packs in a fully discharged state.

11
2.6 Cleaning and Care
We want your Scout equipment to last – so here are some brief steps to keep it happy!
2.6.1 Cleaning
For cleaning we recommend a slightly dampened (not wet) micro-fiber cloth. Do not spray
water directly into the inside of the equipment. Any liquid that goes into the controller may
cause an electrical failure of the device. Do not use a flammable liquid/solvents or cleaning
agents on the controller – just a micro-fiber cloth (dampened if needed).
2.6.2 Care and storage
Scout equipment is designed to handle normal wear and tear but there are some things to
avoid:
Do not get the unit wet internally.
If not using the external connectors be sure to attach the protective cover on
the jacks or water may leak into the controller causing damage.
Do not drop the unit
Do not allow dirt to get into the weatherproof seal. This could cause seal failure
and damage to the camera controller and/or your equipment.
Remove all batteries prior to long term storage.
Failure to properly care for the Scout Camera Controller could result in a leak that may
cause damage. The product warranty does not cover water damage resulting from user
error or abuse.

12
2.6.3 Maintaining Weatherproof Design
Scout equipment is designed to meet the most challenging environmental conditions. It
does, however, require some care to maintain its weatherproof sealing.
Do not twist the pressure relief valve in the top of the housing. It is designed to be
permanently sealed. An ePTFE pressure release system is installed in the housing to prevent
pressure variations that could make it difficult to open the housing. Twisting or altering the
pressure relief valve could cause water to leak into the housing.
Prior to opening the equipment rinse it under gently running water if it is dirty.
It’s very important to keep the housing’s weatherproof seal clean. A single hair or grain of
sand could potentially cause the housing to leak and damage the equipment. To clean the
seal open the housing and gently wipe the seal with a dampened microfiber cloth. Allow the
seal to dry prior to reassembly.
Below is an image indicating the seal location. It is slightly recessed in a groove in the top
cover of the Camera Box.

13
2.7 The Scout Camera Controller
2.7.1 Internal connections / buttons / indicators
There are several internal indicators and connectors on the Scout Camera Controller (left to
right):
1. Wifi button
Turns on/off Wifi and wakes the controller from sleep mode.
2. Power button
Turns on/wakes up the controller from sleep mode.
Press and hold to turn off.
3. USB
Used for updating the firmware.
4. Wifi indicator
Blue when Wifi is currently on.
5. Power indicator
Green when power is on (and not in sleep mode).
Red when activating the internal camera shutter release.
6. Flash sync in
If using Scout flashes, this needs to be connected to your camera’s pc-sync port or to the
camera’s hot-shoe.
7. Camera shutter release cable
3.5mm jack to control your camera.
8. Camera power
Power your camera using the optional dummy battery. Verify your camera is
compatible with the 7 – 8.4v lithium ion batteries prior to use.
9. Aux Out
This 2.5mm jack will let you connect auxiliary devices internal to the camera box. Aux 1
and Aux 2 are available with this connector.

14
2.7.2 External connections
There are several external connectors on the Scout Camera Controller that can be used to
control or receive signals from optional equipment (left to right):
1. Auxiliary control
Can be used with our Auxiliary box to power external devices such as LED or infrared lights.
2. External flash control
Can be used to hardwire Cognisys Scout flashes or attach to your own external flashes.
3. Secondary camera control
Can be used to control a secondary slave camera box (without a camera controller) or other
device.
4. Receiver connection
This can be used as a hard-wired connection to the receiver if not using wireless. It can
also be used to interface with non-Scout sensors.
5. External power
5 – 20V DC. 8 – 20V required if using the optional camera power.
The Scout Camera Box uses weather-resistant connectors and cables. If the Camera Box will be
used outside during rain, snow, or condensing humidity be sure to have the connectors or caps
fully locked in place.If using external 2.1mm, 3.5mm, or RCA connectors they must be kept dry.

15
2.8 Camera connection
The Scout Camera Controller uses a 3.5mm connector for attaching it to your camera.If the
camera is controlling your flash(es) this is the only connection you need! Your Scout Receiver
already came with a shutter cable but if you’d like another or are using the Camera Controller
with your own sensor you can find one here:
https://www.cognisys-inc.com/store/coiled-shutter-cable.html
If, however, you are using one or more Scout Flash(es) you will also need to connect the Scout
Camera Controller’s “flash sync in” RCA connector to your camera. If your camera has a PC sync
connector on it, then all you need is a PC sync to RCA cable:
https://www.cognisys-inc.com/store/pc-sync-cable-locking.html
If, however, your camera does not have a PC sync connector, you will need a hot-shoe instead:
https://www.cognisys-inc.com/store/locking-hot-shoe.html
Why do we use high-quality locking PC sync cables? Because traditional PC sync cables are
notorious for failing or coming unplugged. So even if your camera does have a PC sync
connector on it you may want to consider the locking hot-shoe to give your setup that extra
protection.

16
2.9 Waking the Camera Controller
The Scout Camera Controller will automatically enter a low power mode after its Wifi
connection times out (See section “4.2.7.4 - Timeout” for adjusting this timeout). To wake the
camera controller quickly press either the power or Wifi button. This sometimes isn’t
convenient in the field – especially if you just want to look at how many pictures have elapsed.
You can optionally wake the camera controller by quickly pressing the power button on a Scout
PIR or by navigating on the Scout Receiver to Settings->Wake CamCtrl and pressing enter.
2.10 Download the app
The PC and Mac versions of the app are free. You can download them here:
https://www.cognisys-inc.com/products/scout/scoutcam_tech_specs.php
There is also an Android and iOS application available for a low fee. Search the Android “Play
Store” for “ScoutCam” or Apple’s “App Store” for “Scout Cam Control”.
2.11 Connecting to the Camera Controller
The Camera Controller acts as a Wifi router / access point. You do NOT need a Wifi router to
use it! It will have a name of “ScoutCam” followed by a unique identifier.
2.11.1 PC/Mac connection
Simply connect to the Scout Camera Controller like you would any other wireless connection.
Find the wireless network (as shown below) and then click on it to connect. The controller
defaults to no security but you can add security and set a password later if required. You will
have to connect to the camera controller each time Wifi is started unless you tell the operating
system to “automatically connect”. The computer may prefer a different network (if available)
for auto-connect since the camera controller doesn’t have active internet.

17
Figure 1 - Connecting Windows
Figure 2 - Connecting OS-X
2.11.2 Android Connection
Android has this nice feature that allows apps to control the Wifi. Once you connect up to
the camera controller the first time the ScoutCam app will be able to automatically change
your network connection for you. So the process below only needs to be done once.

18
Figure 3 - Connecting Android
2.11.3 iOS connection
Connecting to your iOS device is simple. You will have to connect to the camera controller
each time Wifi is started unless you tell the operating system to “automatically connect”.
The device may prefer a different network (if available) for auto-connect since the camera
controller doesn’t have active internet.
Figure 4 - Connecting iOS

19
3. Navigating the app
In this section we’ll go into the basics of adjusting settings for the Scout Camera Controller. If
you find your eyes glossing over with all the technical discussion you can always skip to the “5 -
Examples” section to start using your Scout Camera Controller.
3.1 Connection Status
You can verify you have a connection to the camera controller. The indication varies depending
on the operating system.
3.1.1 PC / Mac / Android connection
In the upper-right corner of the application there will be a green or a red indicator. Green
indicates that the computer/device is communicating with the camera controller. Red
means either Wifi is not connected or there is a communication issue (firewall, networking
issue, etc).
Connected
Disconnected
3.1.2 iOS connection
For iOS, the color of the camera tab changes to indicate the connection status. At the
bottom of the screen the “camera” will be blue for connected and red for disconnected.
Connected
Disconnected
3.2 Global buttons
There are five global buttons in the app that affect all the currently connected devices. “Find
Devices”, Read Config”, “Write Config”, “Shutter”, and “Outputs Off”. Their location varies
depending on the operating system:
Figure 5 - Mac/PC Global Buttons (at top)

20
Figure 6 - Android Global buttons (under hamburger icon)
Figure 7 - iOS Global Buttons (at top)
3.2.1 Find Devices
This will go out and look for any present and “awake” devices. The app will do this
automatically when launched (and periodically) but if you forget to wake up a device it
might get missed. Some devices, such as the Scout Receiver and PIR don’t always have their
wireless active in order to conserve battery. To make the Scout Receiver activate its
wireless go to Settings->Wake CamCtrl. For the Scout PIR you can either quickly press the
power button OR walk through the sensor path when the app is connected.
There can be up to one camera controller, four receivers, four PIR’s, eight flashes, and eight
LED’s. Each device must be set to the same wireless channel, and also be set to its own
unique ID for that device type. Having multiple device types with the same wireless ID can
cause communication issues.
3.2.2 Read Config
Pressing this button will read the current settings for all of the active devices.
Other manuals for SCOUT
3
Table of contents
Other Cognisys Camera Accessories manuals