manuals.online logo
Brands
  1. Home
  2. •
  3. Brands
  4. •
  5. Coleman
  6. •
  7. Control Unit
  8. •
  9. Coleman REVOLUTION REVSTOGLND User manual

Coleman REVOLUTION REVSTOGLND User manual

www.colemanbbqs.com.au
Manual Revision #: 2023.09.15 EK

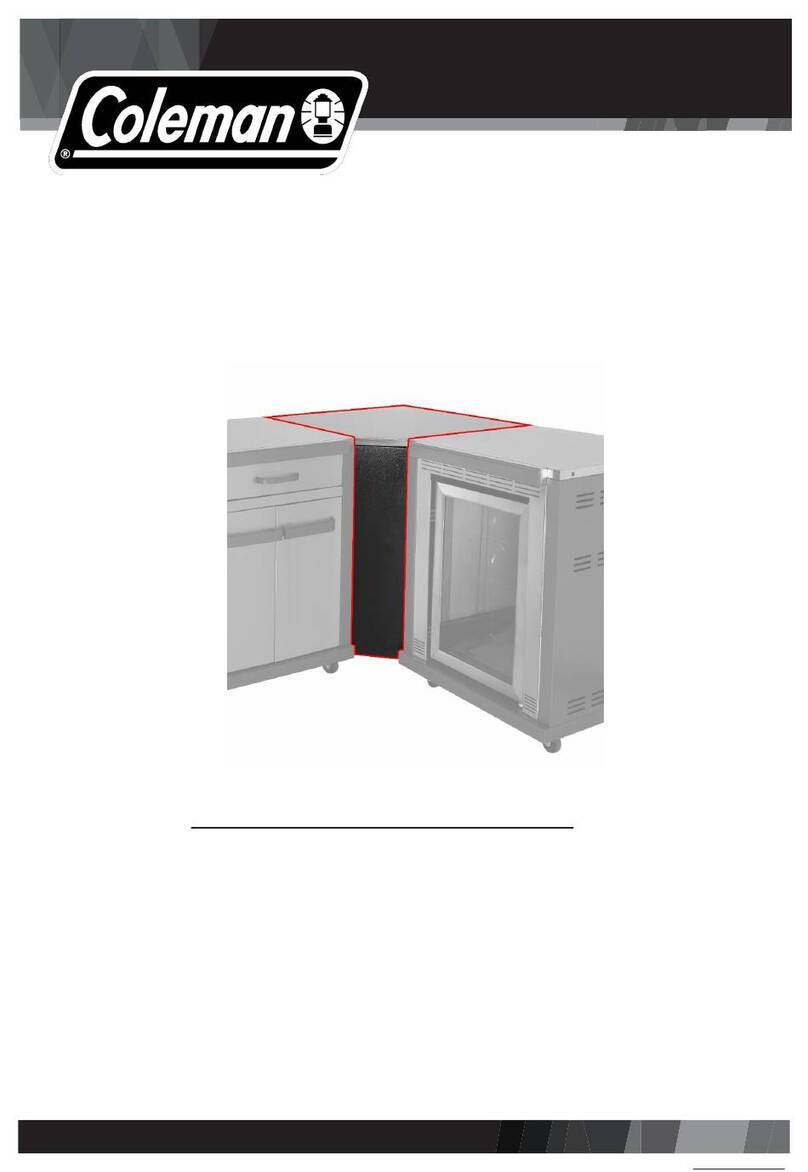
ASSEMBLY MANUAL
REVSTOGLND / REVSTOMAND
LIMITED 5-YEAR WARRANTY
Read and save the manual for future reference.
Assemble your barbecue immediately. Missing or damaged parts
should be claimed within 30 days of purchase.
For product inquiries, parts, warranty and troubleshooting support,
please call 1300 659 489.
REVOLUTIONTM
STORAGE MODULE no drawer
(not include FlareFree cup)
HE AV Y A R TI C L E NEE D S 2 T O LIFT
THIS MANUAL MUST REMAIN WITH THE PRODUCT AT ALL TIMES
To ORDER non-warranty replacement parts or accessories,
or to register your warranty, please visit us on the web at
www.colemanbbqs.com.au
CAUTION
It is recommended that you carefully
read and adhere to all safety
statements, assembly instructions,
and care to directions prior to
undertaking any assembly or cooking
tasks.
CAUTION
Sharp edges. Wear gloves when
assembling your barbecue.
CONTACT CALL CENTRE IF ANY PARTS ARE MISSING
1300 659 489
WARNING
Do not store or use gasoline, vapours,
or any other flammable liquids in the
vicinity of this appliance.
P A R T S L I S T F O R REVSTOGLND / REVSTOMAND
2
2
P A R T S L I S T F O R REVSTOGLND / REVSTOMAND
ASSEMBLY PARTS
NO.
DESCRIPTI
ON
IMAGE
QTY
REVSTOGLND
REVSTOMAND
1
Top shelf
1
REVSTG1001AU
REVSTG1001AU
2
Front panel
1
REVSTG2004AU
REVSTG3009AU
3
Middle shelf
1
REVSC010010
REVSC030010
4
Upper
magnet
2
SRT2018001
SRT2018001
5
Left panel
1
REVCONW0102AU
REVCONW0302AU
6
Drainage
tube
1
SRT2018010
SRT2018010
E X P L O D E D D I A G R A M F O R REVSTOGLND / REVSTOMAND
4
7
Back panel
1
REVCONW0104AU
REVCONW0304AU
8
Right panel
1
REVCONW0103AU
REVCONW0303AU
9
Left door
1
REVSI02002
REVSI03005
10
Right door
1
REVSI02003
REVSI03006
11
Bottom
magnet
1
SRT2018002
SRT2018002
12
Magnet
frame
1
REVSI01009
REVSI03007
13
Bottom shelf
1
REVSI01010AU
REVSI03008AU
14
Wheel rack
4
SRT2018003
SRT2018003
P A R T S L I S T F O R REVSTOGLND / REVSTOMAND
15
2.5"Wheels
with brake
2
SRT2018004
SRT2018004
16
2.5"Wheels
2
SRT2018005
SRT2018005
17
Clip
4
SRTCL001
SRTCL001
18
Side shelf
1
G532Y20002
G532Y10003
A
M6*12
16
SRT2018018
SRT2018018
B
M4*12
21
SRT2018013
SRT2018013
C
M4*8
9
SRT2018014
SRT2018014
D
M4*8
2
SRT2018015
SRT2018015
Installation guide 1
NO.
DESCRIPTION
IMAGE
QTY
13
Bottom shelf
1
14
Wheel rack
4
15
2.5"Wheels with
brake
2
16
2.5"Wheels
2
A
M6*12
16
Installation guide 2
NO.
DESCRIPTION
IMAGE
QTY
7
Back panel
1
B
M4*12
3
Installation guide 3
NO.
DESCRIPTION
IMAGE
QTY
5
Left panel
1
B
M4*12
6
Installation guide 4
NO.
DESCRIPTION
IMAGE
QTY
8
Right panel
1
B
M4*12
6
Installation guide 5
NO.
DESCRIPTION
IMAGE
QTY
1
Top shelf
1
2
Front panel
1
C
M4*8
3
Installation guide 6
NO.
DESCRIPTION
IMAGE
QTY
B
M4*12
4
1.5m
Installation guide 7
Installation guide 8
NO.
DESCRIPTION
IMAGE
QTY
C
M4*8
6
Installation guide 9
NO.
DESCRIPTION
IMAGE
QTY
3
Middle shelf
1
Installation guide 10
NO. DESCRIPTION IMAGE QTY
6 Drainage tube 1
D M4*8 2
Before proceeding to the next Installation Guide, ensure you've correctly assembled the Flare Free cup
from the Coleman Revolution BBQ package. Fit it snugly into the module front panel cutout.
Installation guide 11
NO.
DESCRIPTION
IMAGE
QTY
12
Magnet frame
1
B
M4*12
2
Installation guide 12
NO.
DESCRIPTION
IMAGE
QTY
4
Upper magnet
2
11
Bottom magnet
1
Installation guide 13
NO.
DESCRIPTION
IMAGE
QTY
9
Left door
1
Installation guide 14
NO.
DESCRIPTION
IMAGE
QTY
10
Right door
1
Installation guide 15
Connecting the Module to the BBQ
NO.
DESCRIPTION
IMAGE
QTY
1
M6*16
7
2
M6 Nut
7
3
φ6*16 Washer
6
17
Clip
2

This manual suits for next models

1

Other Coleman Control Unit manuals

Coleman 9330F4552 User manual

Coleman

Coleman 9330F4552 User manual

Coleman REVOLUTION REVCOGL User manual

Coleman

Coleman REVOLUTION REVCOGL User manual

Coleman REVOLUTION REVFRGL User manual

Coleman

Coleman REVOLUTION REVFRGL User manual

Popular Control Unit manuals by other brands

LevelOne ACC-2000 user manual

LevelOne

LevelOne ACC-2000 user manual

National Instruments SCC-FV01 user guide

National Instruments

National Instruments SCC-FV01 user guide

ARMTEL ACM-IP2 user manual

ARMTEL

ARMTEL ACM-IP2 user manual

Toro TPV Series Installation and operation guide

Toro

Toro TPV Series Installation and operation guide

Rockwell Automation Allen-Bradley 1794-IV16 installation instructions

Rockwell Automation

Rockwell Automation Allen-Bradley 1794-IV16 installation instructions

Jetter JX3-BN-CAN installation manual

Jetter

Jetter JX3-BN-CAN installation manual

National Instruments NI 9476E Operating instructions and specifications

National Instruments

National Instruments NI 9476E Operating instructions and specifications

Ross W70 Series Product information

Ross

Ross W70 Series Product information

Seeed Grove GPS Air530 manual

Seeed

Seeed Grove GPS Air530 manual

GHI electronics G400-S user manual

GHI electronics

GHI electronics G400-S user manual

iWorX ASM2 Application guide

iWorX

iWorX ASM2 Application guide

Pilz PSSu E F 4DI-T operating manual

Pilz

Pilz PSSu E F 4DI-T operating manual

VAT 29 Series Installation, operating,  & maintenance instructions

VAT

VAT 29 Series Installation, operating, & maintenance instructions

Johnson Controls Tyco PRV-1A manual

Johnson Controls

Johnson Controls Tyco PRV-1A manual

Bed-Check Classic-Check Quick programming guide

Bed-Check

Bed-Check Classic-Check Quick programming guide

Graco Dyna-Star 24Y408 Instructions, Repair and Parts

Graco

Graco Dyna-Star 24Y408 Instructions, Repair and Parts

TMT TM-8258 instruction manual

TMT

TMT TM-8258 instruction manual

Allen-Bradley 1792-IB16 Series B installation instructions

Allen-Bradley

Allen-Bradley 1792-IB16 Series B installation instructions

manuals.online logo
manuals.online logoBrands
  • About & Mission
  • Contact us
  • Privacy Policy
  • Terms and Conditions

Copyright 2025 Manuals.Online. All Rights Reserved.