Drainable pouch - how to apply and remove
with
con
1-piece drainable ostomy pouch
Ostomy Care
Bolsadeostomía drenabledeunapieza
Cuidado de las ostomías
Instructions for use
Instrucciones de uso
Version
TheColoplast logoisaregistered trademark ofColoplastA/S.All rightsreserved.©
Velcro® is owned by Velcro Industries B.V 2018-06-05
Preparation
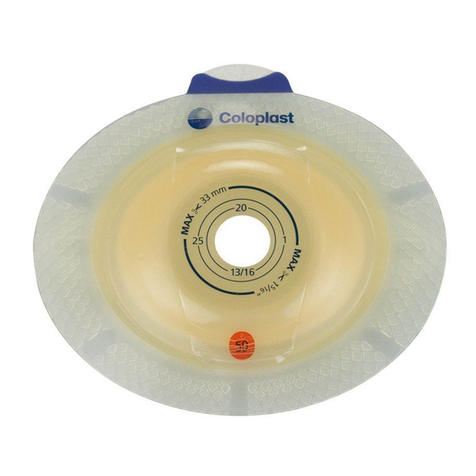
Cut a hole inthe barrier tofit the exact size andshape of
the stoma using a pair of small curved scissors and the
cutting guide on the barrier.
Youcanusethe enclosedstomameasuringguideto
measure the size and shape of thestoma.
An exact fit between the hole and the stoma is important to
reduce the risk of leakage and skinproblems.
Placethepouch onaflatsurfacewith thebarrierside
down.
Close the outlet by folding the bottom of the outlet upwards
three times so that the Velcro® strip becomes visible.
Fold the two turquoise tabs inwards to secure the Velcro®.
Manufacturer:ColoplastA/SHoltedam1,3050Humlebaek,Denmark
Distributed by: Coloplast Corp., 1601 W. River Rd. N, Minneapolis,
MN 55411 USA. For customer service or to return product, please
call (800) 533-0464 Website: www.coloplast.us
Fabricante: Coloplast A/S Holtedam 1 3050 Humlebaek Denmark
Distribuidopor: Coloplast Corp., 1601 W. River Rd. N, Minneapolis,
MN 55411 USA
Symbol Símbolo
Manufacturer: Coloplast A/S Holtedam 1,3050
Humlebaek, Denmark
Fabricante: Coloplast A/S Holtedam 1 3050
Humlebaek Denmark
Do Not Reuse
Para un solo uso
Consult Instructions for Use
Consulte las instrucciones de uso
Date of manufacture.
Fecha de fabricación
Use-by date
Uselo antes de
Theoutletcan be hiddenawaybyusing eithertheVelcro®
dot immediately above the outlet, or by using the Velcro®
strip on the middle of the pouch.
(Thisdoesnotapplytothe transparent pouches where
there is no Velcro® dot on the middle of the pouch).
Thoroughlycleanthestomaandthesurroundingskinarea.
The skin must be completely dry before application of the
barrier.
Batch Code
Código de lote
Application
Peel off the protective film from the barrier.
Indication
The ostomy pouch is intended tocollect output from a stoma. The barrier is
intendedtoadhere to intact peristomal skin andis used forpositioningof the
ostomy pouch.
Foldthebarrierbackwards,alignthebarrieraroundthe
stoma and press it firmly onto theskin.
Information
Ifyouexperienceanallergicreaction,pleasecontactyourhealthcare
professional.
Store product horizontally at cool and dry conditions. Product must not be
storedunderfreezing conditions. Allowproduct to returntoroom temperature
before application.
Apply pressure on the pouch to ensure fast adhesion and
a perfect fit between the adhesive and theskin around the
stoma.
Coloplastacceptsnoliabilityforanyinjuryorlossthatmayariseif thisproduct
is used in a manner contrary to Coloplast's current recommendations.
Warning
Reusing this single-use product may create a potential harm to the user.
Reprocessing, washing, disinfection, and sterilization may compromise
productcharacteristics,causingadditionalriskof physicalharmtoorinfection
of the user.
Removal
Gentlyremove thepouchby pullingtheremovaltab onthe
barrier away from the stomach and roll the barrier slowly
downwards.
Applylightpressure on yourskinwith yourfreehandto
help removal.
The product is intendedfor single use onlyand should be
disposedof with normal householdwaste. Do not flushthe
product down the toilet.


